Hey!! I’m back from NYC after a whirlwind trip at BHG .. more details later, but I participated in a DIY challenge (voting next week!) and the stylemaker event. It was SO great to meet many of you in person!!
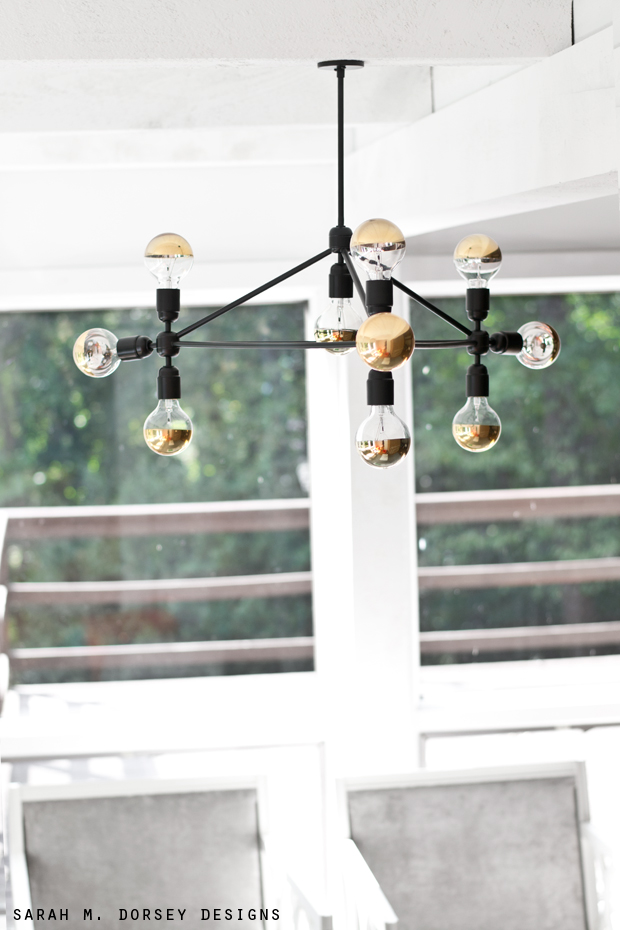
Today, I’m sharing an update on our living room! Our new chandelier ..

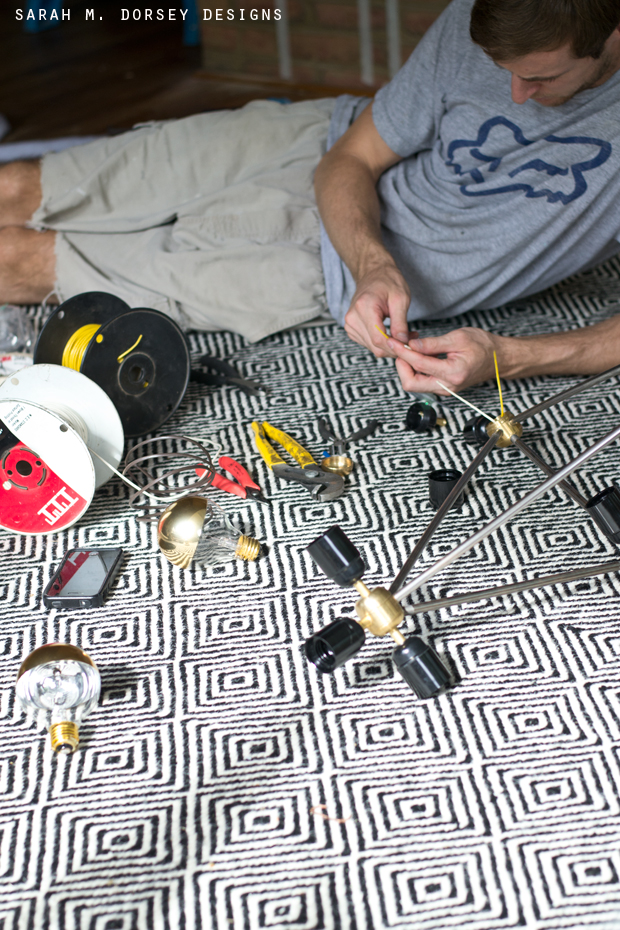
The process was fairly simple (if you’re familiar with lamp construction ..) with a few semi tricky details. Since we currently have a few projects going on – I didn’t get pics of every step, but here’s an overview.
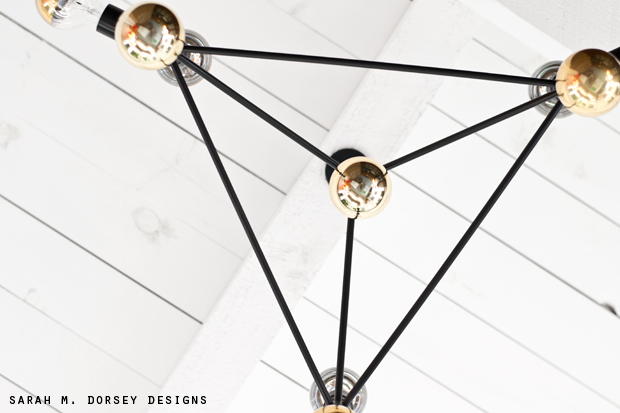
– We were originally thinking of using all brass, but it was way too much money .. so we opted to spray paint. Plus, I loved the idea of black against the white ceiling with gold accents on the bulbs.
– For the lamp clusters (brass in center of photo above) we purchased ones with pre drilled top and bottom holes. For our desired placement, we measured and drilled the side holes, and used a tap and die set so that they would have a threaded opening.
We borrowed some wire from David’s Dad (an Electrician) and David wired the light. Having thin wire that can easily push through all of the rods is crucial!
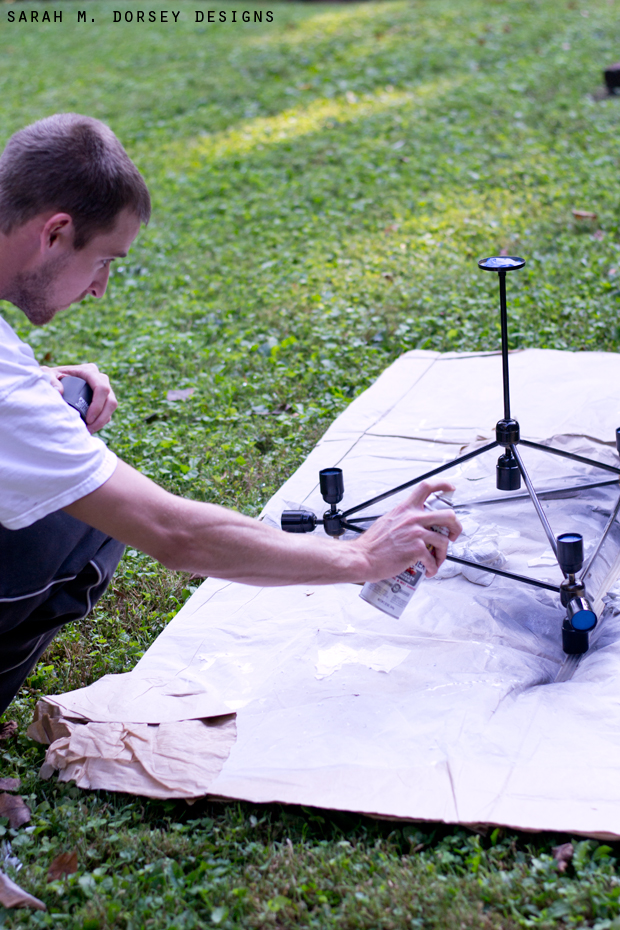
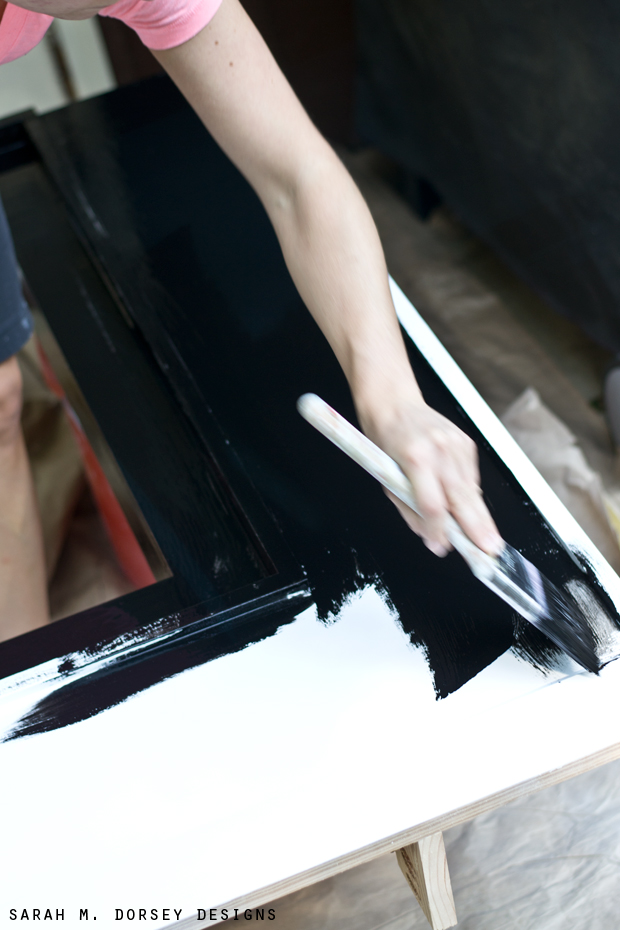
We taped off the wire and sockets (cutting circles out of painters tape) and gave it a few light coats of gray primer and then black satin paint.
We found a smaller vase cap in our lamp parts hoard – it fits perfectly! Also, due to our ceiling, we can’t run wiring .. so we will have to hide the wiring around the beams and run it to the wall. We didn’t have time to find the perfect solution, so it’s currently not connected (we did test the wiring prior to painting though, it lights up!).
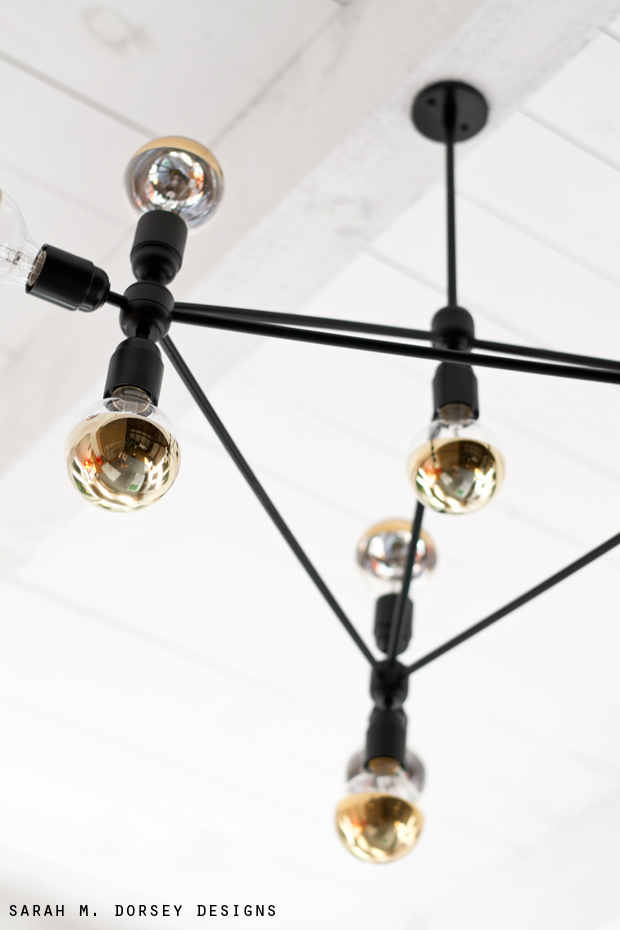
I love the contrast with the ceiling!
Total cost was about $50 for the parts and $50 for the bulbs ..
Thanks to those who voted on instagram for our faux mantel color! As you can see, black won! My first instinct was white (obviously .. since I paint so many things white) but with the white walls/ceiling and light furniture .. I thought black would add some needed contrast (plus I like how it picks up the black accents in the room). For now, we’re leaving the brick as is (I’d love to paint it, but David is anti .. so since it’s irreversible, it will stay as it for now) I’m thinking lighter accents above will help offset the black against the brick.
I’ll be back soon to give a few more updates about my week and our living room!!
Love your lighting! I am dying to try more DIY lighting and this is pinned for future use! Thanks, it looks fabulous. xo Nancy
Love this and the bulbs just make it.
THOSE LIGHTBULBS. I just had to have some so I ordered 8 for a new Sputnik going in my office so THANK YOU!!!! xoxo Kate
oh sarah, it's amazing!!!! LOVE! and i may do this to my kids' new fixture to bring in some gold…. hmmmm….
Love it!!!!!!! Those bulbs are FANTASTIC!
The dream team does it again! So cool! I love the black and gold against the white ceiling!
Incredible! Such a great look and I'm again impressed by your ingenuity and drive to make anything work!
Aaah, that gives me hope to DIY a chandelier too. Have to check out that parts site and I totally adore your fixture.
You are like the Macgyver of interior design! The light is incredible!!!
Gorgeous chandelier! Brilliant!
Leslie
House on the Way
Wow this chandelier looks great!!
http://tastinglifestyle.blogspot.be
Love the you went black. And I bet those lightbulbs are beautiful all lit up!
So so good!! You guys are amazing!
The black looks fantastic, I love how it contrasts against all the white!
My son would love to make this for his place. It's fantastic. What are the sizes of the two poles you used?
Wow, you have a way of pulling off epic DIY projects, and making it look so easy. Jaw-dropping, really. Can't wait to see the mantle!
Seriously! Why am I still baffled by the great things you and your husband make. Geesh you guys are amazing:) This light is FAB
This light is so insanely gorgeous! You guys are so freaking talented! I'm obsessed! (I should probably end my comment here so as to avoid adding ALL THE EXCLAMATION MARKS, but seriously… about to pin the crap out of this!)
Great finished piece and the detailed info and instructions are great. It wouldn't be my project but is a great one for Hubs!
I didn't even know gold dipped bulbs existed in the world. Gorgeous, as always!
Love it! We have a chandelier in the making with stuff from grand brass. By we I actually mean Nick. 🙂
I've actually been trying to figure out a way to DIY something similar, but I was looking at brass parts and you're right they are so expensive! I will definitely have to try the spray paint route. Your light looks amazing!
Sarah! This chandelier is absolutely brilliant. You always do the best DIY's. I am thinking about trying to make this myself and went to the website to look for parts… But having a hard time figuring out what sizes I should purchase. Would you mind sharing your parts list? Also, I noticed there were clusters with pre-drilled side holes. Just curious why you didn't purchase those? Thanks for your advice! Jess
This is one of the most beautiful lighting pieces I have ever seen.
So I pinned this awhile back and want to give it a try but I can't figure out what parts you used exactly on the grand brass site. Any chance you have those items numbers easily available?