• Home
  • About
  • Services
  • Shop
    • Bloglovin
    • Email
    • Facebook
    • Instagram
    • Pinterest
    • Twitter

Dorsey Designs

DIY and Interiors by Sarah + David

  • Home Tour
  • DIY TUTORIALS
  • friday favorites
  • design + build
  • art

get the latest straight to your inbox

Color me Coral

This post has been sponsored by Sherwin-Williams. All opinions are 100% mine, if you’ve been reading for a while, you probably know that 🙂 

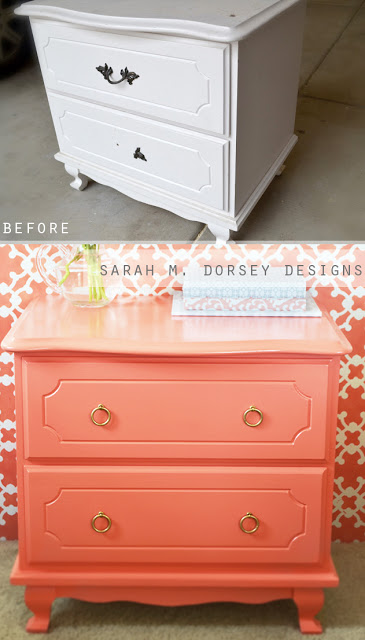
Over the weekend I started painting this dresser that I picked up at a thrift store a few months ago, solid wood (maybe oak?), dovetail drawers, for $8 – yes please!

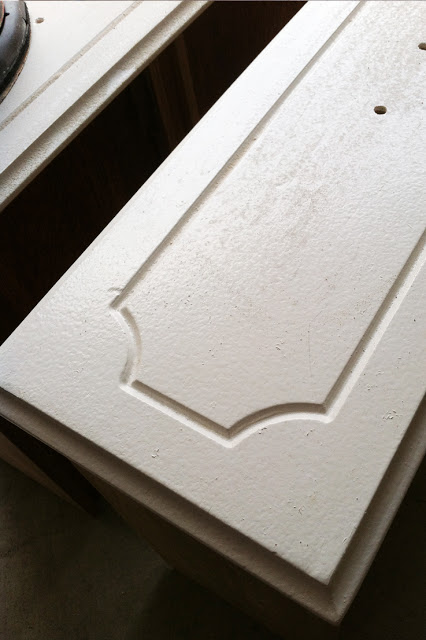
It doesn’t look too bad in the photo above, but looking a little closer, it had been repainted with a thick nap roller, leaving a textured surface. 
Using good supplies/techniques and will produce a much better result and save you time if you ever decide to repaint. Read on to see what supplies I like!

Enter in lots of sanding …
 
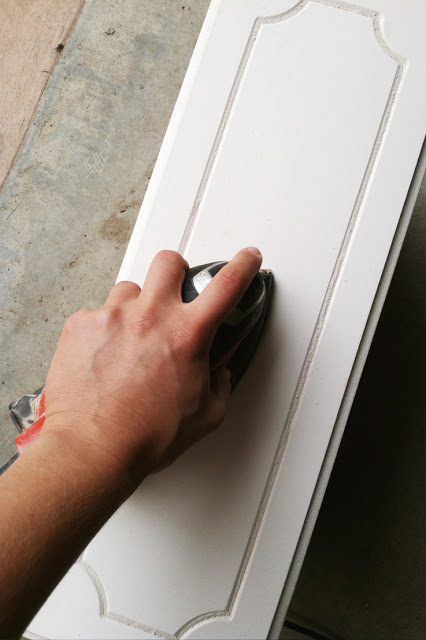
I used my orbital sander with 60 grit sandpaper to remove most of the textured surface, and then went back over with a 120 grit sandpaper to smooth everything out. 
I patched a few holes with wood filler and filled the holes from the old hardware. One was broken so those definitely needed to be swapped out. I decided on brass ring pulls, so new holes were drilled about 6″ from the edge.
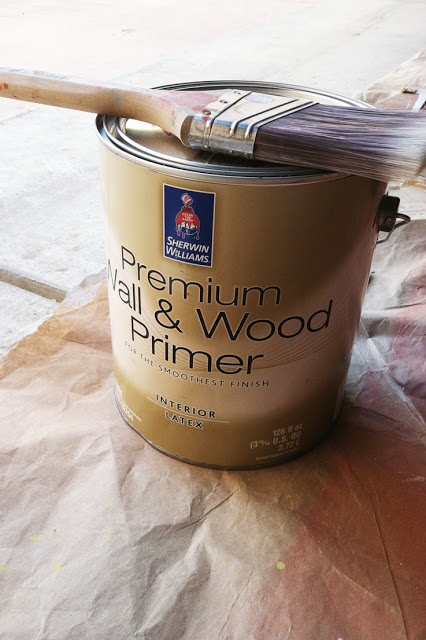
After removing the dust with a microfiber cloth, I used SW Premium Wall & Wood Primer, I find that it has good coverage and adhesion, gives a smooth result while creating a surface that the top coat adheres well to. 
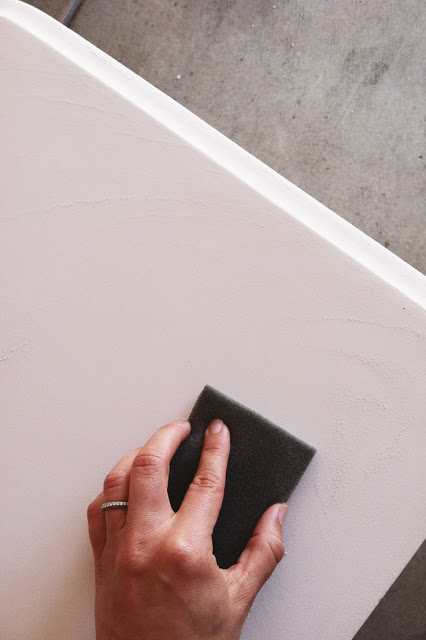
After allowing the primer to dry I used a fine grit sandpaper to quickly sand the surface. I then wiped it down with a microfiber cloth to remove any dust.
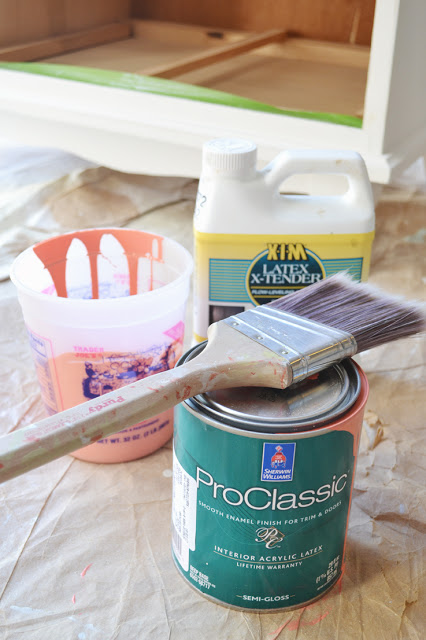
For the top coat, I decided to use one of my favorite paints, SW Pro Classic, it is water based with a hard enamel finish like an oil based, but without the fumes and the brush cleans up with water. The enamel surface is ideal for furniture in high traffic areas for maximum durability. 
I used two thin coats and mixed in a little XIM extender to level out any brush strokes prior to drying. The key to reducing brush stokes, is using thin coats and not over brushing, it will level out when it dries. My favorite brush is the Purdy Clearcut Glide 1.5″ and 3″.  

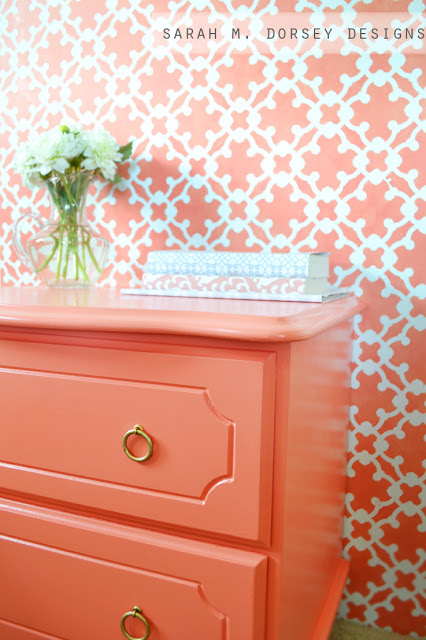
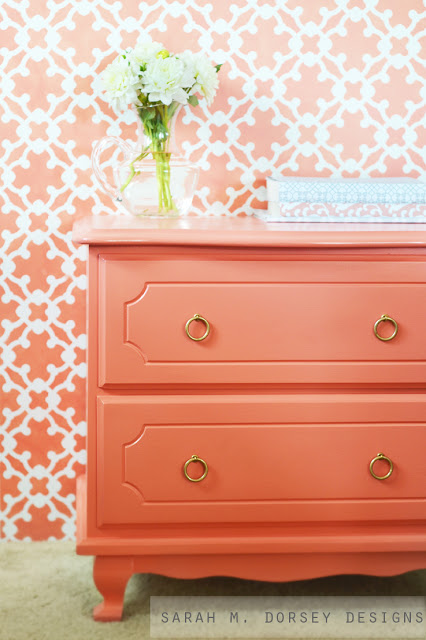
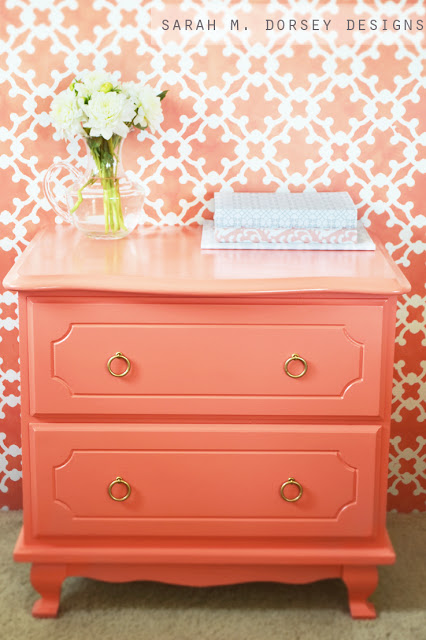
I decided on SW Ardent Coral, a fun, bright, pink coral for the top coat. I’m most likely putting it in my closet for additional storage, but before I move things around I took a few photos with my new stencil.

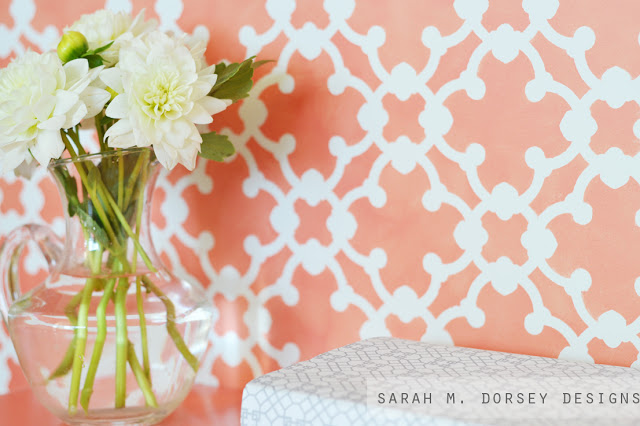
I picked up a partial piece of drywall at Habitat Restore for $2.50, and plan to use it to try out my new stencils. Stenciled wall is also SW Ardent Coral.

I made my DIY Brass Ring Pulls for the hardware.

Much much better than the previous textured surface! And I love the bright pop of color, making it a great accent piece!  

Stencil is now available through my Etsy shop, click here to view 
Bedroom// DIY TUTORIALS// furniture redo// Uncategorized// Uncategorized21 Comments

Subscribe

get the latest straight to your inbox

« Sarah M. Dorsey Designs at LeLePets
Weekend in Review + What I’m Working on »

Comments

  1. Heather Gearhart says

    October 11, 2012 at 6:16 pm

    That looks so nice – love the wall paper in the background as well!

    Reply
    • Sarah says

      October 11, 2012 at 6:38 pm

      Thank you so much Heather! I'm loving my new stencil too!

      Reply
  2. Jennifer @ Delightfully Noted says

    October 11, 2012 at 6:33 pm

    Absolutely gorgeous! I've been wanting to incorporate a coral piece somewhere in my home. Love seeing what products you recomend to.

    Reply
    • Sarah says

      October 11, 2012 at 6:47 pm

      Hi Jennifer! Thank you! I've been a little coral obsessed lately, love it 🙂

      Reply
  3. Cocalores says

    October 11, 2012 at 7:05 pm

    Cute! I always love coral in other people's home, but I just don't see it in my own house. I guess I'm just afraid because it's such a strong color! Well, for me, painting the walls has been a big step after years of white! 😉

    Reply
    • Sarah says

      October 11, 2012 at 7:25 pm

      I guess while we are renting I've putting my personality where I can ha!

      Reply
  4. Unknown says

    October 11, 2012 at 7:11 pm

    Sarah, gotta ask. When you decide on doing new hardware and have to fill up the previous holes, how do you get it smooth? After I have attempted it, I can still see the previous holes. It drives me crazy!!!!
    Also, love seeing you pic's of Pismo. We live in Santa Maria.

    Reply
    • Sarah says

      October 11, 2012 at 7:23 pm

      I like a smoother wood filler like this one http://www.elmers.com/product/detail/E848D13?filterPath=wood-filler%2f

      Also, I think the key is to make sure not to sand too much, it tends to take the filler out before the wood, but you have to sand enough to make it smooth. And if it still isn't smooth after that I like to add a few coats of primer over the holes (sanding in between) it tends to sink into the dips better.

      Hope this helps! Santa Maria is just down the road, nice to "meet" you!

      Reply
  5. Megan Angermeyr says

    October 11, 2012 at 8:36 pm

    Sarah-
    I paint a ton of furniture too, and always use oil based enamel, so thanks for the tip! My one question for you; I know that you said you paint it in 2 thin coats, but do you paint the whole thing at once? Meaning, paint all sides at the same time, wait for it to dry and then paint all sides again. That is what I have been doing, but I wonder if it is better to paint the flat side, let it dry, paint it again, let it dry, and then flip it so another part of the piece is now the flat side? I feel like the flat part (usually the dresser top) always looks the best, and other sides might have either drips (from not brushing enough) or brush marks (for brushing too much). Thanks for any advise!

    Reply
    • Sarah says

      October 11, 2012 at 8:54 pm

      Hi Megan! I go over the whole piece with one thin coat, wait for it to dry and then repeat. Sometimes it takes three thin coats depending on the color. For the sides, typically if I use a thin enough coat it won't drip, but if I catch it early enough wipe it with my brush, if not I'll sand once completely dry. I also like using a foam roller (the smooth white ones) and have gotten great results (again not over rolling) The roller gives a little more control/even coat of paint to avoid drips on the sides. Hope this helps!

      Reply
  6. Charlotte | The Vintage Vogue says

    October 11, 2012 at 9:01 pm

    Sarah this looks incredible! Great job! 🙂
    Charlotte

    Reply
  7. Jenna at Homeslice says

    October 11, 2012 at 10:20 pm

    Such a fun color- is looks great. I think a piece like this would make me smile every time I walked past it 🙂

    Reply
  8. second life of a blue house says

    October 12, 2012 at 2:27 am

    Great job, it looks fabulous! Lisa xo

    Reply
  9. rachael says

    October 12, 2012 at 1:57 pm

    Beautiful! I love Sherwin Williams, we're painting our whole house in their paint right now.

    Reply
  10. Unknown says

    October 13, 2012 at 4:05 pm

    Thanks Sarah for the advice. Nice to meet you too!! 🙂

    Reply
  11. Stephanie says

    October 16, 2012 at 2:49 am

    Beautiful stencil Sarah! And the coral is to die for on that chest!

    Reply
  12. Sheena says

    August 10, 2013 at 3:54 pm

    Hi Sarah! A little late for this post buuutt, I just wanted to tell you that I loved this nightstand and the color you painted it so much that I took a page from your notebook and painted an antique desk we have coral as well! It's not my normal to-go to color but after seeing it here, I had to. You can see it here on my blog – http://www.beaninloveblog.com/2013/08/salsa-dancing-with-my-paintbrush.html Thanks for the inspiration!!!

    Reply
    • Sarah says

      August 10, 2013 at 6:13 pm

      Thanks SO much Sheena!! 🙂

      Reply
  13. Unknown says

    February 3, 2018 at 4:40 pm

    Have you tried a Corona brush? It's a little more, but worth it. I've learned the hard way that cheap brushes ruin projects. Well worth the few pennies to upgrade to a high quality brush.

    Reply
  14. Unknown says

    February 3, 2018 at 4:40 pm

    Have you tried a Corona brush? It's a little more, but worth it. I've learned the hard way that cheap brushes ruin projects. Well worth the few pennies to upgrade to a high quality brush.

    Reply
    • Sarah Dorsey says

      November 12, 2018 at 9:05 pm

      Thanks for the suggestion!

      Reply

Leave a Reply Cancel reply

Your email address will not be published. Required fields are marked *

Contact Me

sarahmdorseydesigns{@}gmail{.}com

Stay Updated!

Get all the latest goods straight to your inbox!

This error message is only visible to WordPress admins

Error: No connected account.

Please go to the Instagram Feed settings page to connect an account.

Must Reads

Custom Peg Board + DIY Circle Art | FrogTape

Custom Peg Board + DIY Circle Art | FrogTape

Main Level Refresh with The Home Depot

Main Level Refresh with The Home Depot

Sponsor

2016 Daily Simplified Planner

Popular Projects

Bookcase Renovation

Bookcase Renovation

March 5, 2012 By Sarah 6 Comments

art above the headboard finished!

art above the headboard finished!

May 15, 2012 By Sarah 27 Comments

Headboard Update

Headboard Update

April 6, 2012 By Sarah Leave a Comment

DIY Belgrave Headboard with Ikat Fabric for the Guest Bedroom

DIY Belgrave Headboard with Ikat Fabric for the Guest Bedroom

June 12, 2012 By Sarah 32 Comments

Tufted Headboard with Nailhead | How To

Tufted Headboard with Nailhead | How To

September 30, 2013 By Sarah 59 Comments

  • DIY TUTORIALS
    • design + build
    • furniture redo
    • diy in 1 hour or less
  • free printable
  • friday favorites

Disclosure

Occasionally, affiliate links are used when they are available. I do earn a small commission when items are purchased using those links. As always, I only link to things that I truly love. I also link to items that I love when an affiliate link is not available. Thanks so much!

  • Home
  • About
  • Services
  • Shop

Copyright © 2025 Dorsey Designs

MENU
  • Home
  • About
  • Services
  • Shop