1/2 sheet of 1/4″ MDF (enough for two lamps)
Wood Glue
Wood Filler
Lamp Socket x2
Wire (we used an extension cord x2 and cut off the end)
Primer/Paint
1/2″ Copper Pipe (3″ section per lamp)
Threaded Lamp Rod
Nuts
Miter Saw
Sandpaper
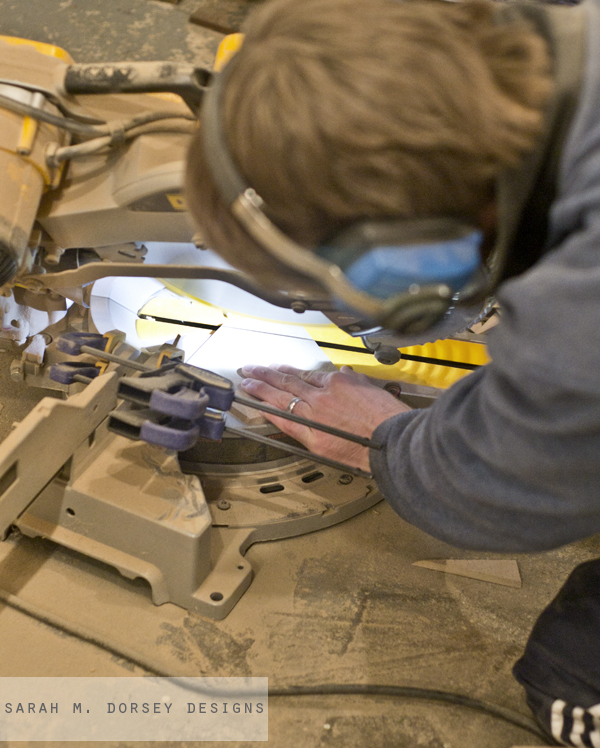
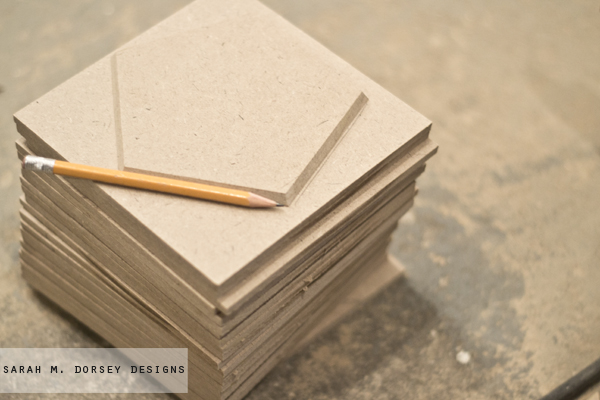
First, David cut 24 – 6″ squares (12 per lamp) out of the 1/4″ MDF. If you don’t have a table saw or sliding miter saw, have it cut into 6” strips at the hardware store.
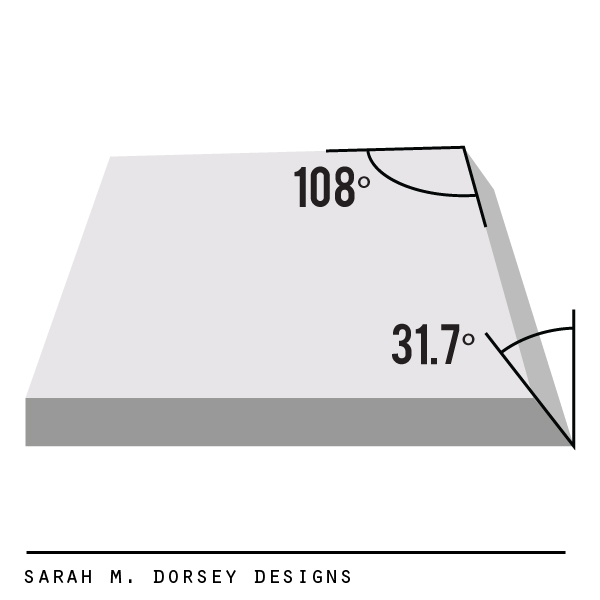
1. Using a miter saw, set the bevel (blade tilt) to 31.7° and the miter angle to 18°.
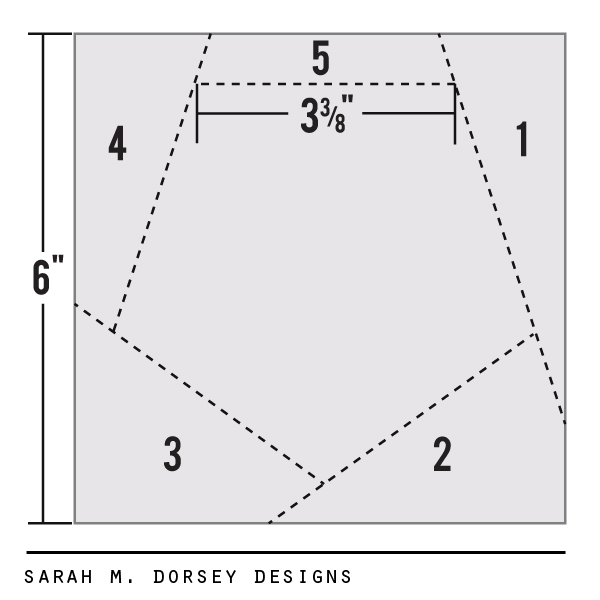
2. Put a piece of tape or draw a pencil line on the miter saw fence 3-3/8” (this measurement was determined from scale that we wanted, feel free to adjust) from the blade. The mark will be used to line up all of the pentagon cuts to ensure that all of the sides are equal.
3. Make the first cut holding the 6” square straight on the fence. Rotate the piece so the cut edge is against the fence to make the second cut. Now that one of the angles is finished, line up the angle with the mark at 3-3/8” and make the third cut. Continue rotating and lining up the angle with the mark for the 4th and 5th cuts.
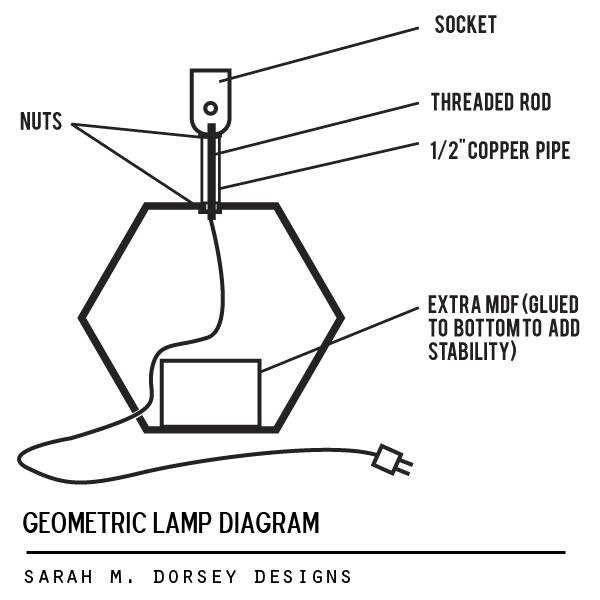
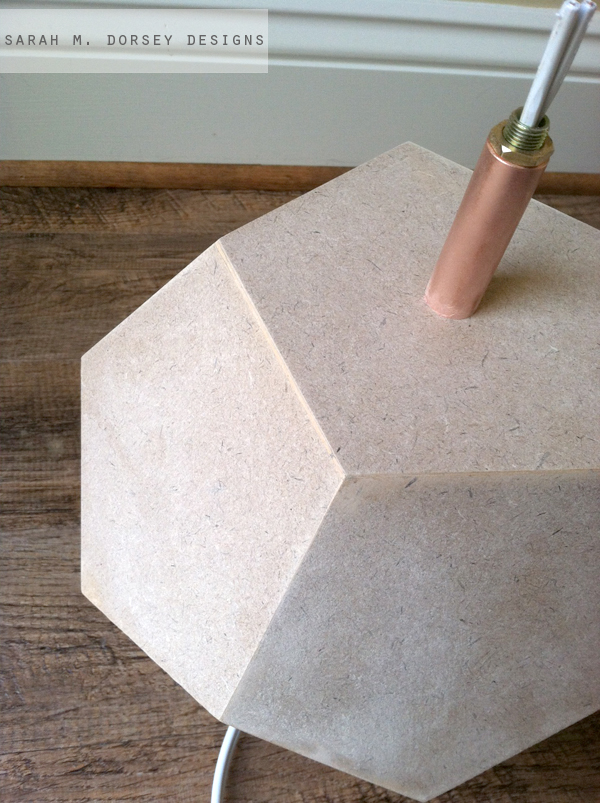
4. Finally, drill holes for the lamp assembly and the wire. Per lamp, drill a hole in the bottom side of one piece for the wire to exit the base and drill a 3/8” hole in the center of another for the threaded lamp rod to penetrate the top.
After cutting one, we then traced the pentagon on remaining 23 MDF squares.
After David cut out all of the pentagons, we started assembling. Ideally we would have made a jig as a guide, but since we were only making two, we glued, held in place till the glue set and then taped to help hold it in place. It worked surprisingly well! ** The final lower pentagon and top pentagon had predrilled holes for the wire and lamp assembly. Don’t glue it all without those important holes! **
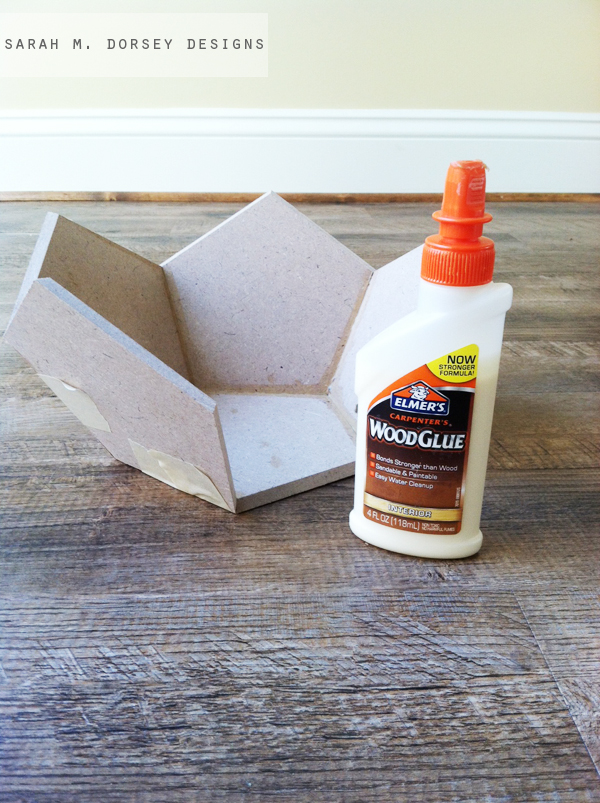
Prior to attaching the final pentagon on the top, we glued extra MDF to the bottom to give it a little extra weight. Then we attached the threaded rod to the top pentagon with a nut and ran the wire through the bottom hole and through the threaded rod. To finish the lamp base, we then glued the top pentagon on.
Since it’s difficult to get the angle exact every time, we filled in the little crevices with wood filler (sanding smooth, once dry).
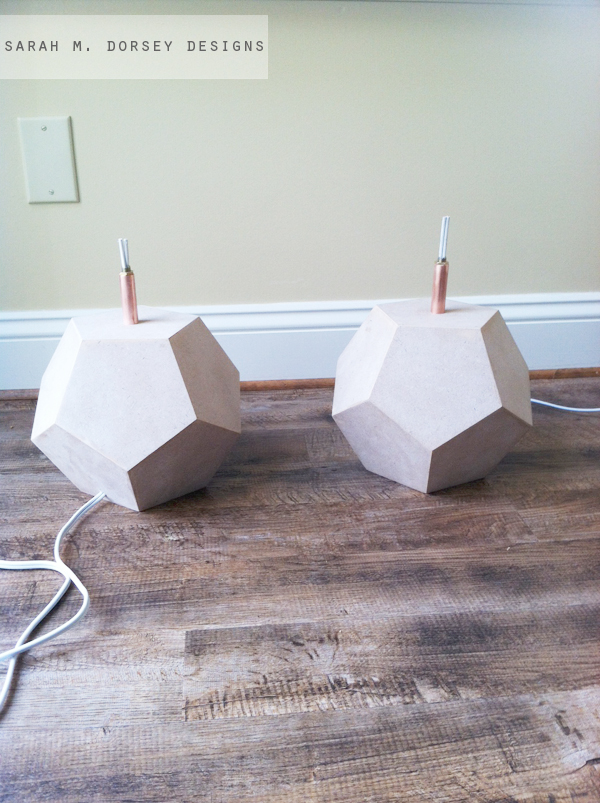
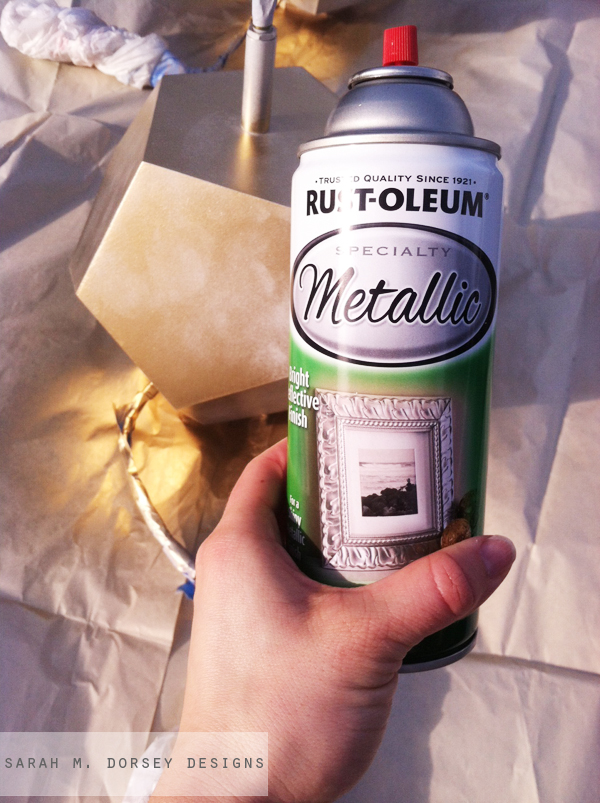
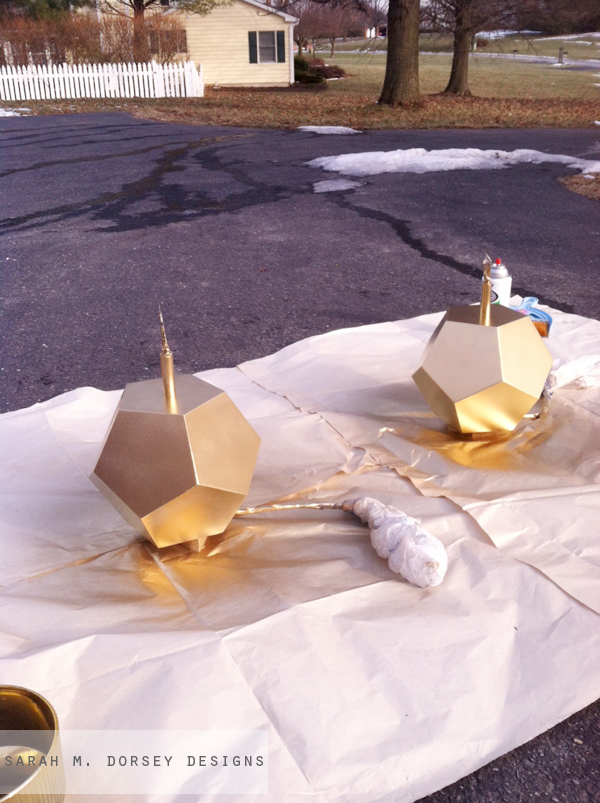
Next, we taped up the cord, primed and then painted with Rustoleum gold (apply in thin coats to make sure that it didn’t drip). About three thin coats.
They got a little scratched while moving them to our new house, so I sanded and put another top coat on. Then I applied Rustoleum Triple Thick Glaze, trying to get an even coat, I applied it too heavily and got some drips. SO I sanded and repainted again ..
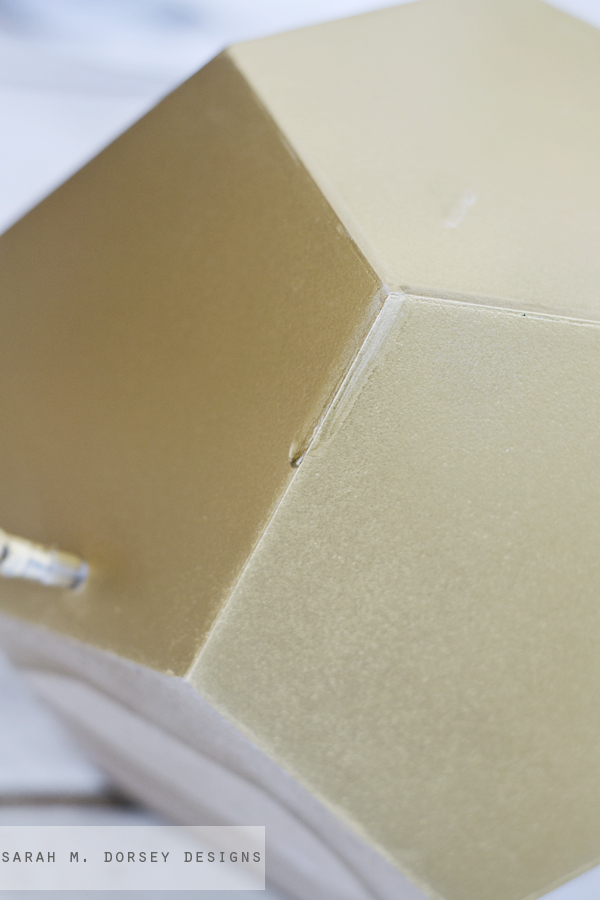
The gold spray paint easily takes fingerprints, so I would recommend using a clear coat THINLY. I’ll be applying one once the weather cooperates with me 🙂
Stencil available in my Etsy shop.
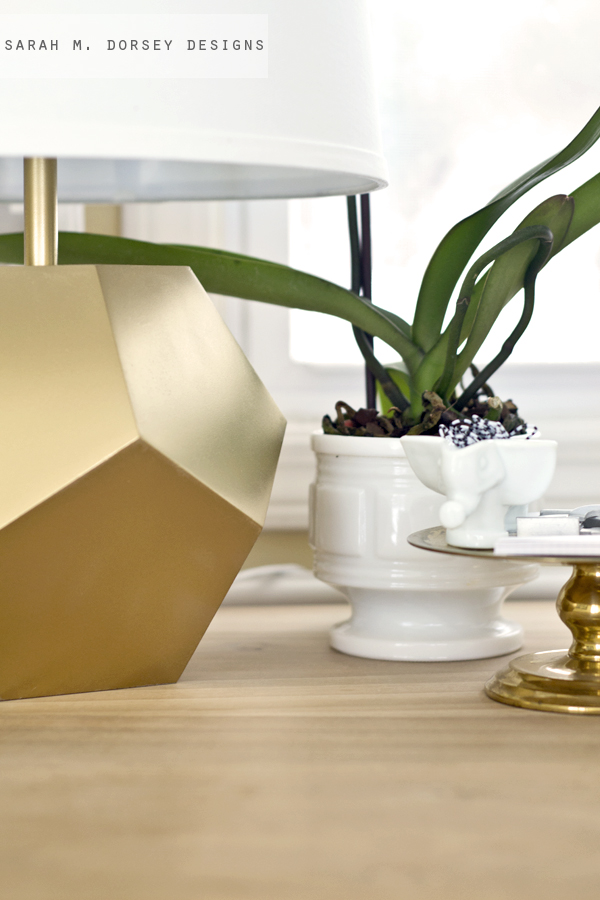
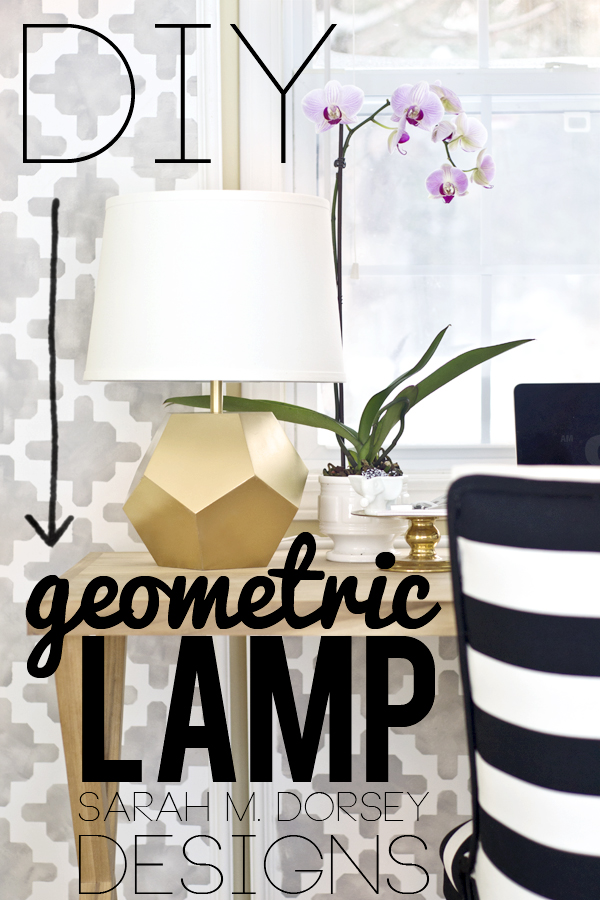
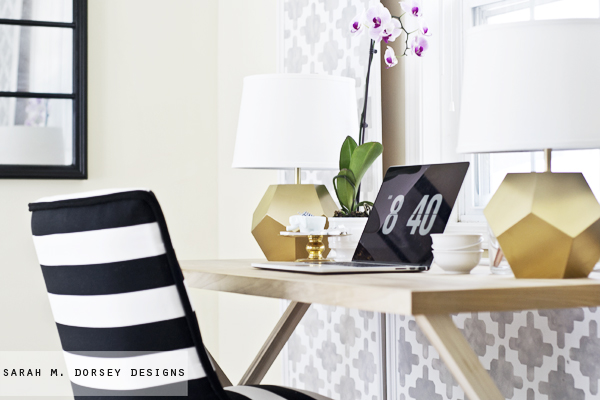
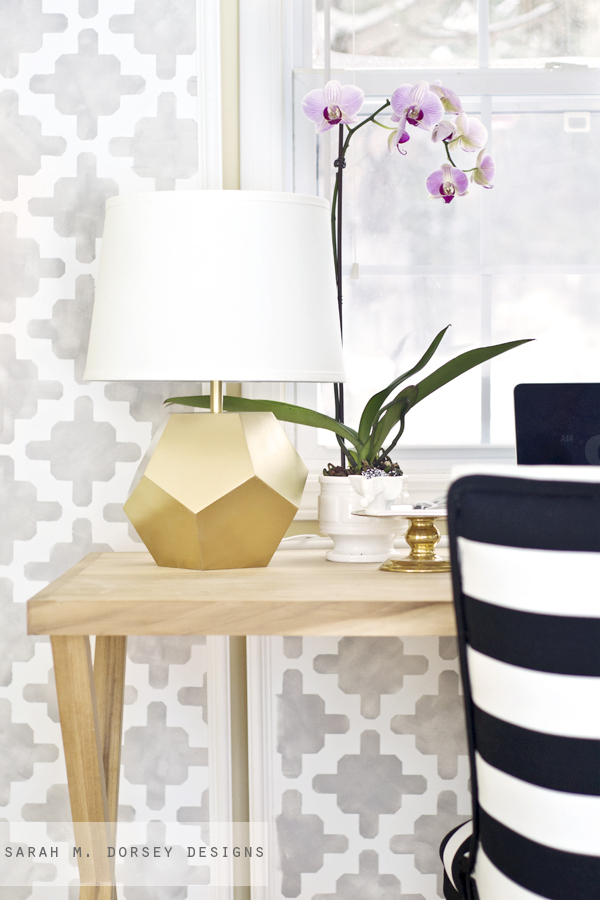
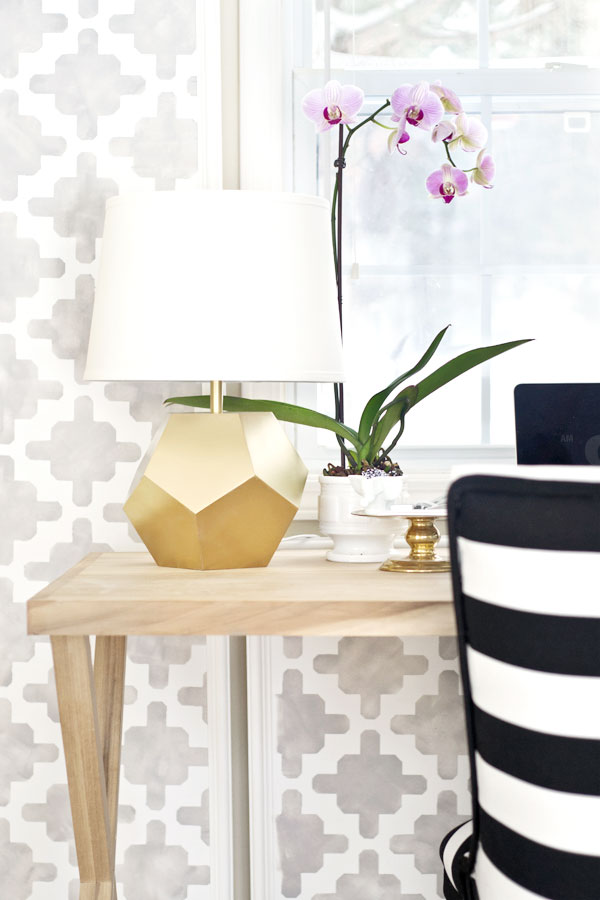
The elephant was a thrift store find. I picked up the orchid from Home Depot for $5 and the pot from Goodwill.
Total Cost:
1/2 sheet 1/4″ MDF $6
Lamp Socket and Wire (extension cord with end cut off) $14
Spray Paint $3
Threaded rod, primer and copper pipe on hand
$23, $11.50 per lamp base. Not bad!
I’m so glad that we tried DIYing before buying! Though I think the real thing would definitely we worth it if you don’t have a miter saw.
What do you think, would you give it a try?
—
P.S. Have you entered for a chance to win Delta Faucet’s New Year, New Room Bathroom Makeover contest? It includes Delta bathroom fixtures, a $3,500 Lowes giftcard, a design consultation from ME and MORE!! If not, enter HERE!!

OMG! You and your husband did an amazing job!!
This is stunning! Tell David great job on all those angled cuts and brain sweat figuring out the math. I'm amazed that it stayed together so well during glue up without a jig and just a little tape. Pinning this for a future bedroom makeover.
Girl!!! You are cray cray!!! Theres no way I could have ever figured out how to make this. Those numbers would've sent me runnin! BUT you are freakin DIY superwoman! They look amazing.
Oh my goodness! I'm with her ^^^ I never would have been able to execute something like this and figured all of that out. You are fab!
The math skills are impressive. The lamps are gorgeous! I was thinking…..you could make a business out of selling the parts as kits. Many DIY'ers might be willing to make it, if it weren't for the math issues.
Your husband is definitely a keeper! What an amazing job.
Oh my word, this is one unbelievable DIY! I'm sure this will spread like wildfire over the blogosphere 🙂 I am just so impressed!! You guys rock!
I like yours way better than the original. The original is TOO shiny. Great job!! Wonder if I can convince my fiance to give it a whirl?
wowza. i'm impressed!
Gosh! Too many angles and math involved for me to make one myself! I still think you should sell them because they are awesome!
That is seriously impressive.
Very Impressed! I probably would have been stuck figuring out the first angle. You guys did and awesome job!
That is unbelievable Sarah and David. Oh my word do I love it!
OK girl… you just keep impressing me more and more with every project! You seriously have some major talent and patience!! These are beautiful!
xo, amy
Wow. I love this!
me in geometry 'x' years ago: "I'll never need this when I'm grown up." Don't tell my math teacher I'm eating my words!
They are truly amazing!!! I'd love to have a pair on our console table behind our couch. And I'd love for you to decorate my whole house because your style is beyond amazing. You are so talented!
You guys make a great team! They turned out fantastic!
You two are definitely a DIY force to be reckoned with! Amazing!
awesome job Sarah! They look lovely on your desk!
These are amazing! Definitely wishing we had a miter saw right about now! You guys rock at finding DIY solutions to things I never would have imagined.
that math is making my head hurt. you guys are awesome!
You understand geometry in a way that I never will. 🙂 I think yours are better than the originals!
I love this lamp! I also really like how you decorated your desk with two, it turned the desk into a great statement area.
THIS IS NEXT LEVEL SHIZ! My goodness! ok, so I DO have a miter saw, and i just might have to give this a try too!
Jaw-dropping. Seriously. You guys are a talented pair!
oh love this!!! i was just thinking about doing this the other day but didn't want to sit down to figure out the math lol! so thank you so much for furthering my laziness :). these will be perfect for in my living room im working on! yeah
I would never, ever be able to have figured those angles out. I am IMPRESSED. Gorgeous results!!
Seriously beyond floored! I love this tutorial! I want to make one so bad!!!! Hope I can figure out the angles! Your tutorial will be extremely helpful!
xoxo
I failed geometry so your jibberish up there means nothing to me :). Great job on the lamps!
Mara
That is so amazing! I love unique projects like this. Thank you for giving us the angles 🙂
That is some real dedication figuring those angles out! It turned out better than the original! Is there anything you can't do?! 🙂
I fell in love with the lamp and got it for my living room. I had to return it because it looked and felt "cheap" to me. I still think I would have kept it for a kids room but I just didn't love it for my living room. I'm sure yours are WAY better the the inspiration one. Amazing work!!!
Gorgeous.
Sarah… I am just simply OBSESSED with you right now! Love the DIY, love the chair {sorry am catching up on my comments} and thank you so much for a tutorial! The hubs is excited to try this… will give you credit of course when I am done! You are brilliant!
Jeeeeeeez you guys are amazing for tackling this AND sharing those tricky angles. Very, very awesome!
You two rock! Could not tell those are not the Land of Nod beauties if you hadn't told!
Wow, you are crazy talented!! I love these, Pinning and hopefully making!!
xo, Tanya
http://www.twelveoeightblog.com/
You are AMAZING! and that lamp is amazing! You should be selling those!
Amazing!
Your patience and math skills are very admirable. 🙂
I'm seriously BLOWN away! This is a DIY project that will go down in history! And your tutorial is so good, I might get brave enough to try it myself! Beautiful project and stunning photos. I have that same little pot that your orchid is in, picked mine up at Goodwill too, and I love it! Bravo to your creativity and skills!
I'm in awe! The lamps are gorgeous, and I'm so impressed with the process. Pinned!
A.M.A.Z.I.N.G 🙂 Loved the lamps and the table. did u build the table? I couldnt locate the details of the table. Please let me know
Here's the link 🙂 http://sarahmdorseydesigns.blogspot.com/2013/02/how-to-build-campaign-style-desk.html
Wow, I just followed a link from Elliven Studio… This lamps are fabulous! Great job!
Wow, I just followed a link from Elliven Studio… These lamps are fabulous! Great job!
Do you think this could be done with a miter box and saw?
Since the angle needs to be pretty specific, I wouldn't recommend it unless you can find one where you can adjust it.
PERFECTION!!!! Saludos from México 🙂
Just came across this DIY lamp on Pinterest, Sarah! What an incredible project – super impressed. I just finished a project with hexagons, which the angle was torturous after a while, so I might wait a while to try something like this, lol. Great job though! xo Jenna
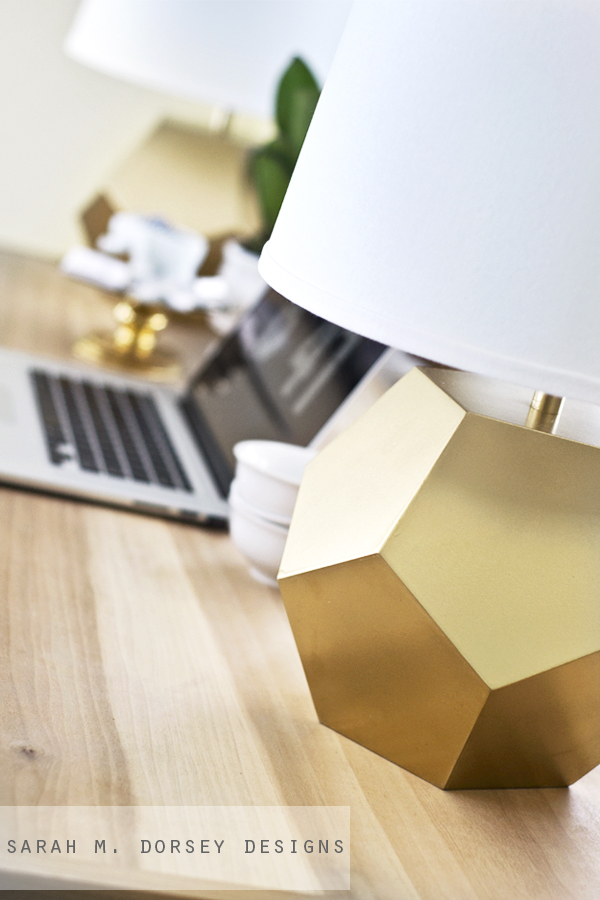
Ahh! That screen saver on the laptop! What is it?! I've been looking all over for a couple years. Great job on the project! Looks great.
Hi Serena! It's .. fliqlo screensaver
I want to buy a miter saw just so I can do this!! AMAZING!
This is my first time to visit your blog. I. Am. Dying. You are amazing. Love the lamp. Want to make one this week! Thank you!
I can't get enough of your projects. I want to do every one. I mean really, wow. It's not often that I follow a blogger and she doesn't get so big and all of a sudden she's not doing what made her so amazing or, she's spending three times what she used to and saying ," and it was so inexpensive". You guys have remained true to your mission and faithful to your followers. Don't ever forget HOW VERY MUCH WE ARE TOTALLY INSPIRED BY YOU. I've been ill and had to be at home. You've given me something to do that also allows me to feel good about myself. I'll never be able to say thank you enough.
Sorry I forgot to sign name, and to say congrats on all of your recent awards and accomplishments. Boy do you deserve them. The comment above is mine also karen
I love this DIY, they look fantastic not sure of I could pull this off but I'm sure going to try!
I love the two lamps on the table *major desk envy*
http://nikkievedesign.com/
Congrats on a genius idea!!
My daughter wants this for her room – in silver! Thanks for posting! I'll be sure to link back to you when we complete this!
Shelia
http://www.houseofhighlands.com
Good Job!! 😀
http://carinasaysbradshaw.blogspot.pt
These are beautiful! I saw the lamps you made with mat board, and the comment that you thought these could also be made with mat board. What template would you suggesting using when drawing the shape onto the mat board, and how much mat board do you think would be necessary to make these two lamps? Thanks – these lamps are inspirational!
Wow! Don't know how I missed these beauties, but I am just now seeing them. We are between houses now, while awaiting the building of or new one, so I am without a workshop. I fully intend to make these once the dust settles at the new place, & use them on a sofa table. Stunningly gorgeous! I have one question… The picture showing the angles to cut, shows "31.7° & 108°", but the written directions say "18°". I am a visual learner, & too lazy to think this through. Could you please let me know which number is correct? Thanks!
Thanks Laura! 🙂 The bevel (blade tilt) to 31.7° and the miter angle to 18° (108 isn't something that you set, it's the angle created because 108 – 18 = 90 on the saw – shows zero on the saw) hope this helps!
Cam you tell me where did you get your desk chair? I think I want to cover mine to add some spice to my office!
It's a DIY! Fabric is from Ikea.
This is worth $100+ WTG!