• Home
  • About
  • Services
  • Shop
    • Bloglovin
    • Email
    • Facebook
    • Instagram
    • Pinterest
    • Twitter

Dorsey Designs

DIY and Interiors by Sarah + David

  • Home Tour
  • DIY TUTORIALS
  • friday favorites
  • design + build
  • art

get the latest straight to your inbox

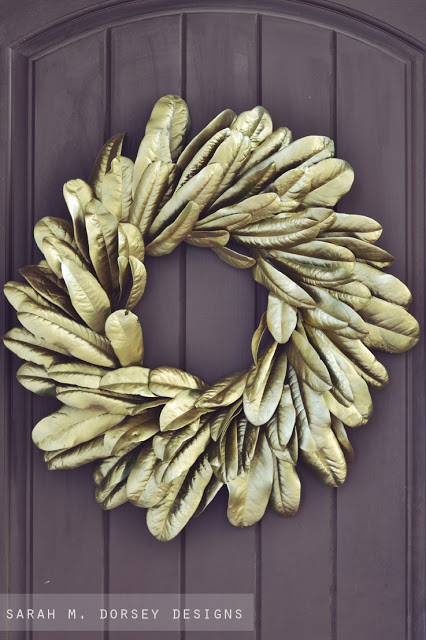
Fall Decor: Gold Magnolia Wreath

When it comes to seasonal decorations, I like to keep it pretty simple. This year for fall, I decided to make a wreath and after seeing Britt’s fall inspiration from Gus & Lula.

I decided to use magnolia leaves because I liked the shape and thought the thickness of the leaf would hold up well. Since I am using real leaves, I don’t plan to keep it past the season, but I hope that it holds up for the next few months.

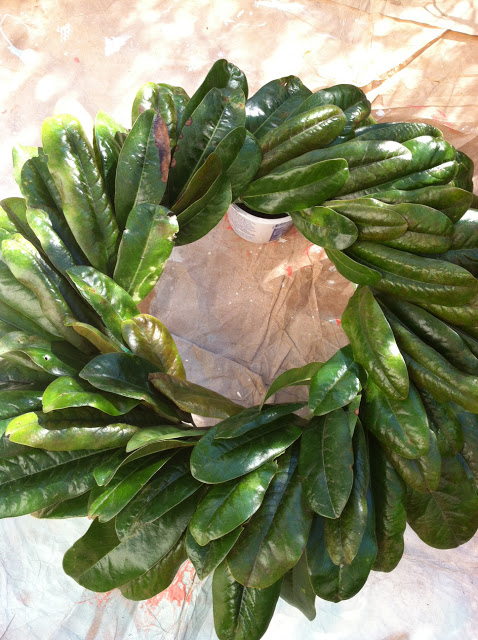
I gathered some leaves …

cut a 14″ foam floral wreath in half so it will sit flush on the door and I’ll have one for Christmas, thanks for the idea Pinterest!

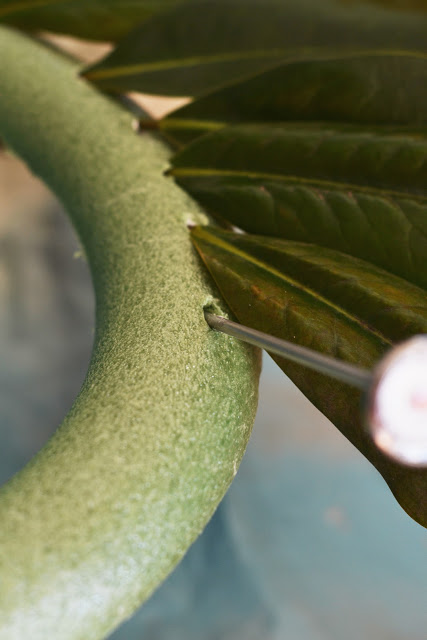
I then poked diagonal holes with a meat thermometer …

filled with a little craft glue and put the leaves in at an angle. I ended up with about three rows of overlapping leaves.

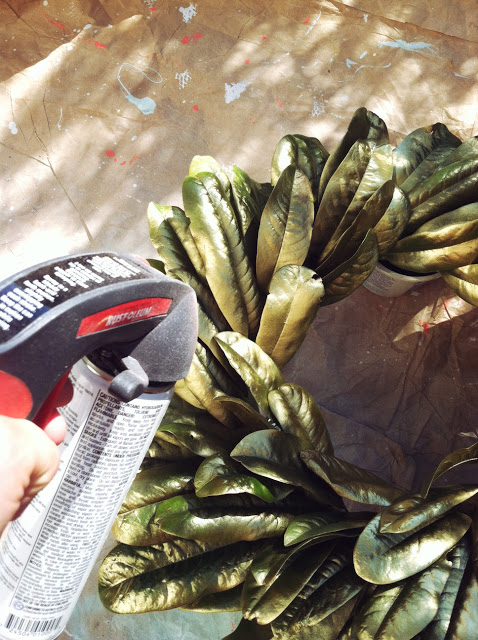
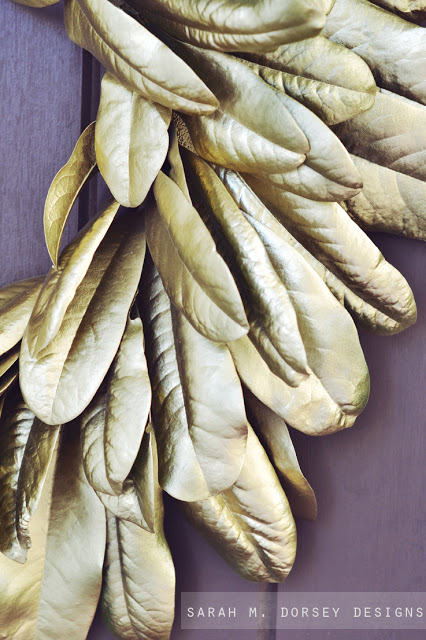
Once the glue dried (about an hour or two) I sprayed it with Krylon’s gold spray paint

I used a 3M hook to mount it to the door, tied ribbon around the wreath fairly tight so that it wouldn’t move as much, and attached it to the hook.

Total cost: foam wreath was about $4 (Michaels with 40% coupon) and gold spray paint was also about $4 (Michaels with 40% coupon), leaves were free!

about $8, plus I have the other half of the wreath to use later!

Total time was about an hour or two …

I’m working on the rest of our porch decor, stop by soon for pics!
seasonal decor// Uncategorized// Uncategorized14 Comments

Subscribe

get the latest straight to your inbox

« Weekend in Review + What I’m Working on
Office Update + My Etsy Shop at LeLe Pets Today! »

Comments

  1. ACHanson says

    October 16, 2012 at 6:13 pm

    Beautiful!! Thanks for the inspiration!

    Reply
  2. irina says

    October 16, 2012 at 6:51 pm

    Love the end result…can you specify what you tied with the ribbon? I wasn't too clear. Thanks!!

    http://girlfrombk.blogspot.com/

    Reply
    • Sarah says

      October 16, 2012 at 6:59 pm

      Hi Irina! I looped ribbon (any will do because it is hidden) through the leaves around the top of the foam wreath and then hung it on a 3M hook. I tied the ribbon fairly snug so that it would stay on the hook, but with enough slack so that the hook fit. Sarah 🙂

      Reply
    • irina says

      October 16, 2012 at 10:49 pm

      Got it! Looking forward to Part 2 – using the other half for Christmas 🙂

      Reply
  3. modern jane says

    October 16, 2012 at 7:05 pm

    The touch of gold really makes it classic! Great idea. I just may have to copy this one!:)

    Reply
  4. Katie Duncan says

    October 16, 2012 at 7:40 pm

    Wow this is so pretty!! The magnolia leaves almost look like feathers.

    Reply
  5. rachael says

    October 16, 2012 at 8:24 pm

    This is so beautiful! I love how simple it is to make but looks quite expensive.

    Reply
  6. Beth@thedailyparagraph says

    October 16, 2012 at 9:44 pm

    I think this is the best wreath I've ever seen. Amazing how something so simple can turn out so beautiful.

    Reply
  7. Shalagh says

    October 17, 2012 at 1:01 am

    Seriously sweet Sarah. And simple. And chic. I am so addicted to spray painting natural stuff. Every year, branches and pinecones change colors just for me via spray paint..

    Reply
  8. Angela Paris says

    October 17, 2012 at 5:39 pm

    so lovely! forwarding to my mom, she'd love this!

    Reply
  9. Nicole says

    October 17, 2012 at 8:20 pm

    it's beautiful! you did such a great job!

    Reply
  10. Brenda says

    April 8, 2013 at 3:01 pm

    How beautiful! Just wondering – my daughter is getting married December 14, if we made these this summer for the aisle decor do you think they would still be ok by Dec?

    Reply
    • Sarah says

      April 8, 2013 at 3:58 pm

      Hi Brenda! Mine held up well! The leaves get dry and curl slightly, so make sure to protect it from getting bumped 🙂

      Reply
  11. Brenda says

    April 8, 2013 at 8:25 pm

    Thank you Sarah! It will really be helpful to make them way ahead of time!

    Reply

Leave a Reply Cancel reply

Your email address will not be published. Required fields are marked *

Contact Me

sarahmdorseydesigns{@}gmail{.}com

Stay Updated!

Get all the latest goods straight to your inbox!

This error message is only visible to WordPress admins

Error: No connected account.

Please go to the Instagram Feed settings page to connect an account.

Must Reads

Custom Peg Board + DIY Circle Art | FrogTape

Custom Peg Board + DIY Circle Art | FrogTape

Main Level Refresh with The Home Depot

Main Level Refresh with The Home Depot

Sponsor

2016 Daily Simplified Planner

Popular Projects

TV Stand with Pivoting Door to Hide Electronics

TV Stand with Pivoting Door to Hide Electronics

July 27, 2012 By Sarah 11 Comments

DIY Rope Art | Tutorial

DIY Rope Art | Tutorial

May 16, 2016 By Sarah 8 Comments

DIY Christmas Gift: Framed Prints

DIY Christmas Gift: Framed Prints

December 24, 2012 By Sarah 2 Comments

Black and White Stripe Chair

Black and White Stripe Chair

January 23, 2014 By Sarah 30 Comments

Damage Free Renter Friendly Draperies with Black Tassel Trim

Damage Free Renter Friendly Draperies with Black Tassel Trim

May 20, 2014 By Sarah 11 Comments

  • DIY TUTORIALS
    • design + build
    • furniture redo
    • diy in 1 hour or less
  • free printable
  • friday favorites

Disclosure

Occasionally, affiliate links are used when they are available. I do earn a small commission when items are purchased using those links. As always, I only link to things that I truly love. I also link to items that I love when an affiliate link is not available. Thanks so much!

  • Home
  • About
  • Services
  • Shop

Copyright © 2025 Dorsey Designs

MENU
  • Home
  • About
  • Services
  • Shop