Hey! Did you have a good weekend? I hope so! After a few unproductive weekends, ours was productive, so that makes me happy 🙂
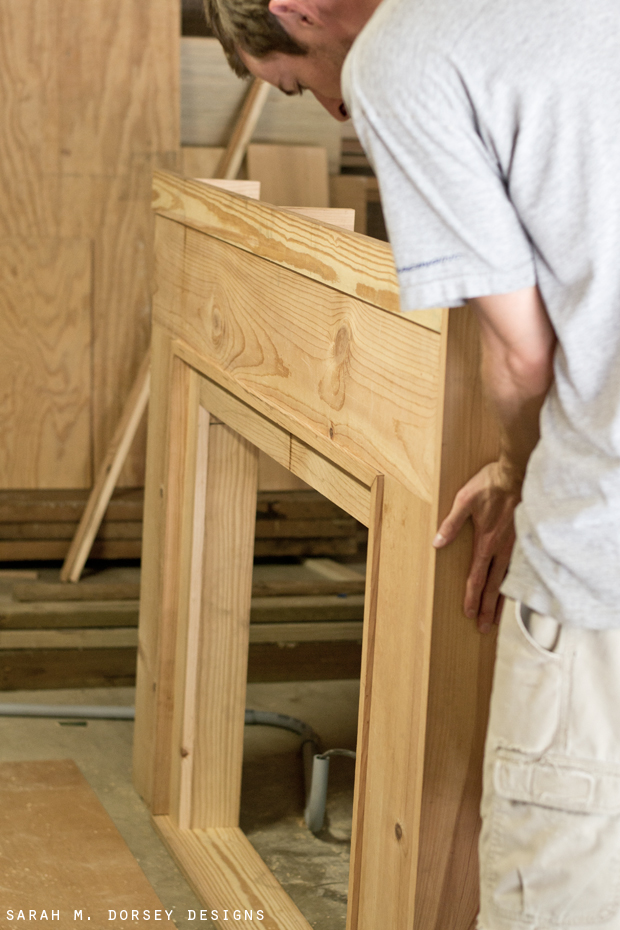
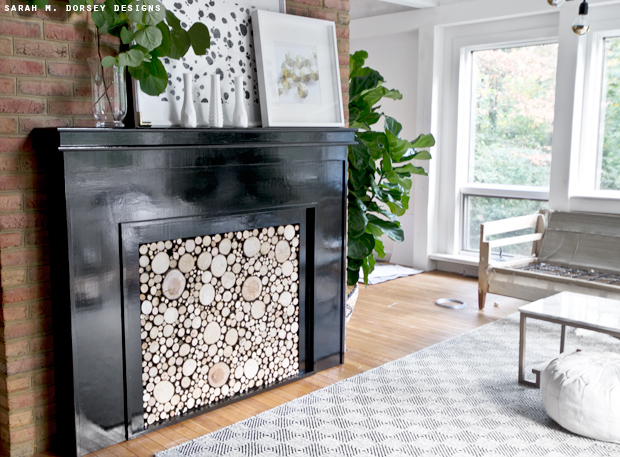
We finished our faux mantel! It really completes the room and looks like it’s always been there, I’m SO happy!!

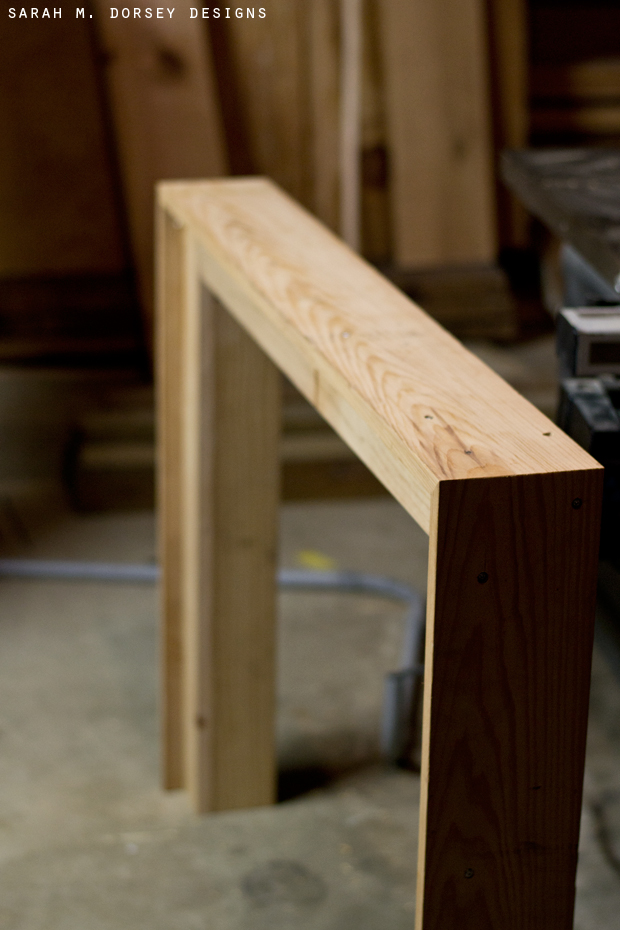
David and I were browsing a local antique shop – which had a lot of reclaimed building materials, including about 50 mantels. We found a shaker style that we liked, but it was a little large and $300 .. it’s hard to justify spending $300 .. when we have the wood (see below) and we can build it to the exact size that we want! So we used that for our inspiration!
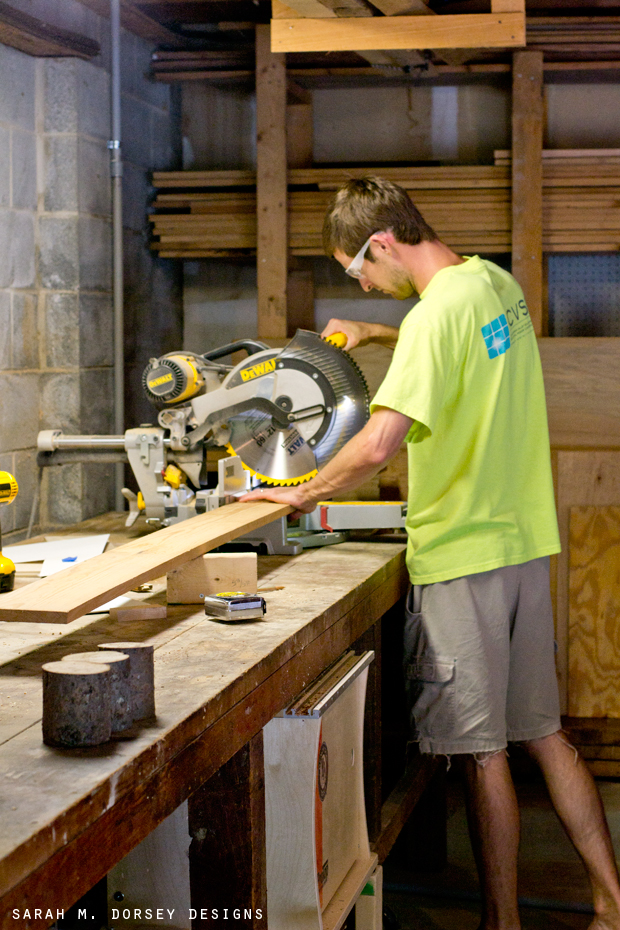
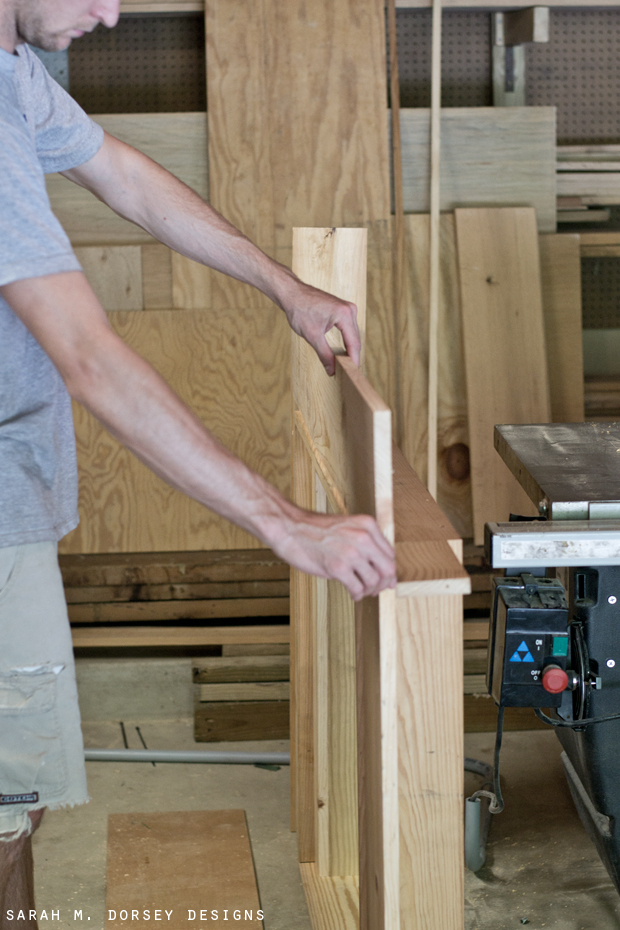
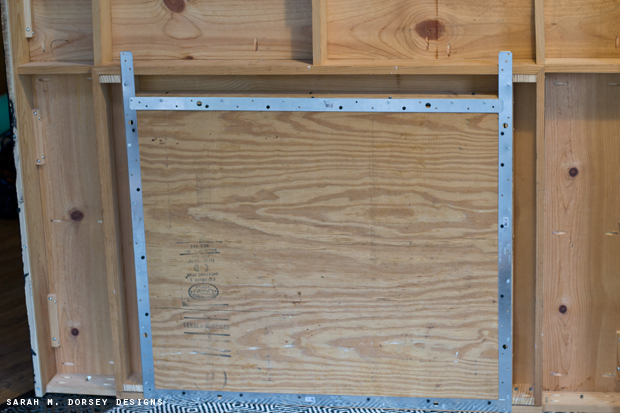
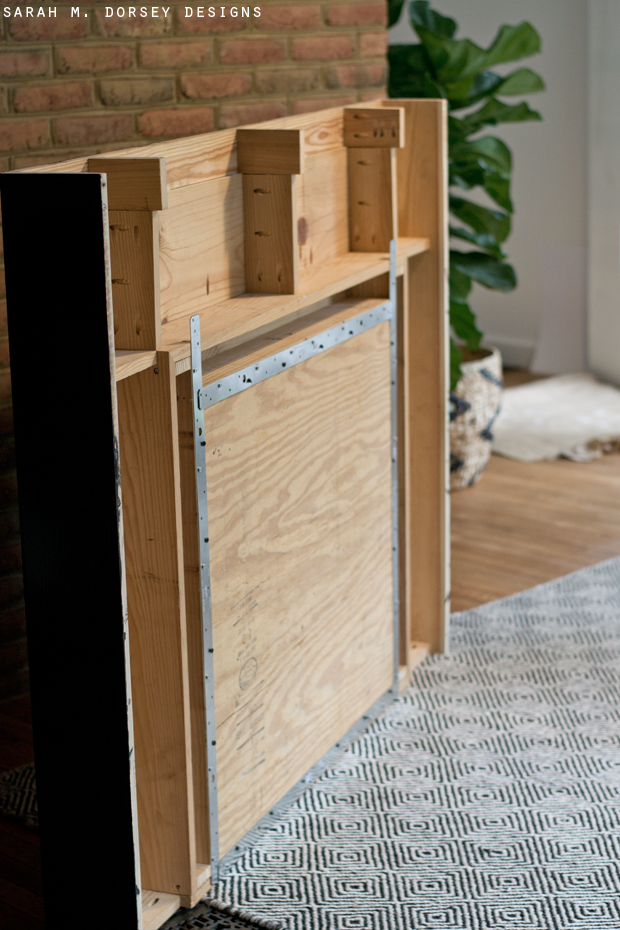
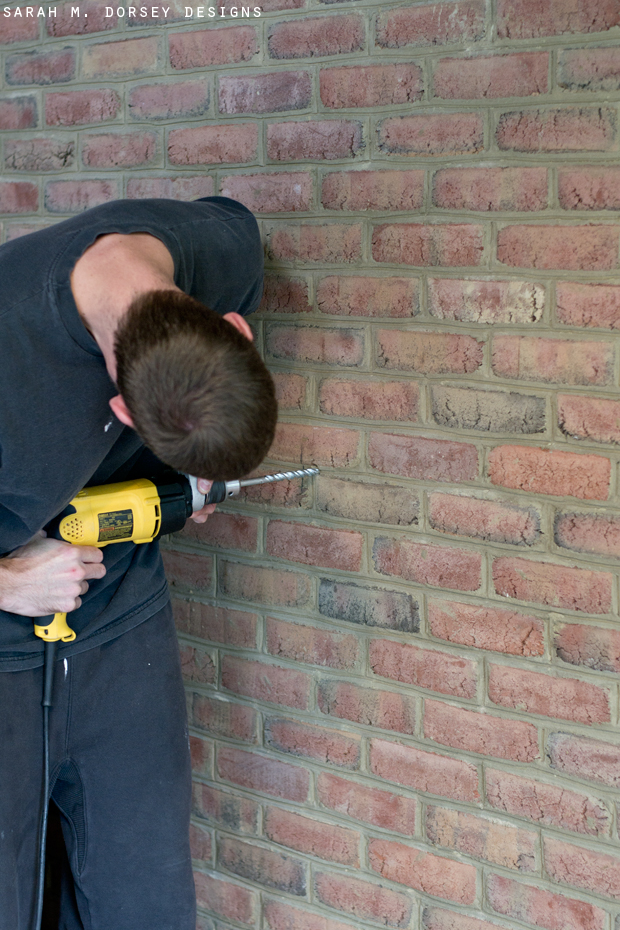
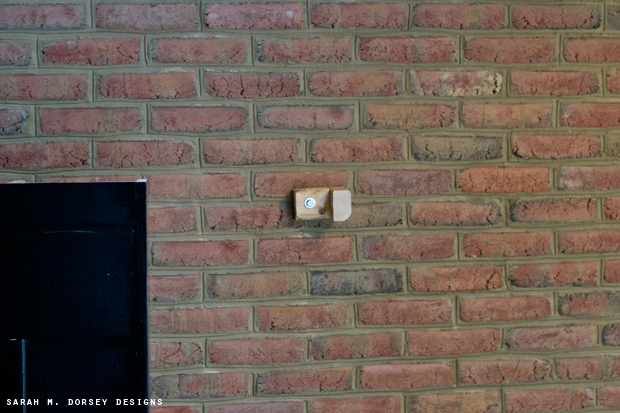
This isn’t a full tutorial, sorry! David designed and made it up as we went .. and since we were working on several projects at one time .. I didn’t get all of the photos needed. If you want to make your own, hopefully the photos below will help .. if not, let us know if a 3-D drawing tutorial would be helpful and we’ll try to do that 🙂

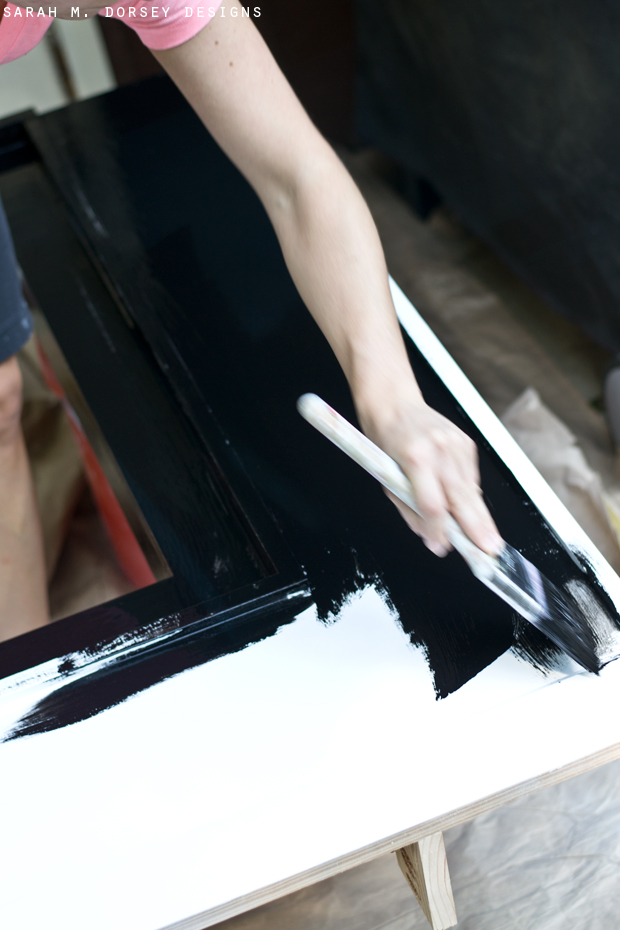
I struggled with what to paint it .. for now, we’re leaving the existing brick .. I didn’t really like white or black with the brick (and definitely not a color ..) but ultimately went with black, I LOVE the drama that the glossy black adds to the mostly white and bright space.
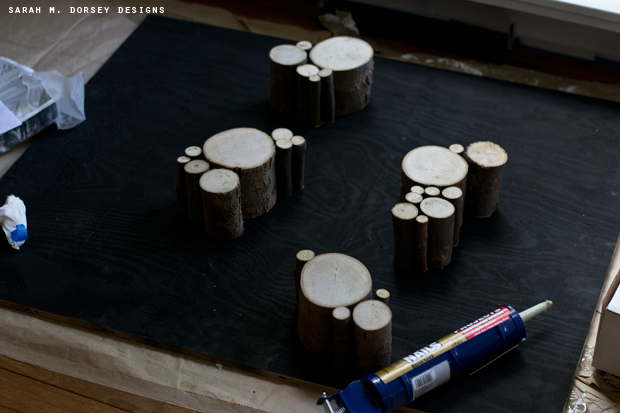
For the cut wood insert, we cut a piece of plywood to the size of the opening and spray painted it matte black (so any spaces blend in). Last thanksgiving or Christmas, David cut 4″ sections from a dead tree at his parent’s house – so they’ve been sitting in the garage for about a year to dry out (just make sure that they can breath, we had them in an open garbage bag and they grew some stuff .. (I wiped it off with bleach)
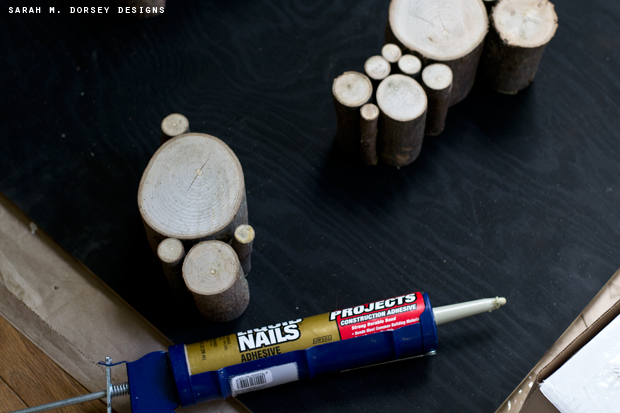
We used a heavy duty construction adhesive to attach all of the pieces (~3-4 tubes)
AFTER
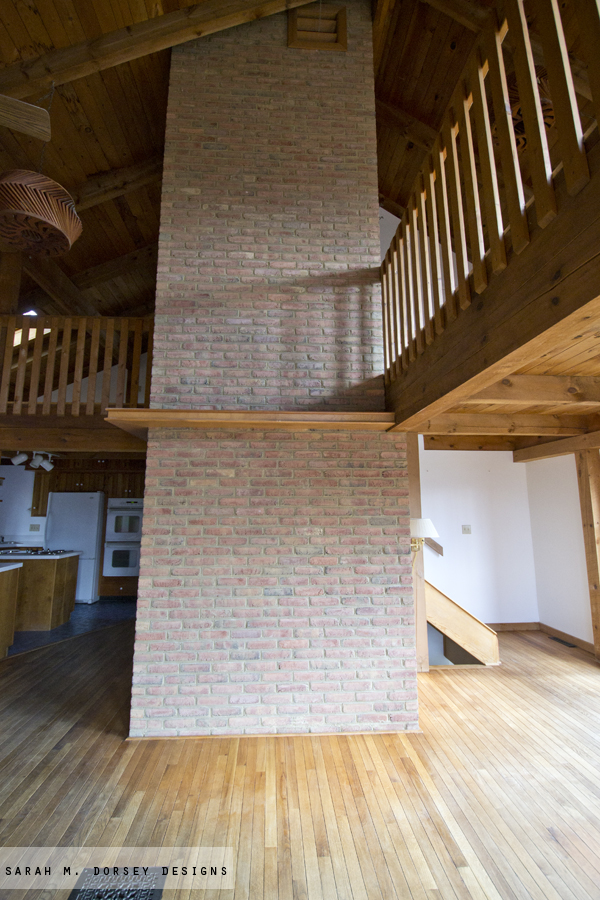
Now you know why we’re holding off on changing the brick .. it’s about 30′ tall! We’ve decided to paint all of the wood in the house (more info here and here). My preference would be to paint the brick, but David is very anti .. if anything, he wants to drywall it!? I don’t get that .. In the meantime, I was thinking about building a white paneled wall, just behind the mantel (and a few feet up) .. so maybe we’ll do that..
Also, don’t mind the un-upholstered sofa .. hopefully we will get to it soon! Sunday, we moved a sofa inherited from my Grandparent’s to hold it’s place until we finish this one.
I’ll be back with more living room details soon!
LOVE it! love the glossy black and love the stacked wood look!
That looks so amazing Sarah!! Love the shiny black on the mantel and as you know I am all about a good faux mantle myself 😉 Love how yours turned out.
Sarah, that looks amazing! I'm so glad you chose the glossy black…DRAMA!
Love it!
What an amazing project!!! Love the idea of painting the brick (I painted mine in my former house and it was the best decision I've ever made!) but also like the idea of what paneling should the hubs stick to his guns 🙂
The mantel looks so great in that space 🙂 Really grounds the room. I love the idea of whitewashing the brick! So you have a bit of color peeking through but it's muted.
That shot of David using the miter saw with his left arm holding the wood like that makes me so anxious!!! I know you are safe with your tools so I hope that was just a photo op 🙂
Thanks so much!! 🙂 I just noticed the photo .. the photo angle makes it look unsafe! I swapped it with another 🙂
Incredible! Love that you are incorporating black into your new home.
I was thinking about doing our fireplace in black too. If we stay in our house, I will rip might just redo mine in black.
Oh my goodness, that looks amazing!! You two are so clever! I love the wood feature inside the mantel – it's perfect!! Can't wait to see how the room turns out. It's such a dramatic space with those high ceilings. The black is the perfect focal point.
I love it! The difference is amazing!
Leslie
House on the Way
I absolutely love this look! Looks amazing!
so gorgeous! I kinda love the brick the way it is..such a nice texture against all the white you're planning.
I totally love it! Wow! I might have to try this myself some day. I think putting a bit of tile on the floor in front of it might help make it look a little less "faux" – and I wouldn't touch that brick. Love it!
This looks amazing!!! I would want the brick painted, too, but…..maybe not have to be the one painting it? Lol 🙂
Love the idea of the panels behind the mantel. And as for the mantel, wow! Y'all did a fantastic job!!
It turned out so great! Isn't it amazing how much it transforms that wall? It looks so much more finished now! And I'm with ya– don't dry wall!
JUST GORGEOUS my dear. LOOOOOOVE the glossy black. Its exactly what that wall needed:)
It looks amazing, that wall was definitely crying out for a mantel! The black was the perfect choice too!
Dry wall that beautiful brick?? No! And you're building a sofa? I have been wanting to know how to do that!! Can't wait to see. You guys are whizzes.
You guys are amazing! looks fantastic! xx jana
Hi Sarah! I've been a long-time reader and have had this post pinned for a future mantel building at our house that is going to now happen next week! Would you mind telling me how deep the side columns are? I love how yours aren't super deep but they're deep enough that the mantel looks real vs. a fake stick-on. 🙂
Hi Sarah! I've been a long-time reader and have had this post pinned for a future mantel building at our house that is going to now happen next week! Would you mind telling me how deep the side columns are? I love how yours aren't super deep but they're deep enough that the mantel looks real vs. a fake stick-on. 🙂