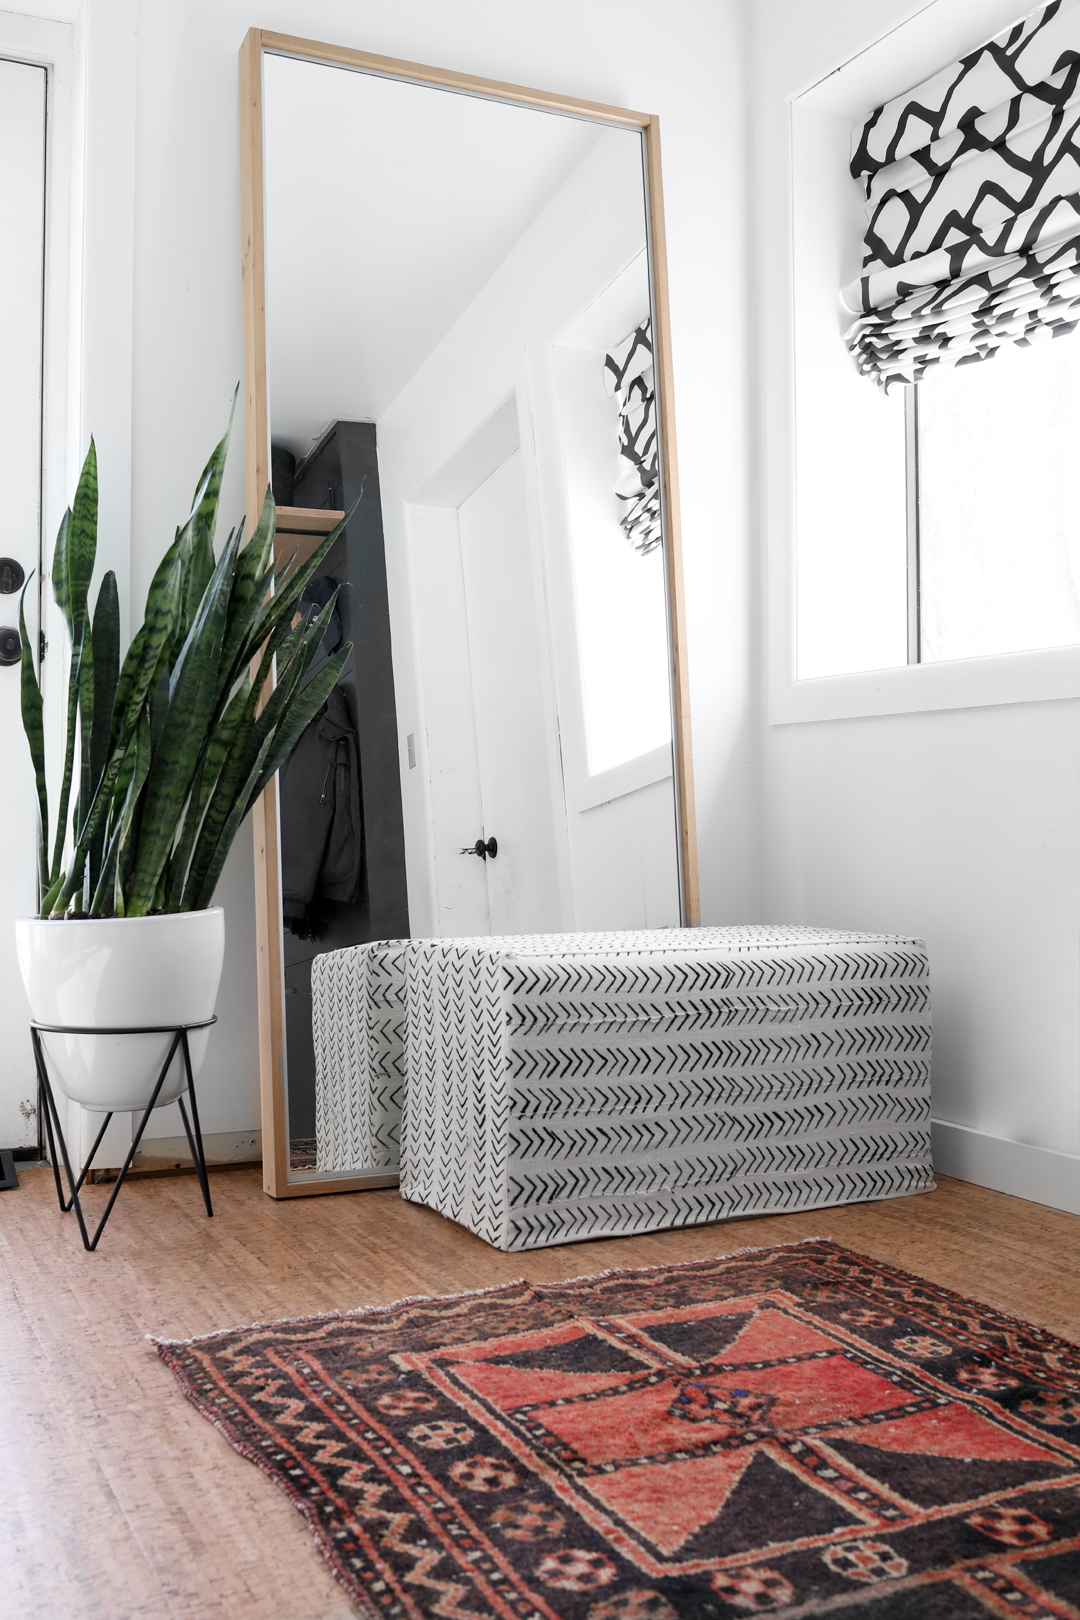
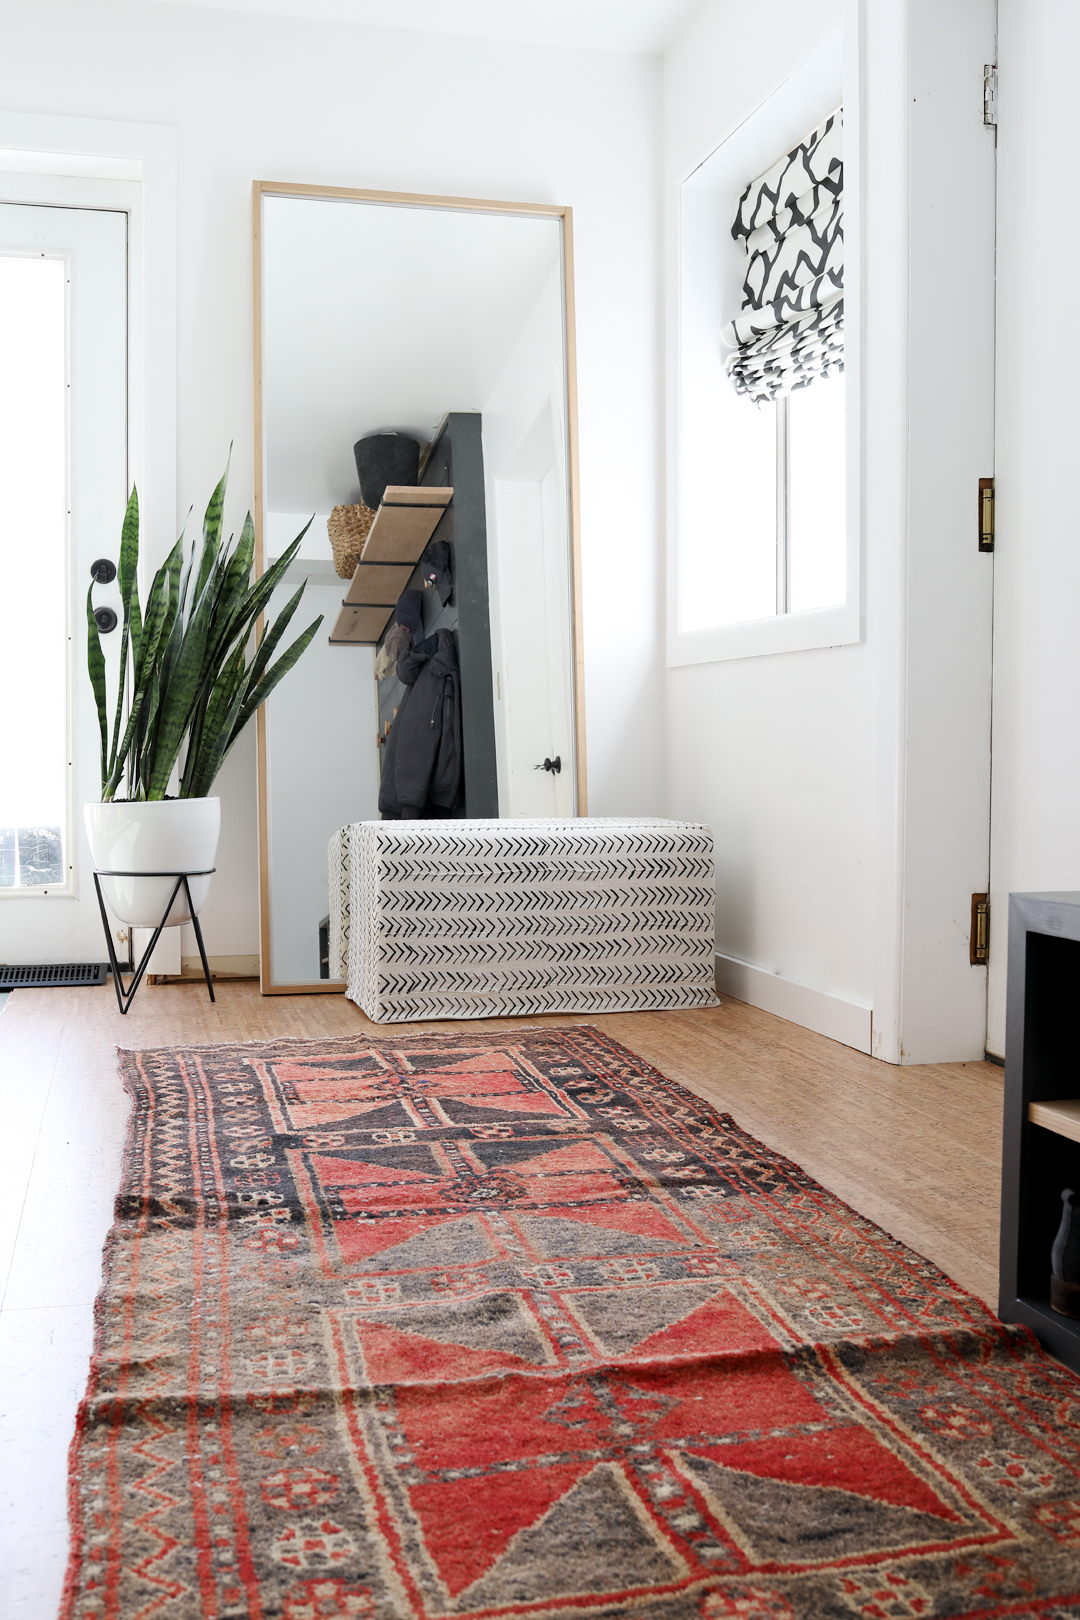
Hi! I hope that you had a great weekend! Today, I’m sharing a tutorial for this upholstered mudcloth bench – that we made for our garage entry! John already loves climbing on this, so I’ll call it a win! Plus, I was able to use all materials that I had left over from other projects, that’s always good!
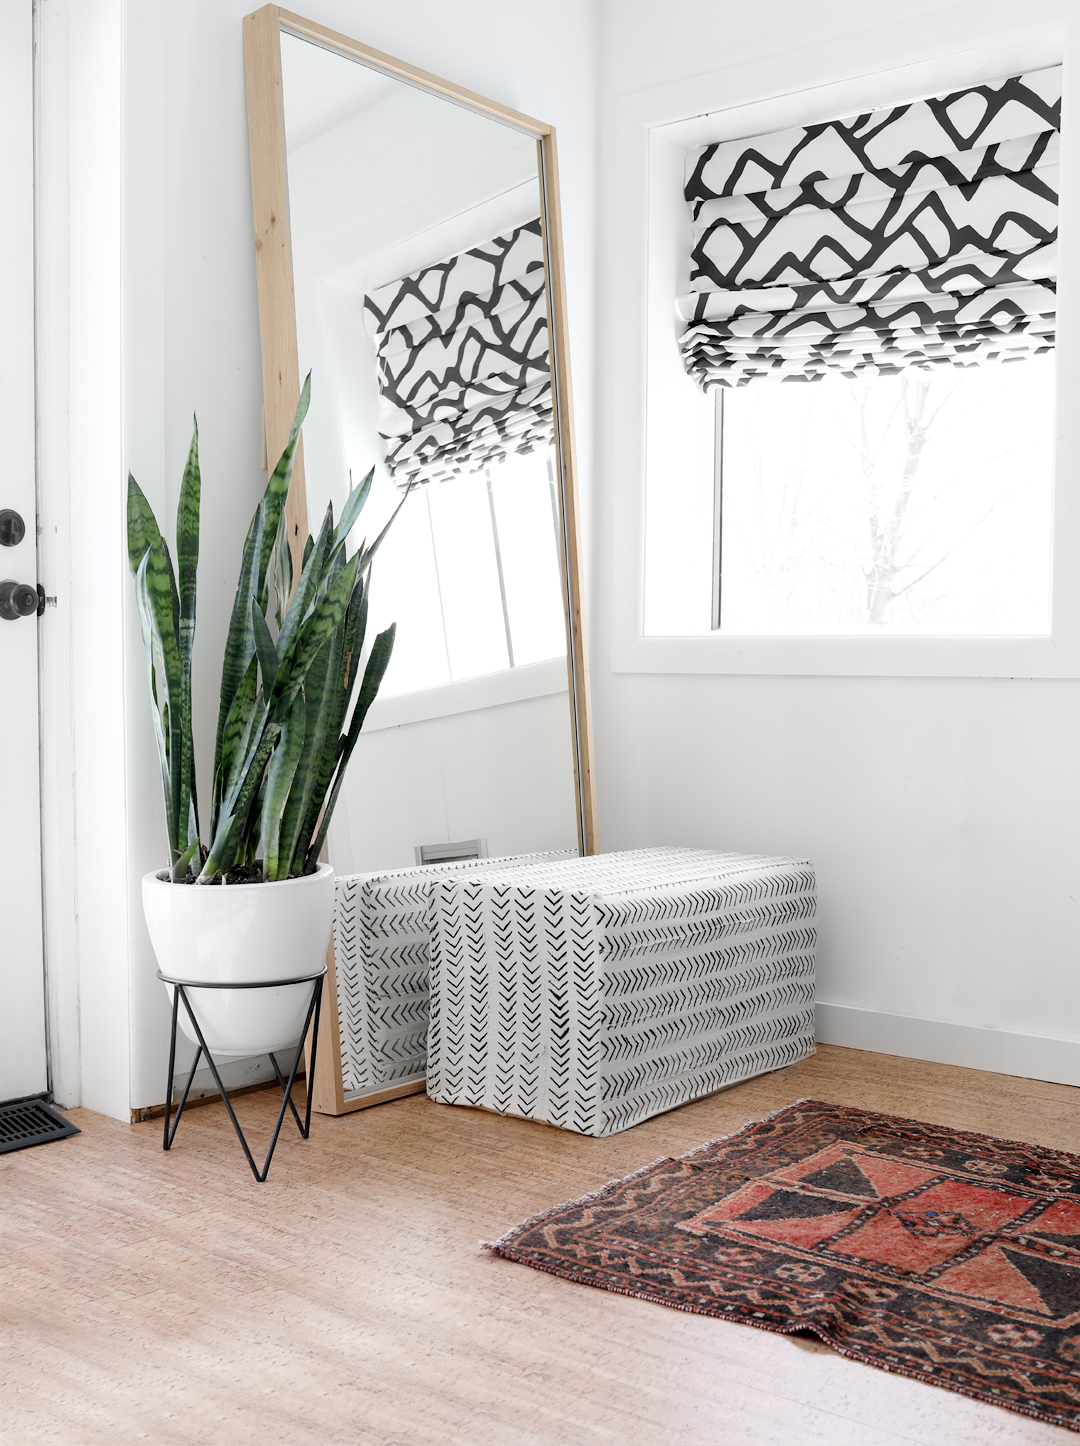
When we lived in Connecticut, I picked up two pieces of mudcloth from The Elephant’s Trunk flea market. I wasn’t sure what I was going to do with it at the time, but this is the perfect application (now I kinda want more!) Danielle Oakey’s new ottoman and Sarah Sherman’s living room inspired this project!
Want to make your own? Here’s how we did it!
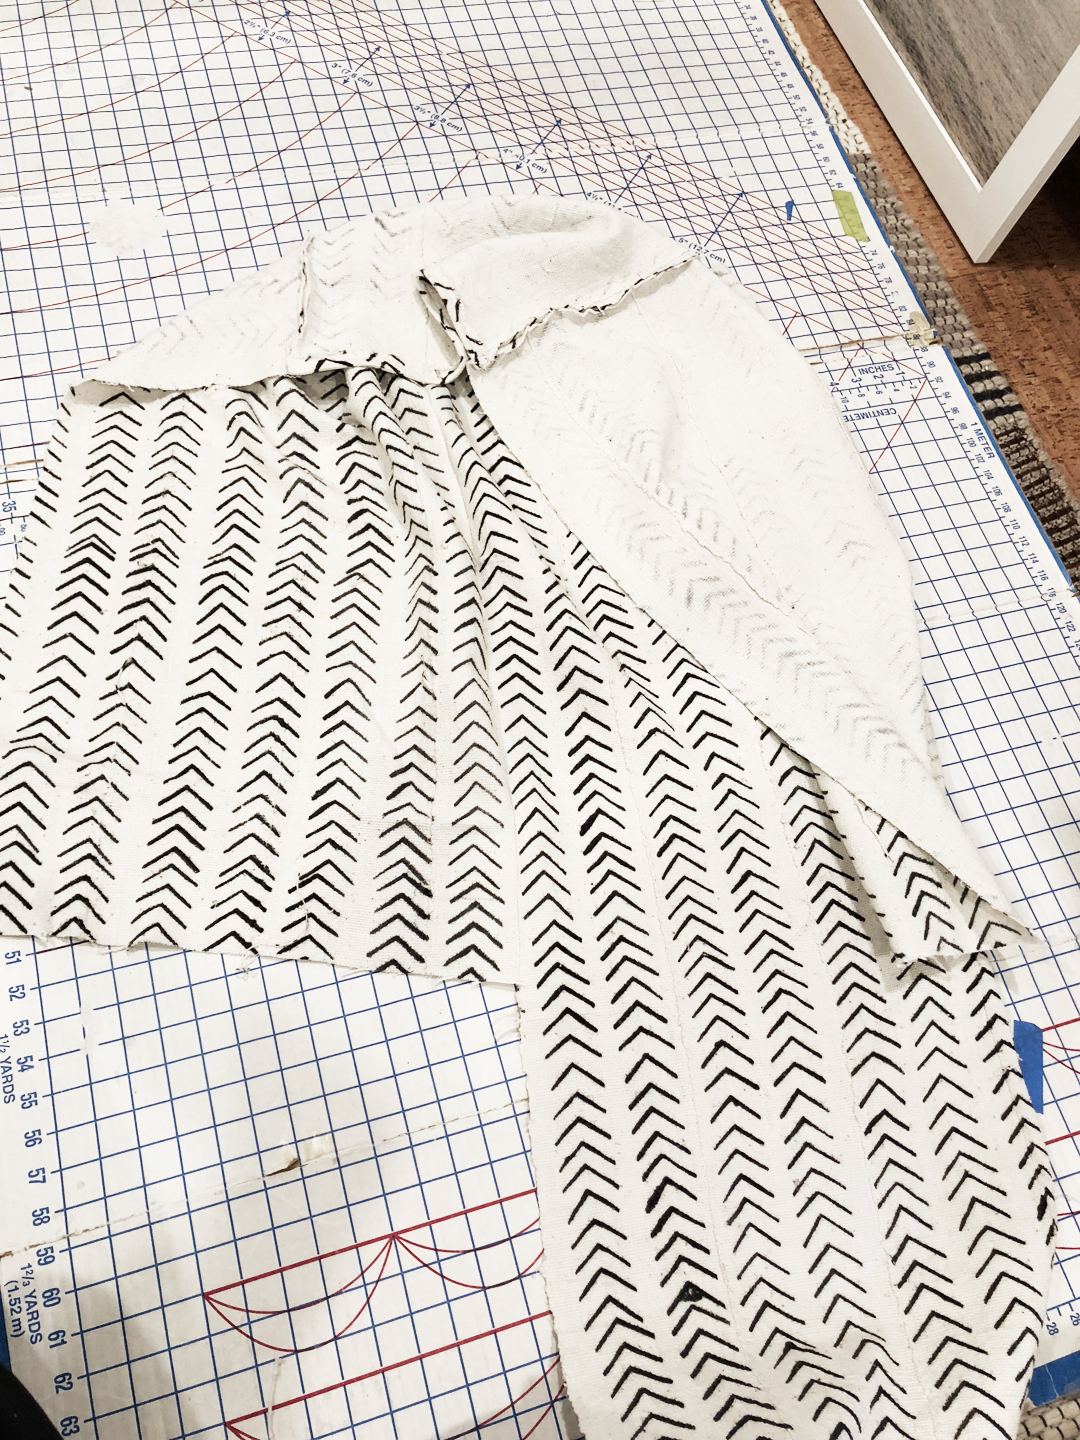
First, I decided to cut and sew the cover, and then the box. That way, the box could be cut to fit. I cut one long piece for the top and sides (no seam between the top and sides), and two identical pieces for the front and back.
My measurements:
Front and back (x2)
31″ x 16.5″
Top and sides piece (x1)
63″ x 16.5″
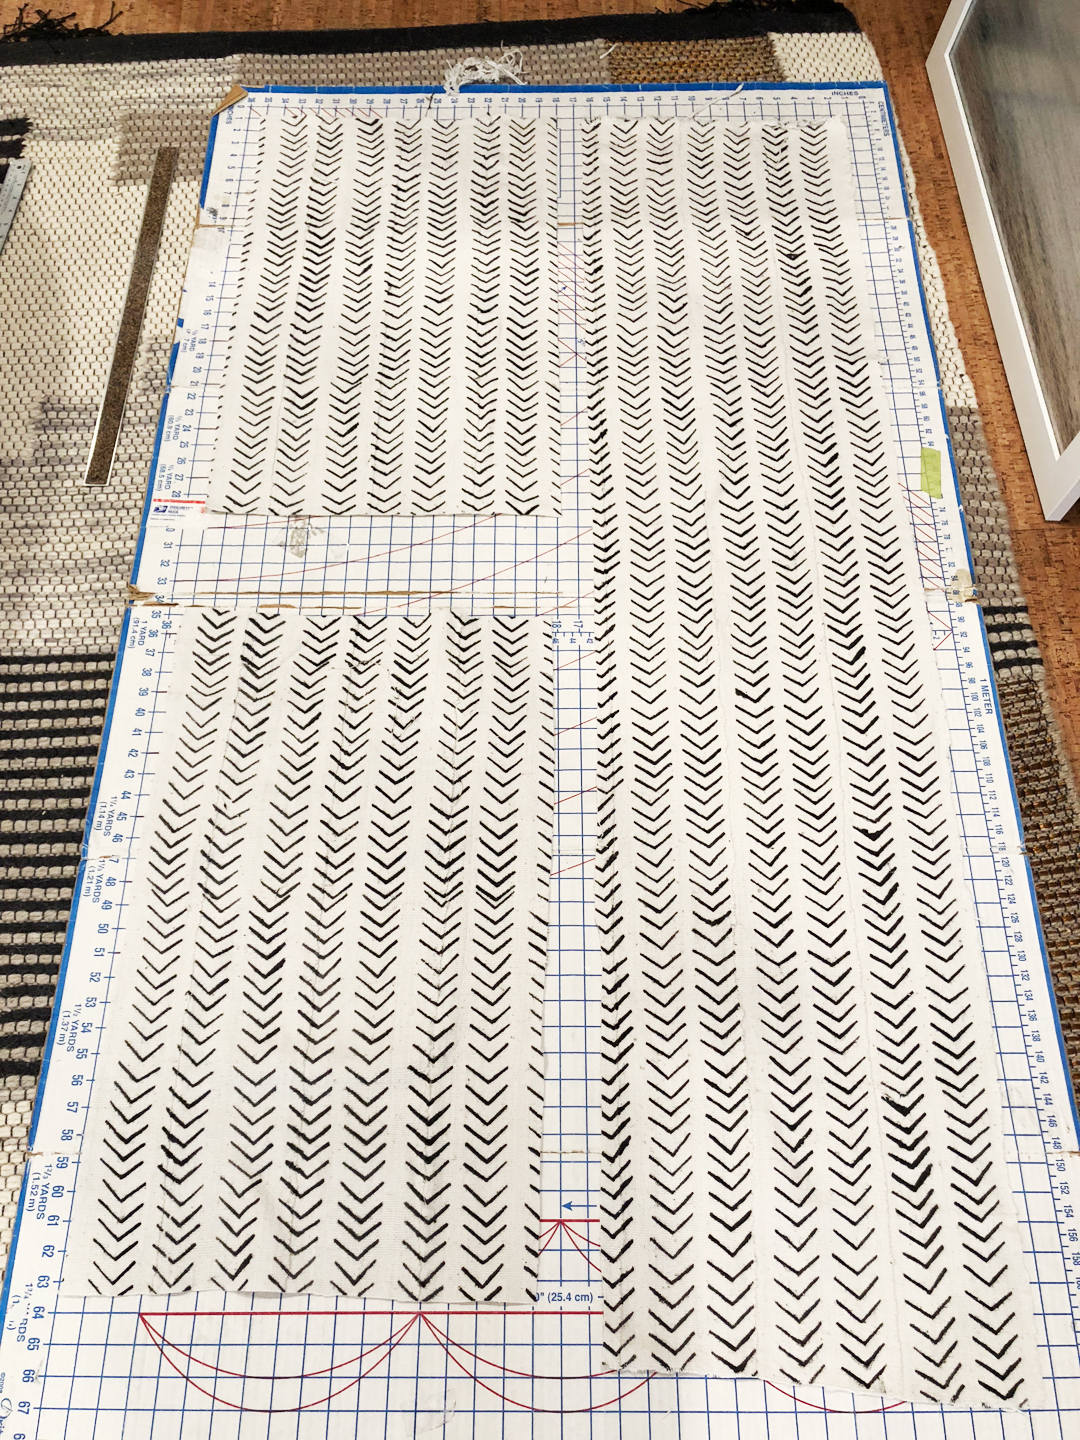
Once all pieces were cut, I hemmed all sides that would be on the bottom of the ottoman, so the short ends of the long piece (future sides) and one of the long sides of both the front and back (4 sides will be hemmed). I just folded about 1/2″ to make a clean edge. Typically, I’ll fold 1/2″ and then fold another 1/2″ so that there is no exposed edge, but I was trying to make the most out of my mudcloth.
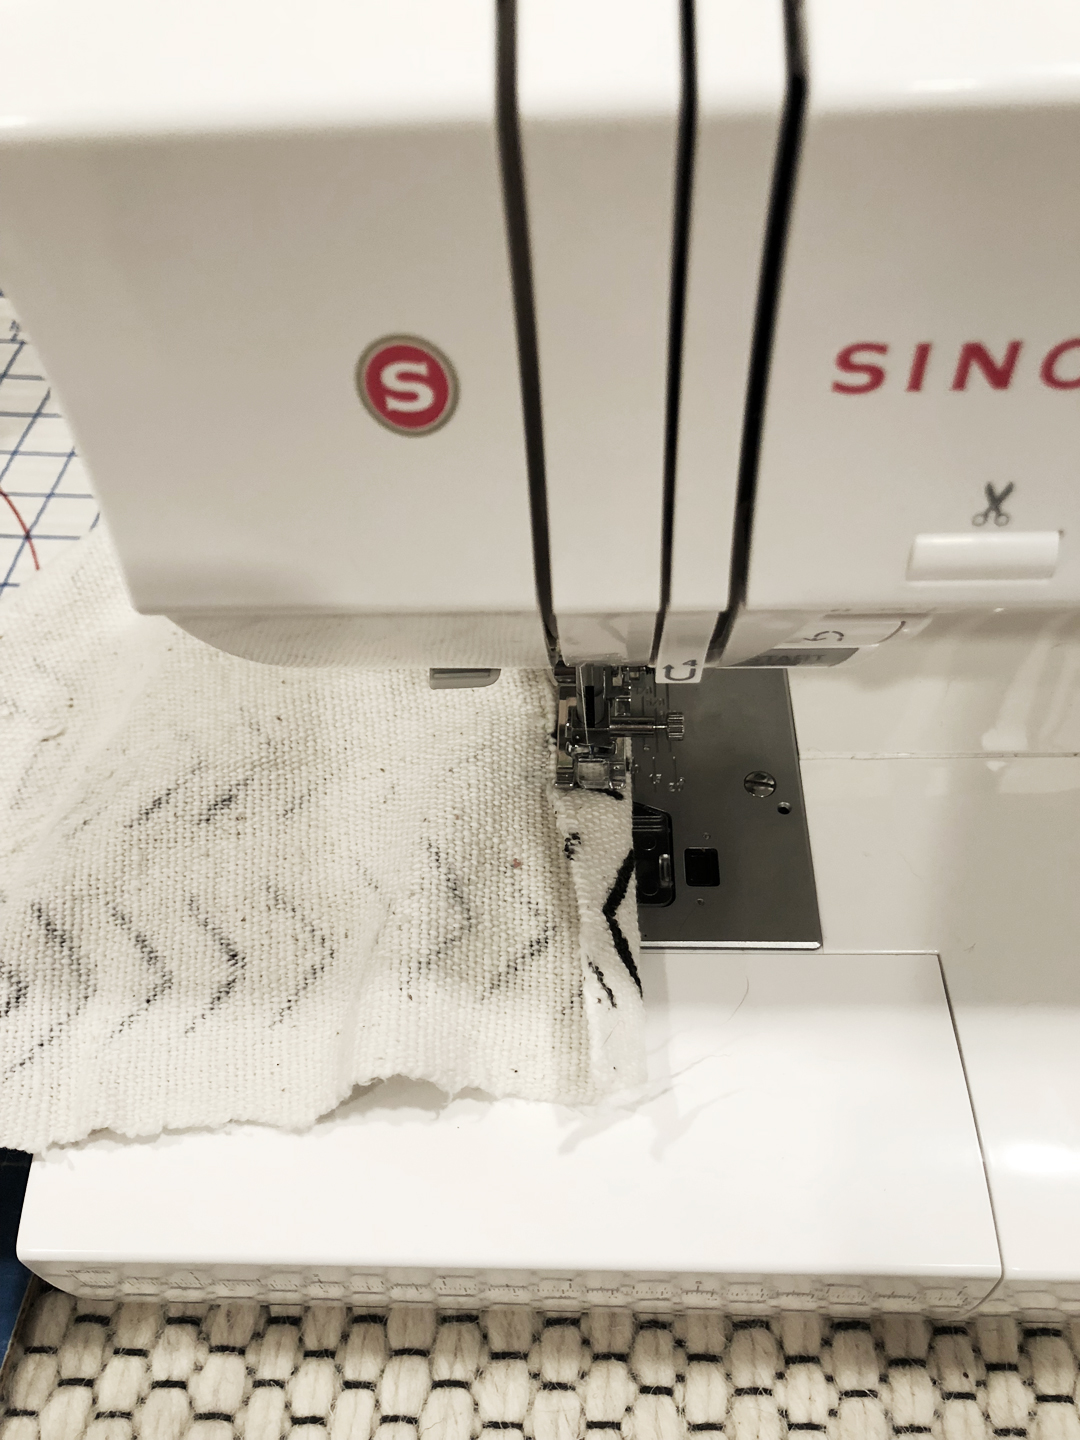
Then, with the faces together, I sewed together the side of the ottoman and the side of the front piece. (make sure the hemmed bottom of the side piece is down) Make sense? It’s kinda hard to show in photos. Once sewn, I repeated with the back piece. I then continued to sew, connecting the top of the front/back piece and the top piece
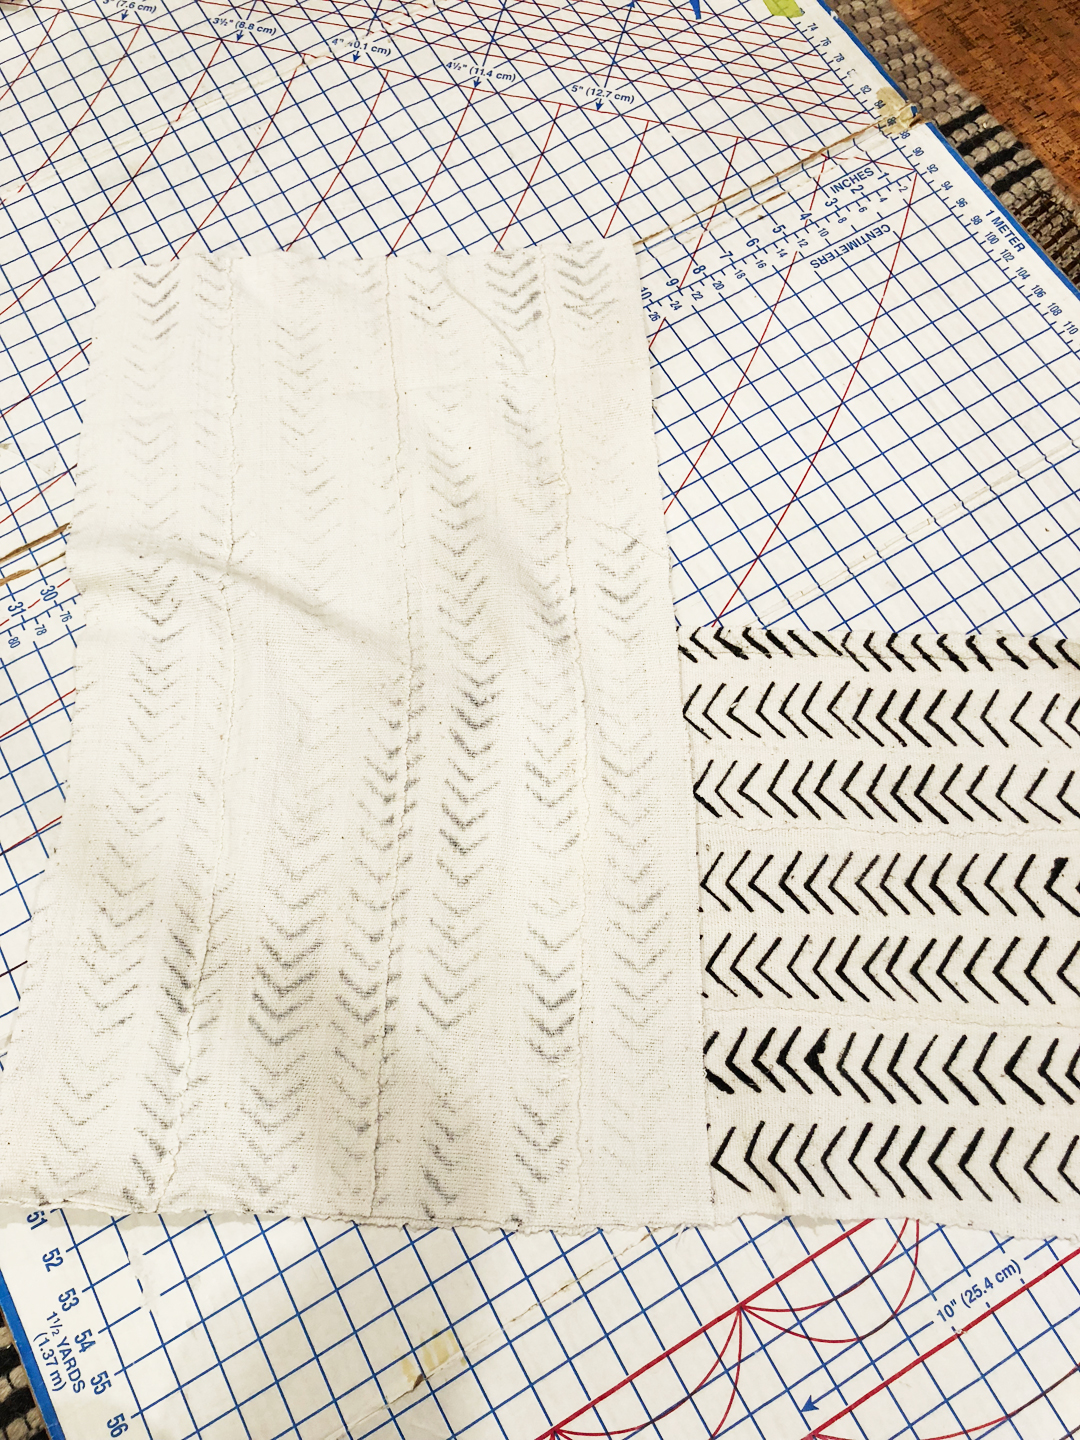
To finish it up, I sewed together the side pieces. If you’re like me, you may have some extra fabric, I simply re hemmed so that the side panel was even with the front and back.
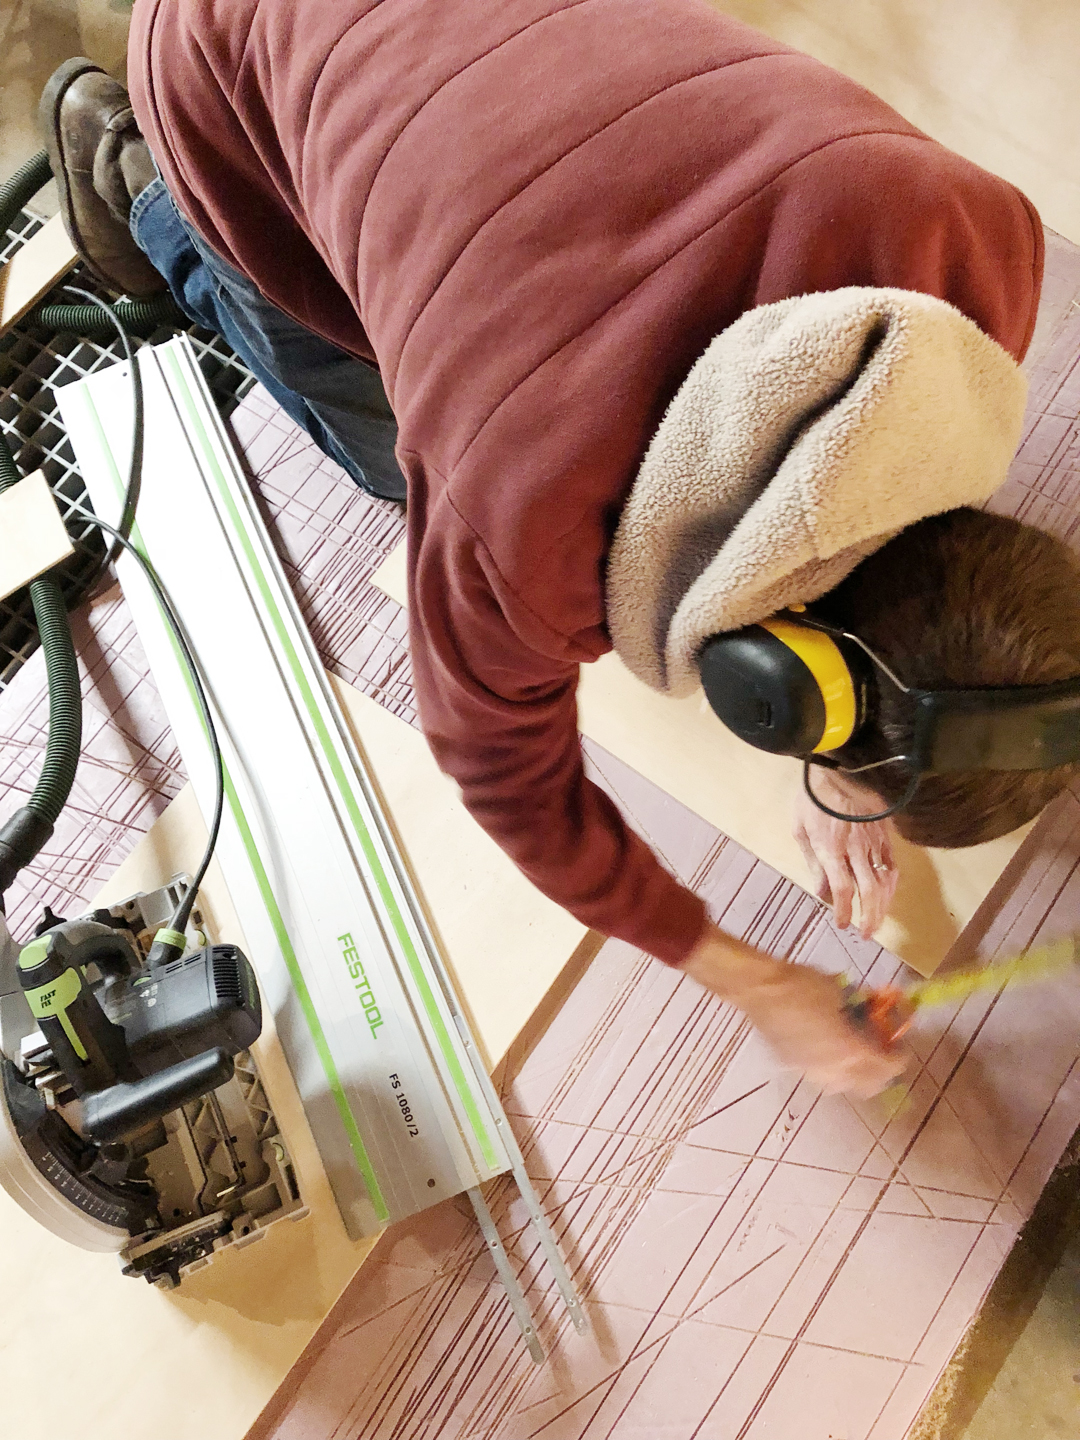
We made the box from left over 1/2″ plywood. It was pretty simple, though we did need to cut it down so the fabric would fit. I’ll share our measurements so you don’t have to!
Cut list:
Front and back (x2)
28 3/4″ x 15″
Sides (x2)
13 1/4″ x 15″
Top (x1)
14 1/4″ x 28 3/4″
First, we measured and made all cuts. We love the Festool track saw, so easy! If you don’t have one, a table saw will work great.
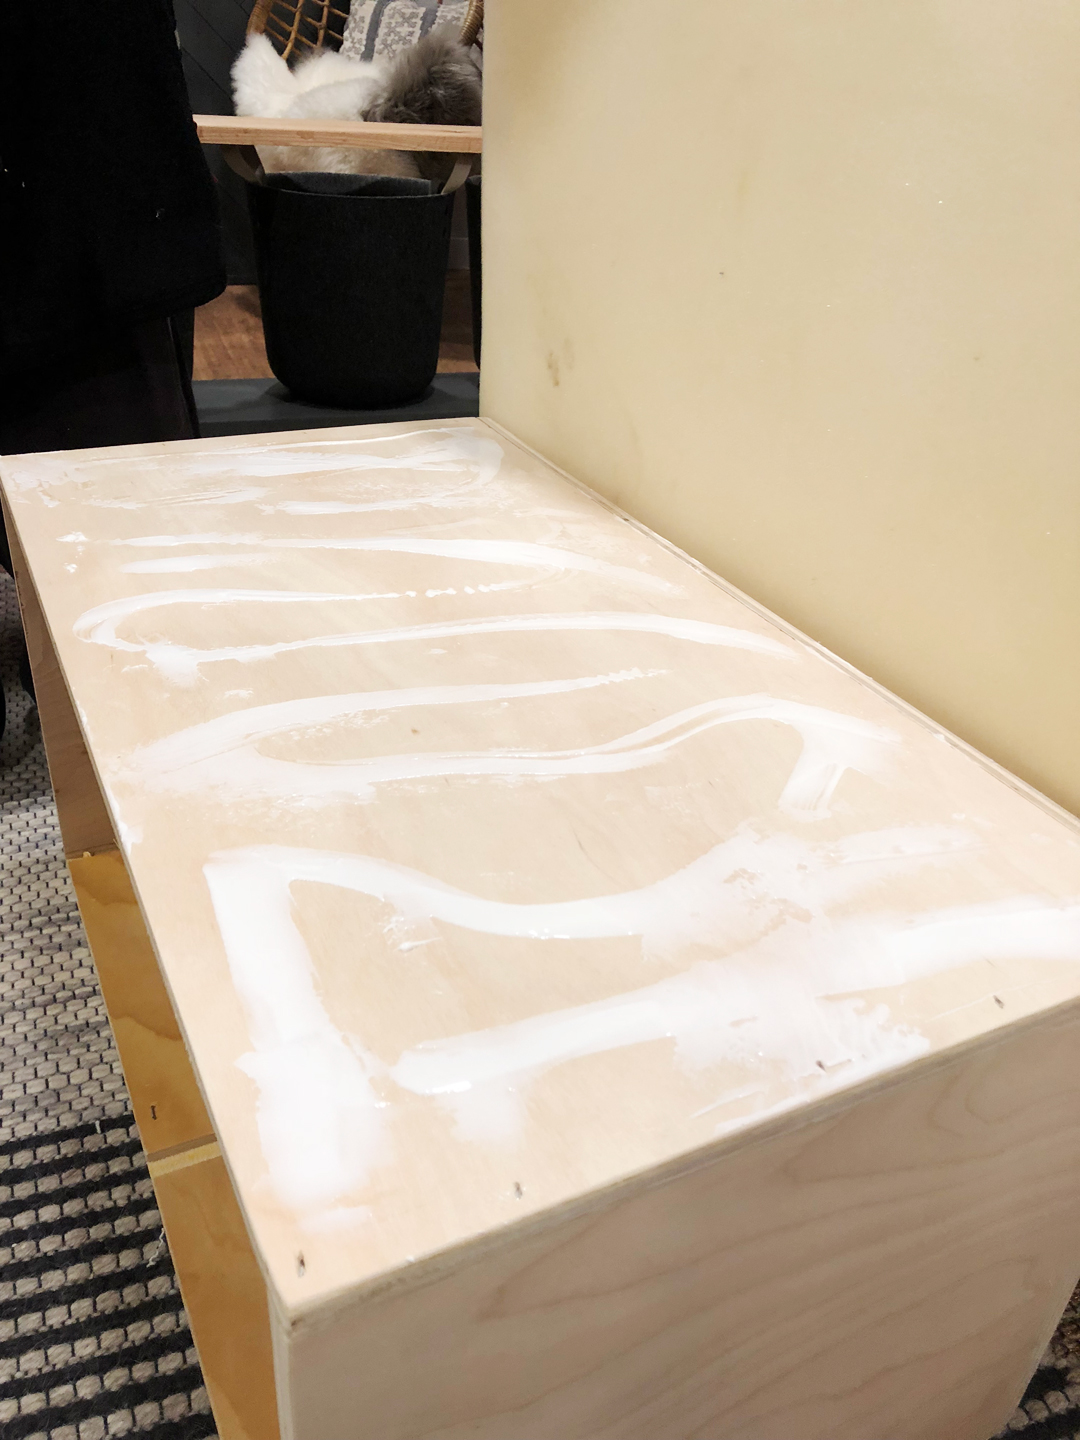
Then, we started building the box. Applying glue to each seam (one at a time).
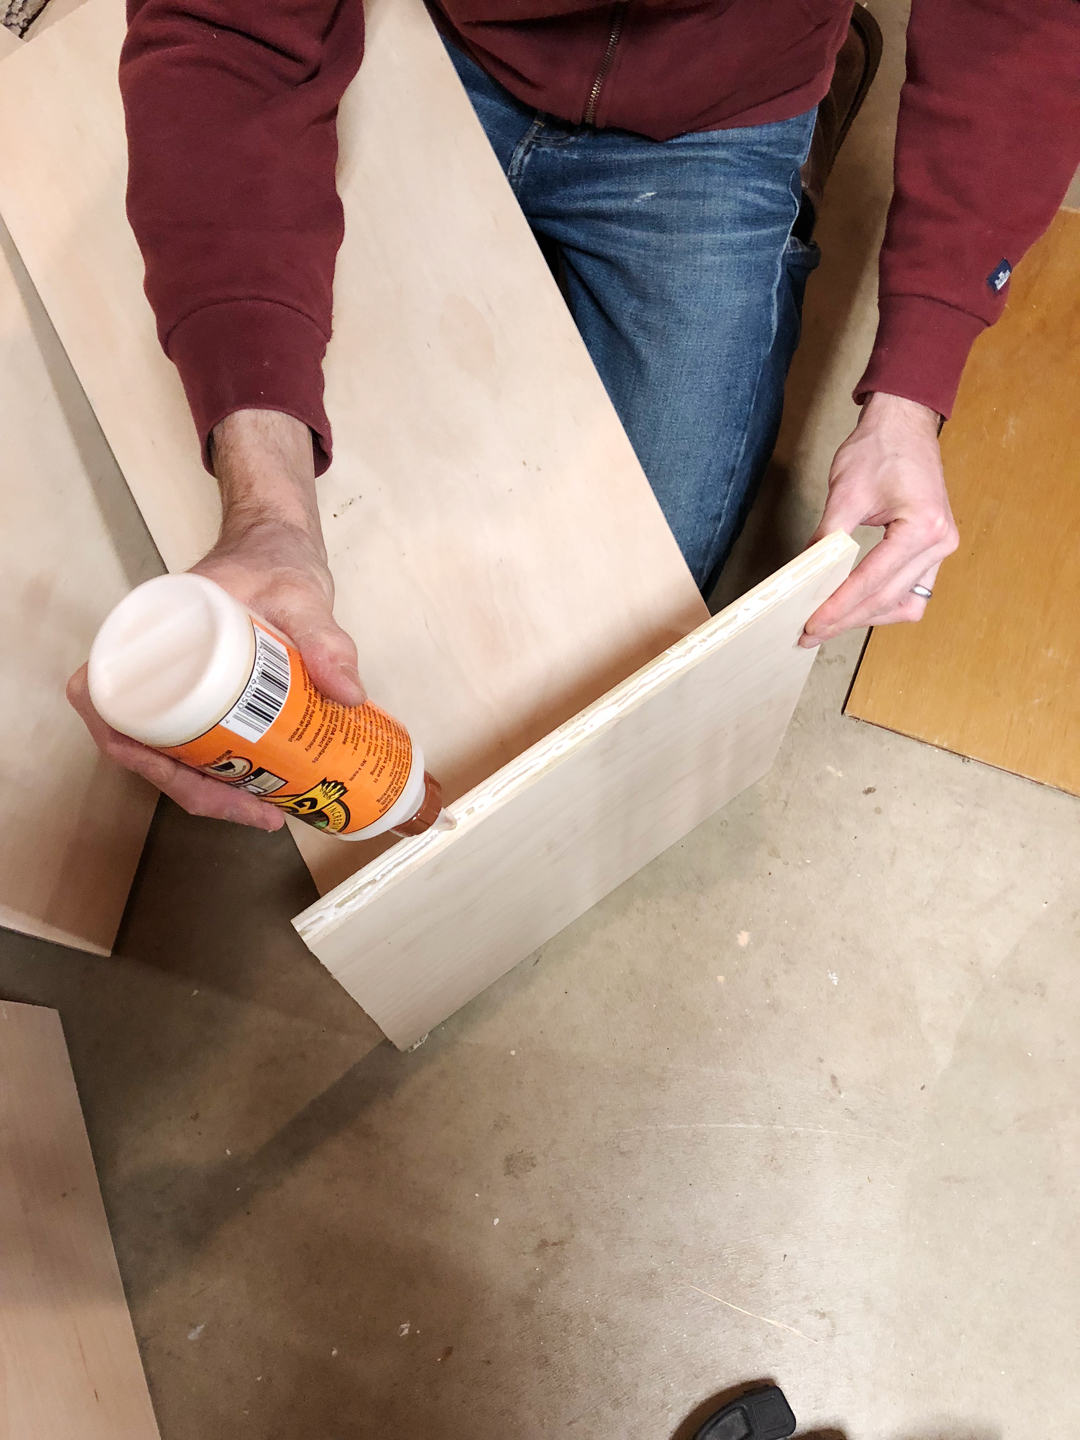
And stapled in place.
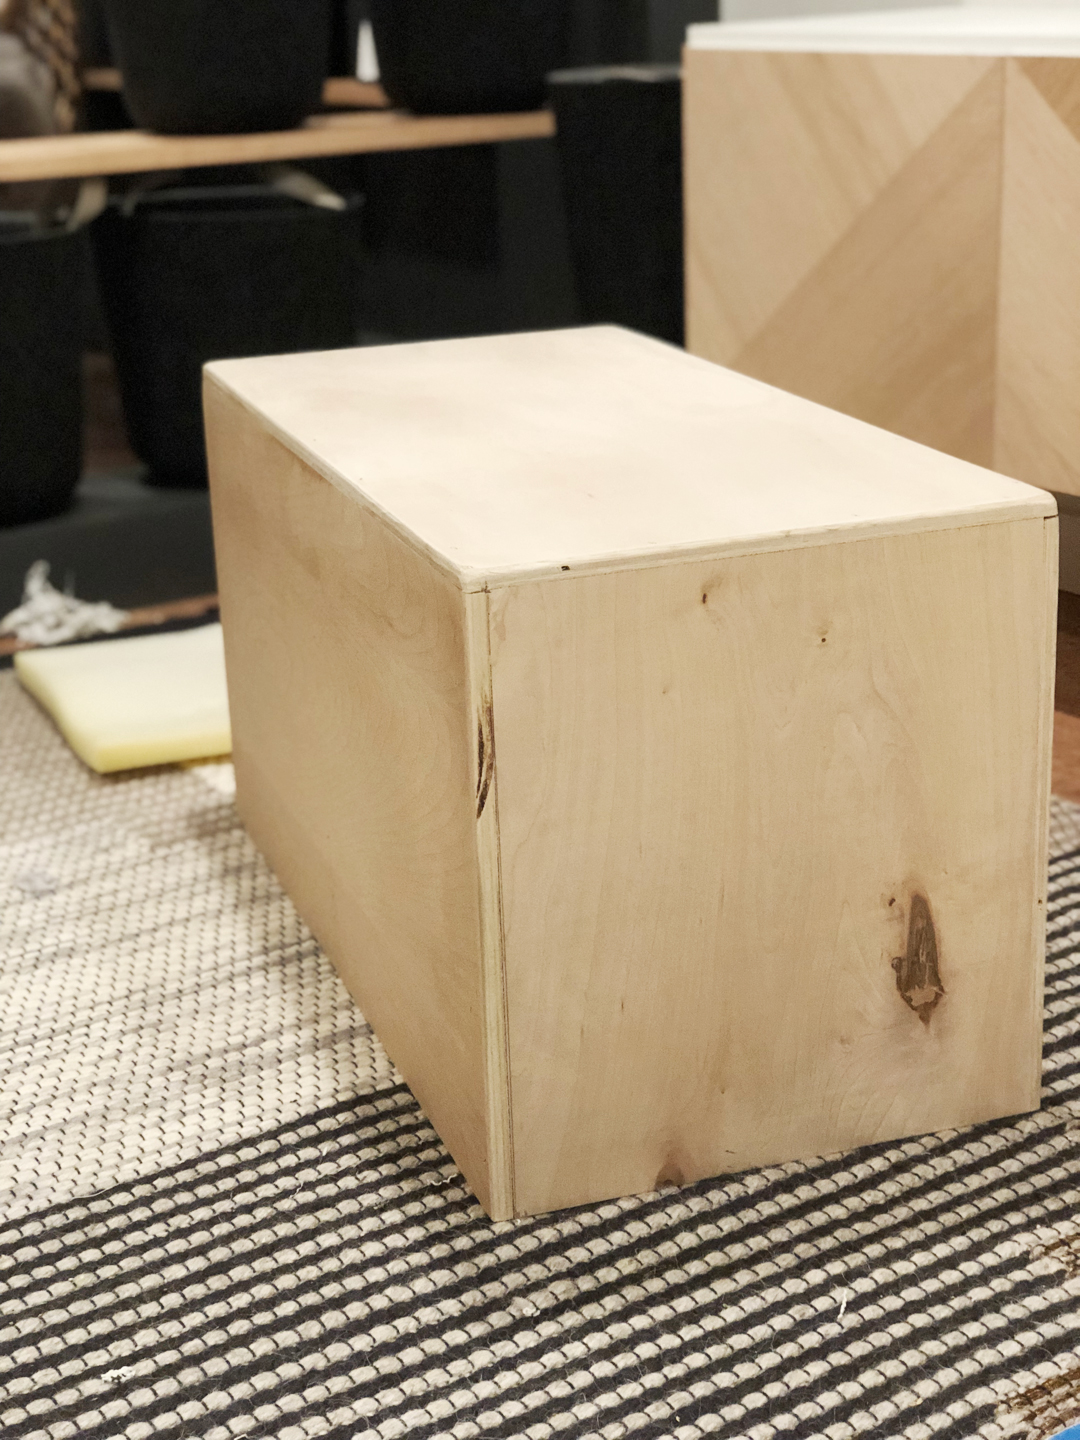
Once the box was built we lightly sanded all edges with 120 grit sandpaper.
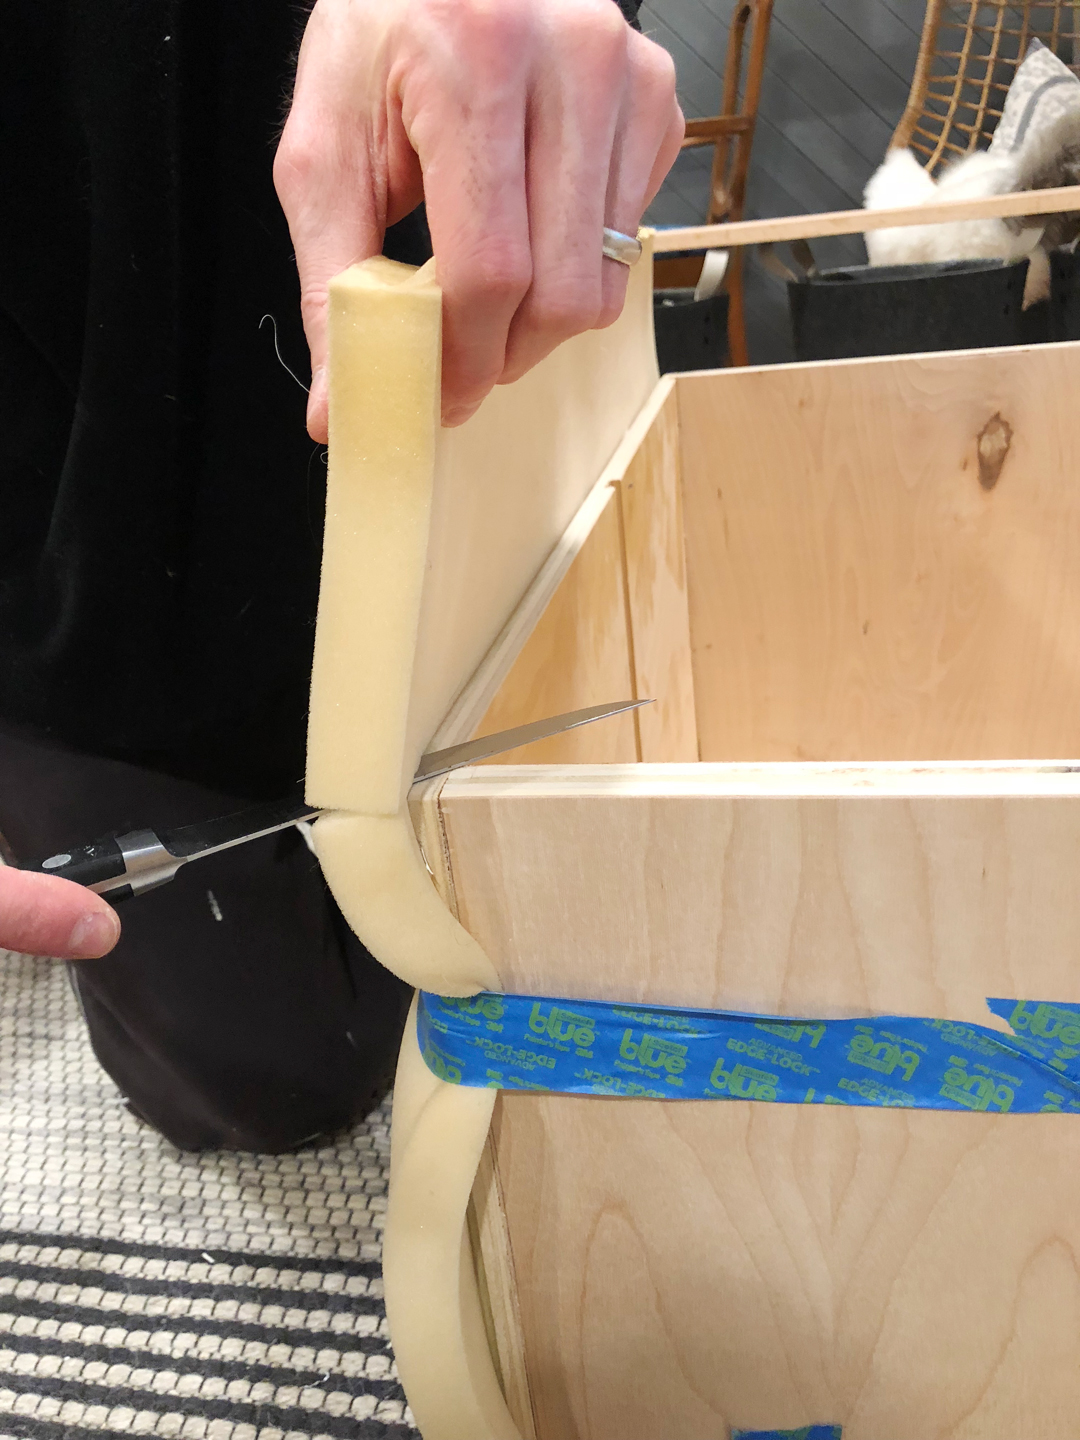
Next, we added foam to the front, top and back (one continuous piece for smoother edges) allowing an 1″ of overhang on each side (the thickness of the foam, to be later filled in when side foam is attached). Note: you may want to test fit your cover with the foam loosely on before attaching the foam to make sure it fits.
We used a fast grab glue (Aleene’s works well) and applied the foam to the front, holding in place until the glue dried, and then the top, and back. We used tape to help hold it down, as it dried. Then we cut a side panels of foam, and glued in place.
Finally, we trimmed the excess foam off with a sharp kitchen knife. Cut carefully, as you go, use the bottom of the bench as a guide.
Once the glue is dry, slide the cover on!
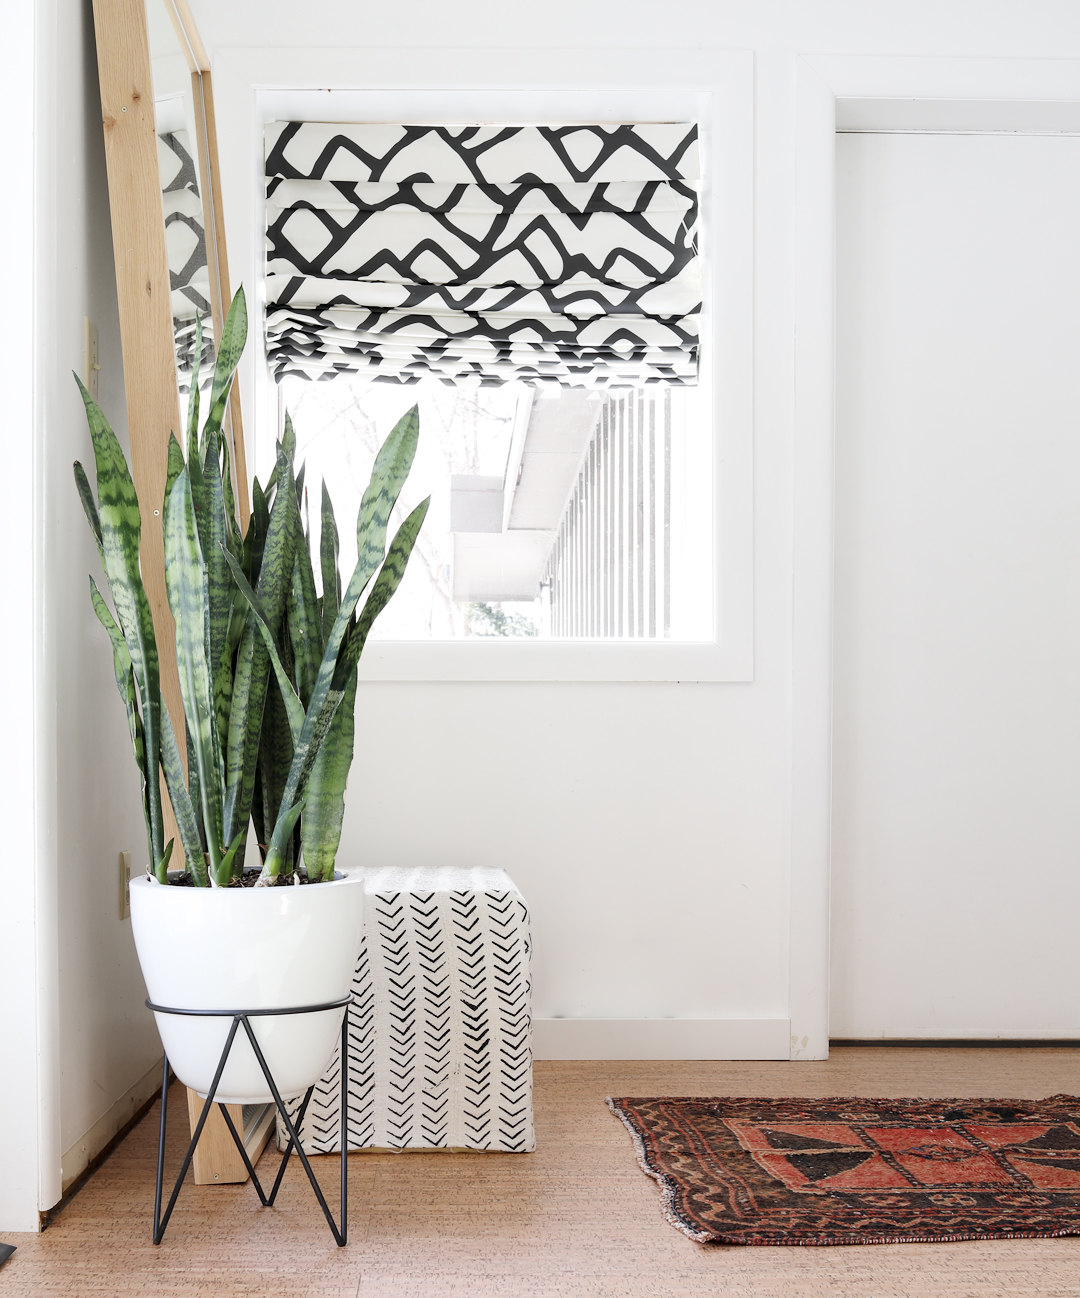
Also, here’s a peek at our built in! Tutorial for that soon! I love how it turned out!!
Sources
Rug (vintage, but from this shop) | Mirror (Ikea hack, tutorial in my upcoming book, June 2019!) | Planter (Marshalls, but this is similar) | Shade, custom fabric, DIY by us, but no tutorial)
Absolutely love this! So creative and talented!
Thank you Jeannie! If you give it a try, let me know how it goes! 🙂
it looks amazing!! you guys are so insanely talented,
Thanks Cassie! That’s so kind! 🙂
I love this bench. Did you make the blinds on the window?
Thank you! We did cover an existing roman shade with farbic. 🙂