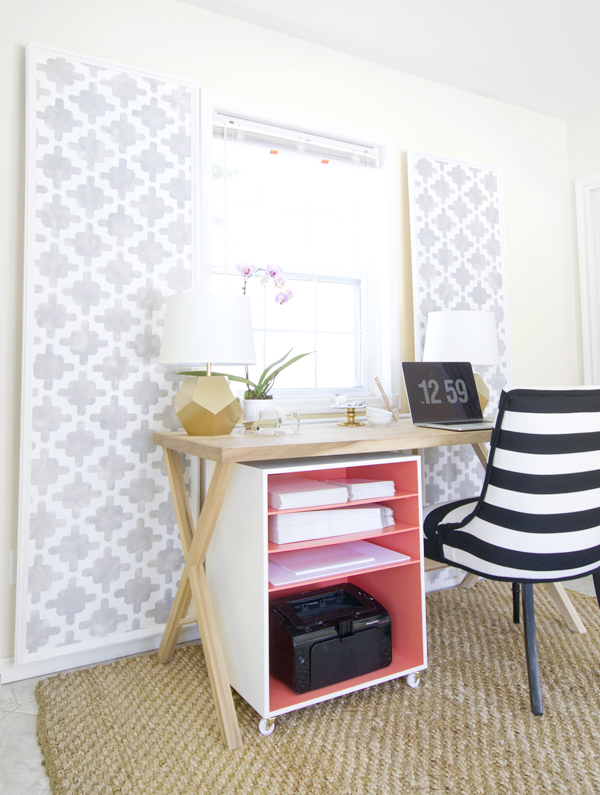
Hi! I hope that you had a great weekend! This week, I plan to get the clutter under control in my office, so I thought it would be the perfect time to share this simple office storage solution that hides ugly printer wires and contains clutter!
We made this a few months ago (so it’s my Ohio office) .. if you missed the original post at Infarrantly Creative, read on!
—
I don’t know about you, but for me, having a clean and organized office helps me stay motivated and productive! The two biggest sources of clutter in my office are printers and paper.
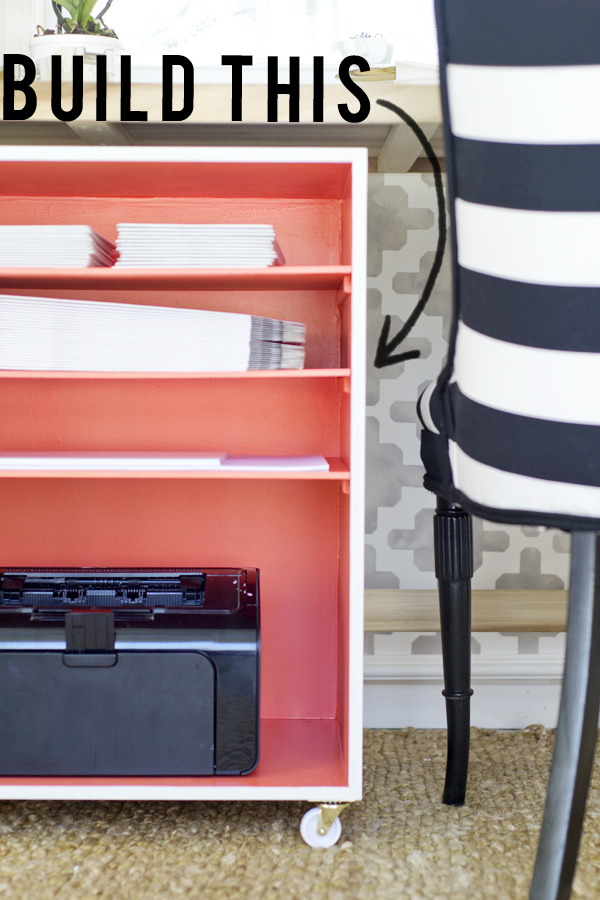
Today, I’m showing you part 1 of my battle against clutter – how to make a small printer and paper cart. It holds my laser printer and some of the paper and envelopes that I use most often.
Want to build your own?
Here’s what you’ll need.
(Finished size: 27″ H x 22″ W x 17″ D)
1/2″ MDF (1/2 sheet)
1/4″ MDF (1/4 sheet)
Thin trim (8′ long)
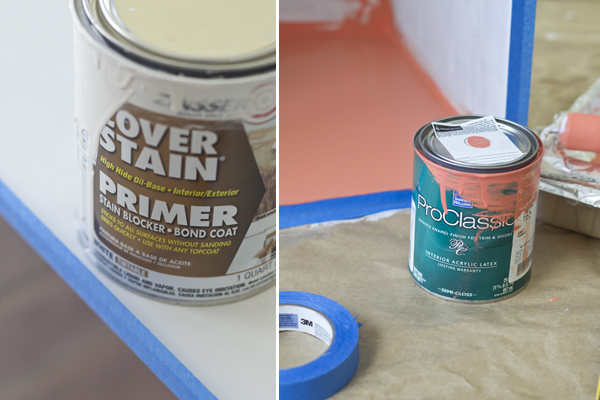
Primer / Paint (White – Sherwin Williams, Alabaster, Coral – Behr, Cool Lava (mixed at Sherwin Williams)
4 Casters (White and Gold from Ace Hardware)
1 1/4″ Screws
1/2″ Screws
Orbital Sander / Sandpaper
Drill
Table Saw / Chop Saw (or get pre cut at the home improvement store)
Cut List:
1/2″ MDF
16.5″ x 24″ (x2 for sides)
22″ x 16.5″ (x2 for top + bottom)
21″ x 16.5 (back)
1/4″ MDF
21″ x 16 (x3 for shelves)
First, we got our MDF pre cut. Most home improvement stores will do a certain amount of cuts for free.
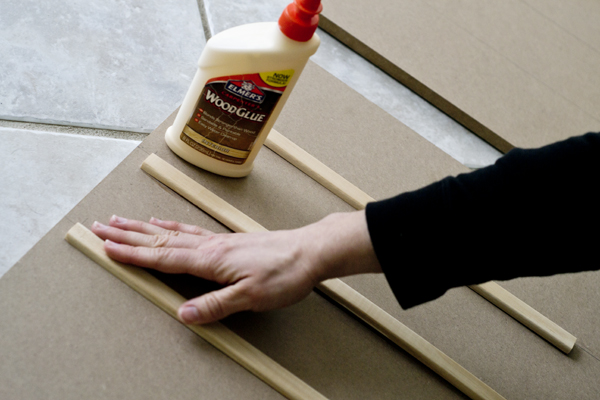
Then we measured the shelf placement and glued the screen mold in place so that the shelf would fit on top – a few inches set back from the front so that it would be less visible. If you’re placing heavier objects on the shelves you may want to add a few screws as well as an extra support on the back.
Use heavy objects, such as books to weigh it down so the glue sets properly.
Next, start building the box. First, we measured equal spacing for the screws (three per side). When using screws with MDF, it is important to pre-drill and counter sink the holes so that the MDF doesn’t split.
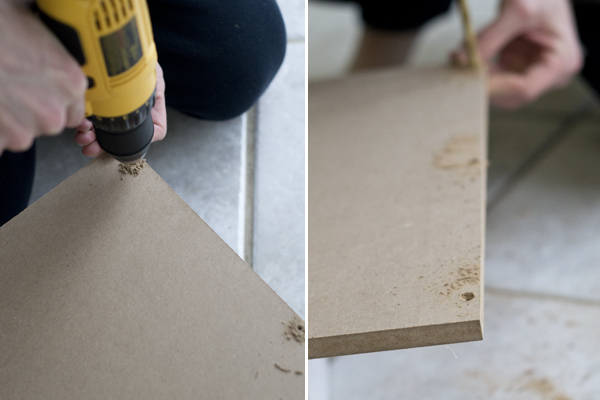
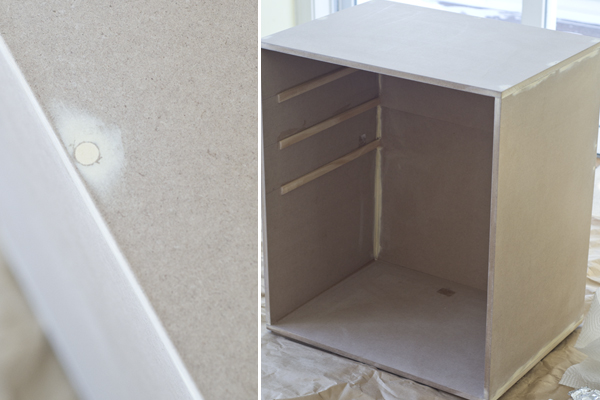
Once the exterior box was built (don’t forget to cut a small hole in the back for the power wire!), we filled the screw holes and crevices with wood filler and sanded once dry. I also slightly rounded the edges with the sander to give the edges a more finished look.
We opted to leave the shelves removable so that I could easily store a taller object later. Either way, it is much easier to paint the shelves outside of the box.
I wiped it down with a microfiber cloth and started painting. First I primed with Zinsser Cover Stain – it’s oil based, so durable, but also stinky and a pain to clean up. For the top coat, I painted a two tone effect. I taped off the edge and painted the inside coral first. Then I painted the outside white. 2 coats each.
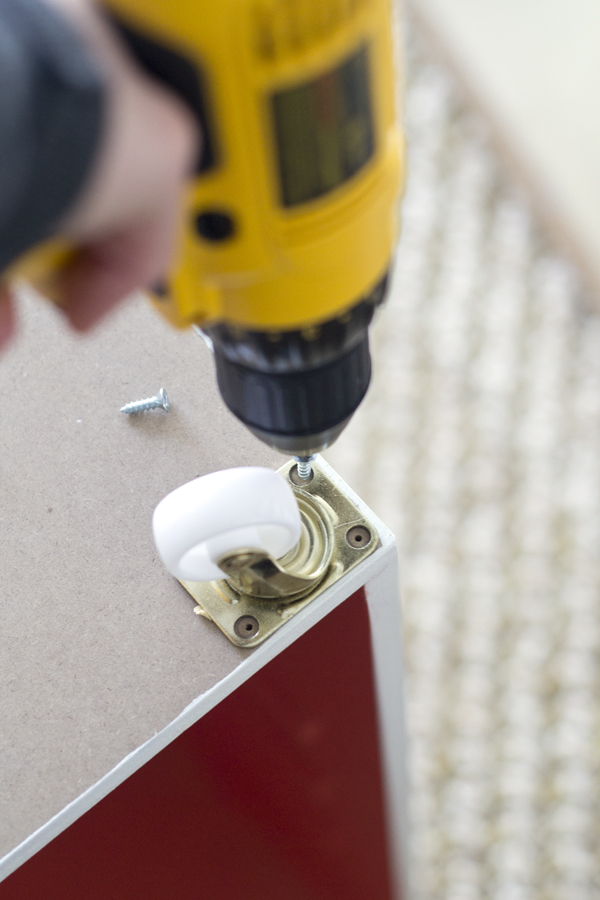
Once dry, I turned it upside down, marked my caster placement, pre-drilled holes and attached them with 1/2″ screws.
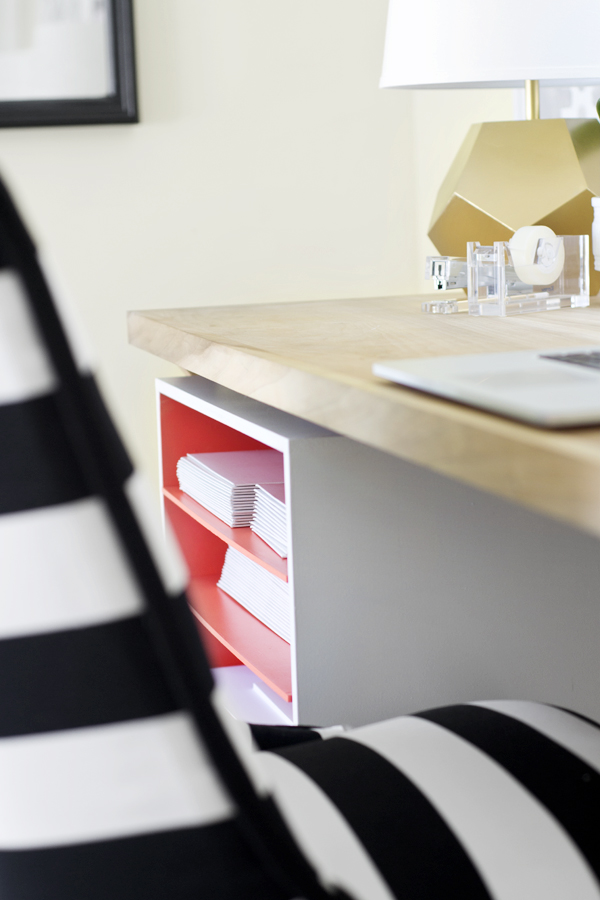
Flip it over, insert the shelves and load it up!
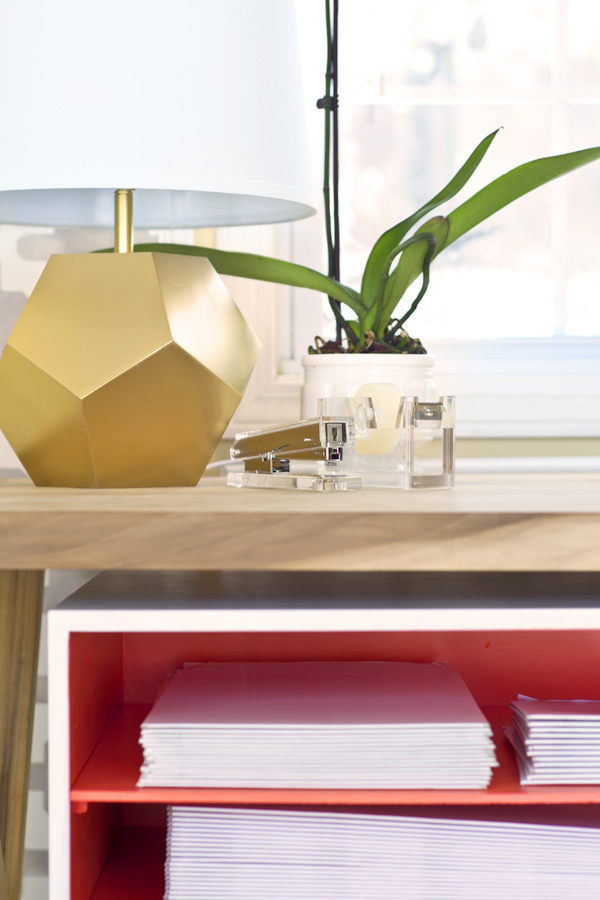
I love how it neatly tucks under my desk, but it would also be great on the side – the casters make it easy to move if needed.
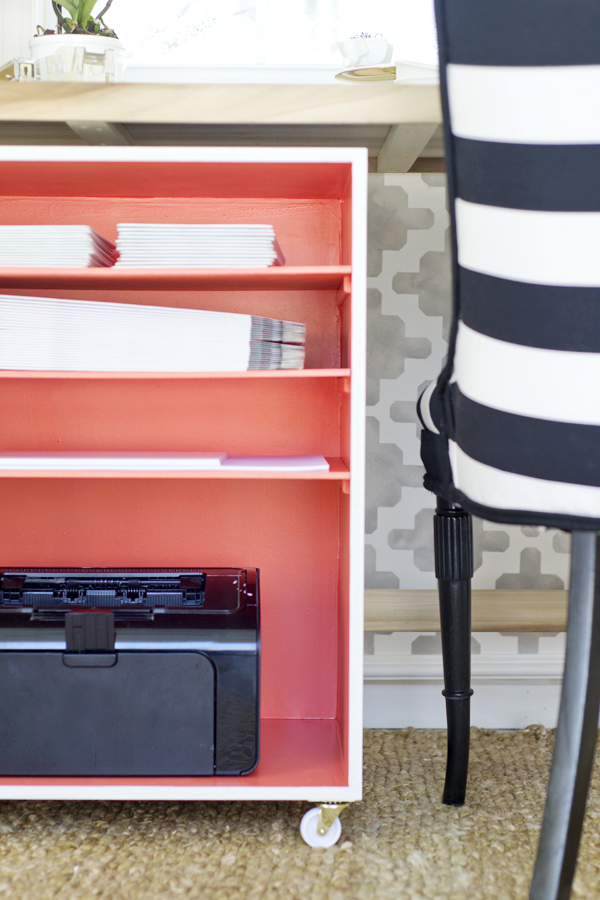
My printer recently broke, so I just ordered a white one – I think it will look perfect here!
This was super simple – only taking about an afternoon. (a little longer taking into account time for the paint to dry)
I hope you’ll give it a try!
SOURCES // X Leg Desk // Stenciled Wall Panels // DIY Gold Geometric Lamps // Black and White Stripe Chair // Clear Stapler // Clear Tape Dispenser
Such a cheery project- I love that pop of color in the inside
love it- the color pop is awesome, and pretty much if it's on wheels, i love it. 😉
I just built a similarly made kitchen pantry with my Hubs. Next I want to try something with colour inside like your shelf. Great project!
Love the pop of color on the inside…it makes it so attractive!
Looks so good! And I am still in awe of those lamps. I have the Land of Nod versions, but only because I found them at an outlet for like $20 a piece. I actually like the matte finish on yours more!
Ha, a clean office keeps me motivated too. Maybe that's my problem right now because mine is a mess 😉 love this of course.