Thanks so much for your kind words on our TN bedroom reveal!
Today, I’m sharing how to make temporary panels to cover boring rental closet doors. I love the look of grasscloth – the texture adds so much to a space! You can see our grasscloth nailhead panels here (I still miss those!)
Here’s our before. So much detail in such a small place. Why do they all look like this? I’d be much happier if they were smooth with a simple trim.

But, adding a custom (temporary) panel is easier than you may think!
Since each closet door is different, measure and customize based on your door, but the process is very simple!
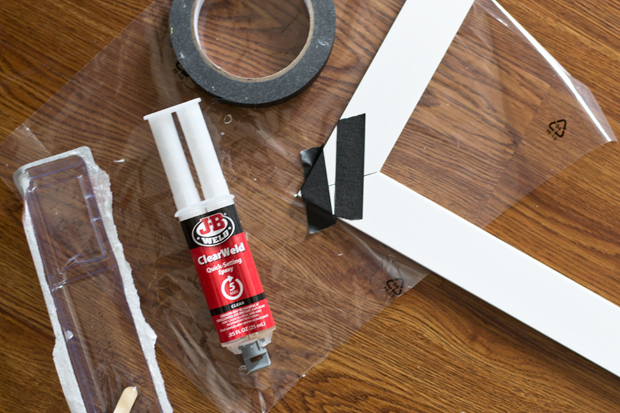
Supplies needed:
– Grasscloth or other thick wallpaper/paper (the thickness of the grasscloth was perfect for durability verse wrapping paper, etc.)
– White 2″ square synthetic trim (make sure it is indoor, it’s easier to cut) Also, be sure to measure the thickness, if your doors slide, mine was very tight.
– Metal ruler, Xacto knife, Pencil, Cutting mat, Tape measure
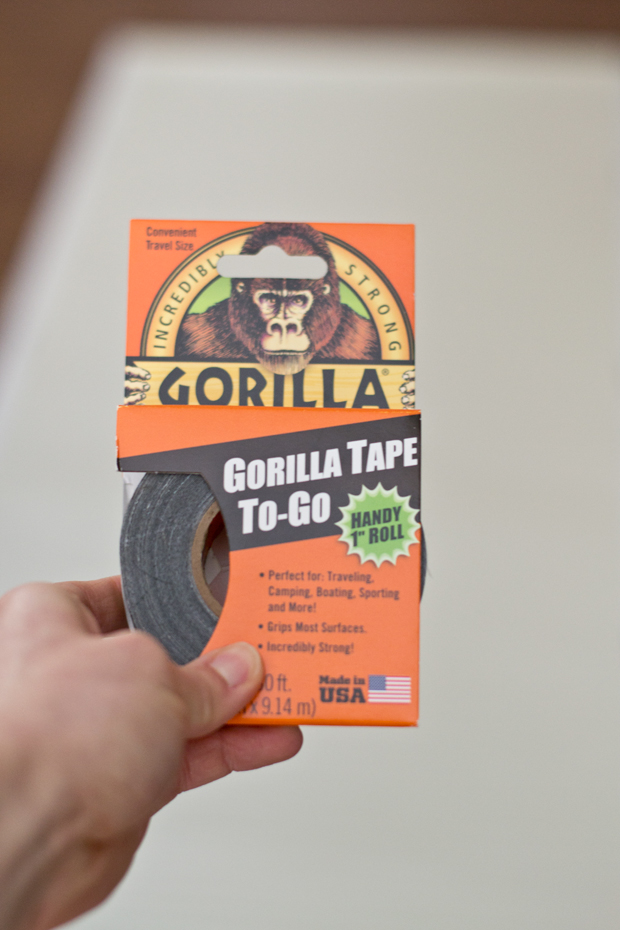
– Gorilla tape
– Epoxy
– Tape
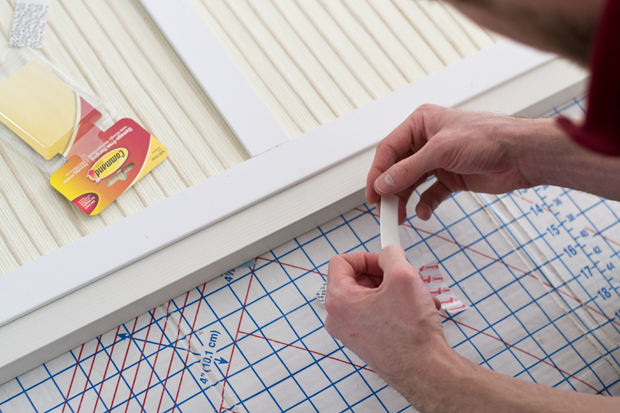
– 3M command strips
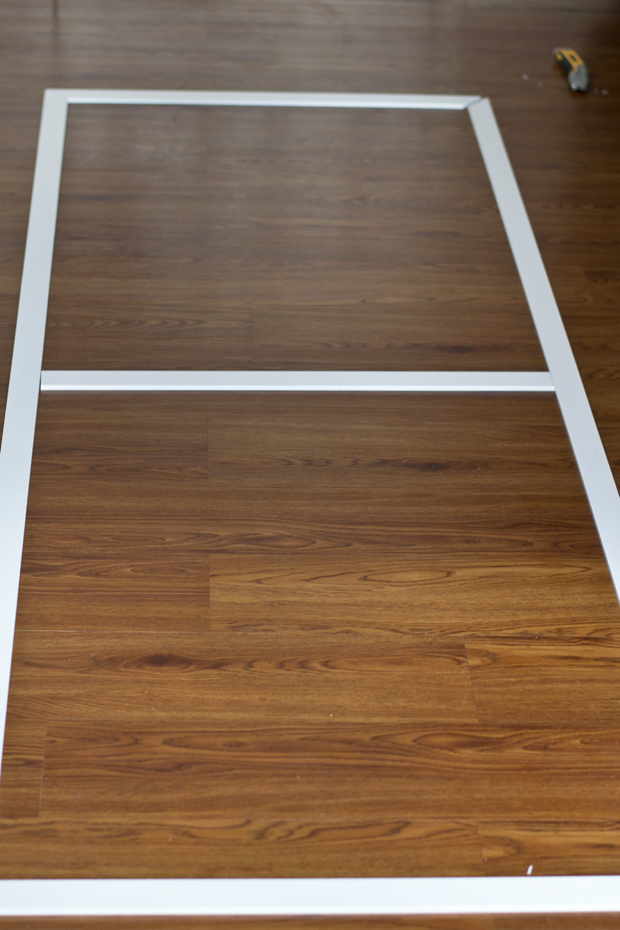
Start building your frame.
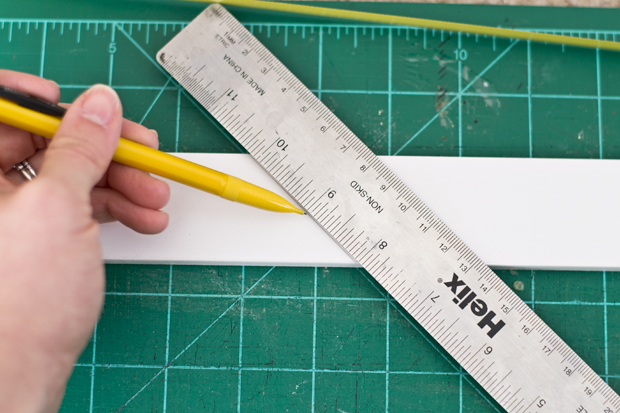
I’d typically cut the trim with a chop saw, but since we didn’t have one in TN, we used an Xacto knife and ruler.
Draw a 45 on one end of the trim, using the guide on the cutting mat was helpful.
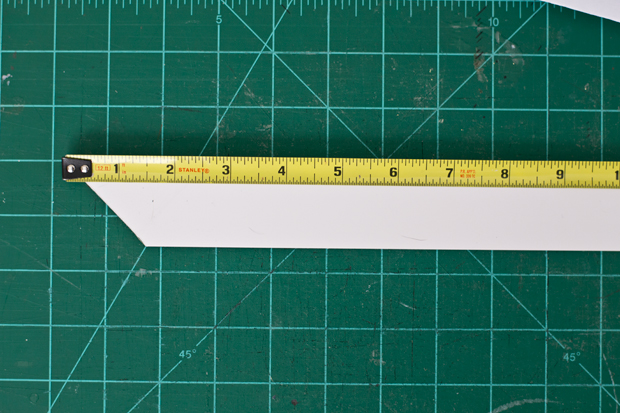
Measure the height from corner to corner, cut a 45 at the other end, be sure that the 45 is cut the correct direction (like a picture frame) Repeat these steps for the other side and the top and bottom. Cut a straight piece to be centered between the two sides.
Join the corners with a fast drying epoxy. Use tape to help brace it while it dries. Repeat and attach the center piece, centered on the panel.
It should look like this (mine isn’t glued in this photo).
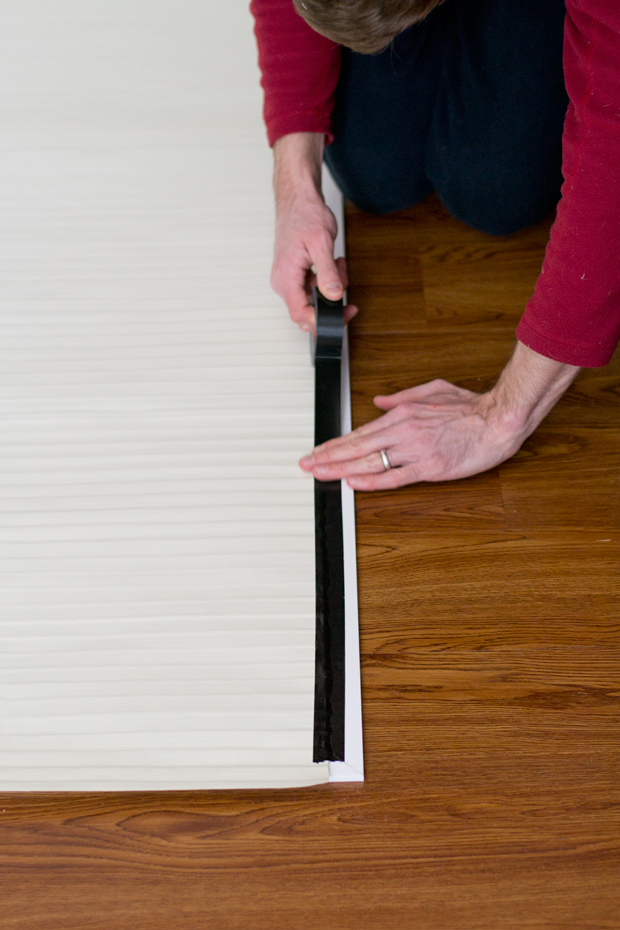
Next, measure and draw a pencil line on the back of the grasscloth. You want it to be about an inch inset from the frame. Cut along the line.

Use a heavy duty tape (remember its one the back, so color doesn’t matter). We liked this 1″ Gorilla tape (we used 2 rolls for 2 doors).
Attach one side, pull tight and attach the other side. It helps to have two people for this step, one to hold the frame and the other to pull and tape. Repeat with the top and bottom.
Using normal 3M command strips, secure the panels to the door. (I think we used about 6 per door) We removed the doors so that the 3M strips could fully cure (1 hour) prior to putting weight on it. If you can’t remove your door, apply painters tape while the strips cure to help take the weight off. We allowed the tabs to stick out a little and then tucked them under. Use a tweezer to help grab them when you’re ready to remove them. The picture hanging ones will work ok if your object is stationary – I’ve found they they don’t work well with objects that move.
Reattach your doors and that’s it!
At first, I was concerned about the existing inset panels and the thickness of the grasscloth. My original plan was to include a backer, but I didn’t have room with the door slide. It ended up being plenty thick for my use. If you have children or dogs that would run into them, it may break, but for average use, it held up great until we moved (with some small bumps)! Also, you may be wondering about the handle, I just left the door cracked a little and opened and closed it from the edge. But, I could have added a handle as well.
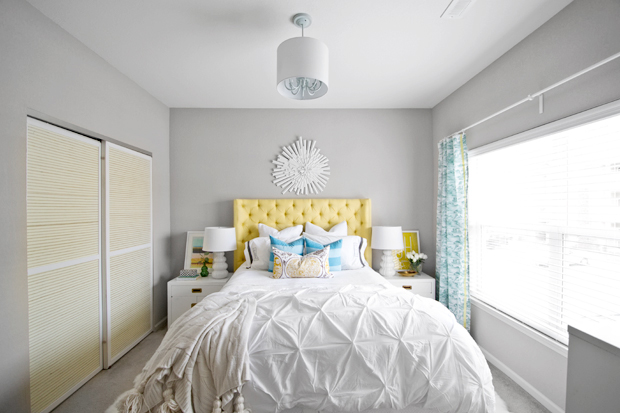
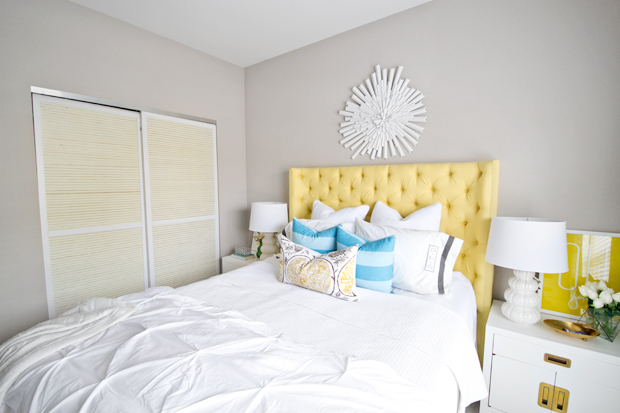
I loved the look!! I saved the paper before we left, so I’ll probably be recreating on a set of closet doors in our new home!
Stay tuned this week for more DIY tutorials from this space!!
Thanks so much to Walls Republic for supplying the wallpaper for this project! As always, I only share products that I love and have had a good experience with!
I had to laugh….I would love to upgrade to six-panel closet doors. Mine are the cheap hollow flat bifold kind. I am trying to find some inspiration to improve my doors. Yours look great, but I cannot afford that grasscloth.
What a great way to customize the look of your space without causing any damage. So important to make a home your own even if you can't make permanent changes. This ads so much more style and texture to you beautiful bedroom! Love it! – Corey at TinySidekick.com
Very nice!