• Home
  • About
  • Services
  • Shop
    • Bloglovin
    • Email
    • Facebook
    • Instagram
    • Pinterest
    • Twitter

Dorsey Designs

DIY and Interiors by Sarah + David

  • Home Tour
  • DIY TUTORIALS
  • friday favorites
  • design + build
  • art

get the latest straight to your inbox

Large Glossy Vintage Inspired Letter | DIY Tutorial

Hey! I hope you had a great weekend! Today I’m sharing a simple, vintage inspired letter tutorial – perfect for a gallery wall or to lean on a dresser or bookshelf! If you missed the tutorial on Infarrantly Creative, read on!

I’ve admired large, vintage letters repurposed from buildings, but I’ve never found one within my budget .. Today, I’m going to show you how to make your own vintage inspired, glossy letter for just a few dollars!

This is super easy – promise! We were able to finish it in about 2 hours (not including resin drying time).

Materials:

1/4″ Plywood or MDF (I used a 1/4 sheet)
Veneer edging (available at home improvement store in the lumber section)
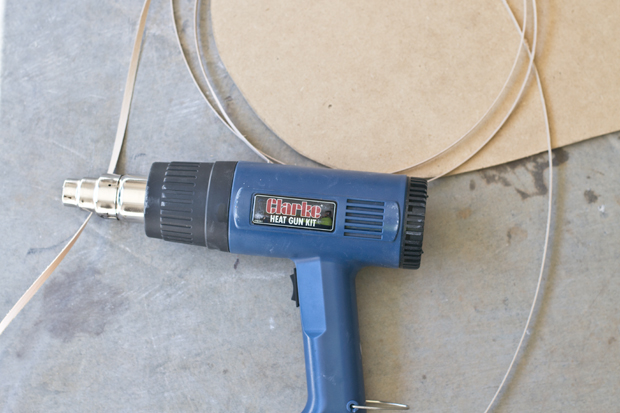
Heat gun or iron (heat gun recommended, it is much easier and faster)
Spray paint
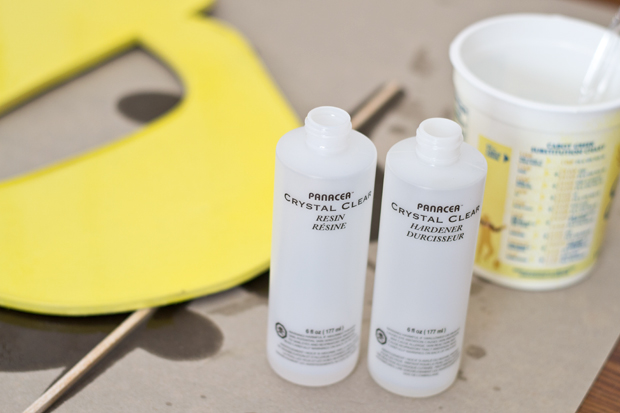
Resin (available at any craft store)

Tools:

Pencil
Jigsaw
Scissors
Projector (or free hand or get printed large scale at copy store)

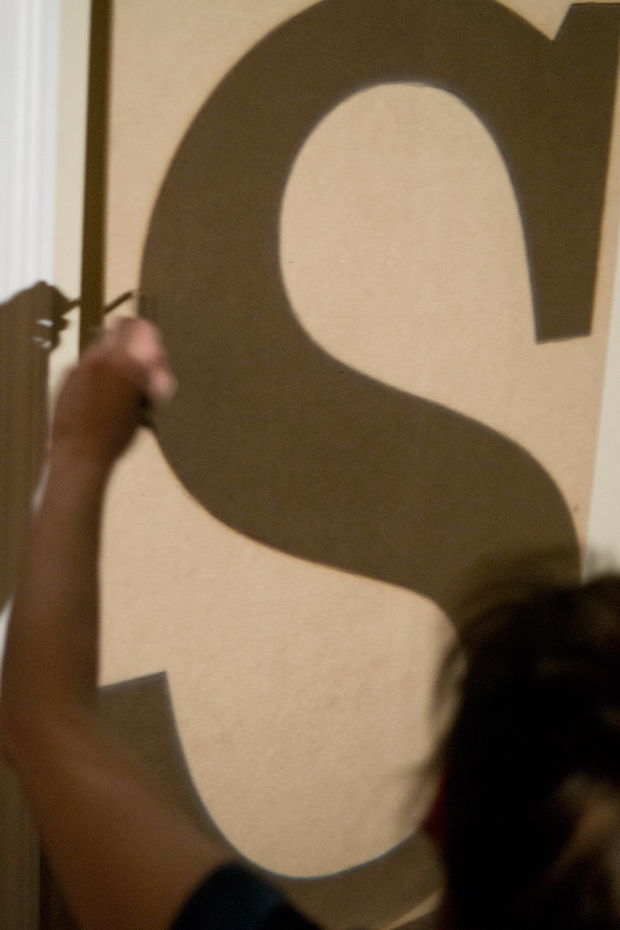
To get started, print desired text on 8.5×11 paper and project onto 1/4″ Plywood or MDF. Trace the outline with a pencil. If you don’t have a projector, free hand if you’re comfortable or get it printed large at a copy store, cut it out and then trace it. (Image below taken from my marquee letter tutorial).

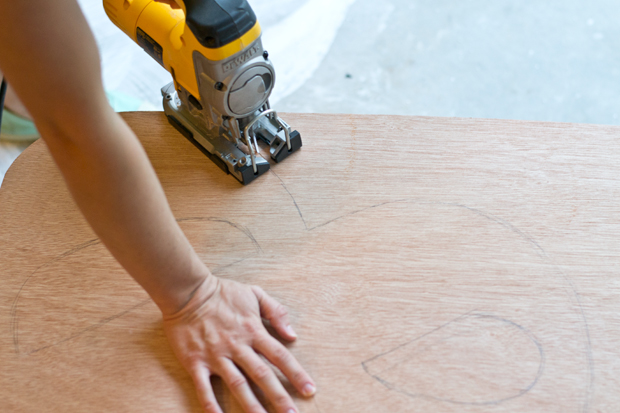
Next, cut it out with a jigsaw. *Tip: when you get to a corner, back the saw out and cut at an angle towards the next point, go back once complete and cut off the extra pieces.

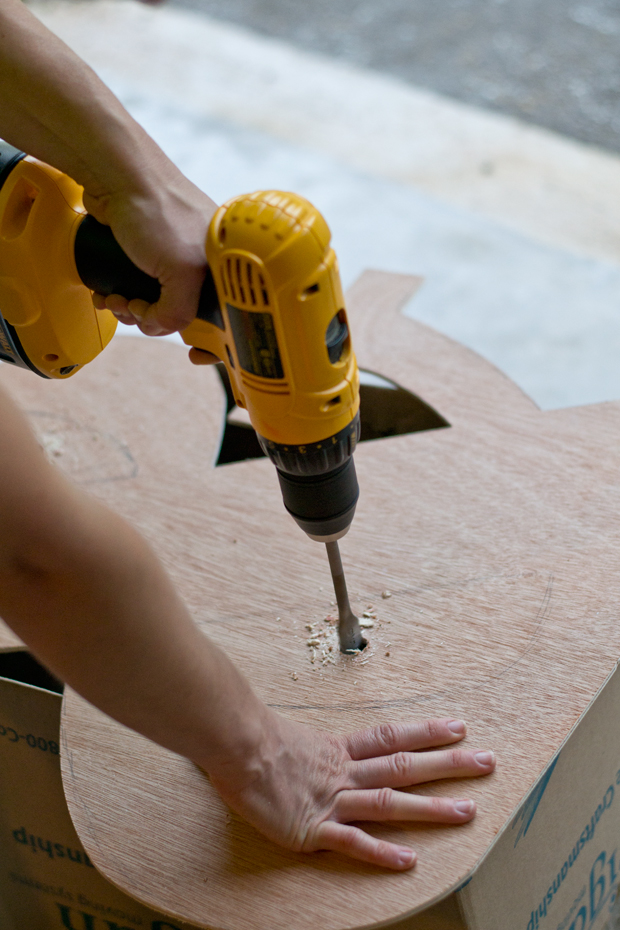
To cut any enclosed areas, drill a hole and then cut out with the jigsaw.

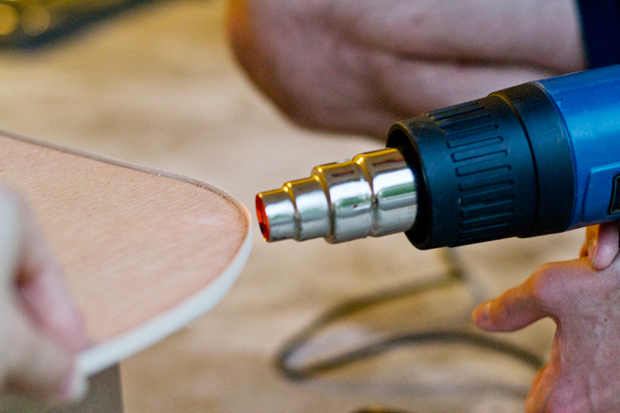
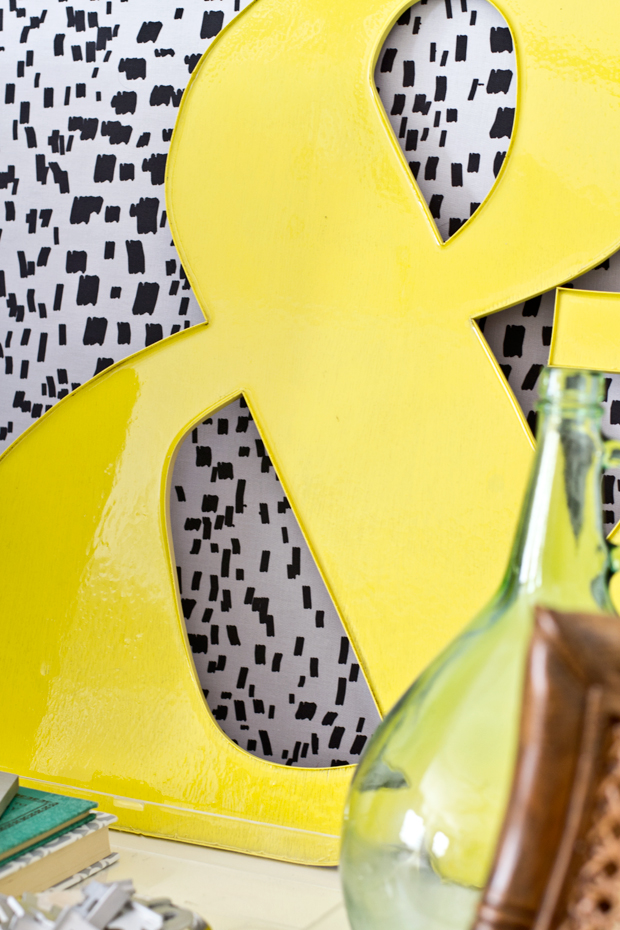
Next, apply the veneer edging. I used a leftover piece from my oversize cork board, so it’s thinner than the standard edging. Just make sure that it creates a raised lip around the edge to hold the resin.

Carefully use the heat gun to apply the veneer edging, melting the adhesive. It helps to have an extra set of hands to hold the edging in place (away from the heat) while the other uses the gun. An iron can also be used, but a heat gun is a lot faster – also it would be tricky to use inside the letter.

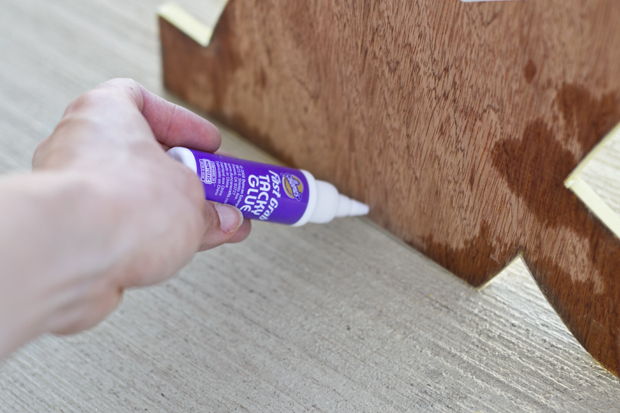
Seal any gaps (on the back and joints) with glue to prevent the resin from seeping out or apply caulk on the front prior to painting (this is important, mine is a little thinner than planned since it seeped out some)

Spray paint the front. I used Liquitex Cadmium Yellow Light Hue. 
Get a glossy finish! Once the spray paint has dried, apply resin to the front. Mix per directions and carefully pour on top. To ensure even coverage, move the resin by picking up the letter and tilting it so the resin floats over the entire surface. Let it dry (24 – 72 hrs), per instructions, on a raised flat surface with cardboard or paper underneath. 

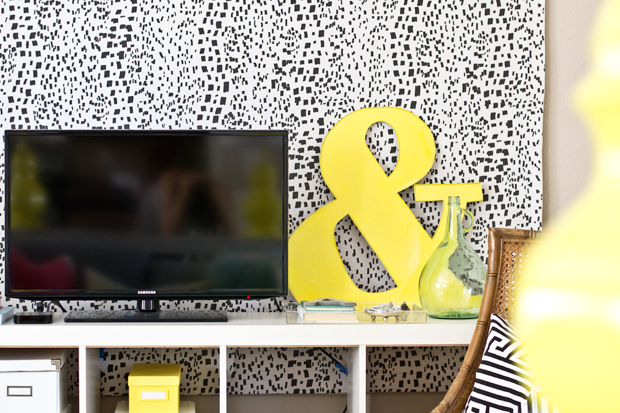
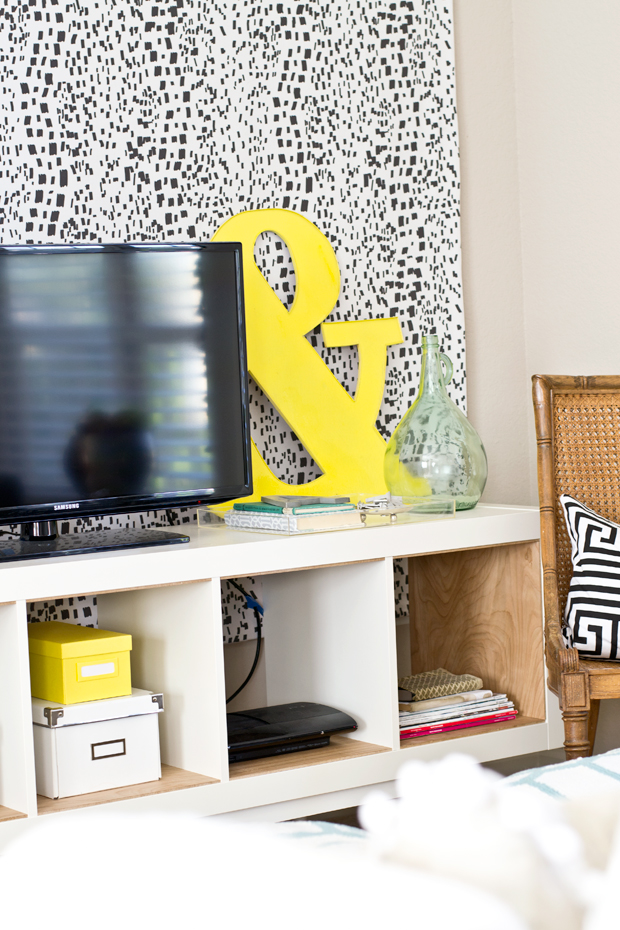
That’s it! Enjoy your custom, affordable letter reminiscent of vintage building lettering!

This would be perfect in a gallery wall or simply leaned against a wall.

I love the glossy finish!

This was so easy, I can’t wait to make more!

I hope you’ll give it a try!!

Also in the tutorial:

Ikea Expedit Birch Plywood TV Stand

Fabric Panel wall 

p.s. check out my thrifted finds from the weekend (on Instagram) here, here and here!

art// DIY TUTORIALS// Uncategorized// Uncategorized9 Comments

Subscribe

get the latest straight to your inbox

« Friday Five | 11.7.14
Better Homes and Gardens Stylemaker Challenge | Full Video and Results »

Comments

  1. Shannon @ Fabulously Vintage says

    November 10, 2014 at 2:16 pm

    Oooh love the glossy finish!

    Fabulously Vintage

    Reply
  2. Carrie Waller says

    November 10, 2014 at 2:29 pm

    SO much fun!!!

    Reply
  3. Amy C. says

    November 10, 2014 at 3:52 pm

    That looks so cool with that glossy finish! And that fun yellow… perfection!!! Great tutorial!

    Reply
  4. Lily L-M says

    November 10, 2014 at 5:07 pm

    This is amazing! you can spend a fortune on one from ebay or, literally, DIY! Well done!

    x Lily
    http://whilemyboyfriendsaway.blogspot.com/

    Reply
  5. Amy @ Homey Oh My! says

    November 10, 2014 at 5:12 pm

    Always amazed by your woodworking skill. This is so delightfully simple, but the glossy finish takes it to another level. LOVE!

    Reply
  6. Cassie @ Primitive & Proper says

    November 10, 2014 at 7:36 pm

    this is amazing!!!! love it!

    Reply
  7. Elizabeth @ The Little Black Door says

    November 10, 2014 at 8:04 pm

    The resin makes all the difference! I love that color. I've had great luck with Liquitex as well. Great job!

    Reply
  8. Julia Konya says

    November 10, 2014 at 8:38 pm

    Oh I so have to try this. We are both having Liquitex projects today too

    Reply
  9. Bethany DeVore says

    November 12, 2014 at 1:07 pm

    So cool! I love the glossy finish!

    Reply

Leave a Reply Cancel reply

Your email address will not be published. Required fields are marked *

Contact Me

sarahmdorseydesigns{@}gmail{.}com

Stay Updated!

Get all the latest goods straight to your inbox!

This error message is only visible to WordPress admins

Error: No connected account.

Please go to the Instagram Feed settings page to connect an account.

Must Reads

Custom Peg Board + DIY Circle Art | FrogTape

Custom Peg Board + DIY Circle Art | FrogTape

Main Level Refresh with The Home Depot

Main Level Refresh with The Home Depot

Sponsor

2016 Daily Simplified Planner

Popular Projects

Super Simple Upholstered Headboard | Tutorial

Super Simple Upholstered Headboard | Tutorial

February 2, 2015 By Sarah 8 Comments

pivoting door to hide electronics!

pivoting door to hide electronics!

July 23, 2012 By Sarah 2 Comments

MBR TV Wall Trellis Stencil Update

MBR TV Wall Trellis Stencil Update

March 29, 2012 By Sarah Leave a Comment

Yellow Tufted Headboard with Arms

Yellow Tufted Headboard with Arms

March 7, 2016 By Sarah 4 Comments

DIY Tufted Headboard with Nailhead and Wings | Bob Vila Thumbs Up Competition

DIY Tufted Headboard with Nailhead and Wings | Bob Vila Thumbs Up Competition

September 3, 2014 By Sarah 14 Comments

  • DIY TUTORIALS
    • design + build
    • furniture redo
    • diy in 1 hour or less
  • free printable
  • friday favorites

Disclosure

Occasionally, affiliate links are used when they are available. I do earn a small commission when items are purchased using those links. As always, I only link to things that I truly love. I also link to items that I love when an affiliate link is not available. Thanks so much!

  • Home
  • About
  • Services
  • Shop

Copyright © 2025 Dorsey Designs

MENU
  • Home
  • About
  • Services
  • Shop