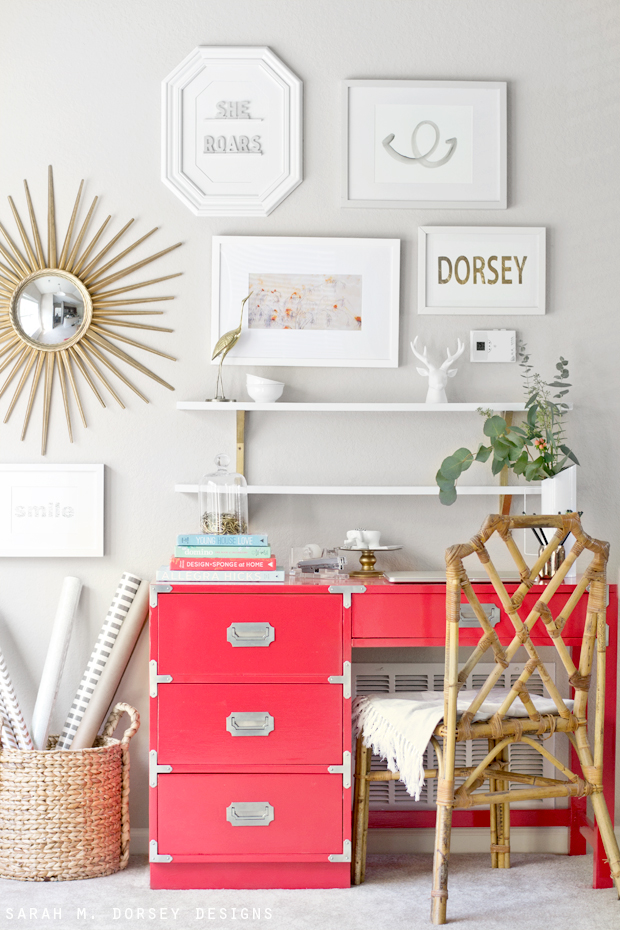
Today I’m sharing our new campaign desk! A few months ago, I found several Bernhardt Campaign pieces on Craigslist. I would have preferred brass hardware and the wood veneer had a weird texture .. so that wasn’t ideal, but at $30 to $40 each, I decided it was still worth it!
Before:
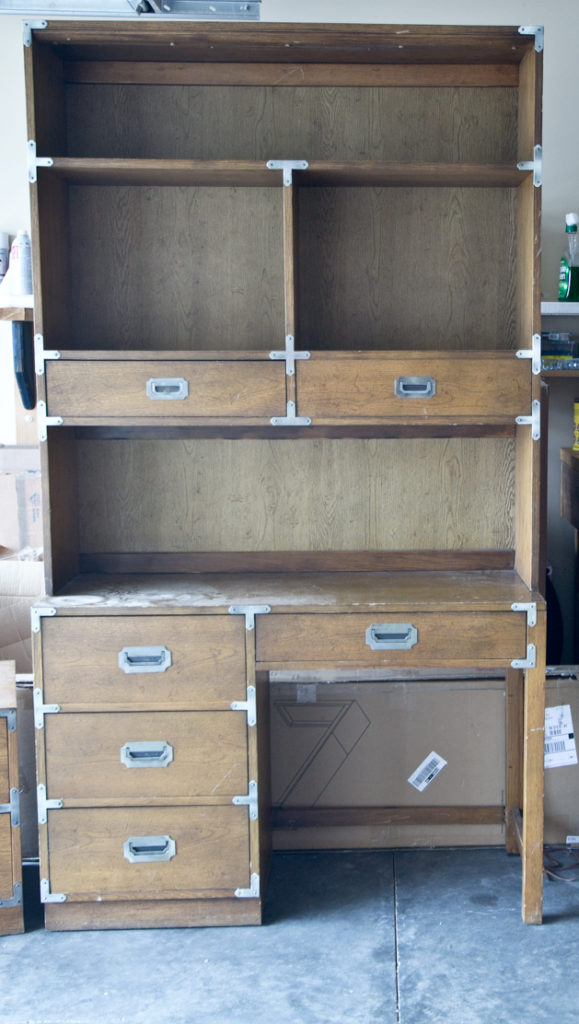
We preferred the desk without a hutch, so we have plans to repurpose that!
For a full tutorial on how to paint campaign furniture and polish hardware, see this post. I still highly recommend the tips shared in that post, but since Sherwin Williams Pro Classic can’t be mixed in deep, saturated colors, I used something else for the top coat.
First, what paint NOT to use: Sherwin Williams All Surface Enamel (I LOVE Sherwin Williams Pro Classic – I use it all the time for furniture .. but this is nothing like that) I was warned in the store that since I was going over white primer it would take several coats .. 5 coats later, it still wasn’t solid. The paint was translucent looking .. maybe this would work for white over white, or a tinted red primer/red paint, but definitely not white primer/red paint. Also, I didn’t like how it went on or how it looked/felt after drying 24 hrs ..

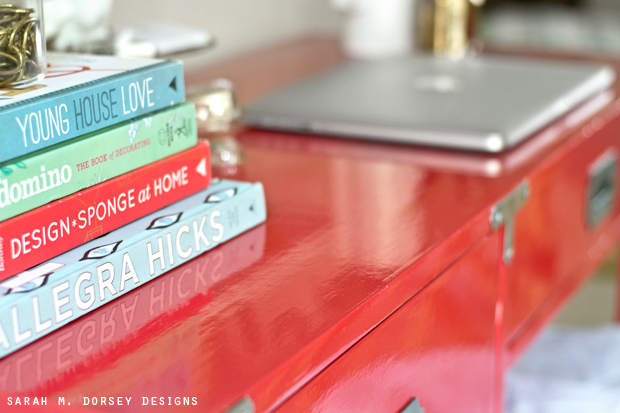
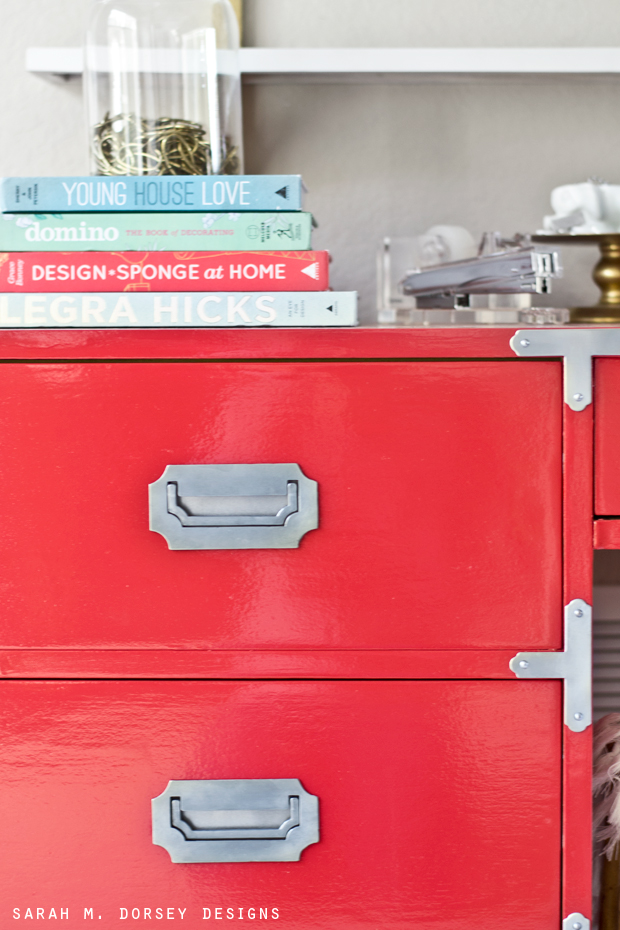
So I did a custom mix of Rustoleum Gloss Sunrise Red and Rustoleum Gloss Sunburst Yellow (oil based) Maybe 70% red and 30% yellow.. it looks super saturated and bright, but in person it is a little more mellow, I’d describe it as a poppy color.
(Prior to painting, this required A LOT of sanding .. the veneer was textured, so we sanded it till it was basically smooth with the orbital sander)
This is my first time using an oil based paint on furniture, but after painting our mantel, I had a good idea of how it would go on.
Here’s a few things to know about oil based paint prior to using it:
– Oil based paint is a pain to clean up (so brushes will need to be cleaned with mineral spirits or thrown away)
– It is stinky – so painting outside is a must!
– It has a slow drying time – 24 hours between coats, this also allows more time for dust to get stuck in the paint, so a debris free area is best. Also, prior to using it, the paint should cure for at least a week
– It covers SO well, you will most likely only need 2 coats.
– The key to getting a smooth finish is not over brushing (natural bristle brush works best) only go over an area with a few passes and move on, leave the brush strokes, they will self level. Apply a thicker coat to horizontal surfaces and thinner coats on vertical surfaces to prevents drips.
– It is a great way to get a super durable, glossy, lacquer like look!
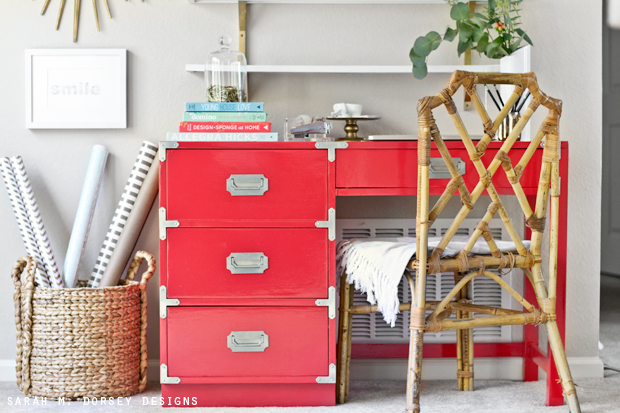
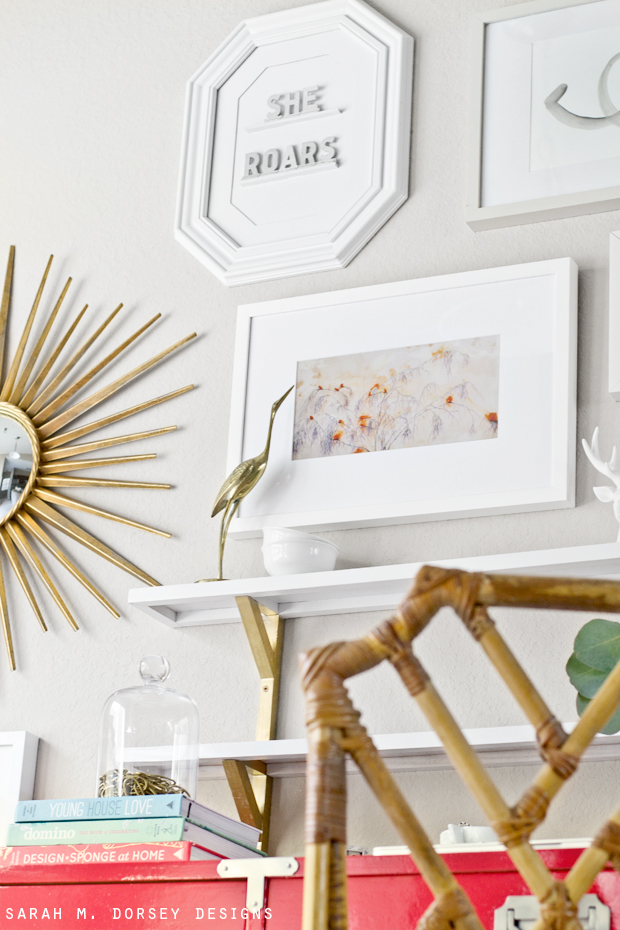
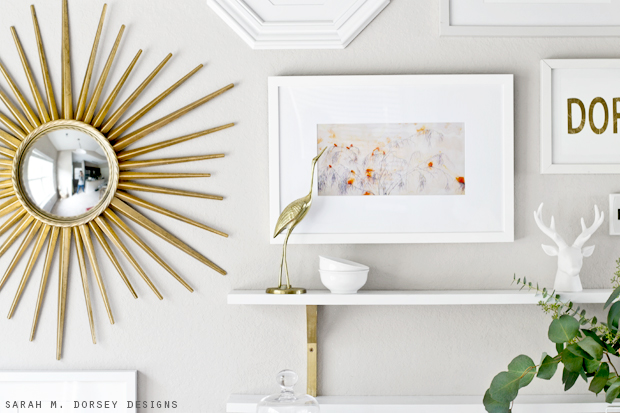
The gallery wall above was centered around this print from Artfully Walls – love how it picks up the red tones in the desk.
This print is a part of the Artfully Walls and Better Homes and Gardens collaboration (as seen in the November BHG issue) I was provided the print to share my styling tips in an upcoming digital styling session with 6 designers (on Artfully Walls a little later! I’ll share the link when it’s up!)
The Dorsey gold leaf diy art is still one of my favorites, tutorial here.
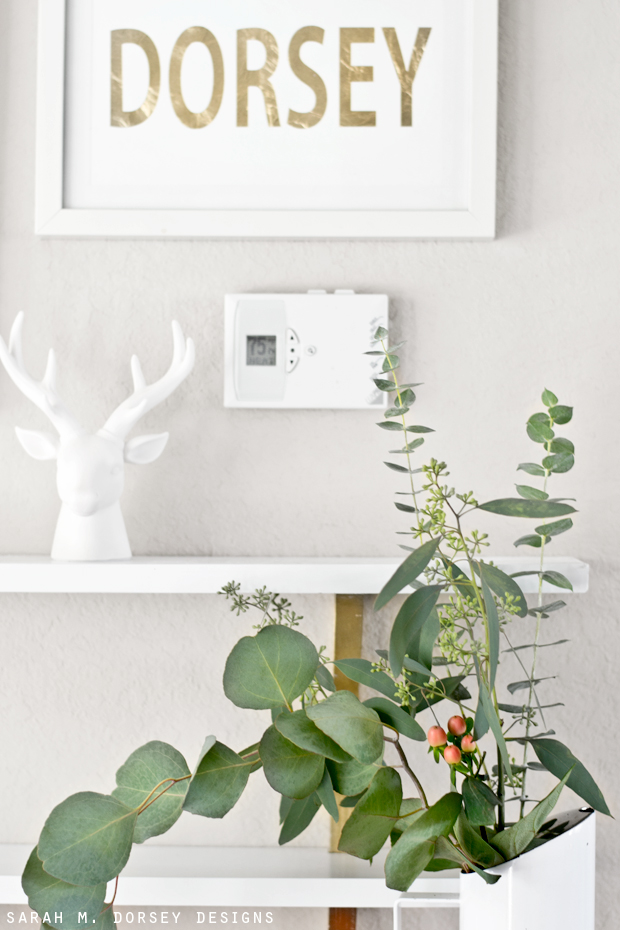
Eucalyptus from Trader Joes, deer head from Target’s Christmas collection. Shelves were made by us for the BHG Stylemaker challenge, starburst mirror was on clearance for $8.83 at Home Depot
Chinese Chippendale chair found at a thrift store this summer .. it still needs a cushion, I might paint it .. might not .. Either way, LOVE it!!
I’m looking forward to adding a few more frames and items to the shelves – one of my favorite things about gallery walls is the flexibility to add to them! But for now, I’m loving this bright corner in our TN rental!
I love how it turned out! Bravo, my friend!
turned out great- that color is fabulous!!
So good! That desk is pure happiness! You never cease to amaze Sarah!
Thanks for always inspiring me!
Sarah, you always amaze me! I love the desk and all your artwork above. The color is so fun. Thanks for the tip about the sunburst mirror- I got one too!
it is stunning!!!!! love that color and the tips! i have used that enamel paint in yellow before- and OMG 8 coats later i was done. maybe it was 6 but either way- ugh.
Love the color you picked for the desk! Looks great, can't wait to see what you do to the top!!
Love that lively burst of color, what an impact! Your mix is perfect, I Iove that this is a tad softer than red. I've lost count how many times I've used that Rustoleum enamel, it's one of my all-time favorites!
Just stunning. Everything you touch just turns out beautifully!
Stunning makeover! I love the color you picked too. Great tips too.
Ohhh, I wish you had a formula for the paint! I've got red samples on hand right now for my daughter's nightstands. Can't find the right one yet but yours looks amazing!
Thanks for the tip on the mirror! I grabbed the last one at our Home Depot for $6.75. They took 30% off since it was the floor model! We're turning into a flush mount ceiling light for our living room.
Devan
Looks great! I love the color, and what's not to love about campaign furniture!?
I love it. Did you know that Consumer Reports rated Behr paint above Sherwin Williams in pretty much every finish, indoors and out? Plus, Behr tends to cost half the price.
Bravo Sarah. You did an excellent job and of course I love the color! 🙂 It looks wonderful!
Sarah! You have done it again! What a gorgeous color you created and the finish is phenomenal!
Love that color. B.E.A.Utiful.
Love, love, love! Great job Sarah! xo
So gorgeous Sarah! I love the bright punch of color!