Good morning! I hope you had a great Easter! Ours was spent at church and then lunch with our extended family. Annabelle got to meet our cousin’s 10 week Shih Tzu Cockapoo and was obsessed (she peed a little when they met, that’s how you know that she’s REALLY excited). Snicker Doodle (yes, that’s his name) was a little small to play, but they have a similar playing style, paws to the face and ankle biting .. in a few months, they will be great friends! We also fit in a little tiling in between for #projectentry. It was a great day!
Today I’m sharing my knockoff tutorial from Creating with the Stars, if you missed my post at East Coast Creative the other week, read on. Also, if you want to make my gold geometric lights, but don’t have a miter saw, this method would work well!!
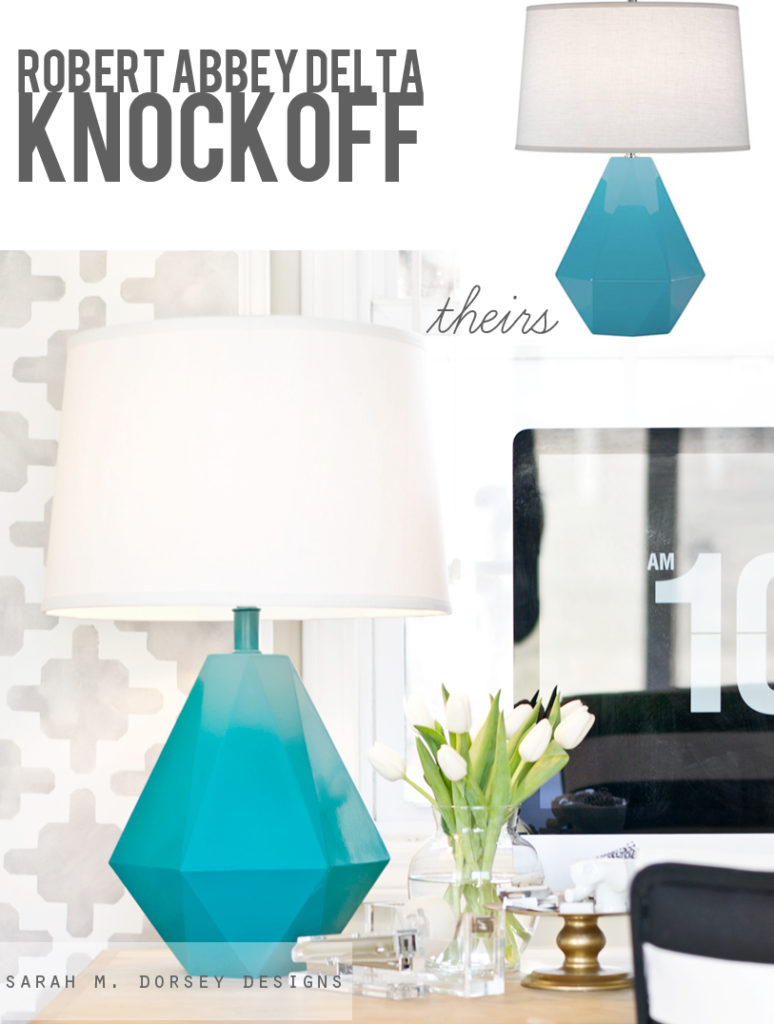
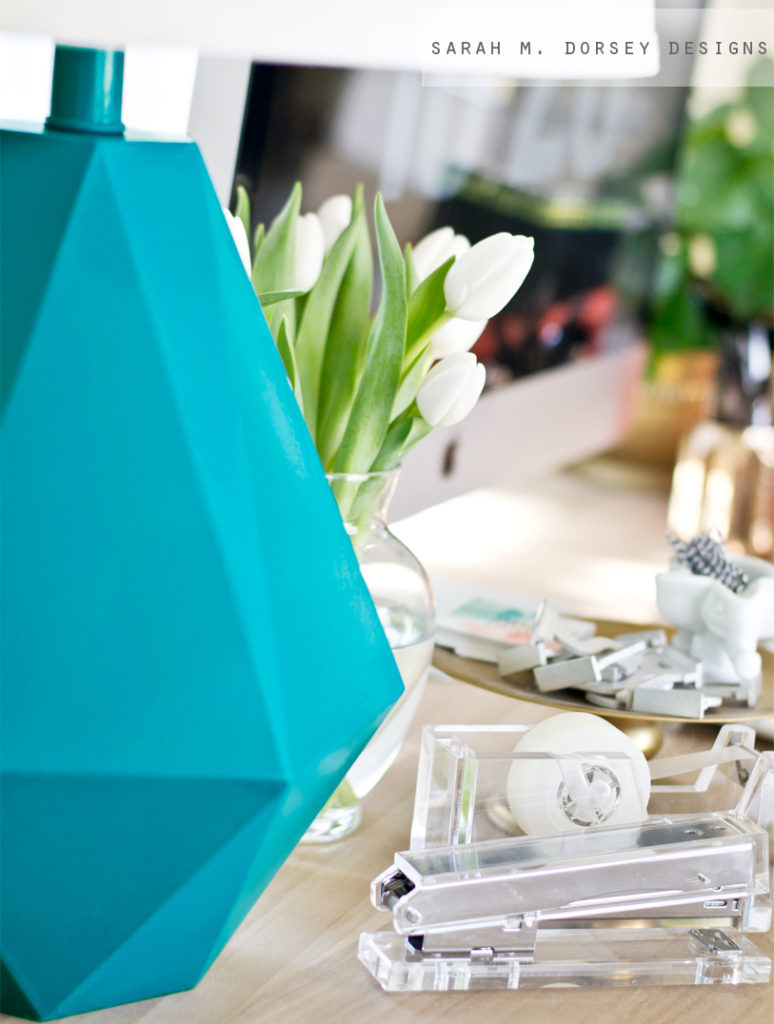
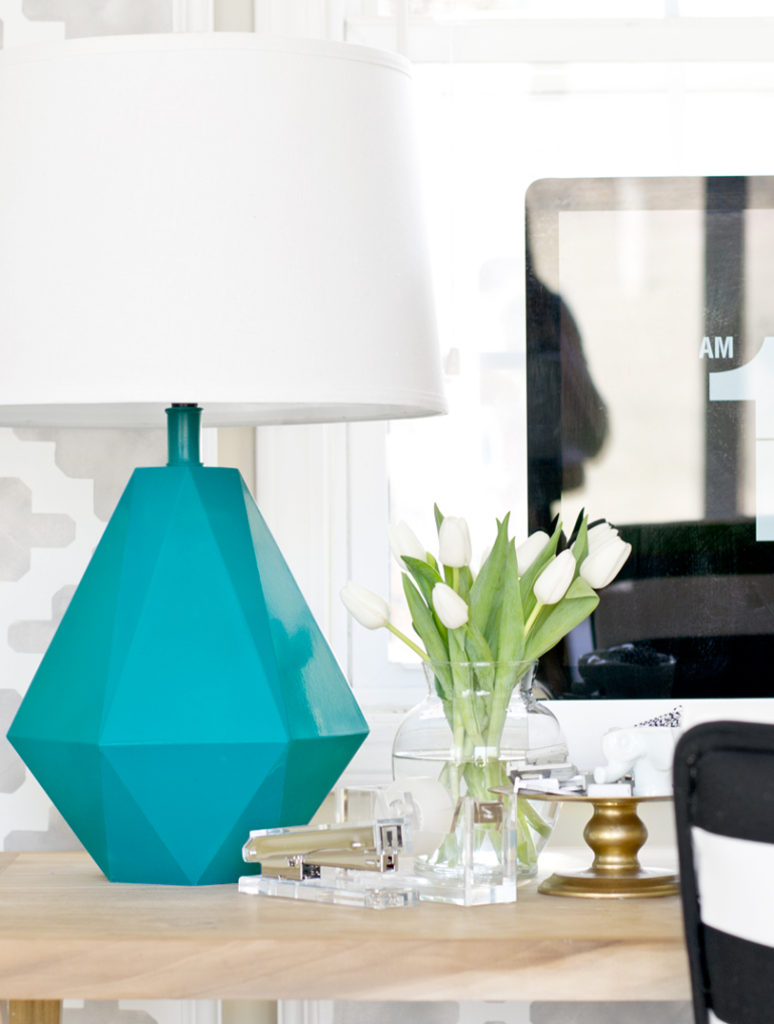
When I first saw Robert Abbey’s Delta table lamp, it was love at first sight! The shape is amazing, I also love that it comes in a variety of bold colors.
I recently made a few office accessories out of mat board, which got me thinking.. since the accessories were surprisingly sturdy, why not a lamp base too?
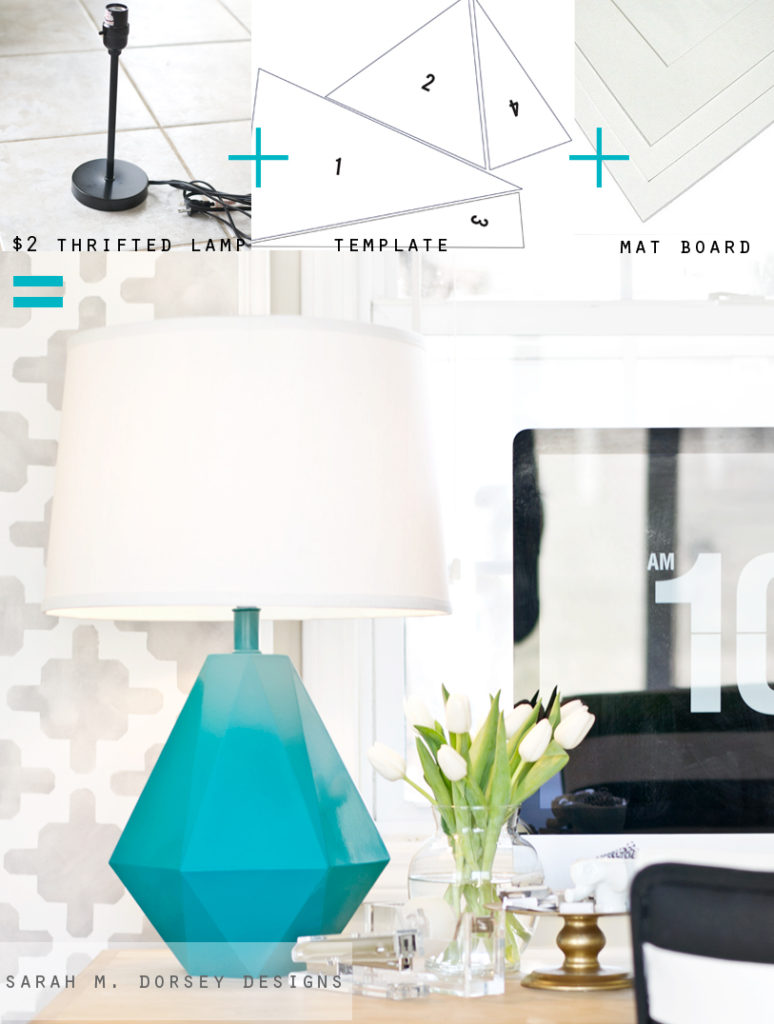
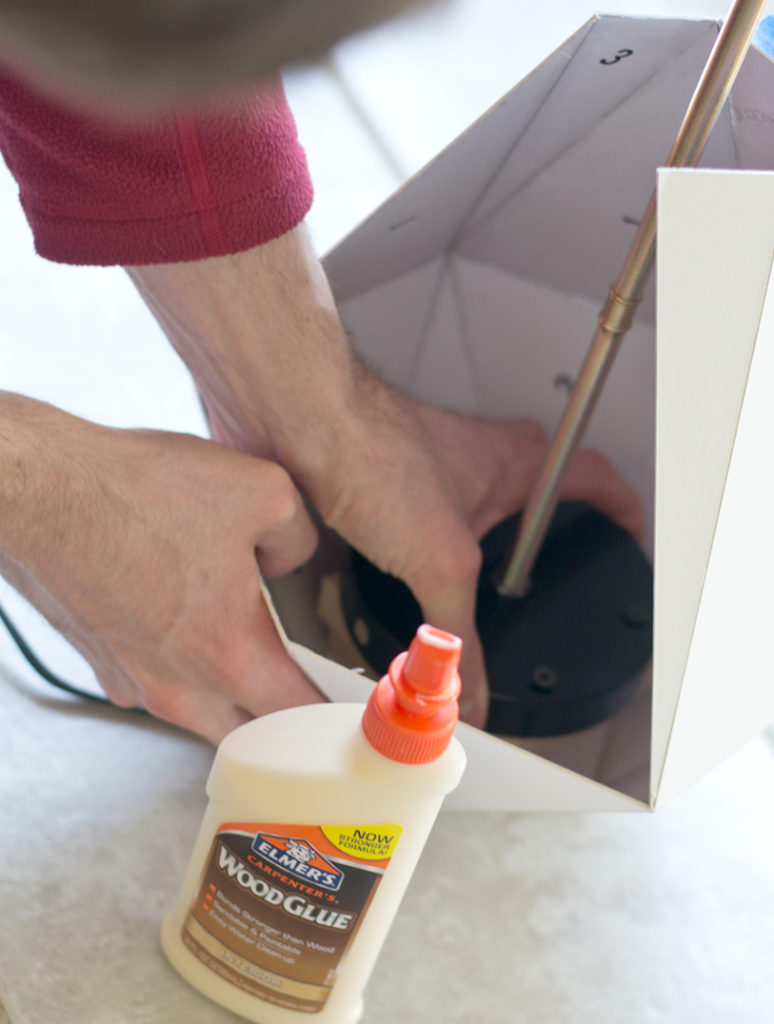
The lamp is constructed using a $2 thrifted lamp, a custom designed template – referencing the Robert Abbey lamp, and mat board.
Here’s all the supplies used:
materials:
– old lamp or lamp kit
– template
– mat board(20″x30″)
– glue
– wood filler
– sanding block (medium + fine)
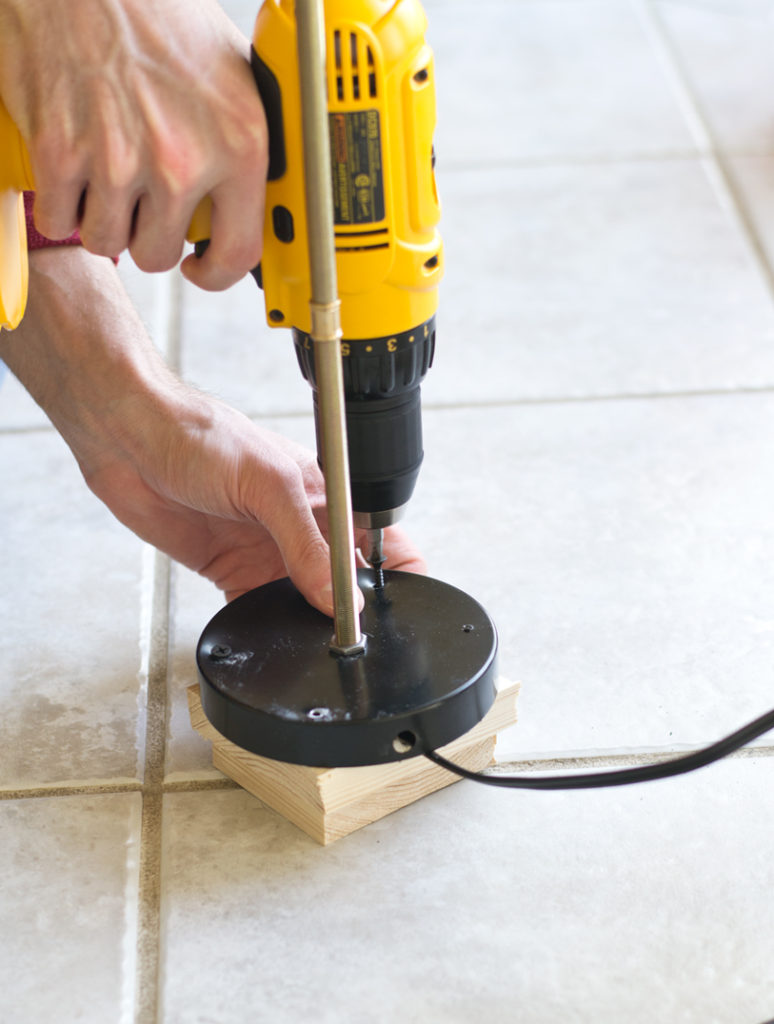
– wood block (add weight to base)
tools:
– painter’s tape
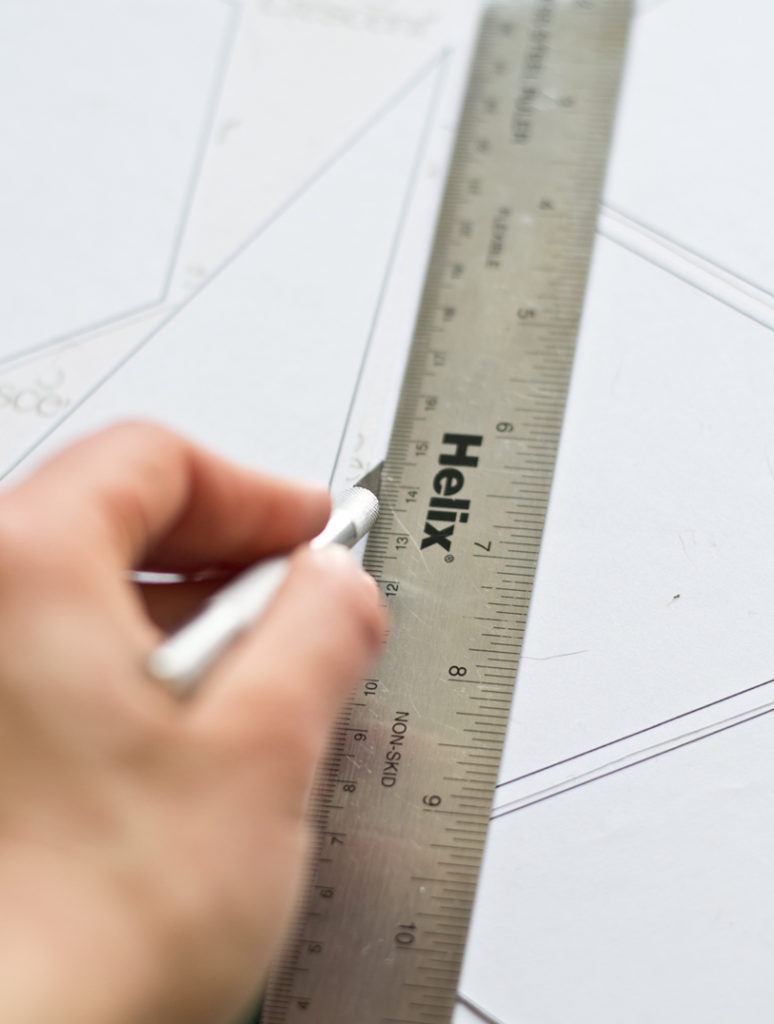
-metal ruler / xacto knife
– drill (optional can substitute xacto knife)
Here’s how we did it!
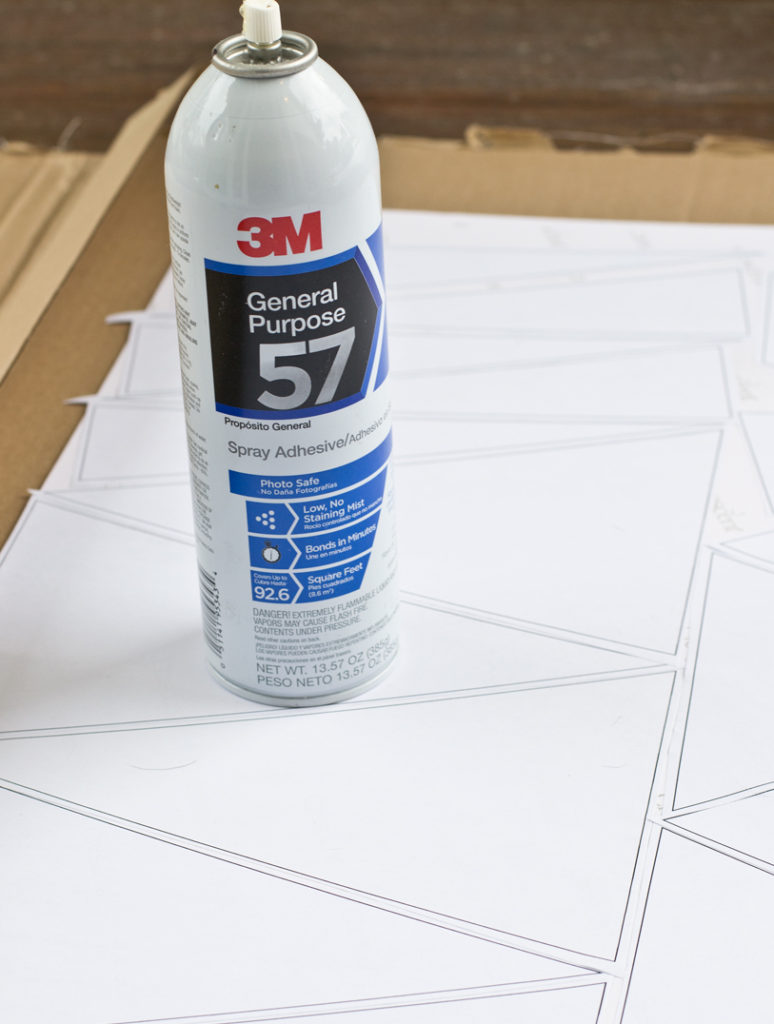
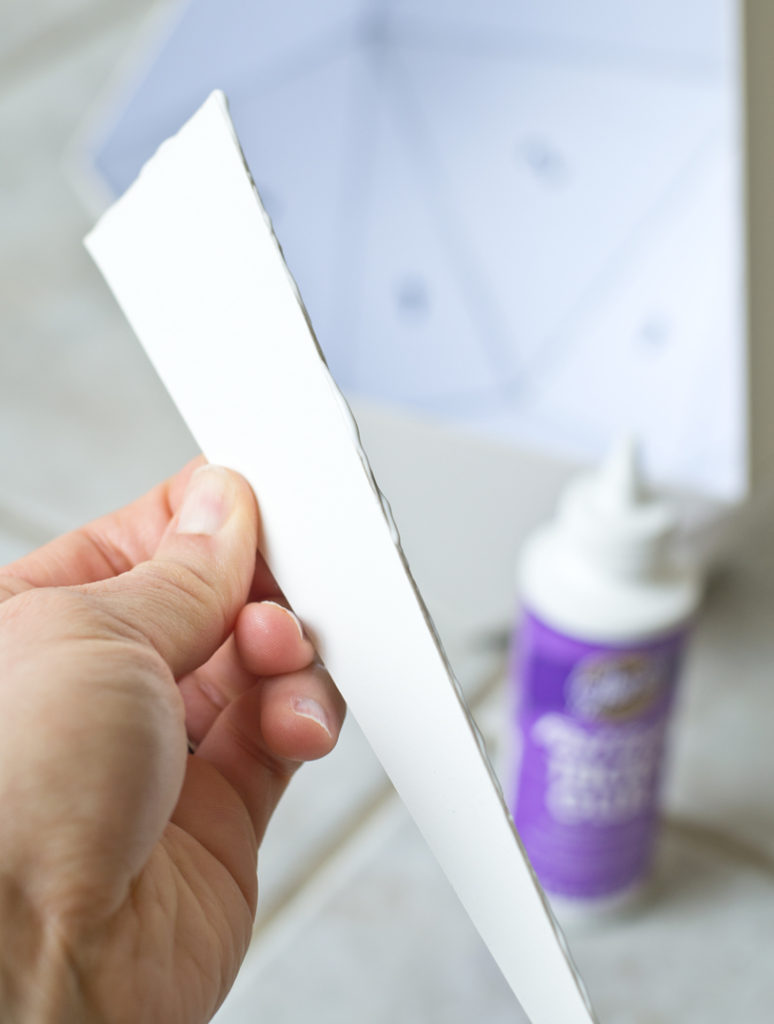
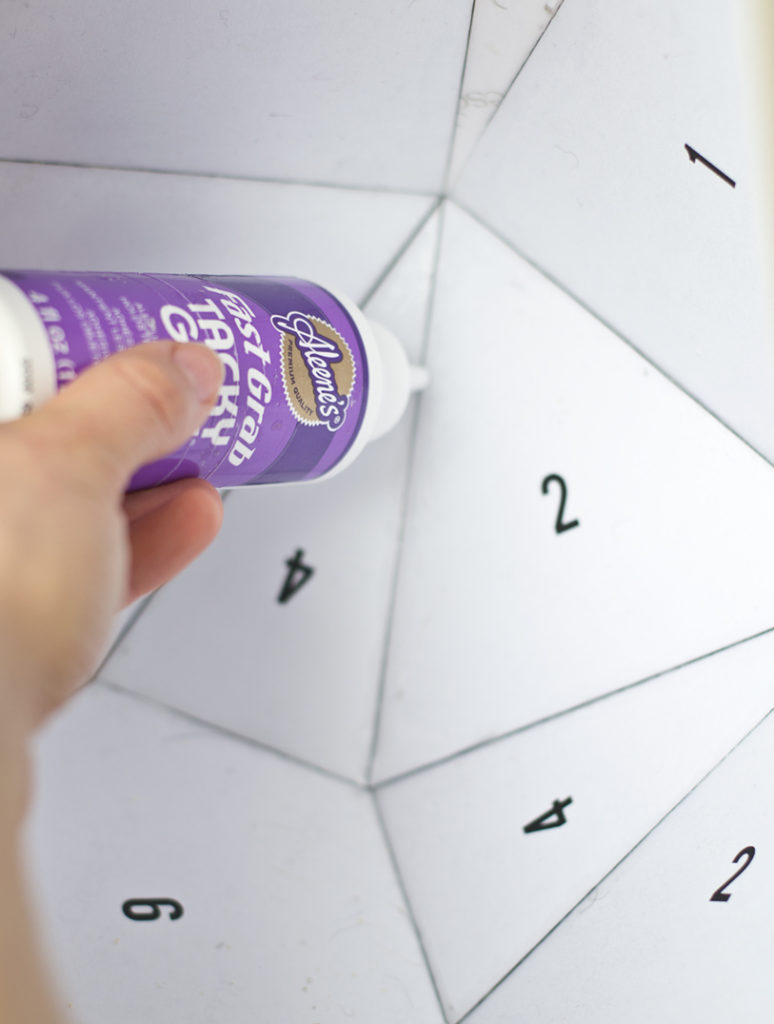
First, we printed the template (6 of each triangle) (1 of each hexagon). You can download our template, here (print on 8.5″ x 11″). I roughly cut the shape out so they would fit tightly on the mat board. Then we used spray adhesive to attach the pieces to the back of the mat board.
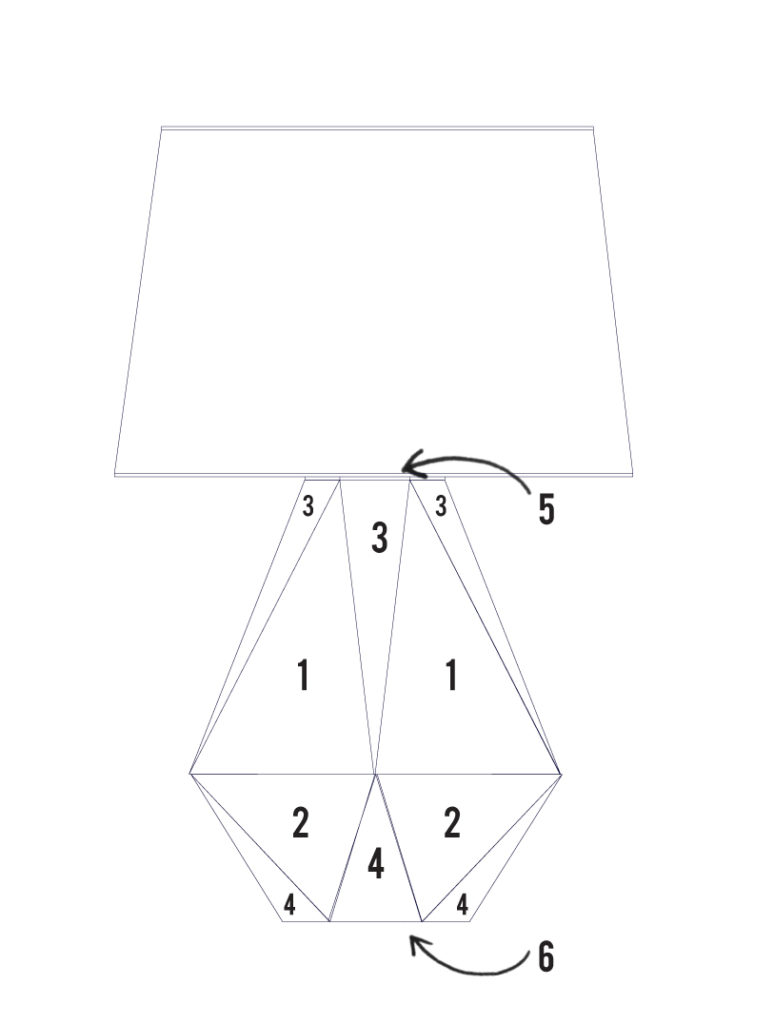
Here’s how they fit together.

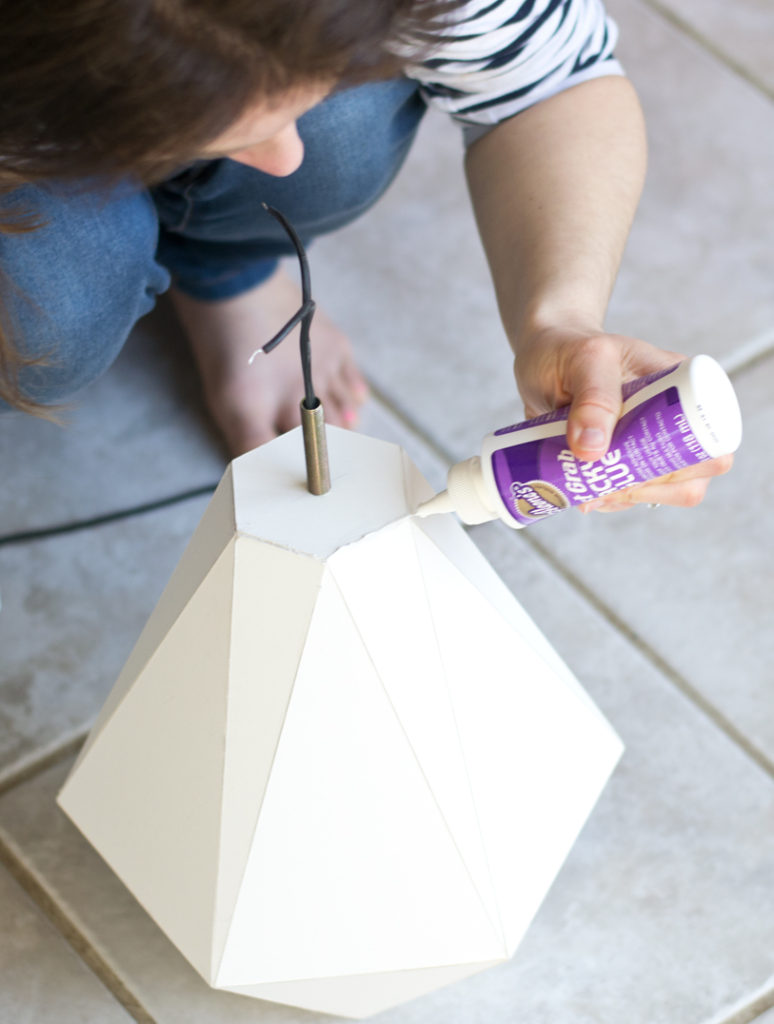
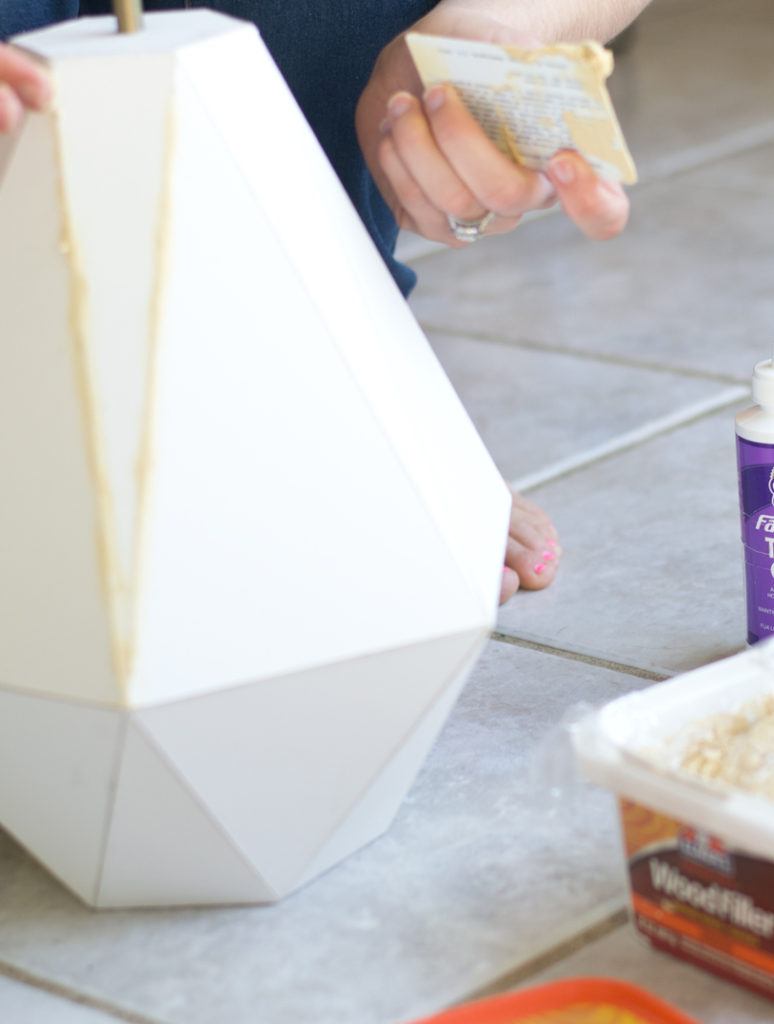
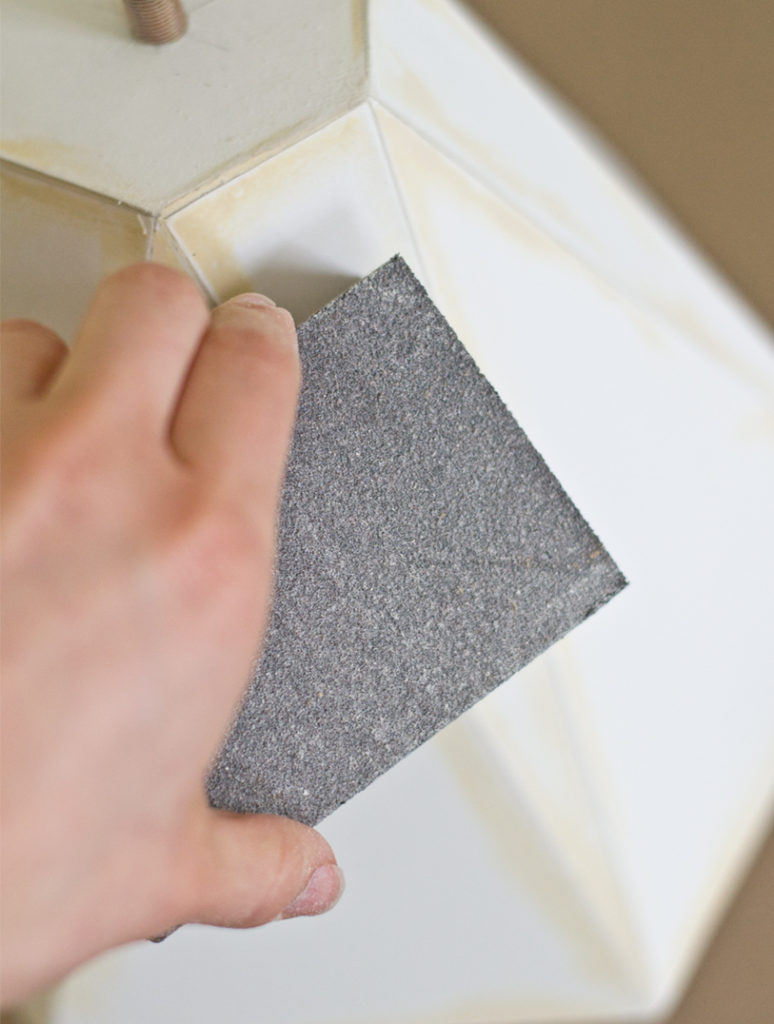
Sand the wood filler with a medium grit sanding block, and finish with a fine grit sanding block. At this point, you’ll notice how sturdy the base it. I pressed fairly hard and sanded a good bit to make sure that the wood filler was even. I didn’t have any issues with it caving in or breaking.
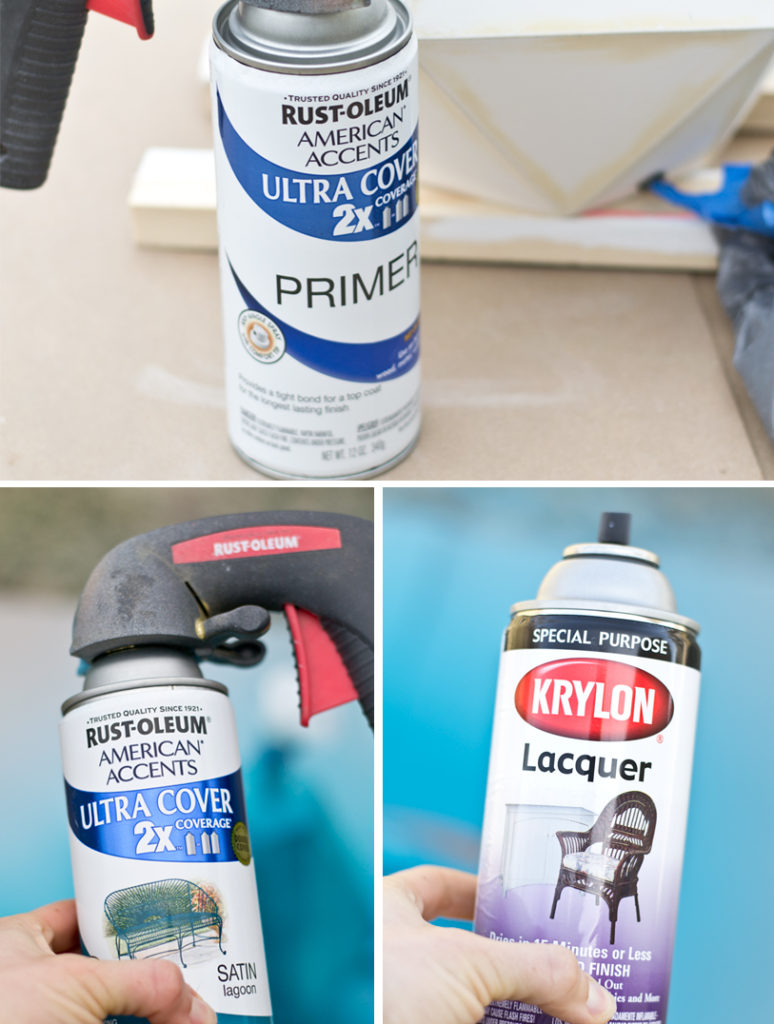
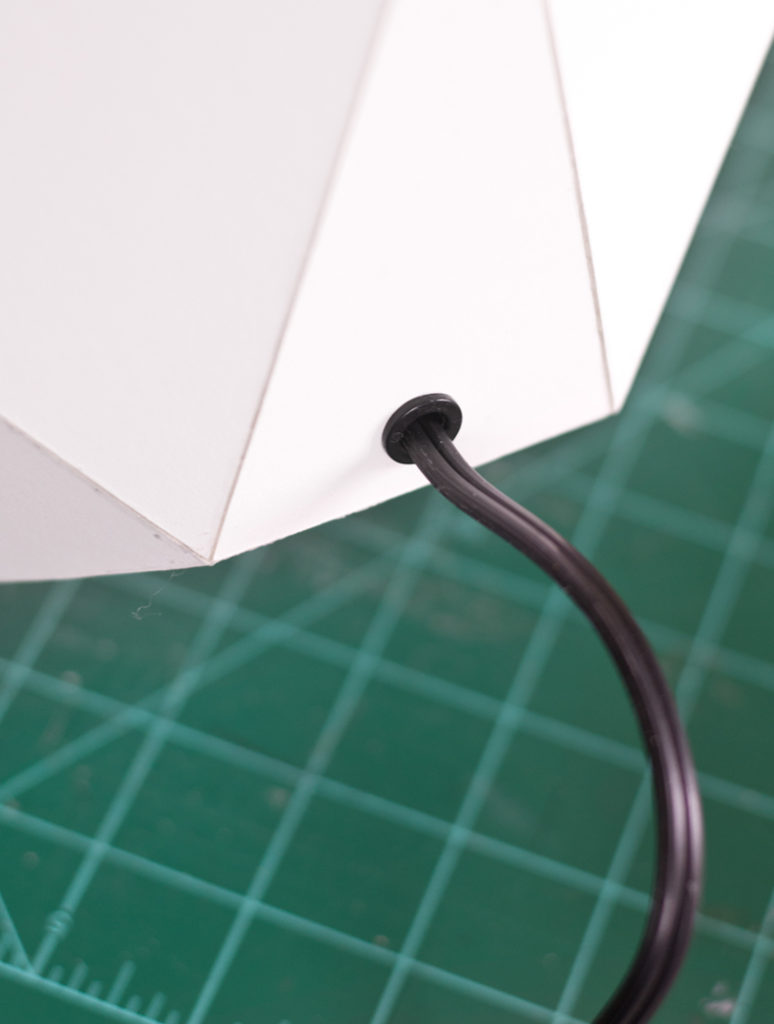
After removing the dust, finish with paint! To cover the top of the threaded rod, we used the top of an old lamp – it just slide over the rod. We then reattached the socket and that was it!
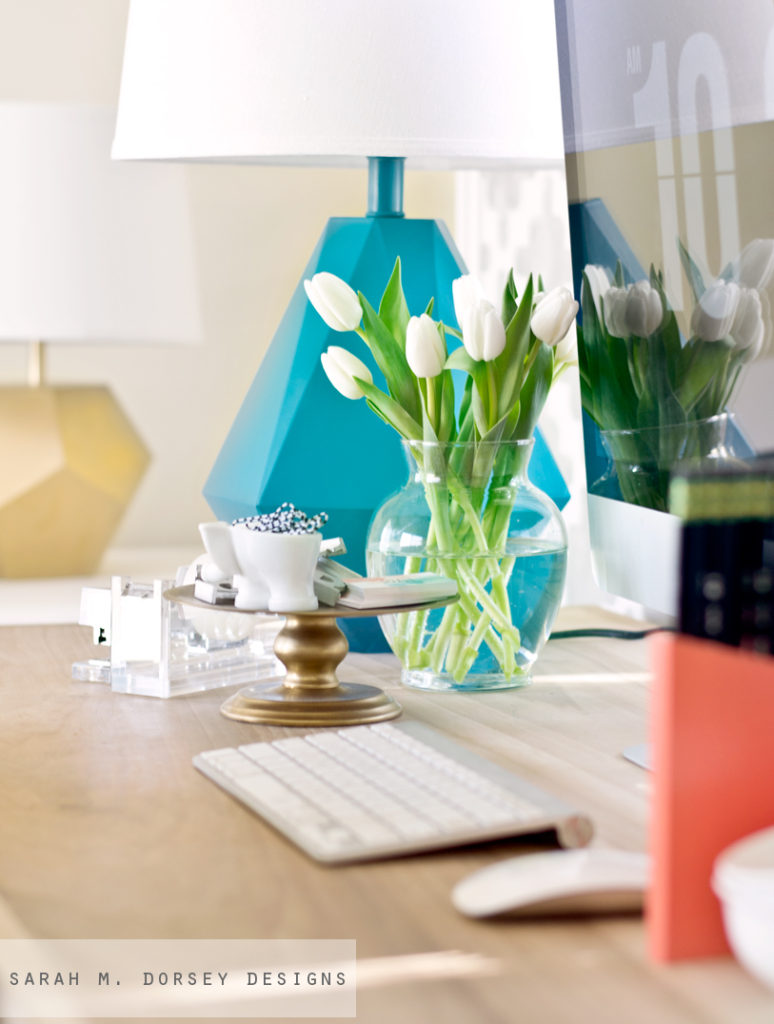
I paired it with Target’s large drum shade.
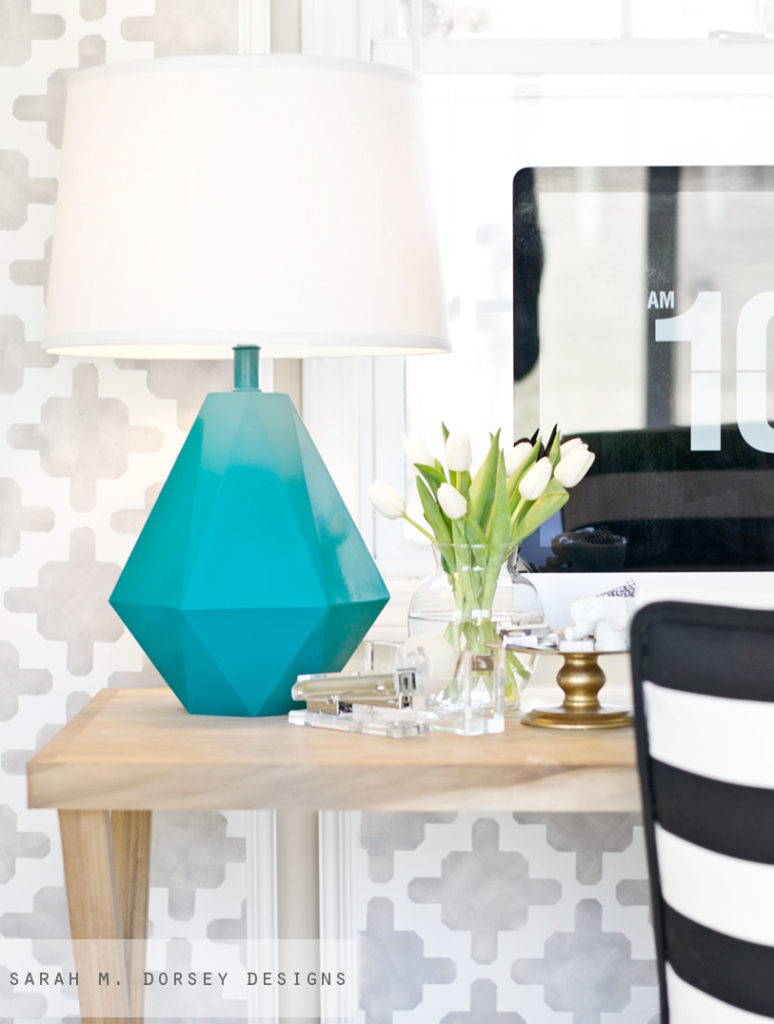
I’m obsessed!! LOVE it!!
Here’s the breakdown of cost and time.
Cost:
Thrifted lamp $2 (plus a few lamp parts from other thrifted lamps)
Mat board $3 (20″x30″)
Spray paint ~$6 (used about half of each can)
Wood filler / glue / sandpaper $0 (on hand)
1×4 ($0 from scrap pile of Home Depot)
Total $11, ($35 with lamp shade) pretty good compared to the $183 Robert Abbey version!
Time:
Preparing template + cutting out the mat board 1.5 hrs
Gluing mat board 2 hrs
Assembling the rest of the lamp .5 hr
Wood filler and sanding 2 hrs
Painting + drying time 2 hrs
Total 8 hrs, so not a huge time investment!
I’m so glad that we tried DIYing before buying! I love how our version came out!
Seriously, you are amazing! The lamp is spectacular! Btw I built a headboard using one of your tutorials. I love your blog!
The things that you come up with! I love this!!! Thank you for sharing the template too!
Love all your DIY projects! Your geometric projects are so inspirational!
You are so ridiculous, I can't handle it! Love your blog!
This confirms what a DIY rockstar you are! Love it and the color Lagoon, I've used that in my daughter's room and it's such a great color!
super awesome.
Wow! This is a completely unexpected DIY! It looks seamless and I love the bold colour you chose to paint it! So great.
Here is an example of really using that math you thought you would never use when you're in high school. Really awesome! thanks for the template. Otherwise, it's too intimidating for this math non-wiz! 🙂
You. Are. Awesome. As if I don't tell you that in every post…. 😉
love love love this lamp! I would never guess that it was made out of mat board. The finish is so smooth and glossy!
so amazing!!! you are genius, my friend!
Wow…you are ah-mazing, Sarah! I love, LOVE following your work and projects. Thanks for sharing.
This looks so good!!
Oh my goodness gracious, that lamp is incredible! You are one smart and creative cookie! Thanks for sharing the good stuff!
This is amazing and I'm also obsessed! Thanks for sharing!
I am obsessed too – cannot believe this is made out of mat board! It looks like ceramic!
You are so insanely talented! I would never have the nerve or patience to try this but it is gorgeous!
you must have so much patience and you are so meticulous with your projects…never in a million years would i have guessed it wasn't ceramic. gorgeous job!
Brilliant. I cannot get over the things you two create (all while making it look SO easy)! Your blog has become one of my favorite! Great job.
Okay, I never ever comment on blogs…but I had to say, why aren't you on Design Star? I've only watched a few episodes, but your work would blow everyone else out of the water! Amazing! I seriously would botch something like that!
Color me impressed. I've been looking for a bedside table lamp and have been hating everything. Doesn't help that my budget is almost nothing…so this is perfect! I love how it turned out – it looks so heavy, but I'm sure it's pretty light weight.
You are the goddess of DIY. Seriously. AMAZING.
I agree with this 100%
This lamp is gorgeous. I cant wait to try it. I can do this from ply wood, right?
where do you buy your mat board?
You can find mat board at any craft store, Hobby Lobby, Michaels, JoAnns. Don't forget to use a 40% off coupon!!
Oh, and what ply of mat board. I just checked an on-line art supply store, and they have 1, 2, and 4 ply
TIA!
I'm not sure what the ply is, but it is what you'd find in a mat for a frame. The thicker will be a sturdier, but a little tricker to cut.
omg I've been obsessed with that lamp and thinking myself how can I recreate it, lol. Yours is fab!
Absolutely loving your blog! Your DIYs are great… thanks for sharing!
I actually worked at Robert Abbey and this was one of my designs. I was googling all the lamps I worked on for an up coming interview and saw this! Gotta say, pretty impressive! It's a really neat feeling to know that this lamp made such an impression, that one would feel the need to "knock it off" 🙂 Anyways, well done! Cheers!