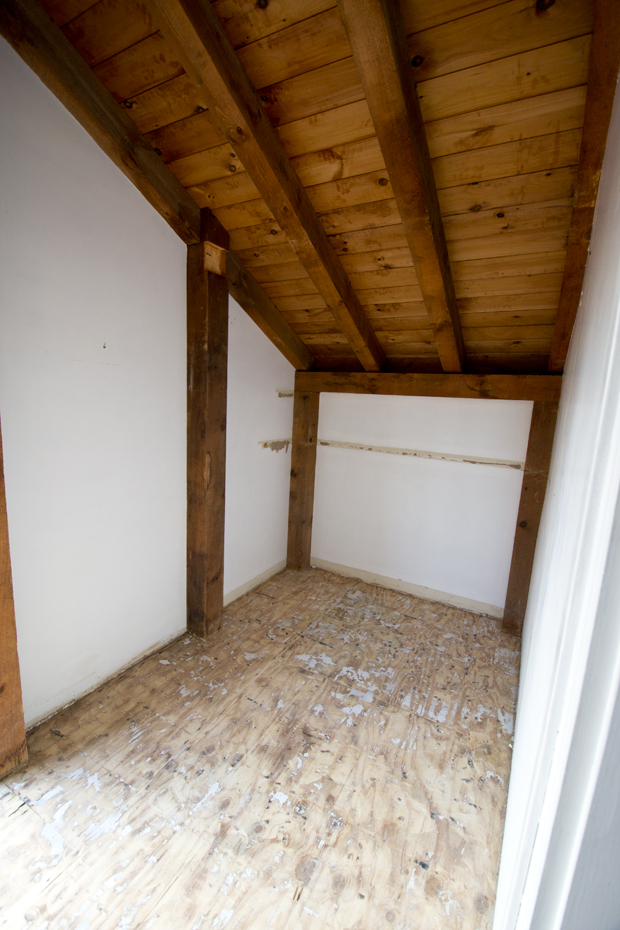
Time is flying by! We’re planning to be in Maryland this weekend to work on our house .. So I thought today would be the perfect day to talk about our experience demoing tile. David did the majority of it since we only had one of each power tool .. so I worked on some other things around the house and popped in to take pictures along the way.
This is our first time demoing tile, so we’re not pros .. but this is our process.
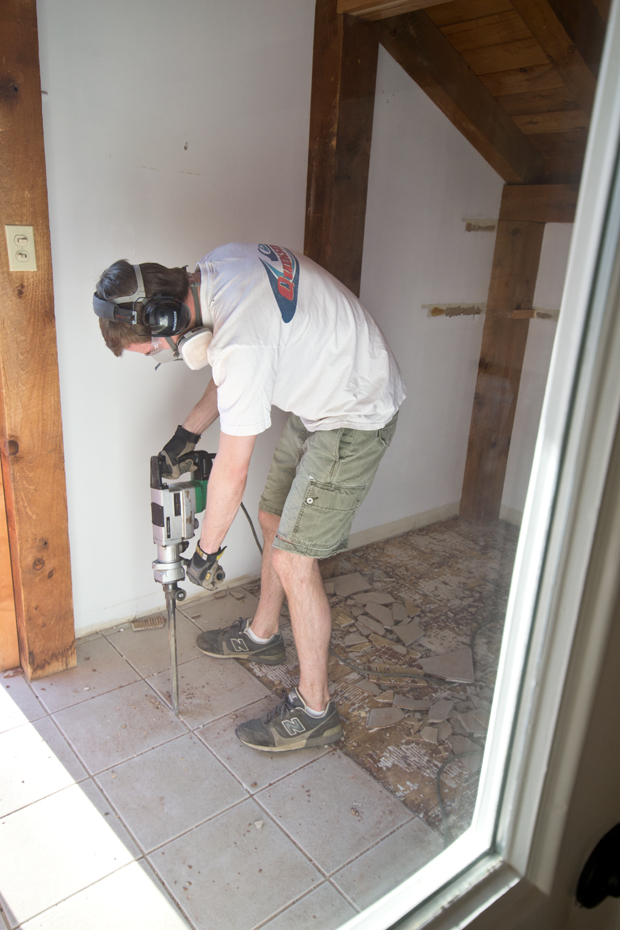
First, you NEED safety gear. Eye protection, hearing protection and a respirator. It’s messy and loud, so all of these things are necessary.
We were lucky that the room was enclosed, so we just kept the door to the house closed, but if you don’t have a door, tapping a tarp to contain the dust would be a good idea.
To get started, we removed the baseboard trim – ours was nailed in place so we wiggled it out using a screw driver (trying not to damage it). We forgot to mark the back as we took it out, so we would know how to put it back, but that would be a good idea 🙂 It’s not a big space, so we’ll just do trial and error.
Using a hammer drill (David’s dad had one we could borrow. Yay!) David first went along the grout line. Next, he broke up the tile – it was easiest to hold the hammer drill at an angle to get under the tile.
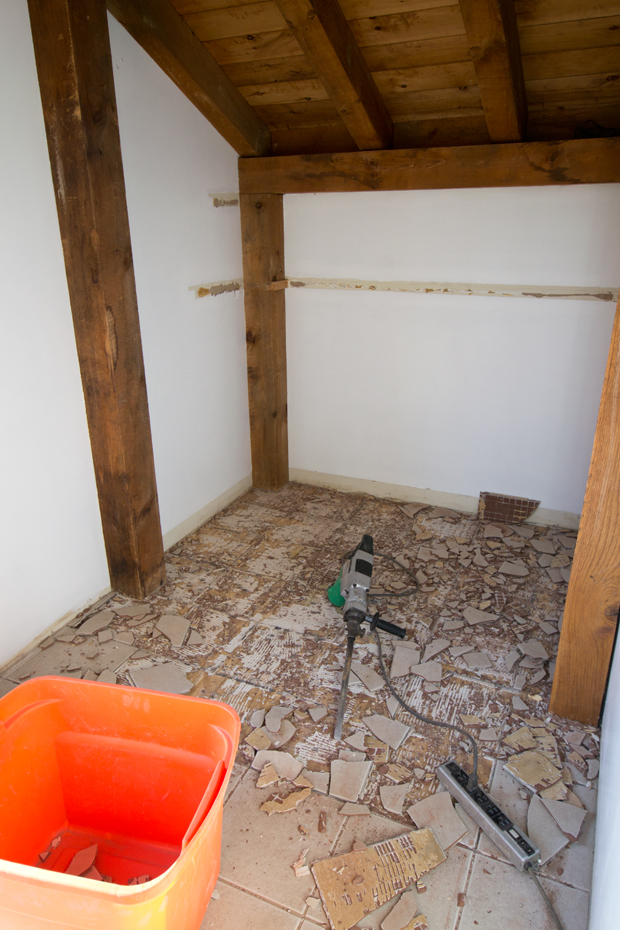
Here’s about half way through. We used an old plastic bin to hold the broken tile. It’s HEAVY, so this works better than garbage bags. It’s also good to clean up as you go ..
Once the tile was removed, we were ready to removed the extra thin set. After a little research, we decided to use an angle grinder with this attachment. Looking back, a 6″ or 7″ would have gone faster and a vacuum shroud would have been helpful since it was MESSY! David had the shop vac nearby and vacuumed along the way.
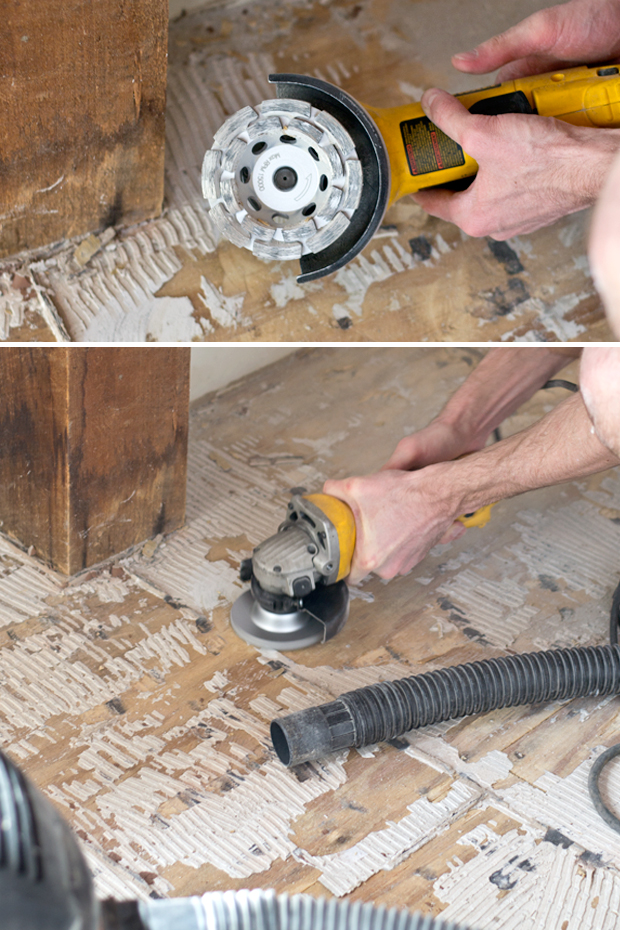
You don’t need to get all of it, but most of it .. you don’t want any high spots, but a layer of thin set prior to placing the backer board will help even it out.
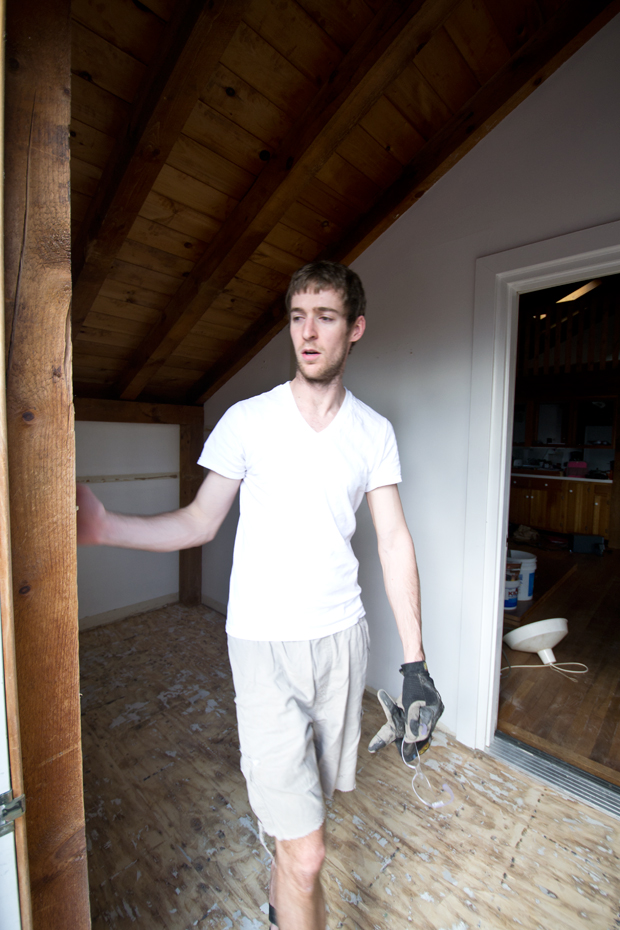
Then you sigh in exhaustion .. I snuck this pic in after David finished .. though I’ll probably be banned from that now 🙂
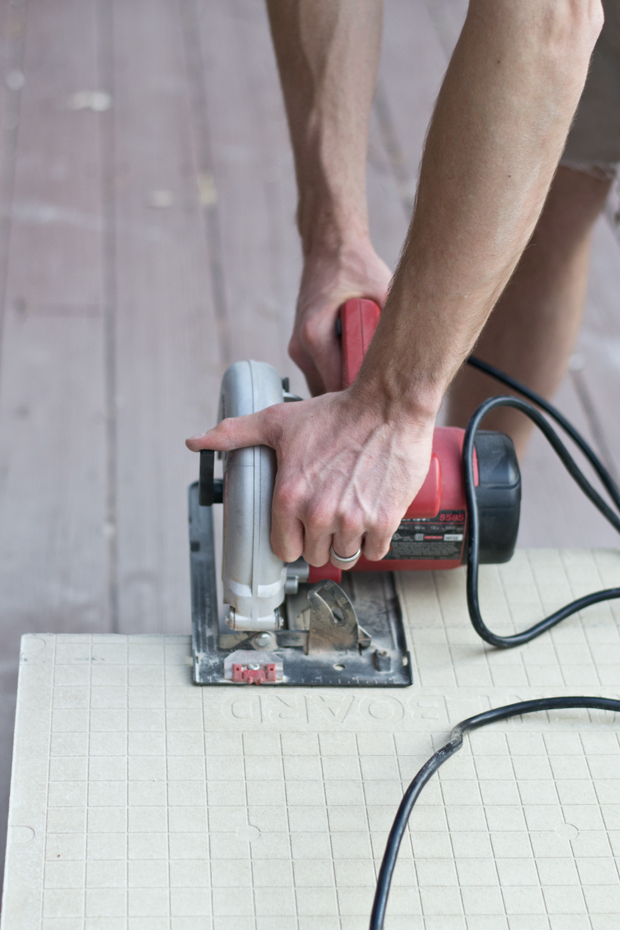
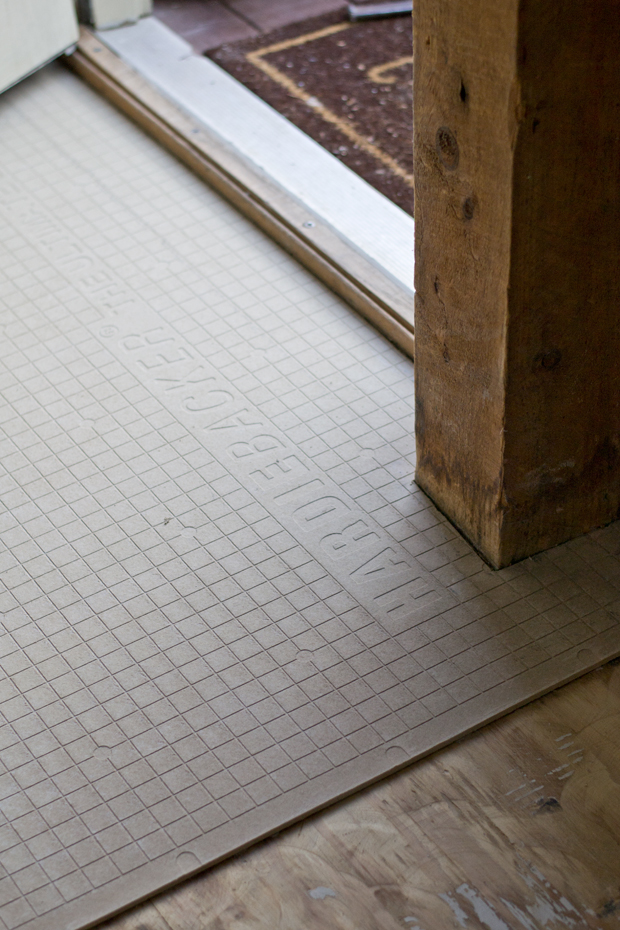
Now that the thin set it up, we were ready to start the new thin set and backer board. Backer board is a sturdy board made out of cement that provides a rigid substrate that prevents the tile from flexing and breaking. Starting in the corner, we measured our cuts .. this was a little tricky since the beams stick out, and they aren’t perfectly square. So we couldn’t scour and break the board along the provided lines (typically how it’s done) .. Maybe we could have filled in the gaps with thin set, but we wanted it as close to the walls as possible. Note: this will dull the blade of the circular saw fast (since it’s cement ..)
We cut all of ours to fit and then picked up each piece individually to put a layer of thin set down. For the thin set, you mix it for about 5 minutes (use a mixing attachment on a drill – preferably corded to conserve the battery on your cordless) and let it set for about 10 minutes (Yours may be different, so follow the directions on the package). David got the edges with a smaller trowel and I got the center with a larger trowel.
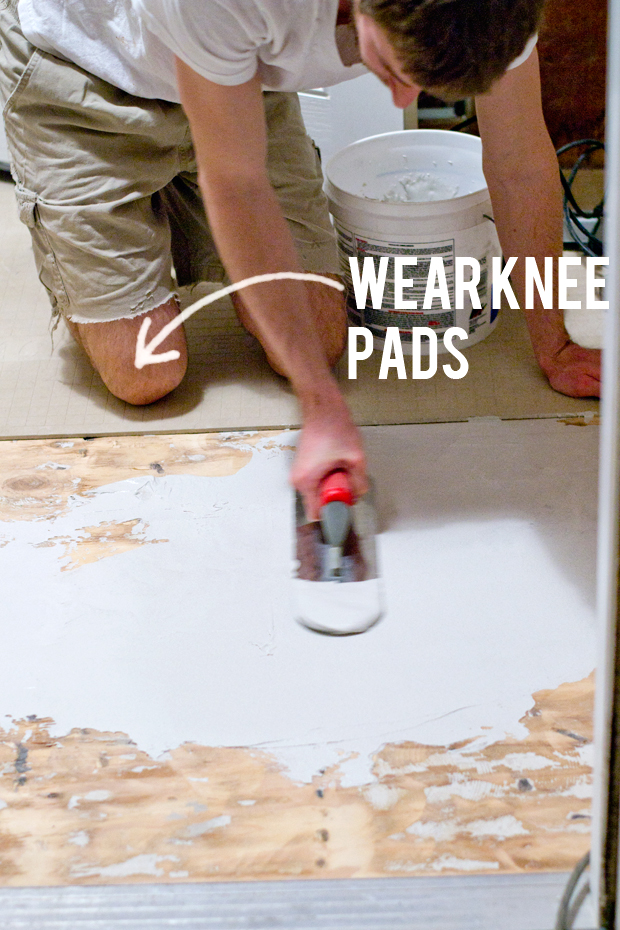
Wear knee pads .. I get tired of telling David to wear them, maybe this will help remind him 🙂
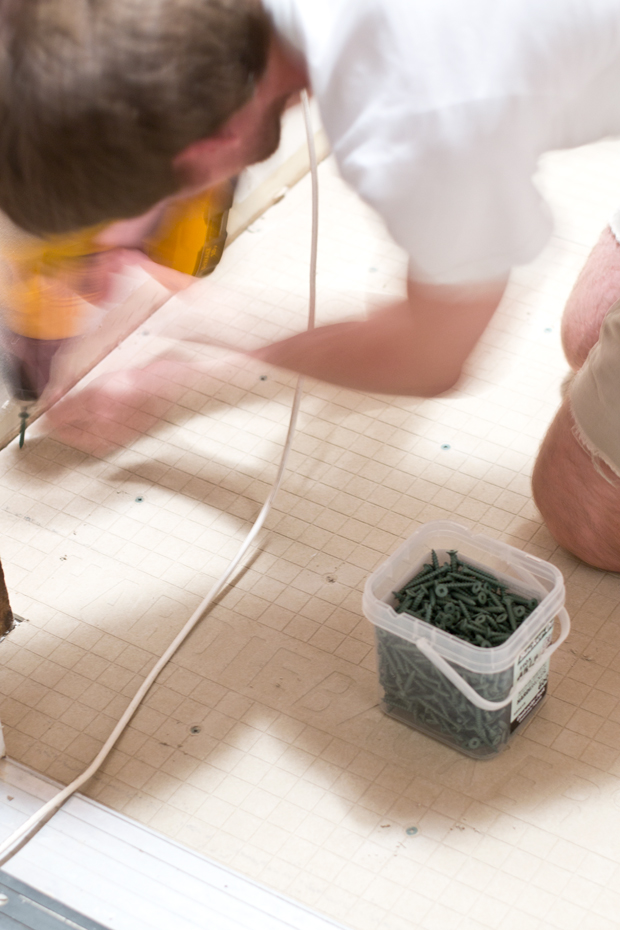
Then using screws for backer board (next to backer board in the store) we attached the board with LOTS of screws. The board had pre set spots for screws, we put a few extra in along the edges.
Now we’re ready for tile! Hopefully, we’ll finish the tile this weekend (realistic?? I hope so 🙂 Follow us on IG to watch our progress!!
Oh, kudos to you guys! That job looks like it ranks right up there with stripping upholstery or wallpaper. 🙁
wow! you guys are animals! way to go!
You guys are such pros!
Way to go! Demo and prep are definitely not the most satisfying parts, but they're a means to an end. Can't wait to see the results!
He did look exhausted. You guys are such a good team.
Ugh. I just did this in my bathroom and am now laying all new subfloor. You guys are awesome! xo Kristin
You guys make a great team!! Way to bust through all that demo! Prepping is definitely the worst part of any job for me.
This looks like a ton of work, wow! I've actually been thinking of the knee pad thing lately for myself – I'm up and down on my knees a lot with projects around the house and my knees are getting sort of rough looking. It's super sexy. So I'm thinking knee pads might be a good thing!