Happy fall! We’re currently making our way from California to Ohio, and driving in fallish weather so this post couldn’t come at a better time! I’m SO excited to be participating in Lindsay – The White Buffalo Styling Co. and Kristen’s – KFD Designs fall home tour! LOVE both of their homes and blogs – thanks so much for having me!!

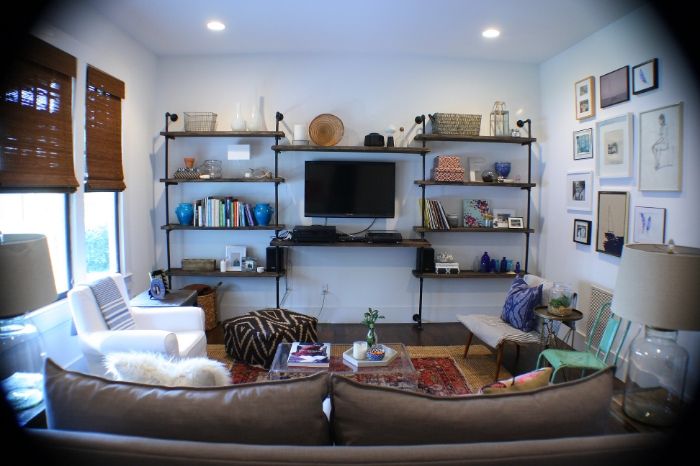
Did you see Kristen’s pipe/wood bookshelf!? Can you believe that she and her Dad made these? It’s SO good!!
and Lindsay’s outdoor dining table!! LOVE the mix of chairs with the natural wood table and buffalo check runner.

When I think about fall, I instantly think about cozying up with blanket and a good book by a fireplace or candlelight. So I decided to make a few candlesticks!
One of my first design jobs was interning at an interior design firm for model homes. I loved install day because we got to pick accessories and style the home – one of my favorite ways to style a coffee table was to add three candlesticks at varying heights. It’s one of the easiest, foolproof ways to style a table because you have a grouping of three (odd numbers are good), variety of height (creates interest by keeping your eye moving) and typically a variety in shapes since they are all a little different. It works well alone, or throw in a tray and a stack of books and your good to go!
I’ve had a few packs of wood shims laying around in our garage for a few months, and decided that making candlesticks out of them would be perfect! Before I get any further, I should say that you never want to burn an open flame near any flammable surface, so these would work for electronic candles. k 🙂
Supplies:
1/2 sheet 1/4″ MDF
1 pack of long wood shims
Wood glue
Wood filler
Primer + Gold spray paint
Tools:
Table saw
Chop saw
Electronic sander
Here’s how we did it!
David ripped a 1/4″ sheet of MDF down to 4″ strips with the table saw (we used less than 1/2″ a sheet for all three). Then with the chop saw, I cut the overall heights to 12″, 8″, and 4″ (4 pieces for each side). Finally a 3 3/4″ square for the candle to sit on.
Next, I started gluing the box together. (the MDF came from an unfinished project, so that explains the green color 🙂 Using wood glue, I placed one side and held until the glue set. I didn’t have any clamps that would work, so I then used a little tape to help hold it in place.
I continued until I glued the third side, then I measured down 2″ (measure and make two marks so it is level) for my center plate. My candle was 3″ so, I wanted it to stick out 1″. Put a bead of glue on all sides of the square, line up with the dots and hold it in place.
Apply the 4th side, make sure that everything is in place and let it dry completely.
Use different parts of the wood shim so that the heights vary. I worked on two sides at once and lined up the corners so that they were flush. Marking the underside with a pencil is SO much faster than measuring every time!
Tape or clamp any wood shims that pull away when drying (the thin ones tend to do that)
After it has dried completely, fill any cracks or imperfections with wood filler.
Let it dry, then sand with a fine grit sandpaper.
I finished mine with primer and gold spray paint, Krylon 18 karat Gold.
When sanding, I left a lot of the wood grain, the metallic spray paint helps to bring out the variances.
I also added an abstract black and white tree pillow (Marimekko, from Crate and Barrel outlet a few years ago)
Thanks so much to Kristen and Lindsay for having me! Make sure to continue the home tour tomorrow with Gabbi from Retro Ranch Reno and follow along for the rest of the month!!
1 – Kristen and Lindsay
2 – Sarah from Sarah M. Dorsey Designs
3 – Gabbi from Retro Ranch Reno
4 – Brittany from Brittany Makes
5 – Jesse from Scout & Nimble
6 – Julia from Cuckoo 4 Design
7 – Carolyn from Sweet Chaos Home
8 – Jennifer from The Chronicles of Home
9 – Bethany from Dwellings by Devore
10 – Carmel from Our Fifth House
11 – Kristin from The Hunted Interior
12 – Anneke from This That & Life
13 – Michelle from Décor and the Dog
14 – Cassie from Primitive & Proper
15 – Ally from From the Right Bank
16 – Shannon from Shannon Berrey Designs
17 – Danika from Gorgeous Shiny Things
18 – Kristin from Bliss at Home
19 – Jenna from Rain on a Tin Roof
20 – Jessica from Dear Emmeline
21 – Kelly from View Along the Way
22 – Sarah from Lacquer and Linen
23 – Eileen from A Creative Day Blog
24 – Sarah from Royal Marigold
25 – Lori from Lori May Interiors
26 – Jennifer from Dimples and Tangles
27 – Caitlin from Desert Domicile
28 – Sherry from Design Indulgence
29 – Lakeitha from Lakeitha Duncan Lifestyle Blog
30 – Shavonda from A Home Full of Color and Whitney from The Curtis Casa.
31 – Angela from Number Fifty-three and Jennifer from Brave New Home.
I love these Sarah!! You have the best DIYs 🙂 Safe travels!!! xo Kristin
Oh man I knew yours would be good:)!! These are very cute! I have those shim things laying around everywhere in our garage. They must sell them in like 1000 per bundle! What a great idea and the color looks great too! Fall is all about candles for sure!
Laura
House Envy
I love the candle sticks. So pretty and so you!
yay for the tours! and love those shim candle holders! i wish i could get inside of your head- so many great ideas!
I LOVE your candlesticks! And that table underneath? Awesome!!! So pretty 🙂
What a great use of leftover wood! Hope the move is going well!
This is such a creative idea! Love the way it turned out. Safe travels!!
Do you often get headaches? How do you store all these awesome DIY's? 😉 I am so blown away by all of your ideas and this simple one is no different. So easy yet so impactful! Love it.
These are pretty cool! They remind me of Jenga : ]
Love these Sarah!!! You're soooo good at coming up with awesome DIY projects. These are so textural and fun! Safe travels my friend.
These are so awesome, Sarah! Hope you took them with you when you moved 🙂
Those are so cool, Sarah! Hmmm, what CAN'T you do? 🙂
Great idea, Sarah! I just recently started using that Krylon 18K spray when they discontinued my fave Rustoleum gold. Happy travels!
I would've never thought those were made of wood shims! GAH. This is SO GOOD.
Such a cute idea! I love the texture and of course ANYTHING painted gold! 😉
Love this shim project…awesome! Loving this tour too!
Those are super cute and it's really nice to discover your blog. P.S. I also have that Marimekko pillow. 🙂
These are right up my alley, great job!
So fun!! Just the right touch of rustic glam for fall!