• Home
  • About
  • Services
  • Shop
    • Bloglovin
    • Email
    • Facebook
    • Instagram
    • Pinterest
    • Twitter

Dorsey Designs

DIY and Interiors by Sarah + David

  • Home Tour
  • DIY TUTORIALS
  • friday favorites
  • design + build
  • art

get the latest straight to your inbox

Roadside Rescue + Painting Laminate + Adding Crown Molding to Table Base

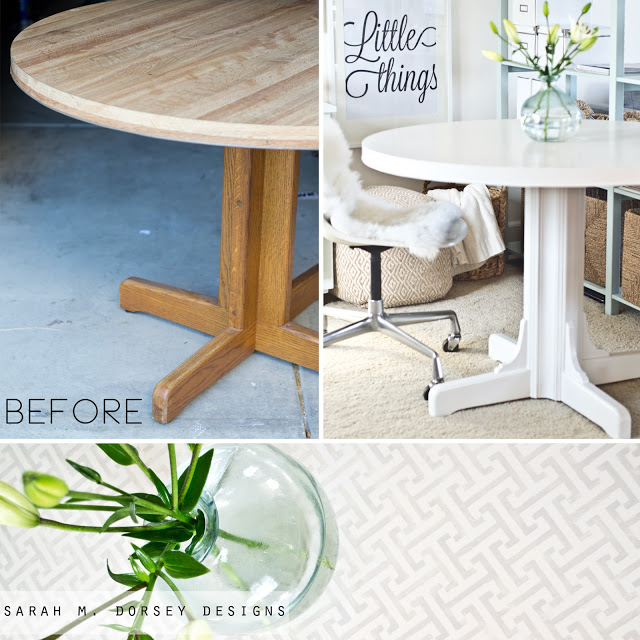
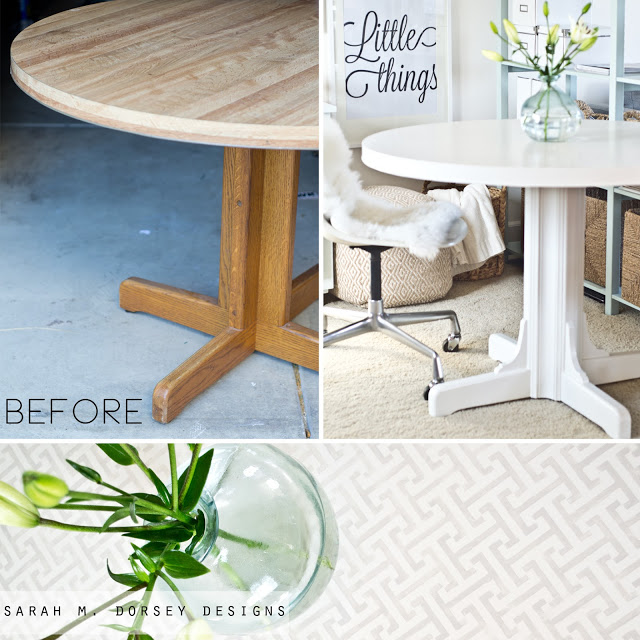
Sometimes my favorite projects come from the least expected places. A few months ago I found this laminate and oak table in the road outside of our house. I didn’t think much of it at the time, but when David got home and asked if I saw the table outside, we decided to go check it out. We weren’t sure about it, but we pulled it into the garage anyways and forgot about it for a few months.

This past week, we finally got around to finishing it and I’m in LOVE with the end result!!

Want to know the best part? It was basically free! I bought white paint for this and a few other projects, but other that that, we had everything on hand! 
Read on to see how we did it! 
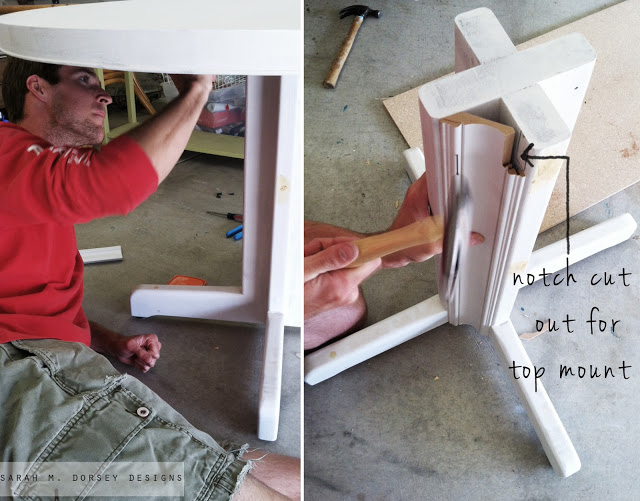
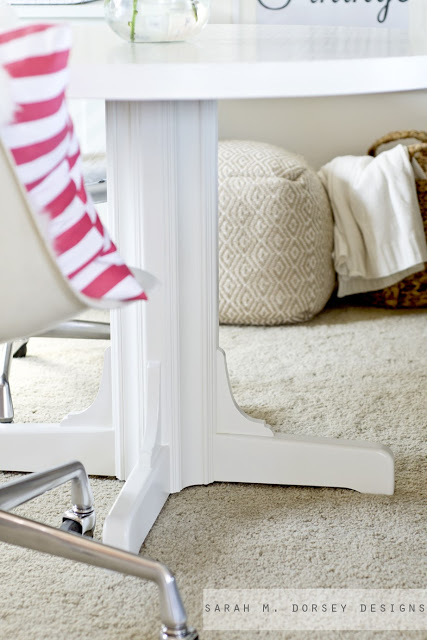
I primed the table a few weeks ago while I had the primer out and filled the holes with wood filler. Last weekend, David was playing around with a few pieces of scrap wood and found some crown molding that we purchased (from Habitat Restore) for another project, but didn’t end up using. It fit PERFECTLY between the existing legs for a seamless transition. It’s like it was made to go there! David cut it to size and cut a notch in the top for the existing table top mount to attach to. You can only see it when you are under the table, so we weren’t worried about covering it up. 
We put wood glue on the edges of the crown molding and secured it to the base with small nails.  

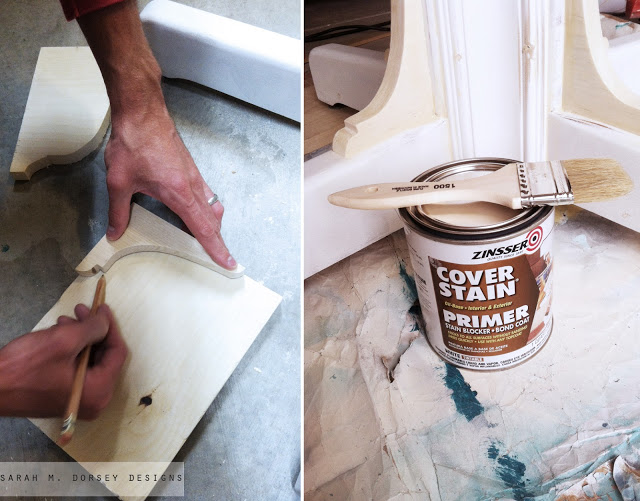
To finish the base, we freehanded a corbel out of a 1×6 and then traced three more. David cut them out with the jigsaw and we attached them to the base with wood glue and finishing nails. We then filled in all of the cracks/seams and nail holes with wood filler.

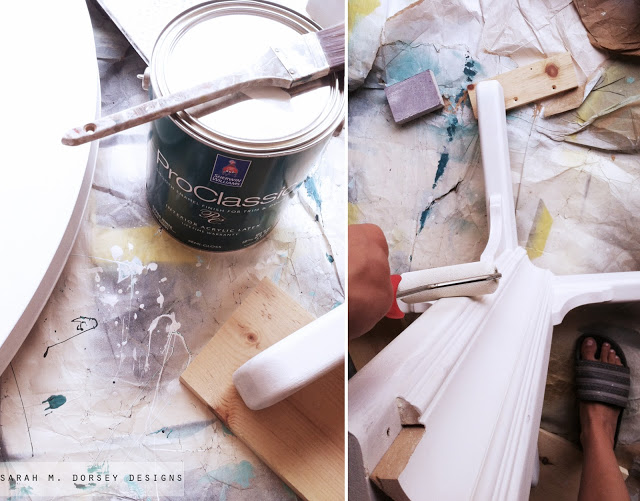
After sanding and wiping down with a microfiber cloth I used my favorite primer, Zinsser Cover Stain. It sticks to glossy surfaces (though it is best to sand first) and it is SUPER durable!! I used two coats on everything and three on the top for extra durability. It is oil based, so that means it’s stinky and the brushes need to be cleaned with mineral spirits (or use cheap ones that can be tossed).

 I finished with two coats SW Pro-Classic in Alabaster, a light creamy white.
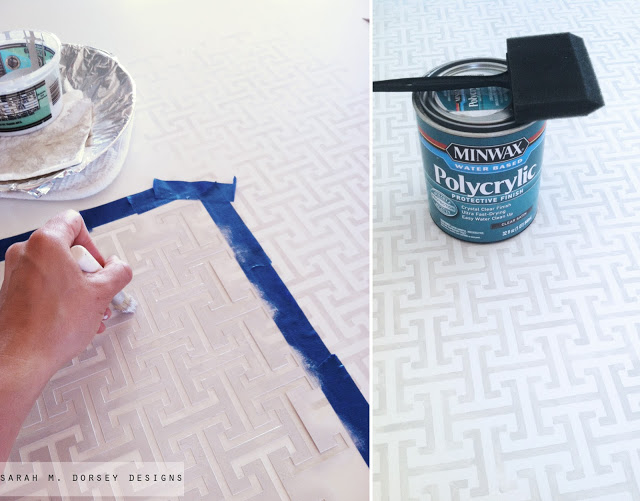
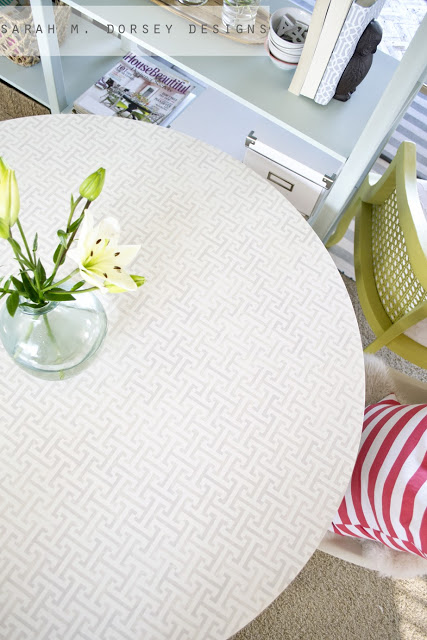
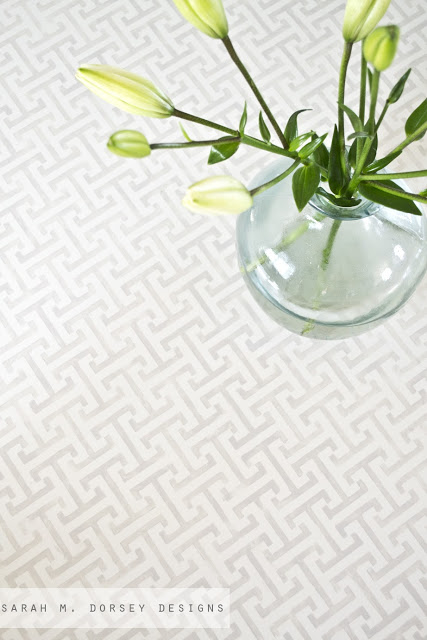
We created a stencil in Illustrator and cut it on our Silhouette Cameo and stenciled it with a light gray, SW Big Chill.
Since the top is laminate and it will get a lot of use, I decided to add a few coats of water based polyurethane. Oil based poly will yellow over time on light surfaces, so water based is best for white paint.  
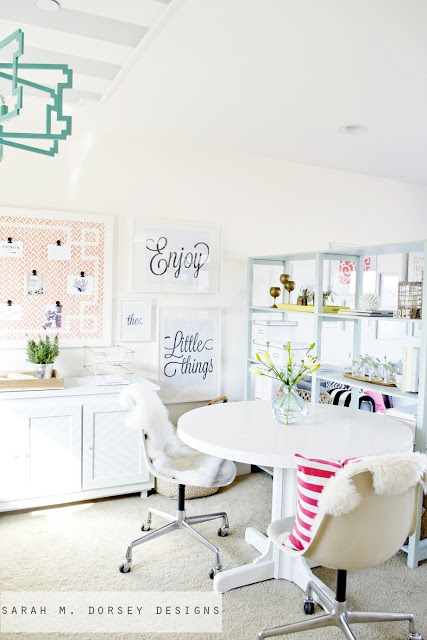
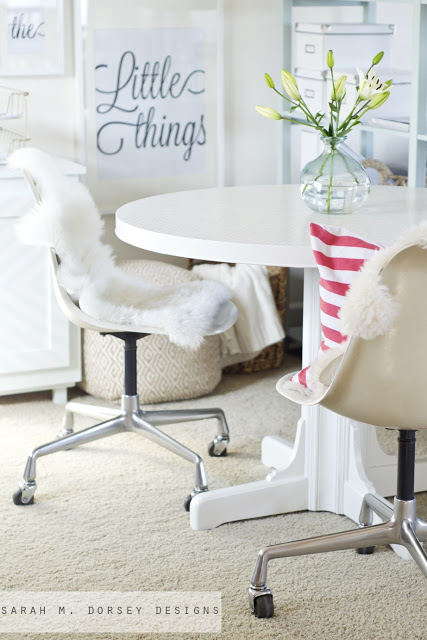
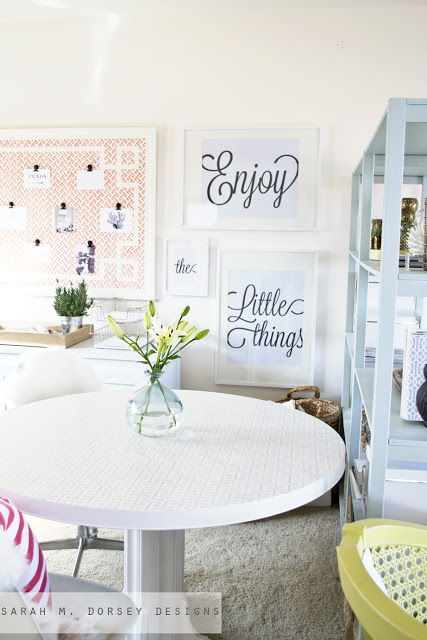
It is the perfect addition to our office! Extra work and dining space. It isn’t too large or small and the round size makes it easy to move around. 
Notice something else?? We also finally finished the other Eames chair!!! Tutorial a little later 🙂 I’m planning to put a few of the chairs that I recently found, once I refinish them. Updates on Instagram if you’re interested. And then the Eames chairs will go back to the desk. 
I love love love the new table base! It makes to look so much more expensive!  
I was originally planning to paint the top in a bolder color/pattern, but I think the simplicity and low contrast works well with the other colors and patterns in the room.

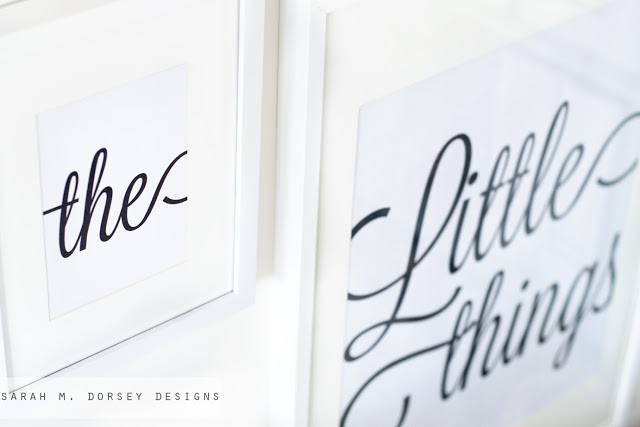
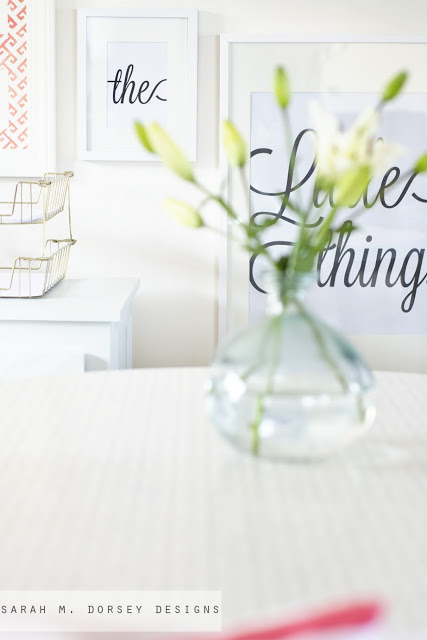
Finally, I created a few prints using text and got them printed as Engineering prints at Staples. The quality is similar to a laser printer (so so quality), but a $1 something each is such an affordable option for large scale prints! I was inspired by the prints in Kristin’s fabulous nursery, found here. 
You can download “enjoy the little things” HERE. It includes two 16×20 prints and one 5×7 print. You’ll have to cut the 16×20 down yourself or Staples can do it too. I printed the 5×7 at home. Enjoy! 🙂 
Ahh SO much better!! Have you used crown molding in an unconventional way too? I’m officially obsessed and will be looking for more project ideas using it! 
Sources:
Table: roadside find, but craigslist and goodwill would be good places to look
Crown Molding: Habitat Restore (about .50 a foot) 
Primer: Zinsser Cover Stain, oil based, Home Depot 
Paint: Sherwin Williams Pro Classic 
Poly: Minewax Water based, Home Depot 
Stencil: Made by me
Frames: Ikea Ribba, here and here 
The office/living room is almost done, then I’ll post more pics showing the whole space! 🙂 

DIY TUTORIALS// furniture redo// office// Uncategorized// Uncategorized49 Comments

Subscribe

get the latest straight to your inbox

« Favorite Clearance Finds
Statement Art Free Download »

Comments

  1. emily says

    July 1, 2013 at 11:32 am

    lovely as always! You always add the best details to your diy projects.

    Reply
    • Sarah says

      July 3, 2013 at 12:36 am

      Thanks so much Emily! 🙂

      Reply
  2. Kristin@bliss-athome.com says

    July 1, 2013 at 12:25 pm

    Gorgeous Sarah 🙂 I really just love all that you do! xo Kristin

    Reply
    • Sarah says

      July 3, 2013 at 12:37 am

      Thanks Kristin!! xo sarah

      Reply
  3. diytheory says

    July 1, 2013 at 12:33 pm

    have you done a tutorial anywhere on how to make stencils with your Cameo? I am getting ready to make a stencil for my office, but can't figure out what type of material to cut it out of.

    Reply
    • Sarah says

      July 1, 2013 at 4:55 pm

      I haven't done a tutorial yet – I learned how to cut my own design by watching a few you tube videos, if you're interested. I use a thin craft plastic, you should be able to find at Michaels or Amazon 🙂

      Reply
  4. Julia Konya says

    July 1, 2013 at 12:39 pm

    I love the added molding! Looks so pretty in your room!

    Reply
    • Sarah says

      July 3, 2013 at 12:37 am

      Thanks so much Julia! 🙂

      Reply
  5. Jesse Bodine says

    July 1, 2013 at 1:35 pm

    Wow! Your table turned out gorgeous and nothing beats free! I pass up tables like this all the time and now I will buy the next one! It would work great in our basement to serve as a lil eating area. The crown molding and stencil makes such a difference. 😉 Jesse @ Scout & Nimble

    Reply
    • Sarah says

      July 3, 2013 at 12:41 am

      Thanks so much Jesse! 🙂 I've already used the table a lot, it's the perfect size for our little space! Looking forward to seeing what you do with one!

      Reply
  6. Mrs. DeVore says

    July 1, 2013 at 2:49 pm

    Love how this turned out, don't you just love finding stuff for free?

    Reply
    • Sarah says

      July 3, 2013 at 12:42 am

      Thank you! Yes, free is always the best! 🙂

      Reply
  7. Meg says

    July 1, 2013 at 4:17 pm

    Love it! But really loving that artwork! Ah-maz-ing again!!

    Reply
    • Sarah says

      July 3, 2013 at 12:42 am

      Thanks so much Meg! 🙂

      Reply
  8. aleshahaley says

    July 1, 2013 at 4:33 pm

    WOW the table looks amazing!! Holy cow you never disappoint, Your house is so adorable!

    Reply
    • Sarah says

      July 3, 2013 at 12:43 am

      thanks so much alesha! 🙂

      Reply
  9. Gwen, The Makerista says

    July 1, 2013 at 4:50 pm

    beautiful! i'm always amazed at what you can do! thanks for sharing!

    Reply
    • Sarah says

      July 3, 2013 at 12:45 am

      Hi Gwen! Thanks so much! 🙂

      Reply
  10. Beth @ Sawdust and Embryos says

    July 1, 2013 at 5:18 pm

    LOVE this Sarah! That subtle pattern is the perfect finishing touch!

    Reply
    • Sarah says

      July 3, 2013 at 12:46 am

      Thank you Beth! 🙂

      Reply
  11. Jennifer Patillo says

    July 1, 2013 at 5:58 pm

    GORGEOUS!!! This is one of the only blogs that my husband will let me show him things from ;)! Even he can't deny the talent you guys have!! I love this!!! Btw, I painted a laminate dresser for my daughter's room and used a zinser stain covering primer, and the drawers have started to yellow. The dresser was painted a really light gray….wonder if I should sand it back down and try using the water based poly? I think we used an oil base spray poly?? hmmmm.

    Reply
    • Sarah says

      July 1, 2013 at 7:03 pm

      Hi Jennifer! Thanks so much, that's so sweet! 🙂 I just started using Zinsser cover stain (per Kate, Centsational Girl) recommendation and love it!! As far as I know she hasn't had any issues with it yellowing light paint, so if you used oil based poly, I'd guess it was the poly. Oil based poly has a slight amber tint, which yellows over time – making light colors yellow. I'd probably sand down the dresser to remove the poly and recoat with paint if needed and then use water based poly 🙂

      Reply
  12. Auralee says

    July 1, 2013 at 6:09 pm

    Sarah – so beautiful as always, I can't say that enough! I love the prints "enjoy the little things." Any chance you're willing to sell them, so that I can send them off to a Staples near my house?

    Reply
    • Sarah says

      July 1, 2013 at 7:04 pm

      Thanks Auralee! I just uploaded the PDF for the prints (link in text describing the prints), enjoy! 🙂

      Reply
    • Auralee says

      July 1, 2013 at 7:30 pm

      Thanks Sarah!!! As for the frames, where did you purchase them from? I bet you're going to say IKEA 🙂

      Reply
    • Sarah says

      July 1, 2013 at 7:55 pm

      Yep 🙂 ikea Ribba 15.25×19.25 mat opening and 5×7 opening

      Reply
  13. Anonymous says

    July 1, 2013 at 6:31 pm

    I love the artwork that you made! What font did you use?

    Reply
    • Sarah says

      July 2, 2013 at 5:34 pm

      It is Lavenderia http://www.losttype.com/font/?name=lavanderia

      Reply
  14. Unknown says

    July 1, 2013 at 6:48 pm

    Sarah, please tell how you did the prints. I would love to make something like.
    Erin

    Reply
    • Sarah says

      July 1, 2013 at 6:57 pm

      Hi Erin, I just added the PDF to download (link in text describing prints). The larger are 16×20 Engineering prints from Staples. They print larger, so you'll need to cut them down or have Staples do it for you. The smaller one is a 5×7 that I printed at home 🙂

      Reply
    • Unknown says

      July 2, 2013 at 3:48 pm

      Thanks. But, what if I want to do a different saying? Do I just type it into word and ???? I swear, I am so inept. I need my hand held and a step by step instruction. Like, sit at computer, turn on at right hand side, etc., I kid you not. UGH!!!

      Reply
    • Sarah says

      July 4, 2013 at 11:16 pm

      I just posted a few more saying here: http://www.sarahmdorseydesigns.blogspot.com/2013/07/statement-art-free-download.html. I couldn't figure out how to make a large scale document that was editable, but if you would like something custom, I could make a similar version for $5

      Reply
  15. Cassie @ Primitive & Proper says

    July 1, 2013 at 8:25 pm

    that looks amazing, sarah!!!! i love what you did to the top! i still need to publicly thank you for my awesome stencil- i have been waiting for the right project! just wanted you to know i hadn't forgotten. 🙂

    Reply
    • Sarah says

      July 3, 2013 at 12:47 am

      Thanks Cassie! Would love to see my stencil on one of your fabulous pieces!! 🙂

      Reply
  16. Elizabeth @ The Little Black Door says

    July 1, 2013 at 11:53 pm

    Sarah it is simply awesome sauce!! I'm so in love with that table, and I'm downloading those prints as well. I think I'm going to need to use those for sure!!! Great work!

    Reply
    • Sarah says

      July 3, 2013 at 12:49 am

      Thanks Elizabeth! Would love to see the prints in your home – thanks for downloading!

      Reply
  17. Jennifer@The Chronicles of Home says

    July 2, 2013 at 12:40 am

    Beautiful! The moulding was such a great idea for giving it a high end look. Who would have thought such a dull castoff could be so pretty? Well…obviously, the answer to that questions is, "you." 🙂

    Reply
    • Sarah says

      July 3, 2013 at 12:51 am

      aww thanks so much Jen! 🙂

      Reply
  18. Kelsey Bobo says

    July 2, 2013 at 4:03 am

    Where did you get the frames for the artwork? If you don't know exactly, can you attach a link to some frames similar to yours?

    Reply
    • Sarah says

      July 2, 2013 at 4:15 am

      Hi Kelsey! They are Ikea Ribba: 2 of http://www.ikea.com/us/en/catalog/products/40243544/ and 1 of http://www.ikea.com/us/en/catalog/products/50142969/

      Reply
  19. Laura Stutzman House Envy says

    July 2, 2013 at 4:21 pm

    Beautiful as always Sarah! Way to make a treasure out of a roadside rescue! Love these transformations!

    Reply
    • Sarah says

      July 3, 2013 at 12:51 am

      Thanks so much Laura! 🙂

      Reply
  20. erin says

    July 2, 2013 at 5:22 pm

    Your blog is completely inspiring! I found it a few months ago and have been greedily devouring past posts. Now I look forward every week to seeing what genius thing you are going to create. Your vision is quite amazing! This post has me wishing I could find a great "garbage table" on the side of the road so I could copy yours- crown molding- I never would have thought to add that, but the transformation is brilliant! PS- I'm wondering if you would share the font you used for the prints. It's lovely!

    Reply
    • Sarah says

      July 2, 2013 at 5:33 pm

      Hi Erin, Thanks so much! 🙂 The font is Lavenderia http://www.losttype.com/font/?name=lavanderia

      Reply
    • erin says

      July 2, 2013 at 9:21 pm

      Awesome, I already have that one. I think it just looks more impressive in the larger scale. Thanks!

      Reply
  21. Kristin Jackson says

    July 3, 2013 at 4:27 am

    Love the table transformation!!! Thanks for sharing the nursery link too 🙂 Your prints look amazing!
    xo-Kristin | the Hunted Interior

    Reply
  22. Katja @ Shift Ctrl Art says

    July 3, 2013 at 2:14 pm

    I love that you went the extra step and added molding and trim. That just took that table to the next level. Love the stenciling too! Perfect!

    Reply
  23. Peta says

    January 14, 2015 at 12:27 pm

    I live in Australia & I own this table except the edges of the top have been routered & it would so fit in with the moulding on the legs. I was going to get rid of it this week. Thank God for Roadkill Rescue & you.

    Reply
    • Sarah says

      January 16, 2015 at 2:19 pm

      Yay!! So glad you found this post!

      Reply

Leave a Reply Cancel reply

Your email address will not be published. Required fields are marked *

Contact Me

sarahmdorseydesigns{@}gmail{.}com

Stay Updated!

Get all the latest goods straight to your inbox!

This error message is only visible to WordPress admins

Error: No connected account.

Please go to the Instagram Feed settings page to connect an account.

Must Reads

Custom Peg Board + DIY Circle Art | FrogTape

Custom Peg Board + DIY Circle Art | FrogTape

Main Level Refresh with The Home Depot

Main Level Refresh with The Home Depot

Sponsor

2016 Daily Simplified Planner

Popular Projects

Dining Room Update | Chippendale Chairs + Renter Friendly Accent Wall

Dining Room Update | Chippendale Chairs + Renter Friendly Accent Wall

March 12, 2015 By Sarah 16 Comments

DIY Tufted Headboard with Nailhead and Wings | Bob Vila Thumbs Up Competition

DIY Tufted Headboard with Nailhead and Wings | Bob Vila Thumbs Up Competition

September 3, 2014 By Sarah 14 Comments

Rattan Chair Makeover

Rattan Chair Makeover

April 14, 2014 By Sarah 13 Comments

Chartreuse and White Caning Chair Finished!

Chartreuse and White Caning Chair Finished!

August 28, 2012 By Sarah 23 Comments

Large Black and White Abstract Art for the Office

Large Black and White Abstract Art for the Office

August 5, 2013 By Sarah 30 Comments

  • DIY TUTORIALS
    • design + build
    • furniture redo
    • diy in 1 hour or less
  • free printable
  • friday favorites

Disclosure

Occasionally, affiliate links are used when they are available. I do earn a small commission when items are purchased using those links. As always, I only link to things that I truly love. I also link to items that I love when an affiliate link is not available. Thanks so much!

  • Home
  • About
  • Services
  • Shop

Copyright © 2025 Dorsey Designs

MENU
  • Home
  • About
  • Services
  • Shop