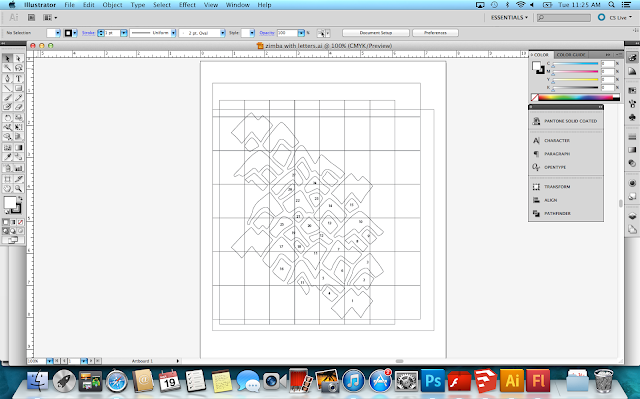
We calculated the repeat at about 27″ wide and 32″ high, recreated the shapes in Illustrator, printed it on 8.5×11 sheets of paper and then taped them together. Having additional sections of the repeat is important when lining it up (the more the better, I wish I would of made a few more sections)!
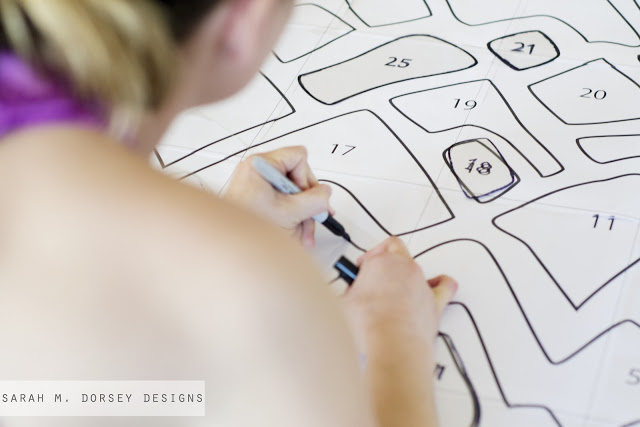
I created a PDF of the pattern to be printed on 8.5×11 paper. Print the sheets, line them up and tape together. I numbered each sheet on the upper left corner, but you may want to cover that up once you start laying out the pattern to avoid mixing them up with the stencil numbers. I’d recommend taping paper to a table and then taping the print out to the paper to avoid them slipping around. Download available HERE
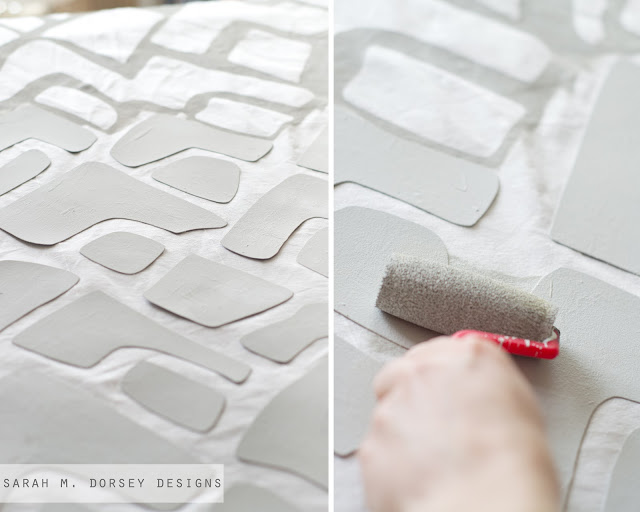
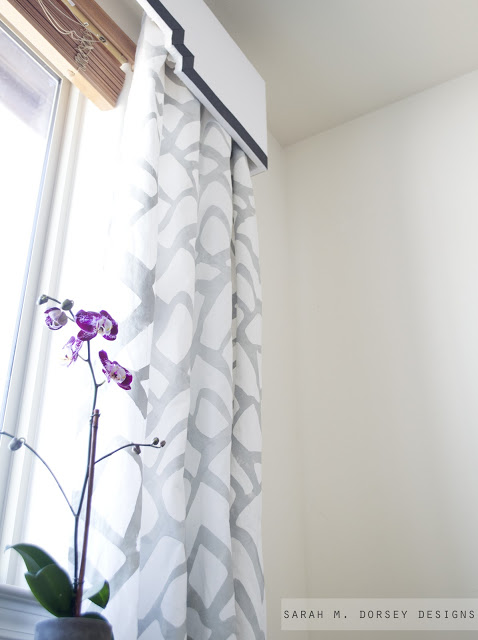
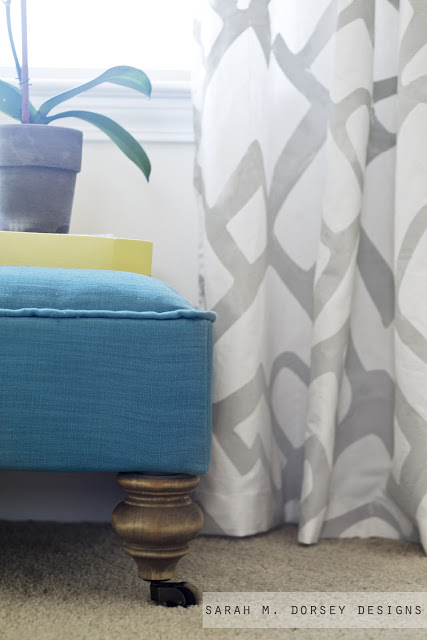
Double stick tape was placed on the back of the stencil pieces. The panel was centered and placed on top of the print out. The drapery panel was semi translucent so I could see the pattern underneath to line it up, a must for this project! Then I used a small foam roller to paint … a lot! Once done with an area, I moved the panel and replaced the stencil, lining it up from underneath.
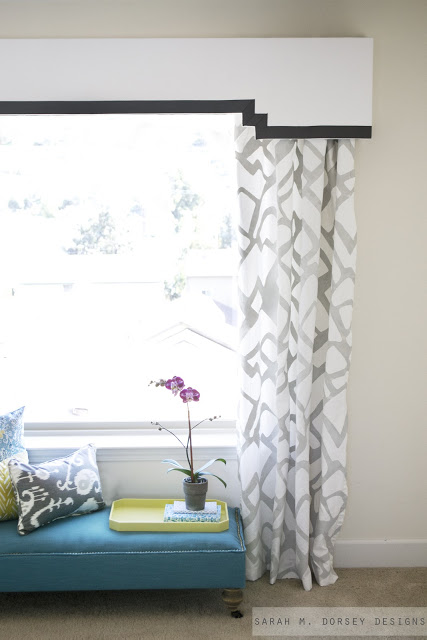
Each panel took about 2.5 hours to stencil. Four drapery panels would of been about $900 in fabric, this cost about $50, definitely worth it in my opinion!
The ottoman tutorial tomorrow, I used a few new materials to cut costs, so I’m excited to share 🙂
I hope you enjoyed! I’m off to work on our paint themed project! Wish me luck!

Wow, the drapes look great and I love the color of the ottoman.
Thanks so much Ashley!! 🙂
Great job and gorgeous. (I voted for it!) Excited to see the ottoman details, and your paint project!
Hi Sarah, Thank you!! 🙂
Wahoo! I'm two for two. 🙂 They really do look amazing!
Thanks so much for voting!! 🙂
I totally guessed right and voted for you! Love the ottoman and the curtains look awesome!
Thanks so much for voting Nicole!! 🙂
I was right again. Woot woot!
Can I ask where you got your gray ikat pillow? I some at Marshall's the other day that were very similar. Think I may run back out and get them.
~Mara
Thanks so much for voting! 🙂 It is from Marshalls, I've been loving their selection recently!
I knew it! Conrats! They look awesome:)
Thanks Bobi! 🙂
I knew it again and that's the one I voted for because I love it.
Looks beautiful. I hope you get 1st this time.
The nester had this picture on her blog the other day!
Yes! Thanks for voting!! 🙂
Love both the ottoman and the drapes! I just wish I were as crafty as you!
Thanks so much Kimberly! 🙂
Love it all…and I guessed right, too, like a lot of others 🙂 Pretty excited for your source on those bench legs…they were the first thing I noticed and I showed my hubs who said something like, "uh, yeah, I guess they're nice," to which I replied something like, "WHAT?? You GUESS?? They are gorgeous, I can't wait to find out where they're from!"
haha, I was guessing that was the source you were asking for 🙂
http://www.amazon.com/Marseille-Bun-Foot-4-H-Hardwood/dp/B003BQHO72/ref=sr_1_4?ie=UTF8&qid=1363802747&sr=8-4&keywords=bun+foot
and the casters
http://www.amazon.com/gp/product/B008NC6GJ6/ref=oh_details_o00_s00_i00?ie=UTF8&psc=1
It made the ottoman more expensive, but I think worth it!
Luckily we were planning on building it already, so we had them on hand!
I'm IN LOVE with your project! I've been eyeing the Zimba fabric for drapes as well but the price is killer. How well did your stencil hold up? Any bleed through on the IKEA panels? I don't think I'm brave enough to attempt this but I just might try 🙂
Hi Caitlin! Thanks so much! Good questions! The stencil held up really well, I stuck a few new pieces of double stick tape as I went so that they would stay better. The paint did bleed through the panels, you could line them if you would like. Also, I did do two coats on most of it (I ran out of time, so I'll go back and finish the rest later!)
THis may be a silly comment, How did you know what the pattern repeat and actual design was? Did you get a sample of the fabric and copy or are you that skilled?
Hi Kathryn! I based my design from the image on Schumacher's website, I imported it into Illustrator and drew from the image. I then could enlarge it so that it was the scale that I wanted 🙂
This is fantastic! Are you going to do a tutorial on the pelmet covering the top of the curtains? Would love to see how you did that! Cheers to you!
I have one planned for tomorrow 🙂
Simply fab!!! Great job Sarah 🙂
Thanks auralee! 🙂
These.Are.Gorgeous!!! I've seen a lot of other ones stenciled, but these are by far my favorite!
Wow! I am impressed. I really love the curtains and the bench.
Thanks Rhonda! 🙂
Beautiful! Turned out perfect!
Would LOVE to know about the Valance, that's gorgeous too! Did you make that also?
Thanks for the tutorial on the drapes!
Hi Diane! Thank you! 🙂 Here is the link: http://sarahmdorseydesigns.blogspot.com/2013/03/custom-cornice-for-draperies.html
Hi! Since I dont have Illustrator how would one lay out the pattern? Will you print the pattern off?
Thanks,
Marlene
Hi Marlene, I just added a PDF file for the stencil to the post (underneath the second photo) Thanks!!
Thank you!
Marlene
Gorgeous … thank you for sharing. Now we just need to head out to IKEA, if only it closes to where we live 🙂
I've been working on a black/white/blue scheme in my living room. I don't NEED drapes because our house is hidden behind trees, but I WANT them so desperately. My husband is too in love with our Craftsman/Shaker trimwork to cover it with drapes. Still, I am hoping if I bug him about it enough, he'll acquiesce. My second problem is finding the right fabric. What I love about Schumacher Zimba is that it's a simple geometric and it has more flow than a traditional stripe. Of course, the price is more than I would be able to spend, so I am smitten with your DIY pattern. Thank you for doing the work for the rest of us! Now i I can just convince The Mr. to let me go for it ….
Draperies can add SO much! Maybe compromise with sheers 🙂
I LOVE this!!! Thank you SO much for sharing the stencil! I was wondering what color the charcoal paint is that you used? I'm so excited to try this!
Hey Sarah! I'm going to try to do this for curtains in my dining room but it seems that page #13 on the PDF is missing. Or else maybe I'm "missing" something? LOL 🙂
Hey! I check the file and it looks like I accidentally had two pages in twice, I removed one and added the correct one. Hopefully this takes care of it! Thanks!
Those curtains are amazing! Great job. 🙂
I absolutely LOVE your blog! You are a true DIY'fer and I am so inspired by all your projects and your beautiful homes. I can't wait to start tackling some of my own furniture projects. You make it all look so do-able, especially to someone like me who is still new to remaking over vintage furniture.
Thank you!!! 🙂
Hi Sarah, do you know if anyone’s used your stencil to do walls? Any thoughts on whether/how to do so?
Hi Betsy! I’ve used all my stencils on walls with good luck. Let me know if you have a specific question 🙂 Thanks!