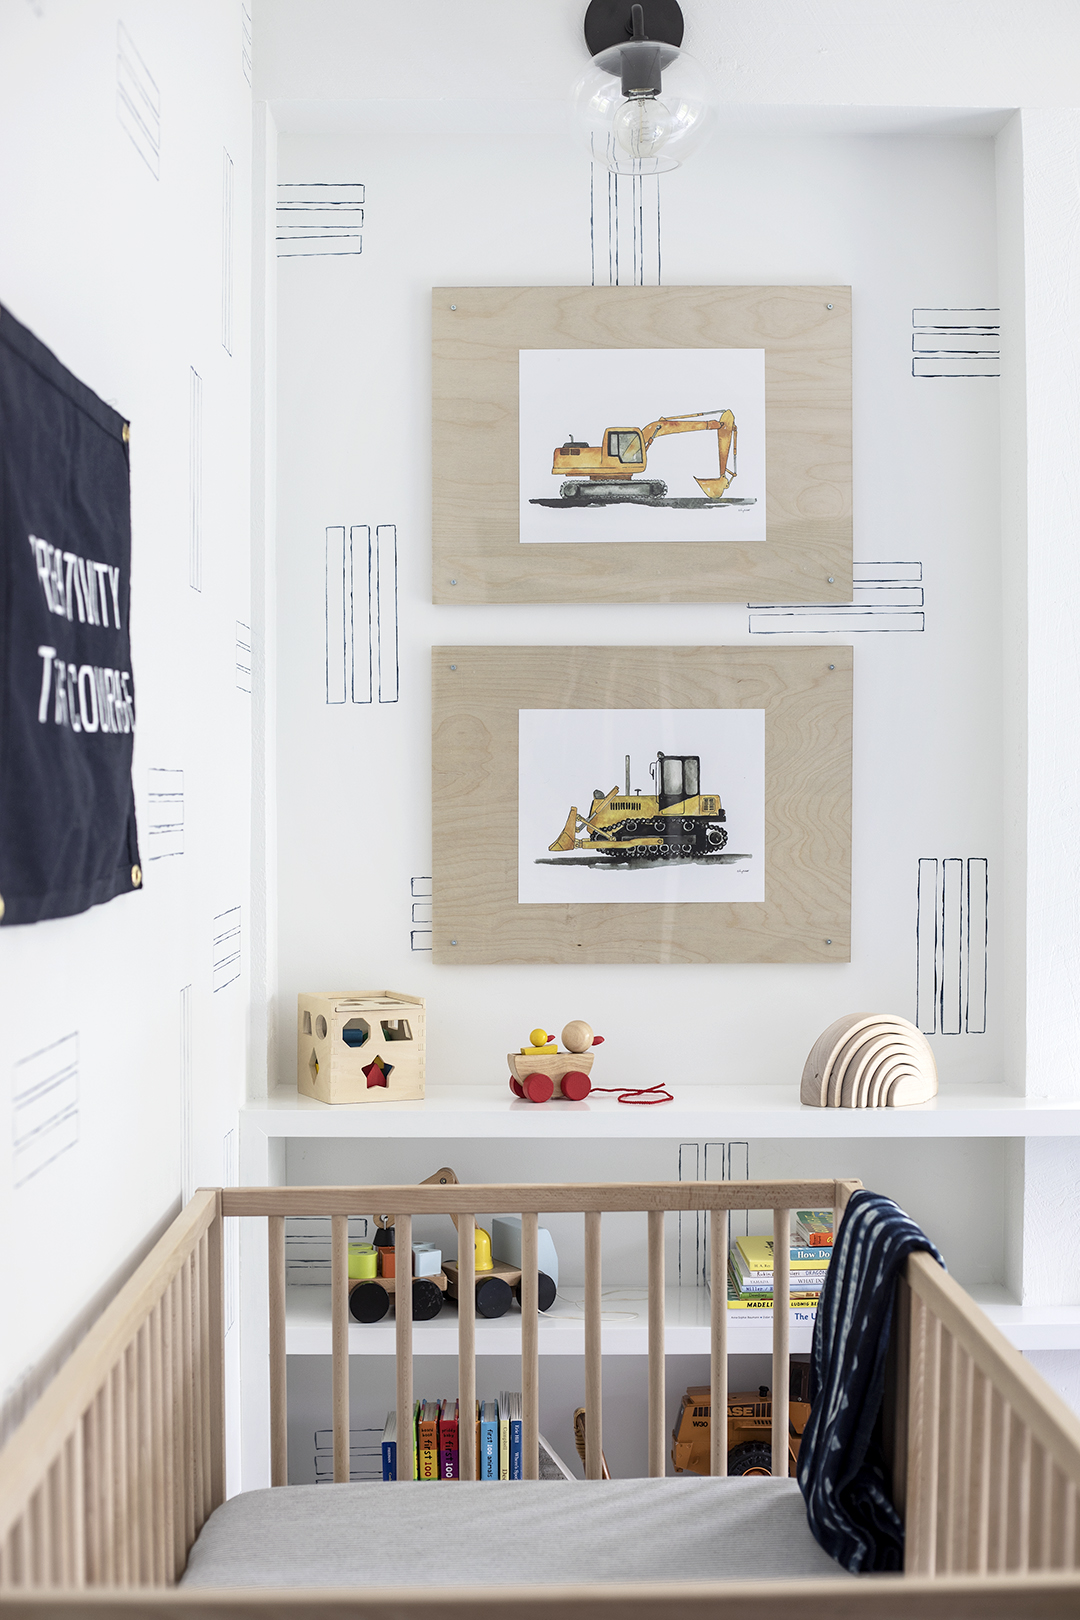
Hi! Thanks for your positive feedback last week for the reveal of our son’s nursery!! I was so happy with how this space turned out. We all LOVE being in here! It’s the new favorite room of the house. Today, I’m sharing a tutorial for how we made these DIY frames from Birch plywood and lucite. We had all the supplies on hand, maybe you do too! Making these FREE for us! Sources listed at the bottom of the post.
You will need:
1/2″ Birch plywood (we needed enough for (4) 16″ x 20″ pieces) (Our prints are 11″x14″) Plywood is from a local lumbar mill, but any Home Depot, etc. will have as well
Clear lucite (1/16″ thickness – or any comparable thickness will work) (we needed enough for (4) 16″ x 20″ pieces)
1 1/2″ FrogTape painter’s tape
Permanent marker
T Square
Track saw / Table saw
Drill (1/8″ drill bit) / Driver
1/2″ Cap Head Screws (4 per frame) (don’t use wood screws – that will potentially crack the lucite) (We used 3/4″ Kreg screws and cut the back, since that’s what we had on hand)
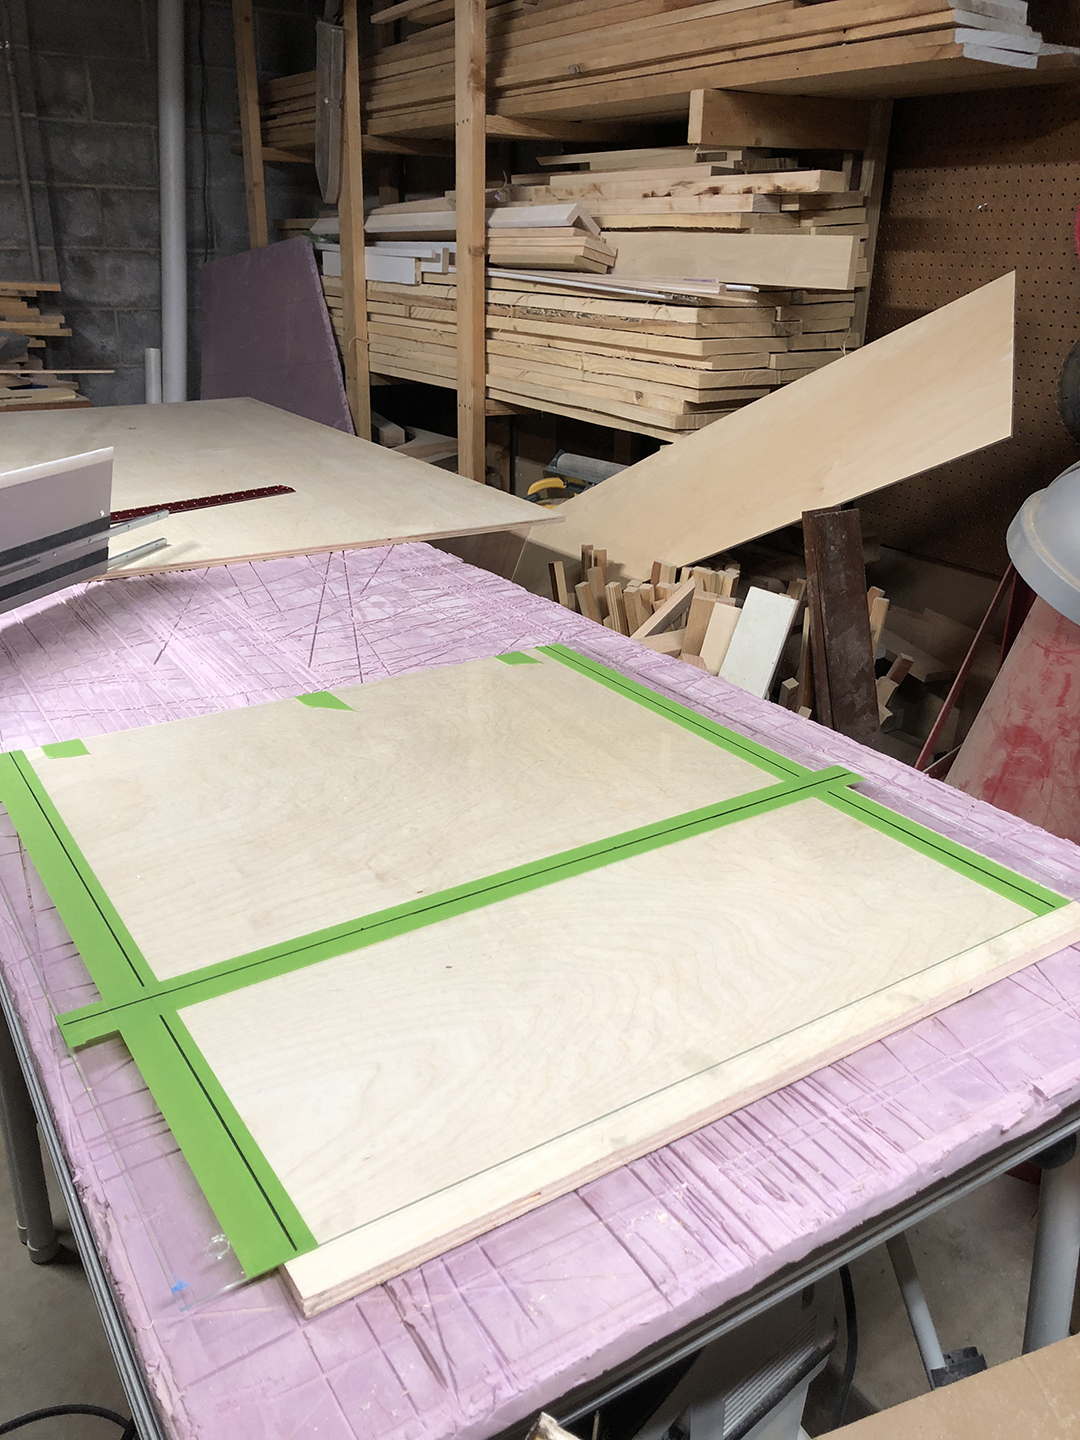
To get started, measure and mark desired frame size on painter’s tape on top of lucite. Using painter’s tape will allow you to mark the surface while protecting it. Apply 1 1/2″ FrogTape in the general location (exact measurement will happen next). With a T Square, and a permanent marker, draw a straight line on one end, the height (16″ for my frame) (or a little taller) of your frame. From that line, measure over the desired width of the frame (20″ for my frame) Repeat for the top and bottom of your frame.
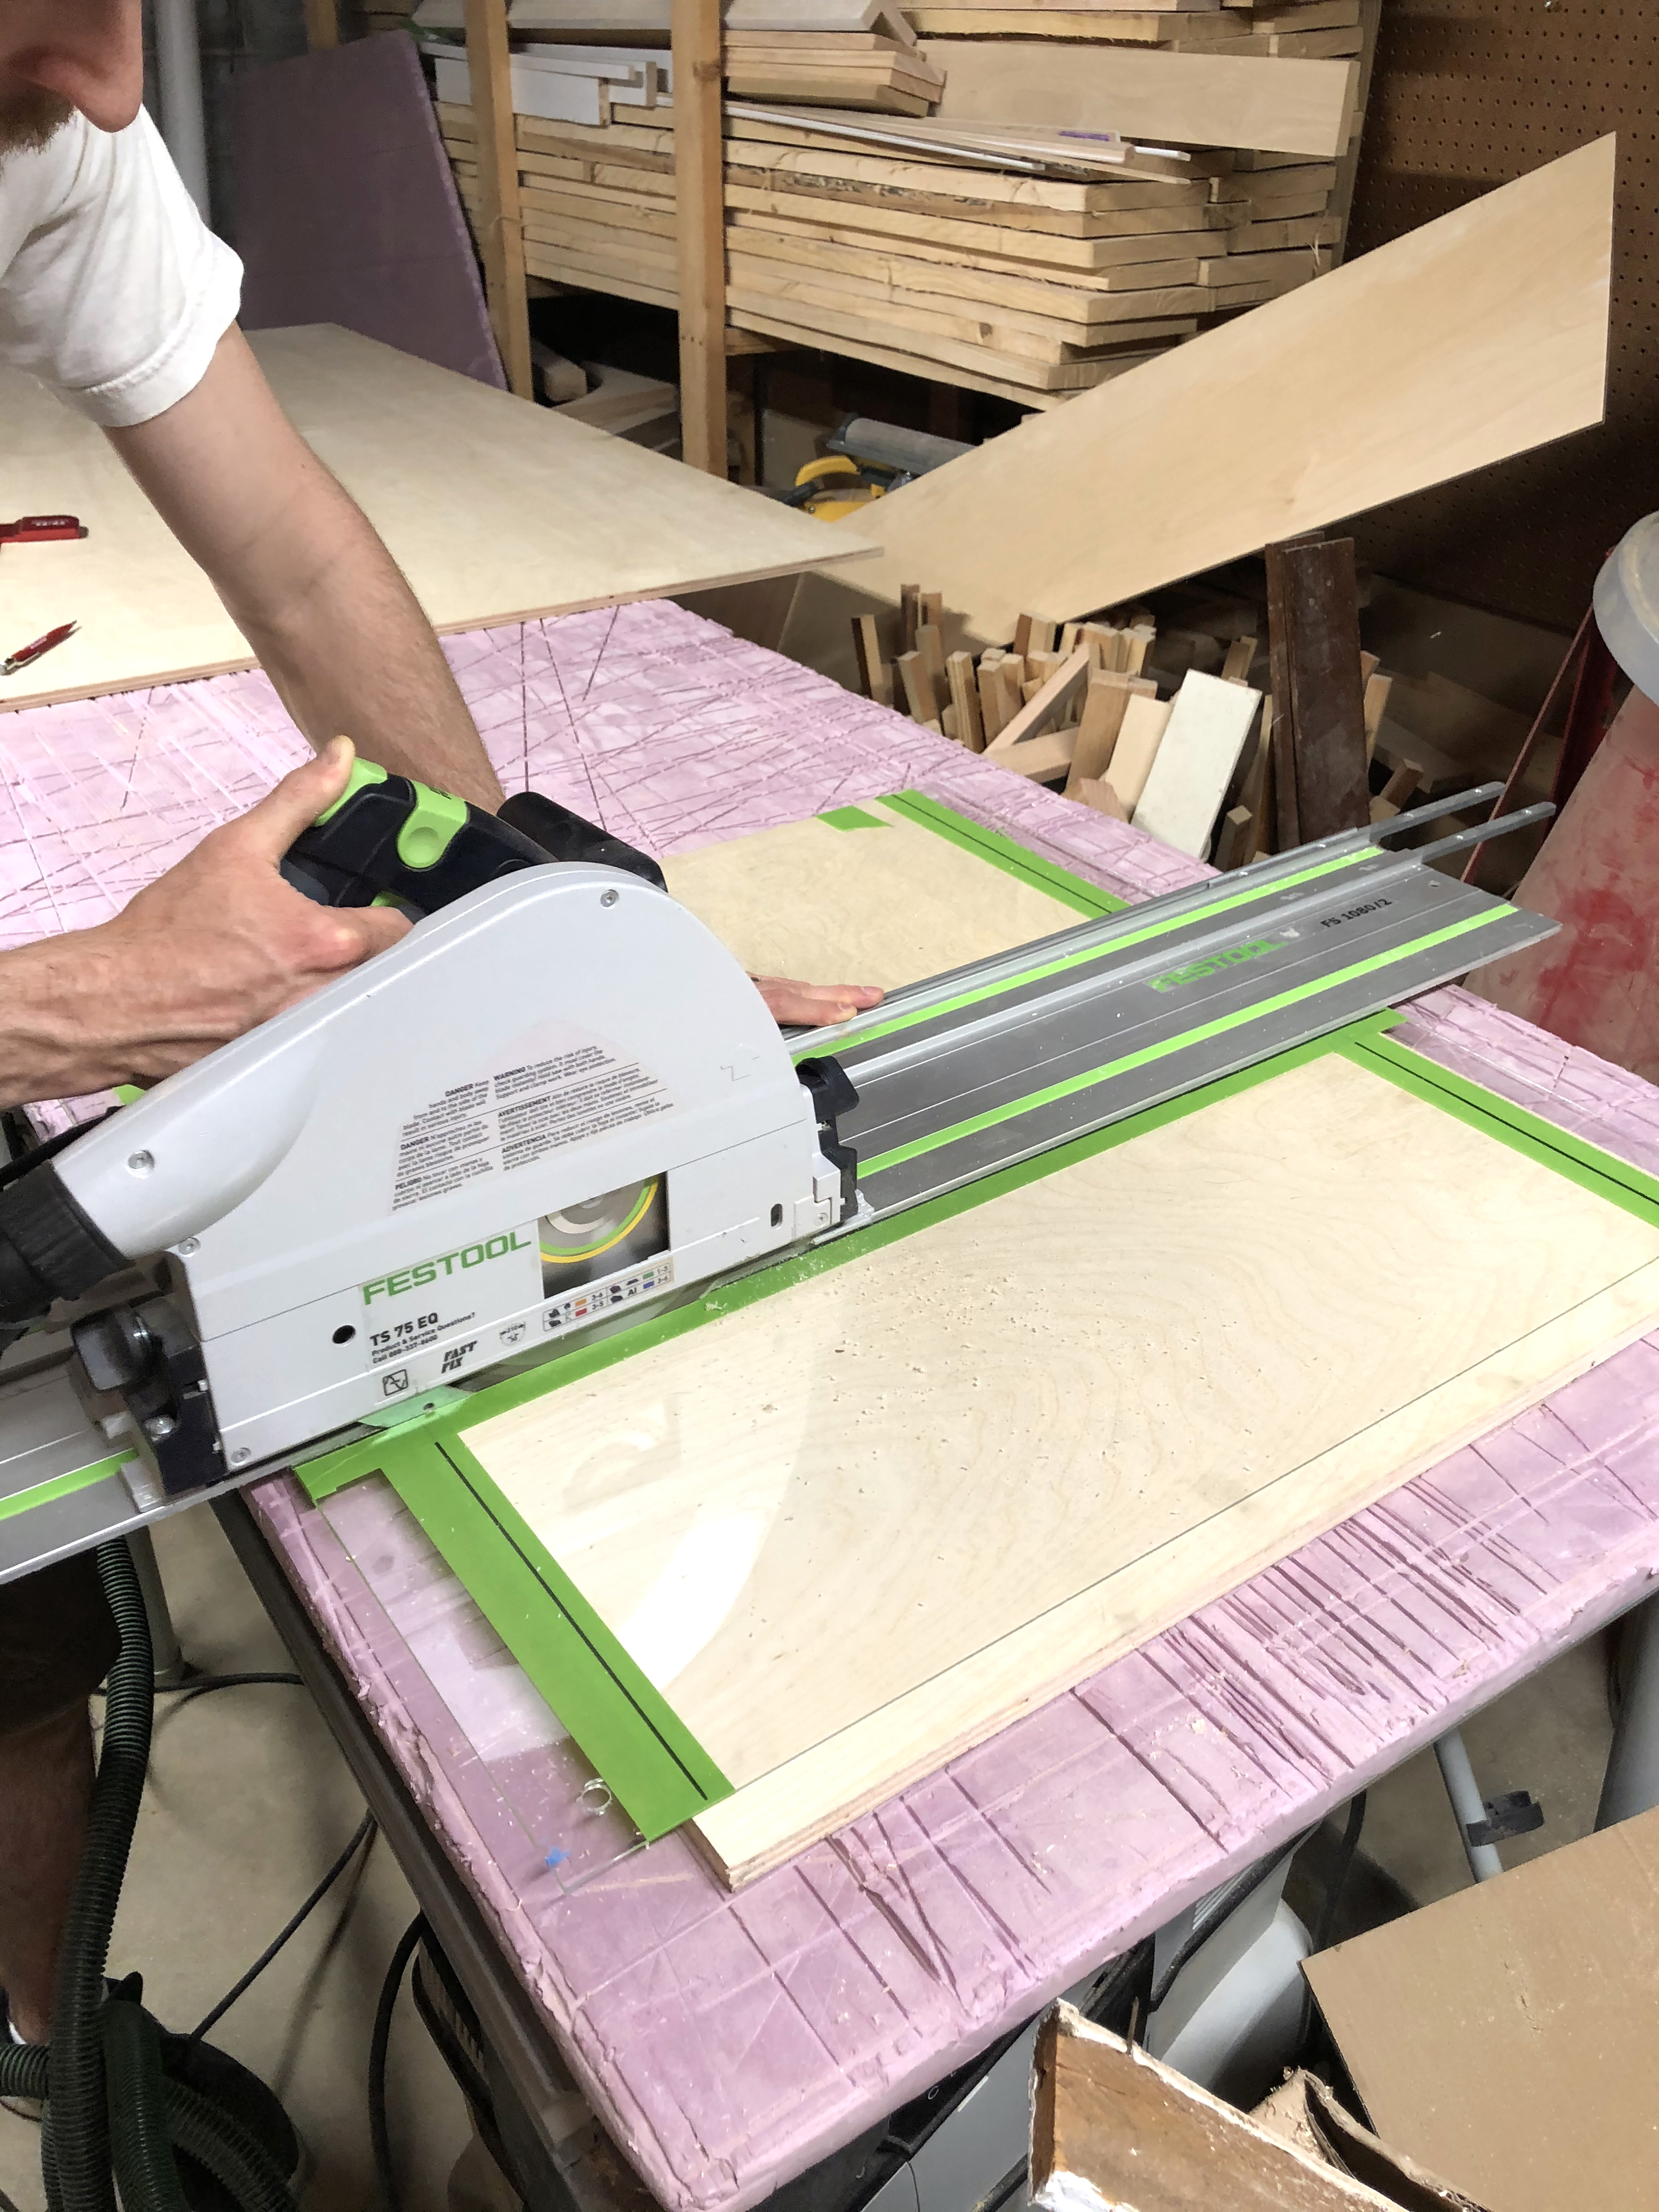
Once the frame size is marked, lay it on top of 1/2″ Birch plywood and cut to size. Use tape to hold the plywood and lucite together as you cut.
We used a track saw for these cuts, but a table saw will work as well. Be careful with the lucite, you want to use a fine blade, the tape helps protect the surface. We LOVE our track saw and use it for almost every project. It’s pricey, but worth it, if you love wood working.
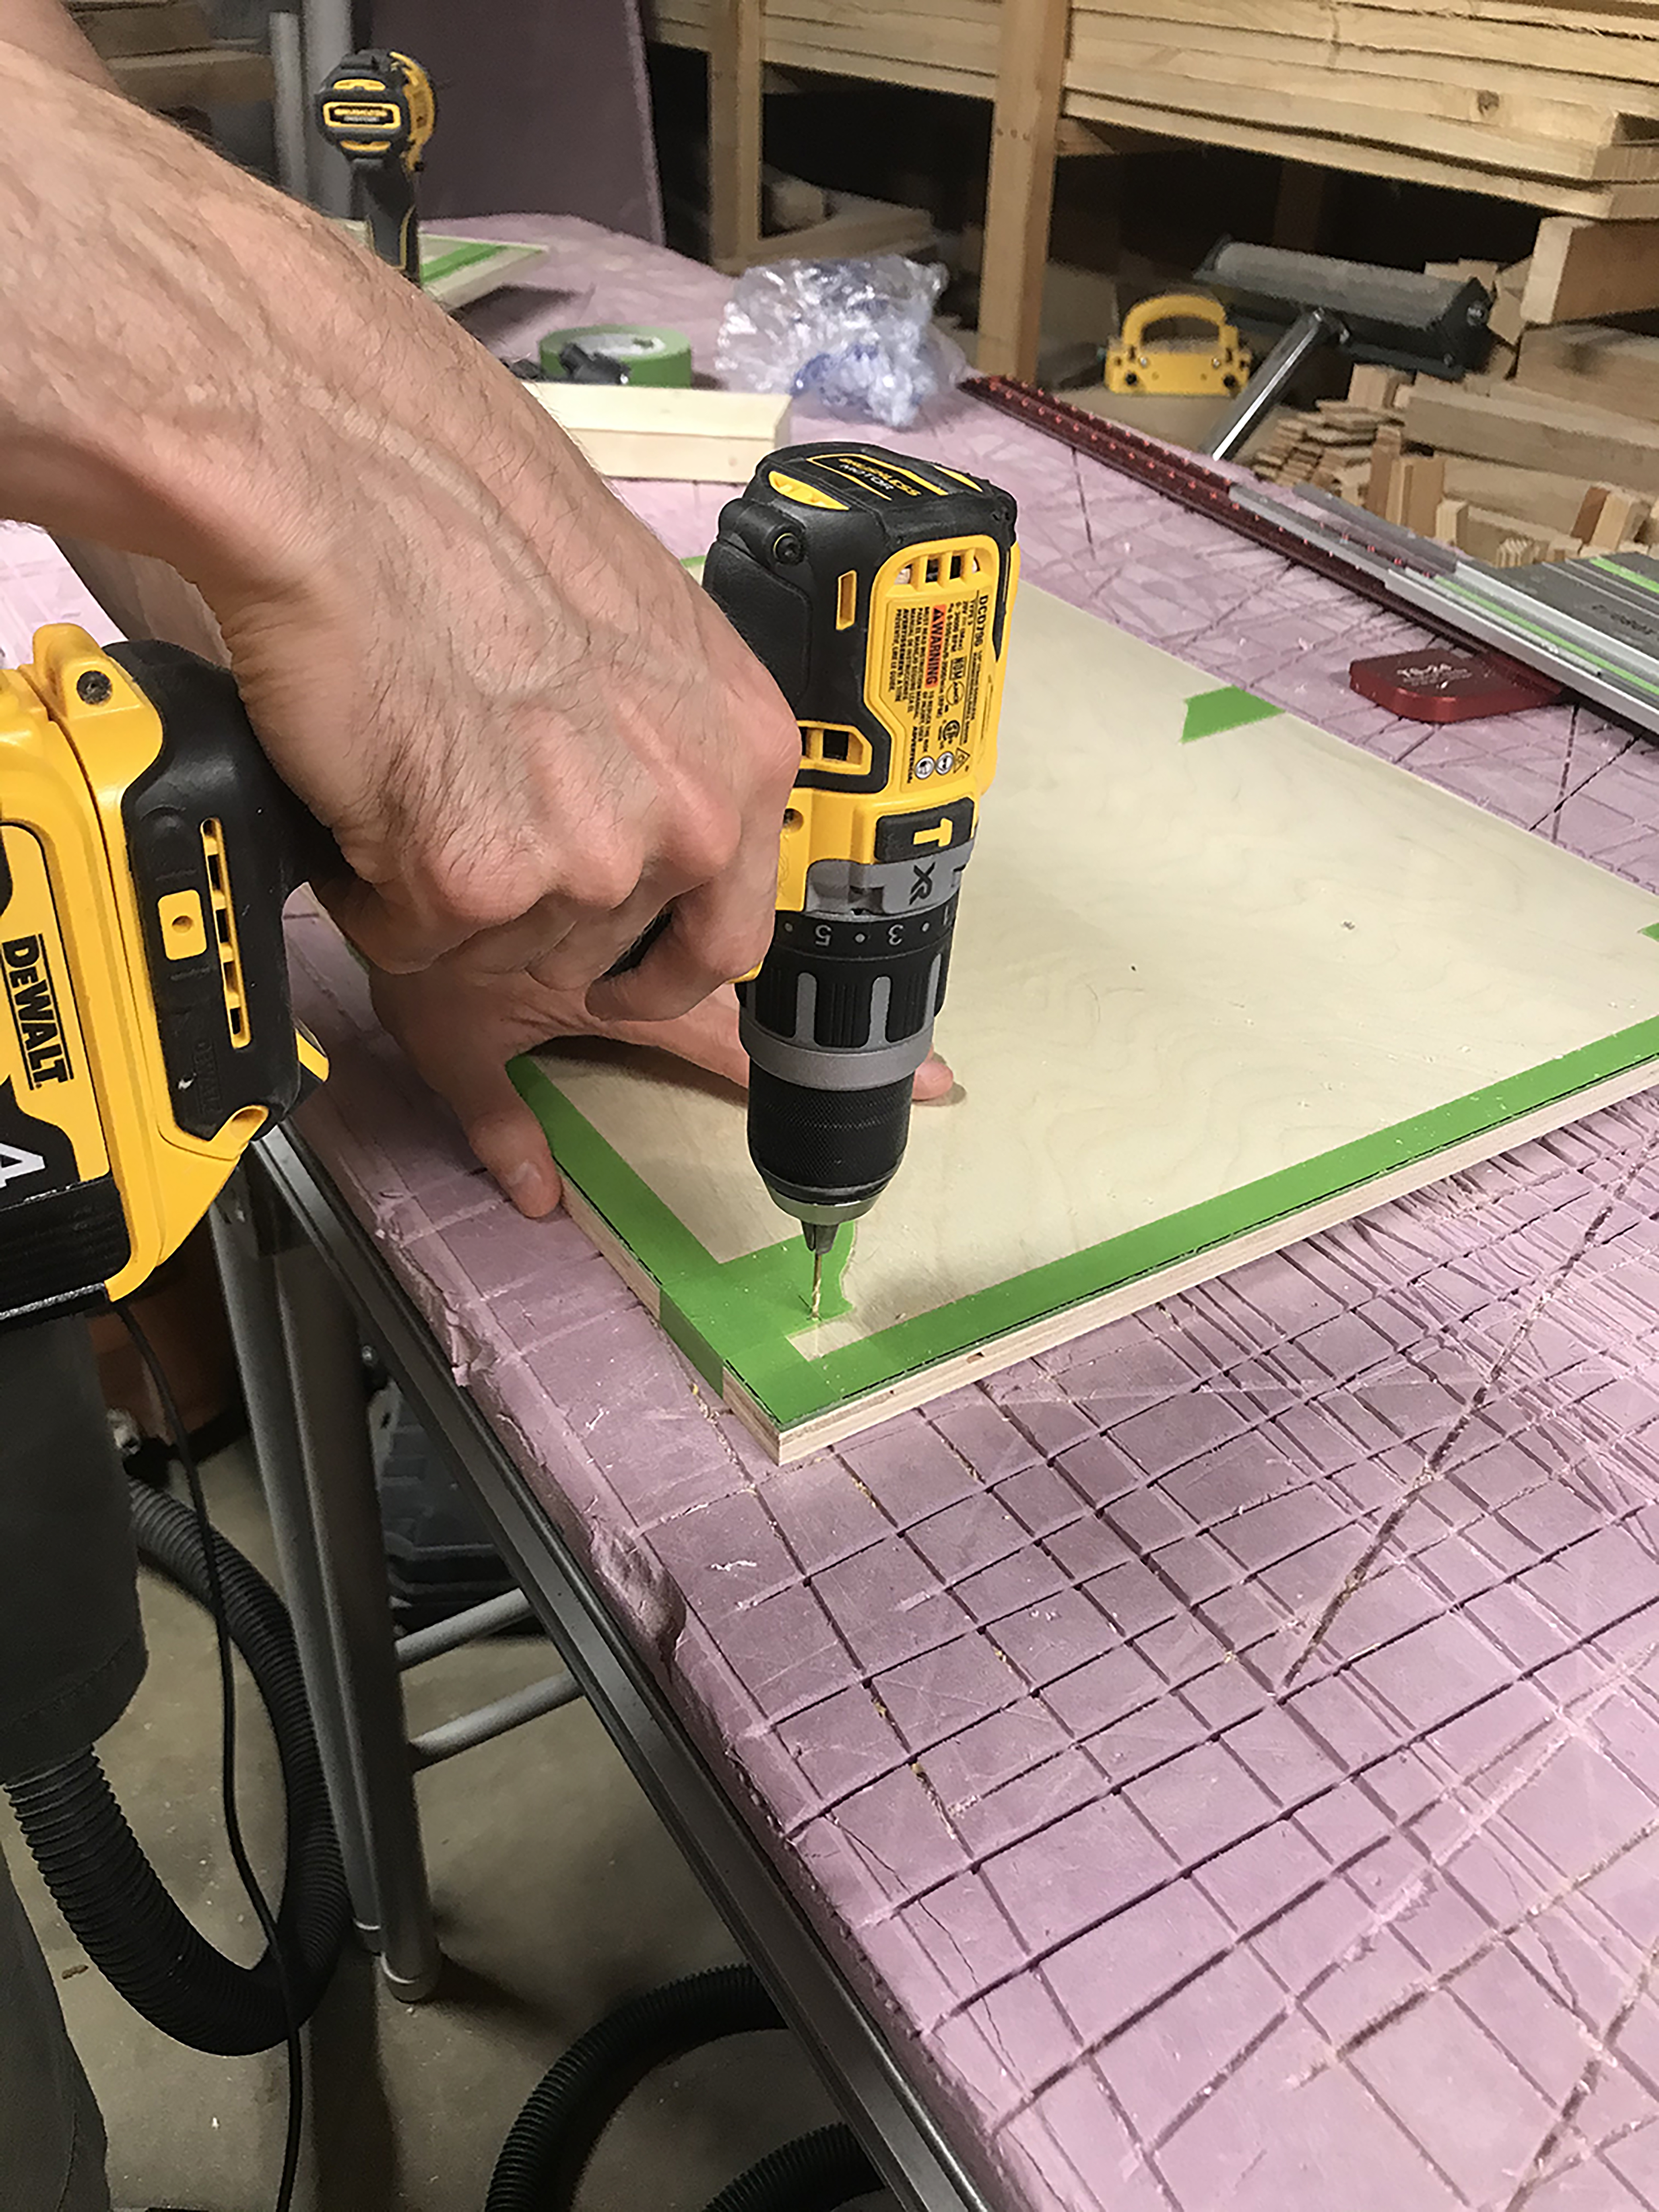
Once the wood and lucite are cut, measure and mark the holes for the screws. Ours are 1 1/4″ from each corner.
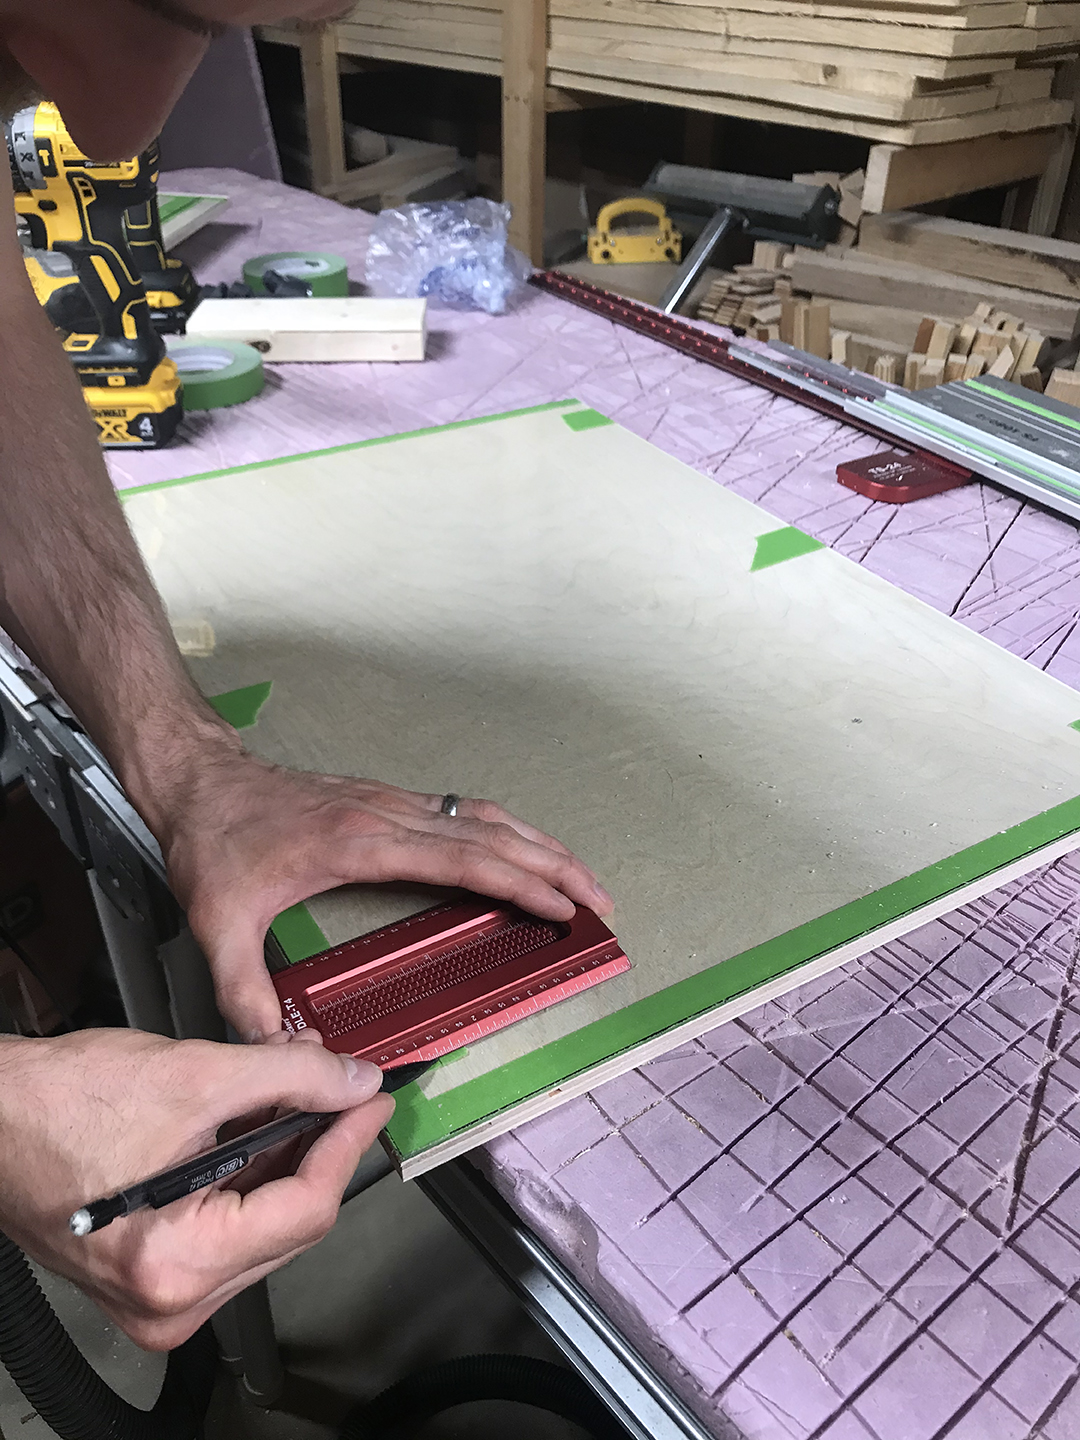
Pre drill the corner holes with 1/8″ drill bit.
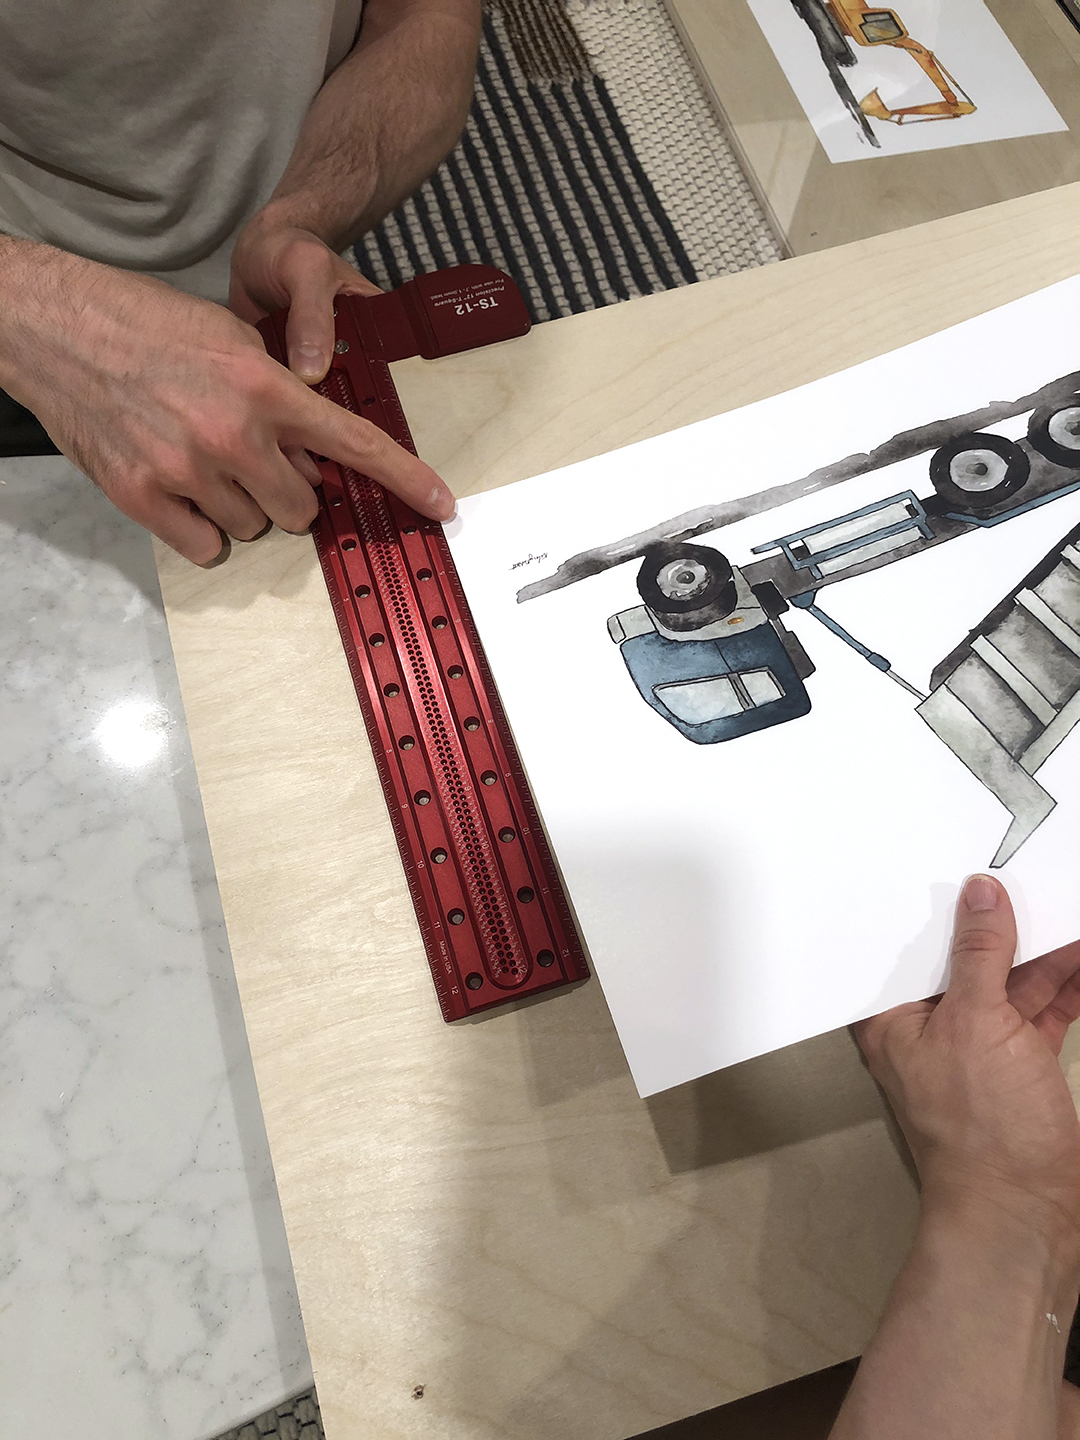
Clean the wood and plywood with a cloth and mount prints to plywood. Apply acid free double sided adhesive on the back of the print (We used double sized scrapbook adhesive circles). Measure center on the plywood (a T square works well for this) Secure print to plywood.
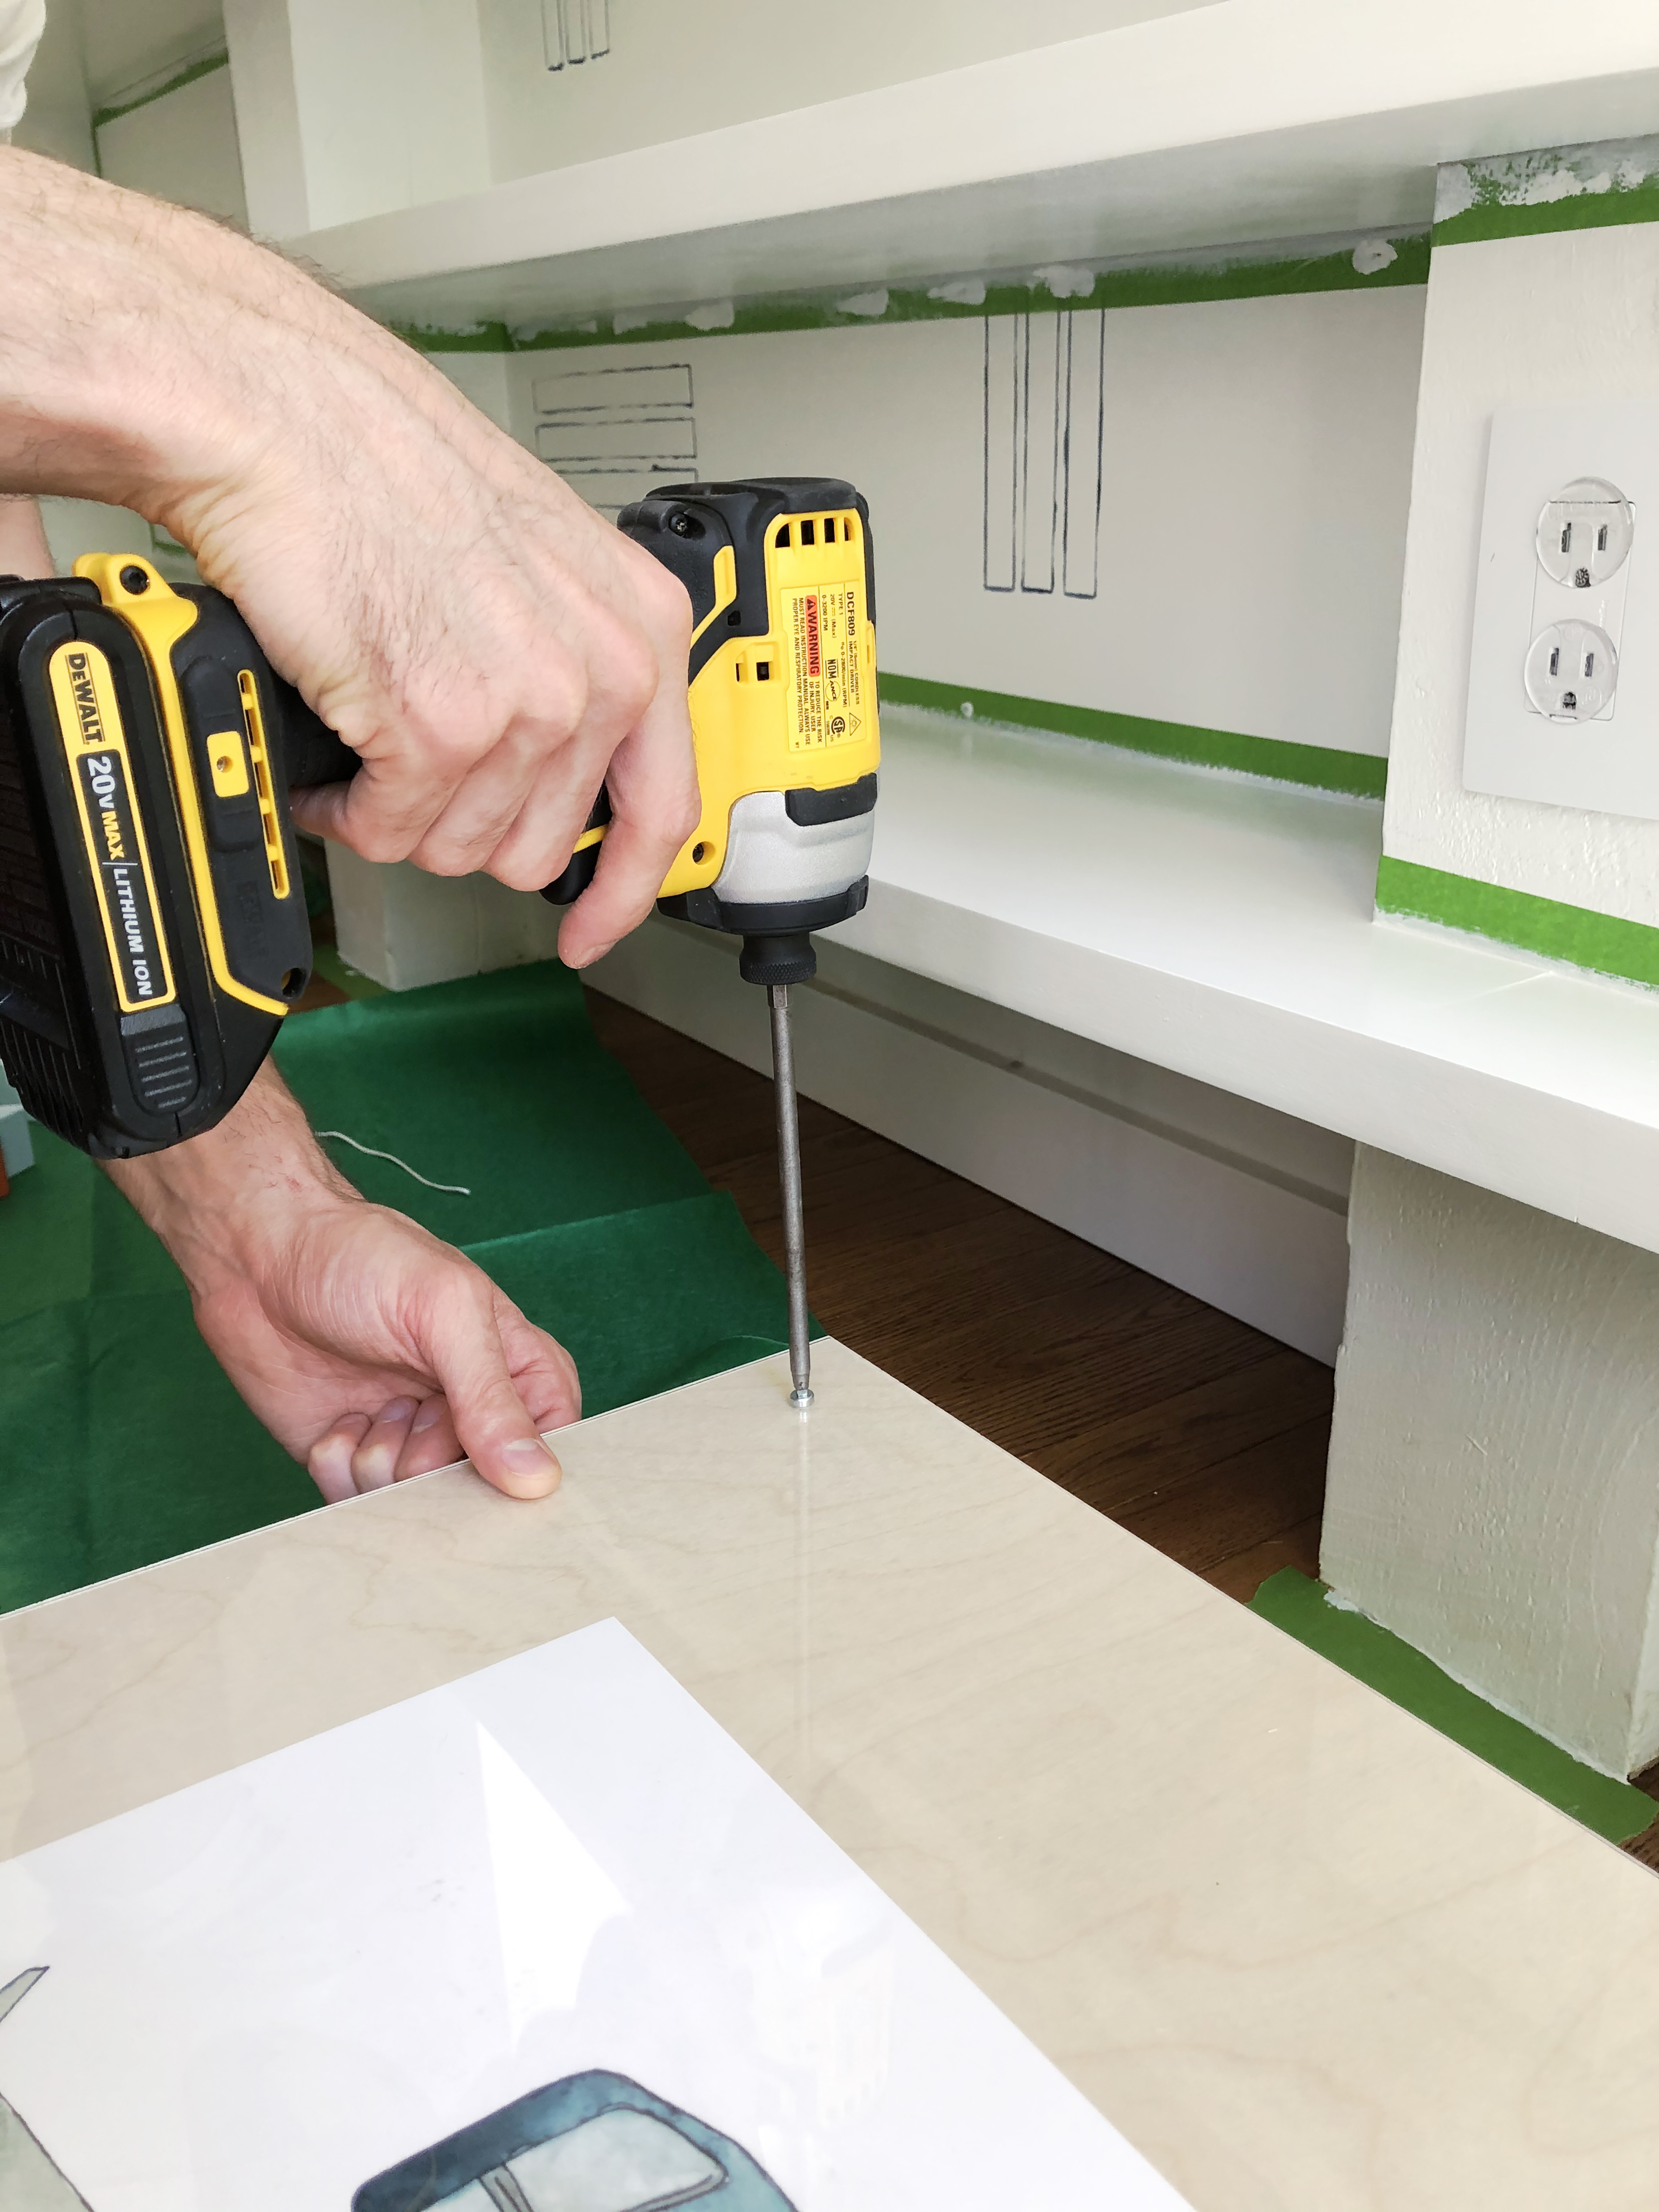
Place lucite on frame and secure four corners with 1/2″ cap head screws. Tighten gently, to avoid the lucite from cracking. With 1/16″ lucite and 1/2″ plywood, the screw will be secure, but not go all the way through.
On the back of the frame, mount hanging hardware of choice. We used (4) 3M picture hanging strips. We’ve had good luck with these, following the directions (you have to press firmly and let them set) and using extra strips, to ensure that they are secure. I like to account for double the weight. I would not use these for directly above a crib or anywhere where you are concerned about it potentially falling.
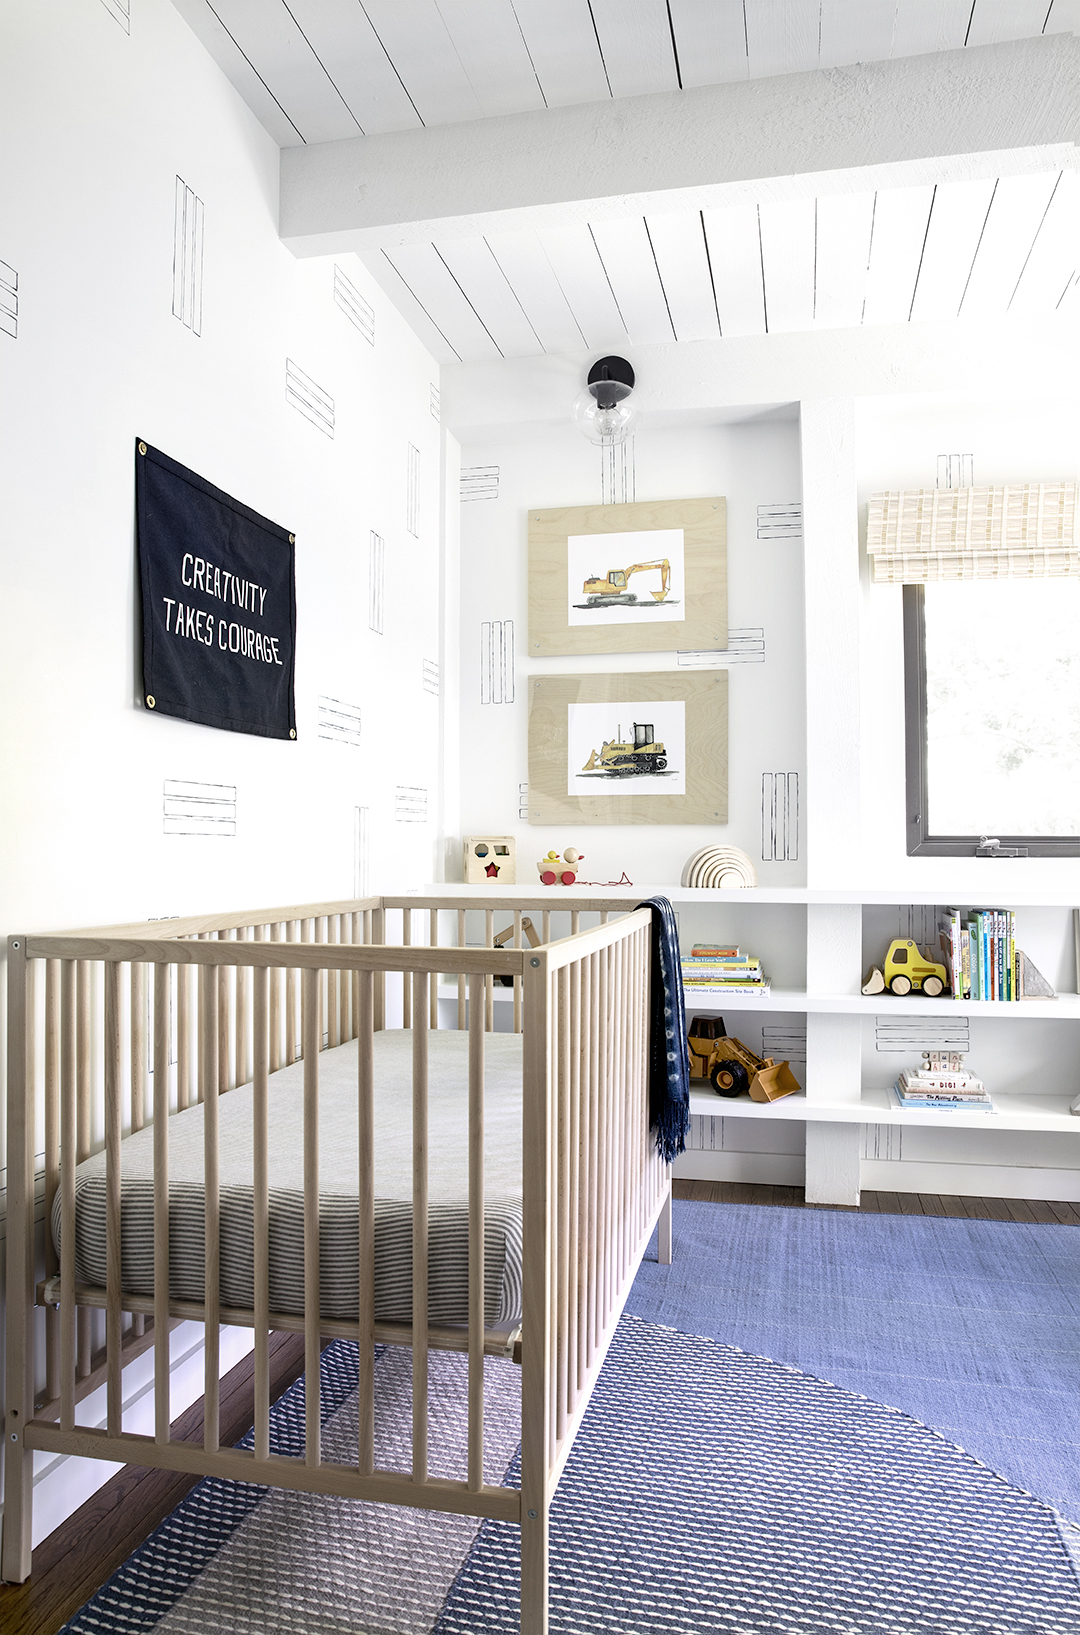

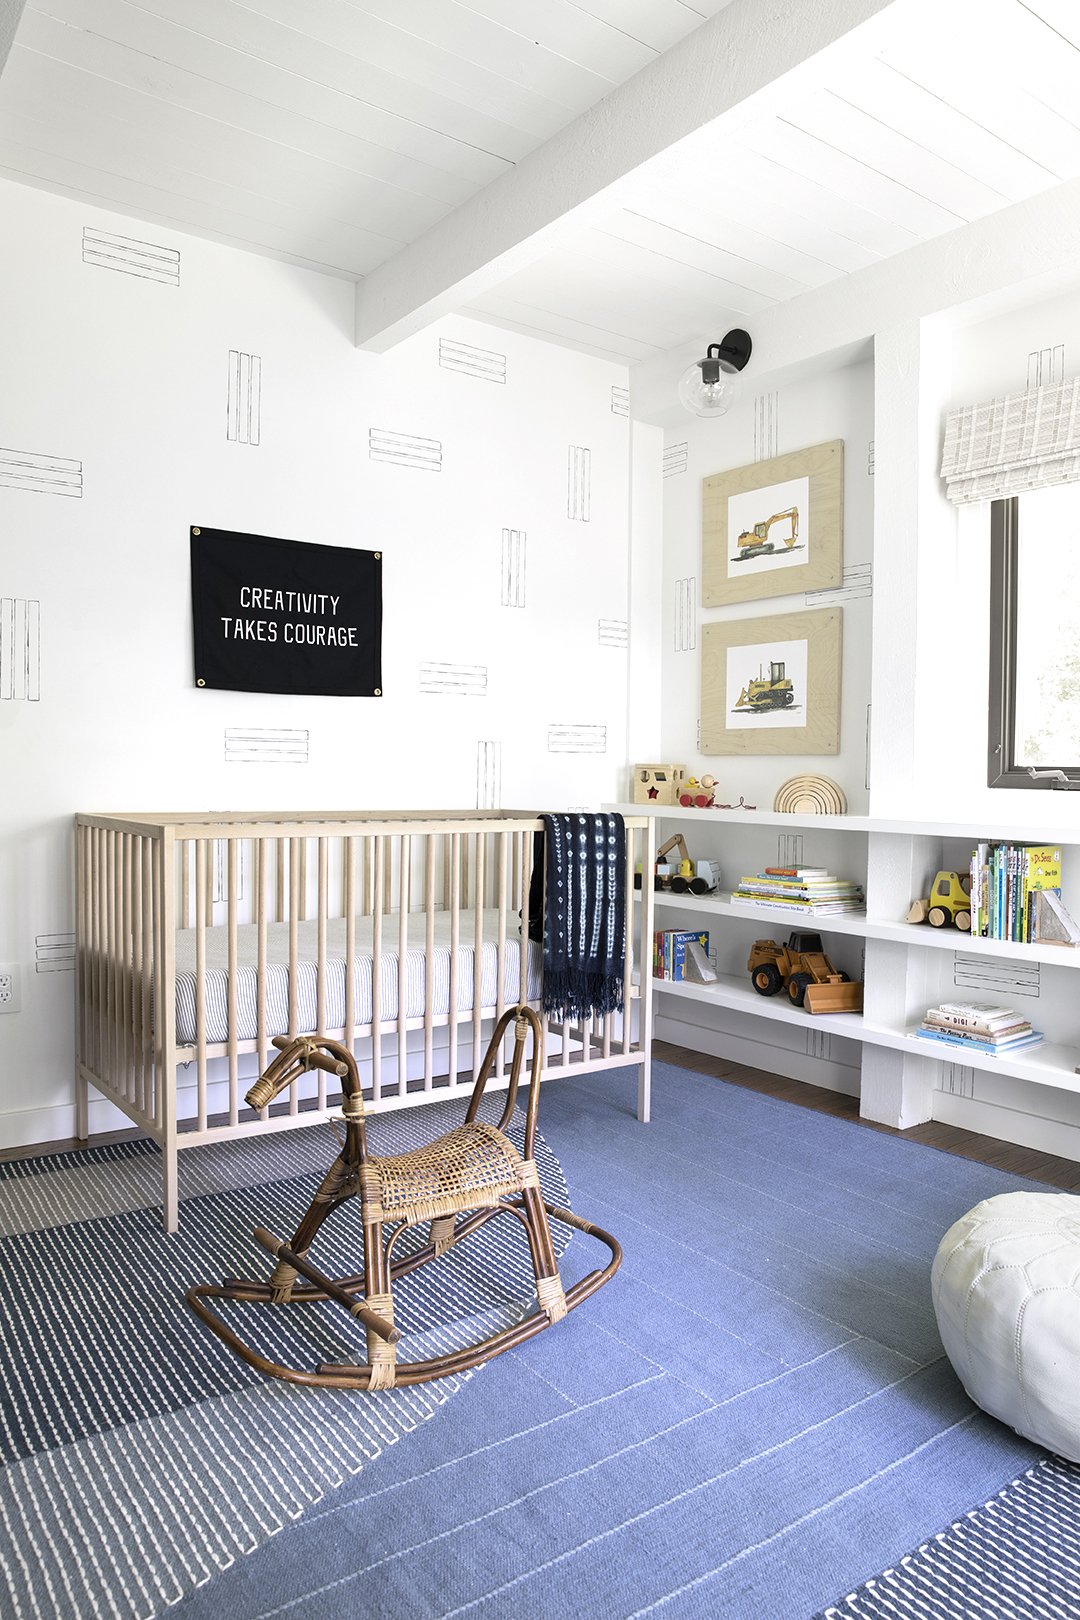
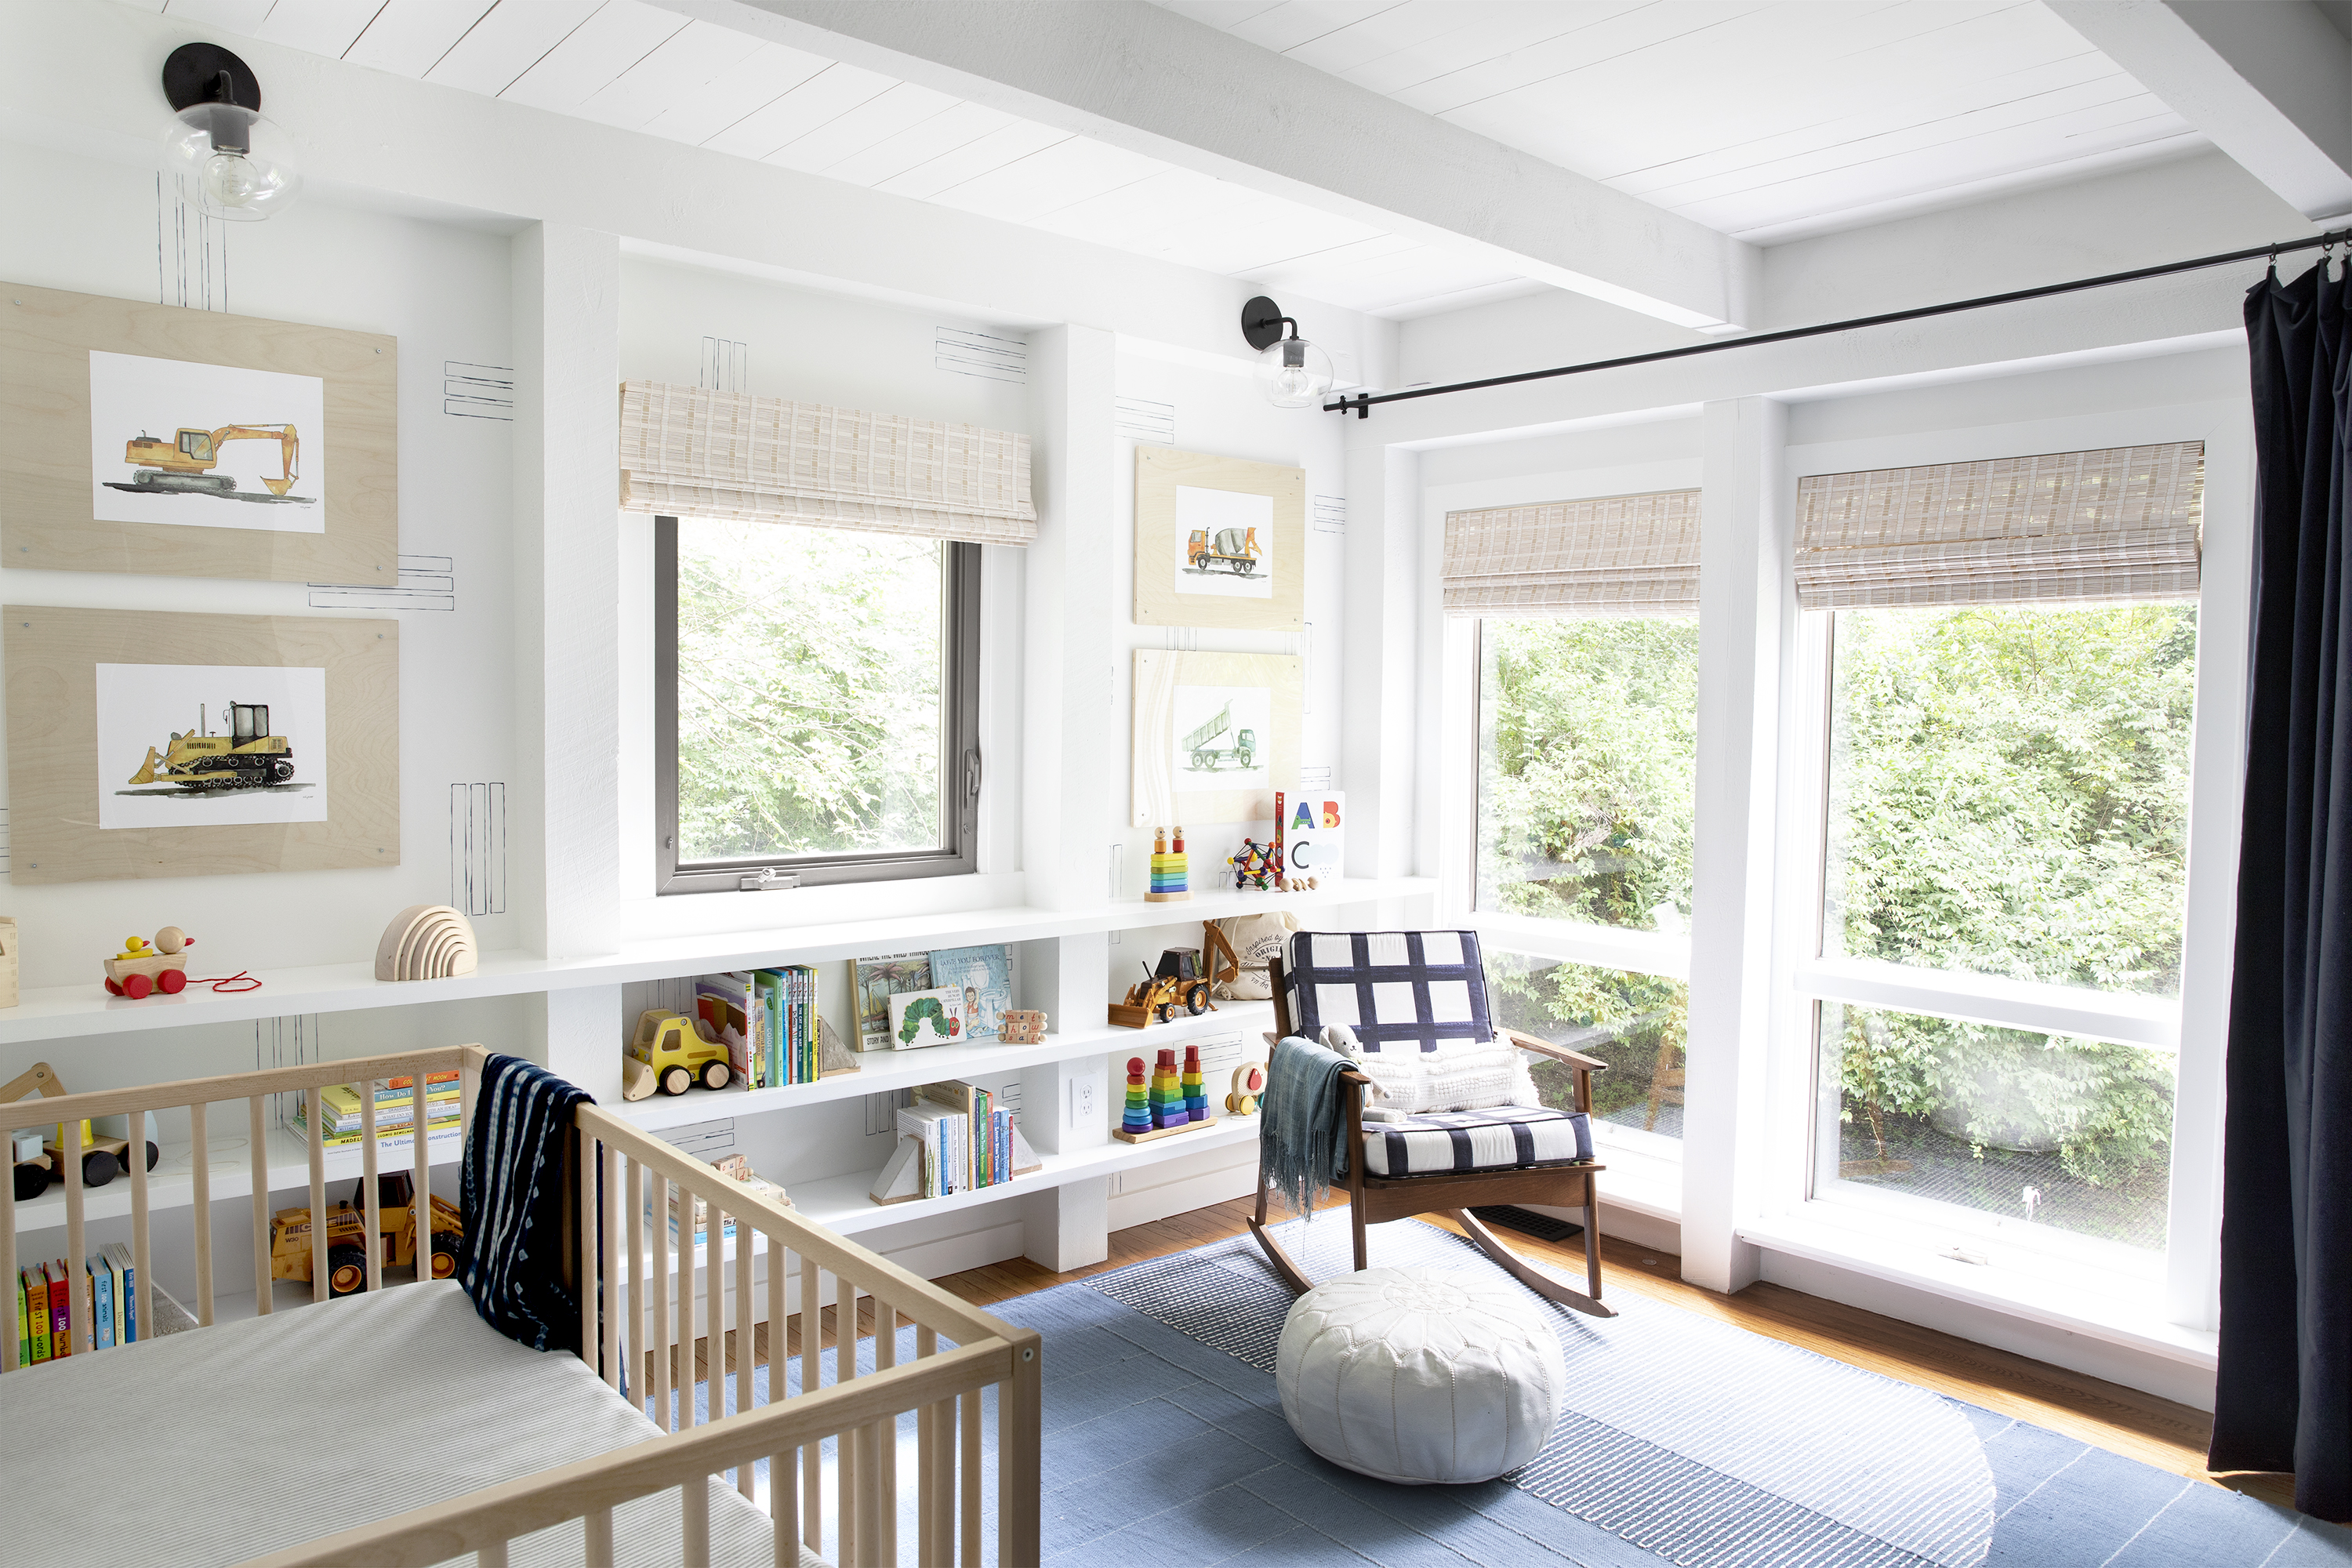
Construction prints are from THIS fabulous shop (prints are 11″x14″)
See THIS post for all other sources
Thanks for stopping by, let me know if you have any questions!
Leave a Reply