• Home
  • About
  • Services
  • Shop
    • Bloglovin
    • Email
    • Facebook
    • Instagram
    • Pinterest
    • Twitter

Dorsey Designs

DIY and Interiors by Sarah + David

  • Home Tour
  • DIY TUTORIALS
  • friday favorites
  • design + build
  • art

get the latest straight to your inbox

Chandelier Pendant with Drum Shade for Guest Room

Hi! Hope you all had a great labor day weekend! David’s brother was here, so we explored the coast and of course there was some DIY too! 
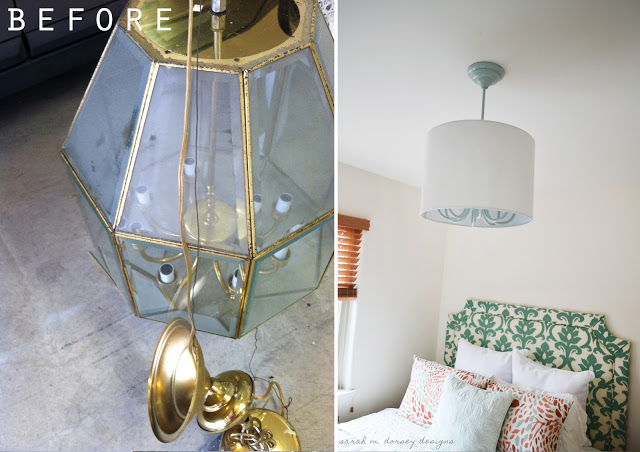
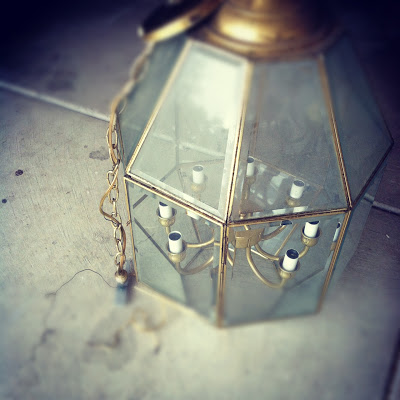
If you follow me on Instagram @sarahmdorseydesigns you might of seen this massive outdoor chandelier a few weeks ago. I spotted in the pile of freshly donated items at Habitat Restore, and after I asked how much, and heard $10 … I said sold!

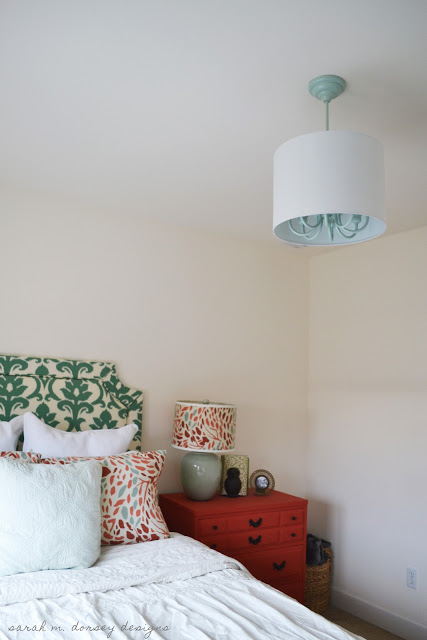
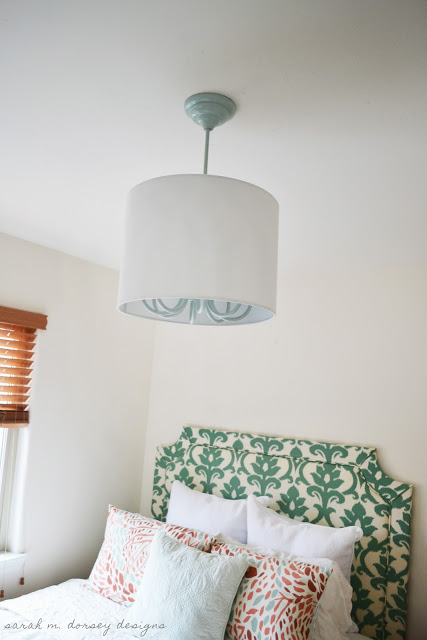
This weekend we finally got around to painting and installing it – I was inspired by the fabulous chandelier drum shade fixture at Young House Love!

We decided to install the rope fixture above the first landing on the stairs (more on that later) and the chandelier in the guest bedroom

The shade is 14″ from Lamps Plus that I purchased a year or so ago for another project.

After priming, we airbrushed the pendant with BM Bali, a green gray blue (I think Rustoleum Glacier Ice is similar, but I couldn’t find it in store)

The height that we wanted, it is completely constructed of parts from the left over chandelier (one advantage of buying a massive fixture, lots of parts!)

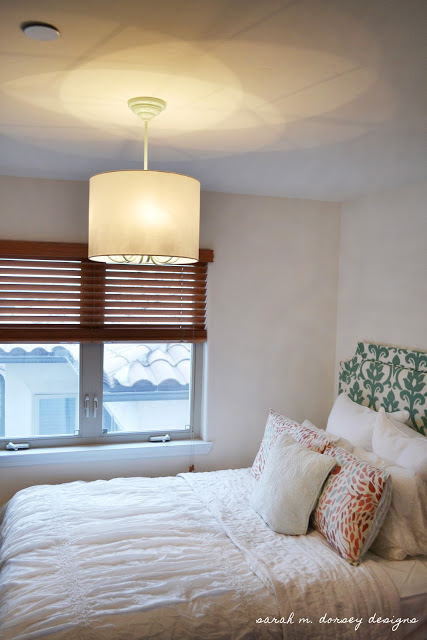
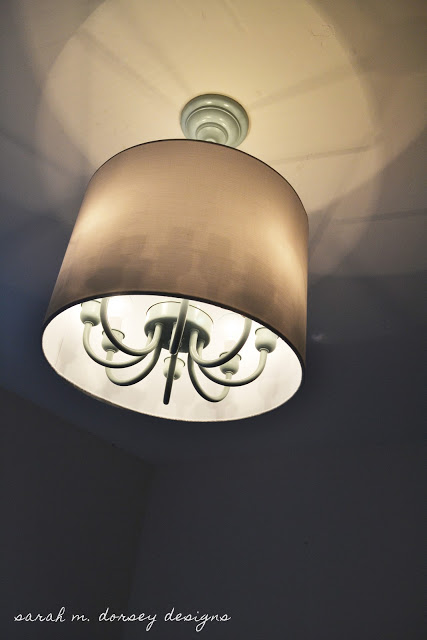
And a few with the lights on …

I love how the light is redirected on the ceiling

It currently has (4) 25 watts bulbs from the rope fixture, but I would like to find a lower wattage since it takes 8 total. So I am off to find those today!

There is about 2.5″ from the chandelier to the shade for air circulation!

and one last before and after …

I also have plans for the glass exterior … stay tuned to see if my idea works!

If anyone is interested, I will draw a diagram with the parts that we used to get the height, secure the shade, etc. Let me know 🙂
lamps// Uncategorized// Uncategorized9 Comments

Subscribe

get the latest straight to your inbox

« Big Sur and Long Weekend
Weekend in Photos: Labor Day »

Comments

  1. Jenna at Homeslice says

    September 4, 2012 at 10:02 pm

    Beautiful! I love the color you painted it..

    Reply
  2. Lisa Summerhays says

    September 6, 2012 at 12:25 am

    Fast improvement. Love your color choice!

    Reply
  3. Lisa Summerhays says

    September 6, 2012 at 12:28 am

    Vast, ha! Not sure if it was fast. 🙂

    I spotted a light just like that a few weeks ago at DI and past it by. Great eye to see beauty in someone else's junk.

    Reply
  4. Nora says

    September 7, 2012 at 8:32 pm

    I'd totally like to see the diagram. Its so pretty!

    Reply
  5. natalieshawn says

    September 16, 2012 at 3:38 pm

    i would love to see a diagram! i recently repainted and installed a chandy in my closet…but w/o the shade. I love the way yours looks!

    Reply
  6. Anonymous says

    October 19, 2012 at 1:25 am

    I would also like to see a diagram!!

    Reply
    • Sarah says

      October 19, 2012 at 1:29 am

      I actually made a post later, here you go! http://sarahmdorseydesigns.blogspot.com/2012/09/how-to-install-drum-shade-over.html

      Reply
  7. Anonymous says

    April 16, 2014 at 5:27 pm

    how did you remove the glass enclosure? I have a similar lamp in a tiffany shape – but the glass covering seems to attached to the chandelier

    Reply
    • Sarah says

      April 16, 2014 at 7:41 pm

      We used a screw driver to bend the metal around the glass panes .. it was a little time consuming, but it worked well. Some frames are tougher to bend than others, so it depends on your frame.

      Reply

Leave a Reply Cancel reply

Your email address will not be published. Required fields are marked *

Contact Me

sarahmdorseydesigns{@}gmail{.}com

Stay Updated!

Get all the latest goods straight to your inbox!

This error message is only visible to WordPress admins

Error: No connected account.

Please go to the Instagram Feed settings page to connect an account.

Must Reads

Custom Peg Board + DIY Circle Art | FrogTape

Custom Peg Board + DIY Circle Art | FrogTape

Main Level Refresh with The Home Depot

Main Level Refresh with The Home Depot

Sponsor

2016 Daily Simplified Planner

Popular Projects

Deep Tufted Headboard In Process

Deep Tufted Headboard In Process

September 23, 2013 By Sarah 13 Comments

Painted Puffy Paint Design Canvas – Headboard Art Take 2 In Process

Painted Puffy Paint Design Canvas – Headboard Art Take 2 In Process

May 14, 2012 By Sarah 2 Comments

Cane Chair Peek

Cane Chair Peek

August 27, 2012 By Sarah 2 Comments

Poppy Red Campaign Desk

Poppy Red Campaign Desk

October 30, 2014 By Sarah 19 Comments

Chinese Chippendale Chairs | Real Time Progress Round 2

Chinese Chippendale Chairs | Real Time Progress Round 2

October 6, 2014 By Sarah 14 Comments

  • DIY TUTORIALS
    • design + build
    • furniture redo
    • diy in 1 hour or less
  • free printable
  • friday favorites

Disclosure

Occasionally, affiliate links are used when they are available. I do earn a small commission when items are purchased using those links. As always, I only link to things that I truly love. I also link to items that I love when an affiliate link is not available. Thanks so much!

  • Home
  • About
  • Services
  • Shop

Copyright © 2025 Dorsey Designs

MENU
  • Home
  • About
  • Services
  • Shop