This post has been sponsored by FrogTape.
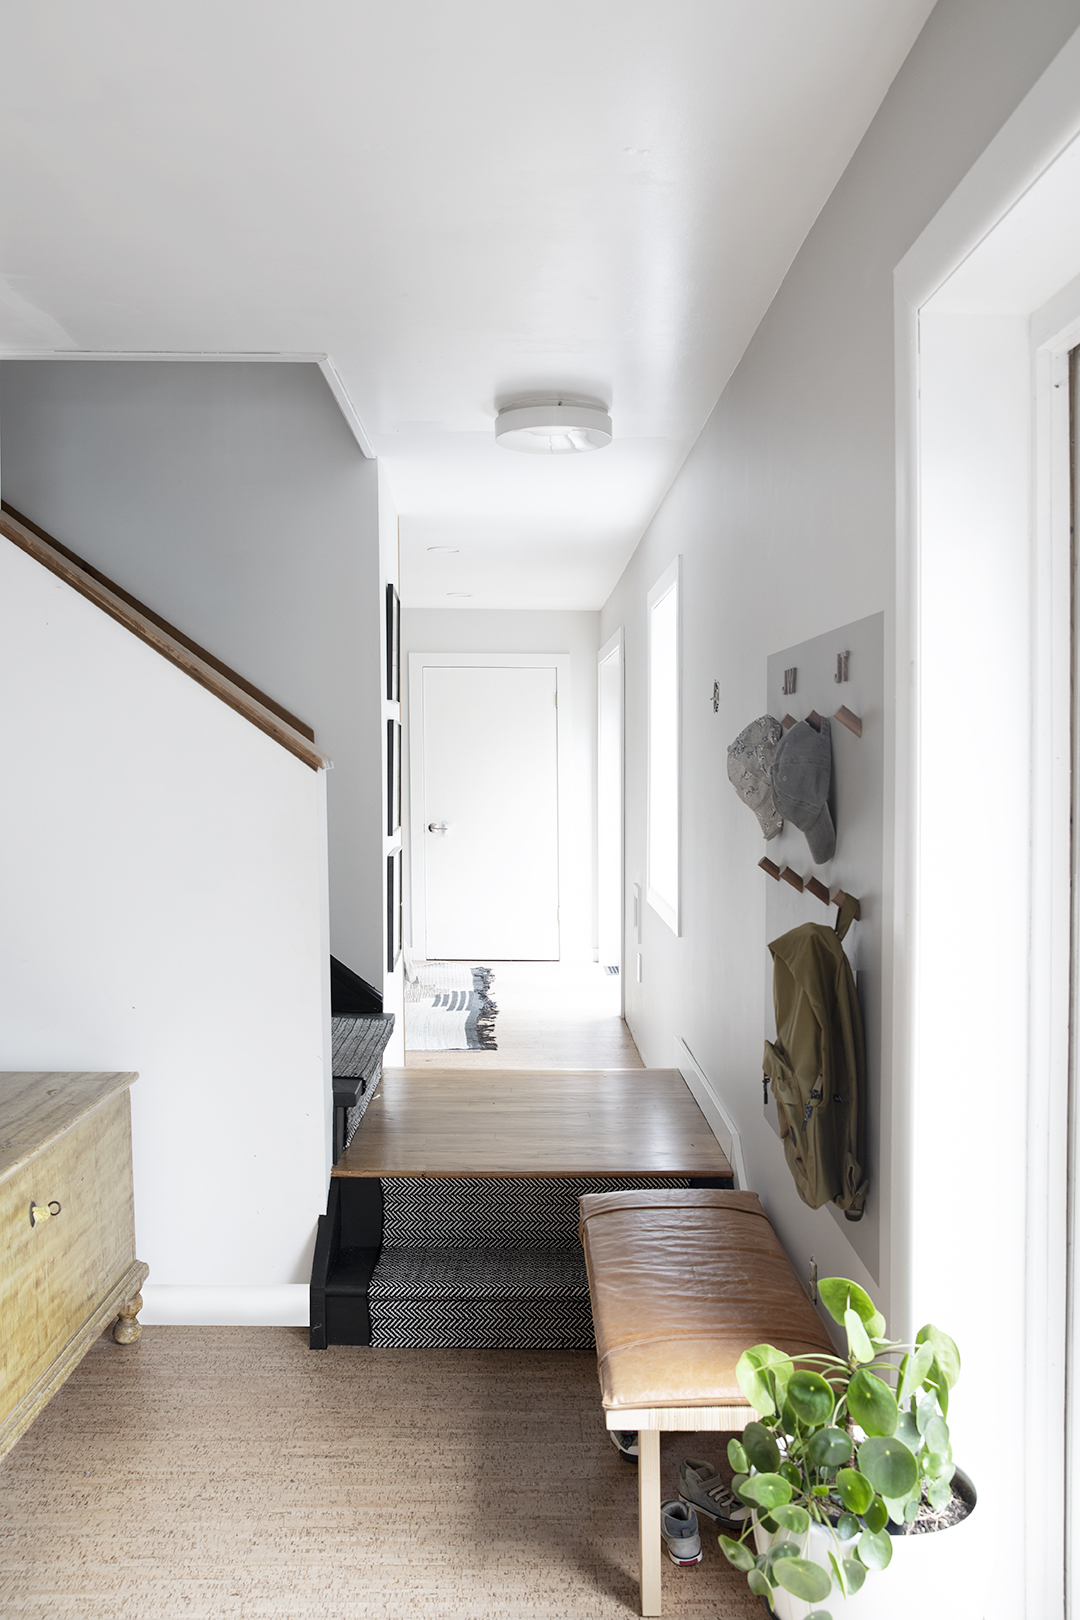
Our oldest starts preschool this week!! Everyone says it, but time has really flown by. I wanted to bring a little more functionality to the space – adding a hook zone so he could put his things away himself (one less thing to pick up!!) was a top priority. Adding a defined area (two shades darker then the wall color) with FrogTape is a SUPER easy and inexpensive way to add definition to an open space. David also made hooks and letters (our boys initials) to finish the space. Read on to see how we did it!
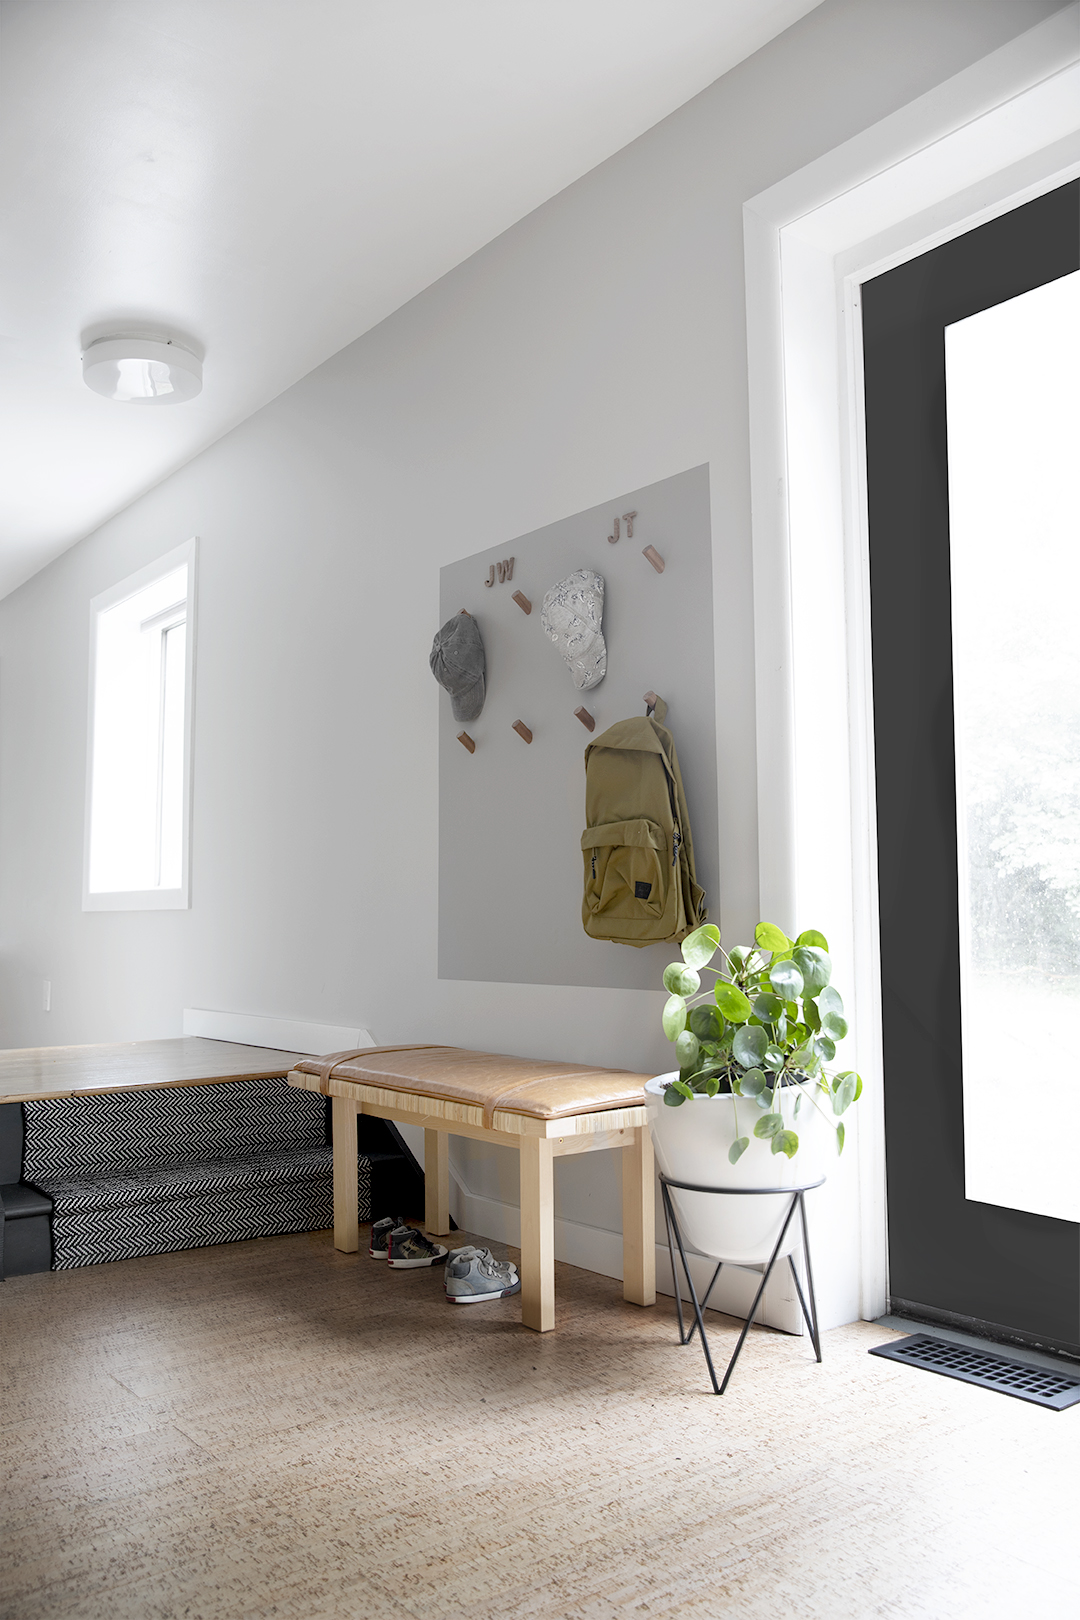
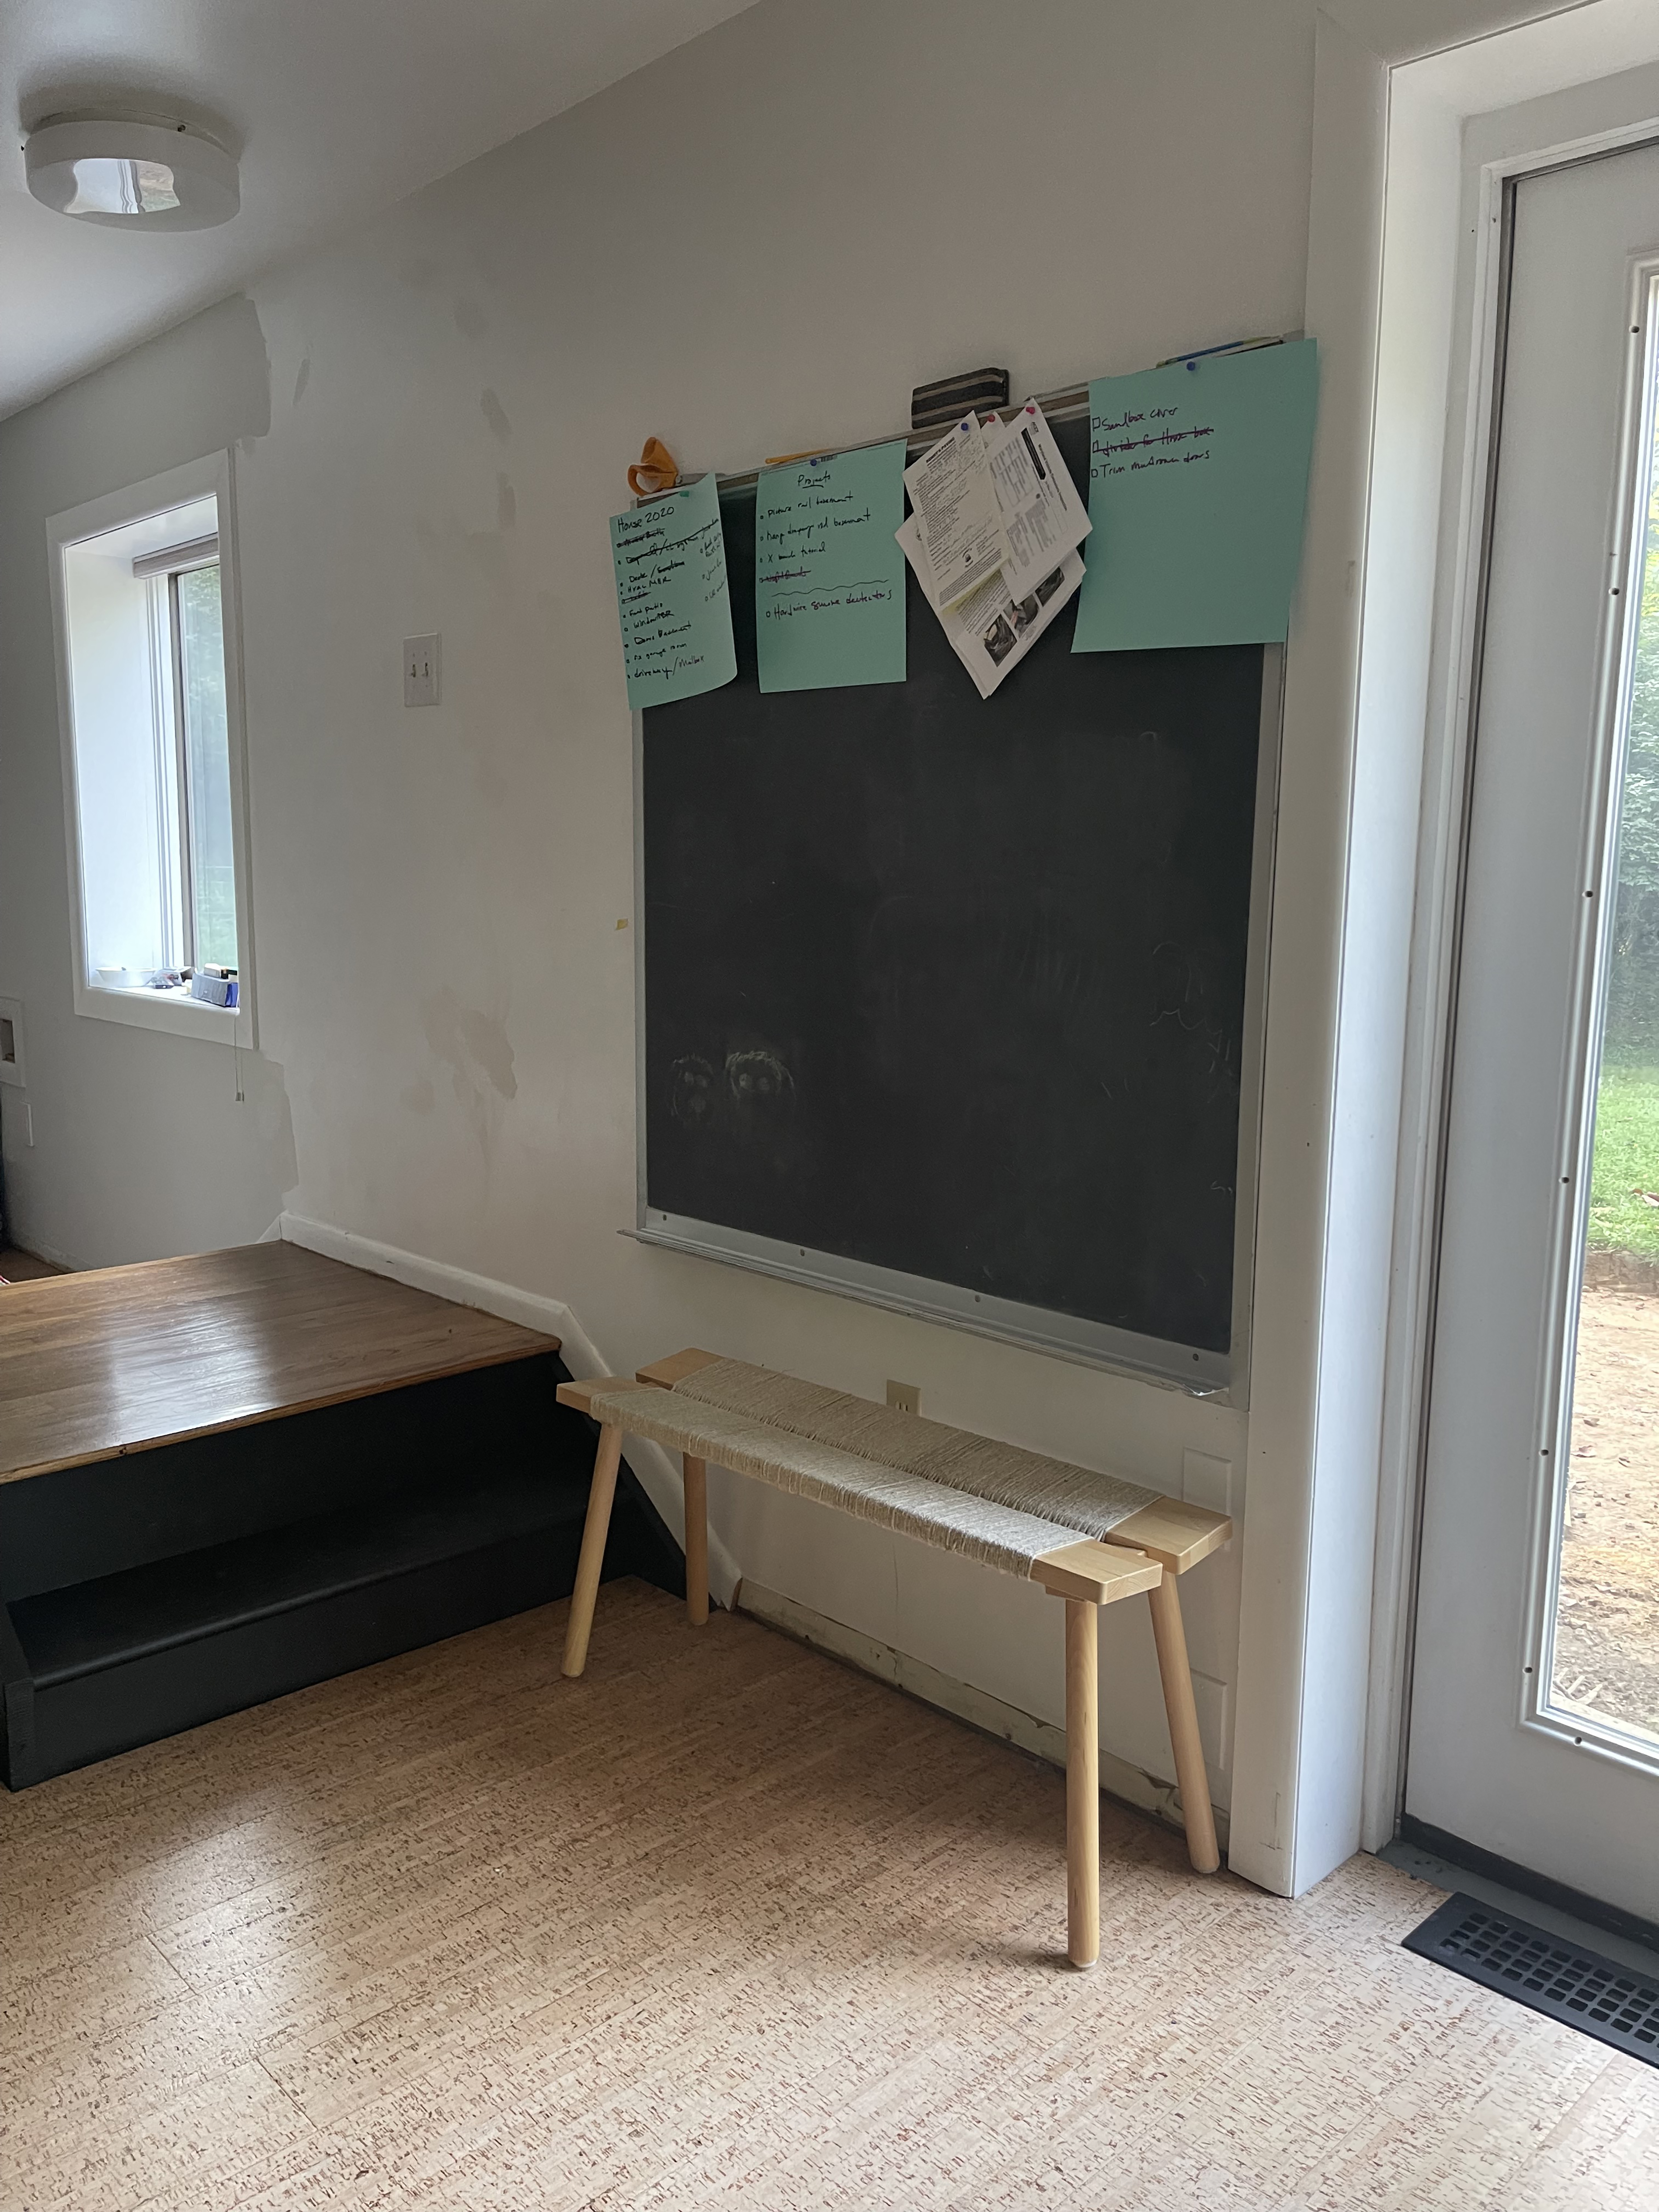
I’ve been wanting to take down this chalkboard since we moved in – once we got our son his backpack (which he was SO excited for), I knew this would be the perfect spot to add a hook area for him. Also, this wall has been half painted for a few years, so it was definitely time to give this whole space a fresh coat of paint.
BEFORE
Materials
Ruler (laser is helpful too, but not essential)
Pencil
Paint (my wall paint is SW Repose Gray (50%) rectangle is SW Dorian Gray)
Painting supplies (roller, brush, drop cloth – I love these from FrogTape)
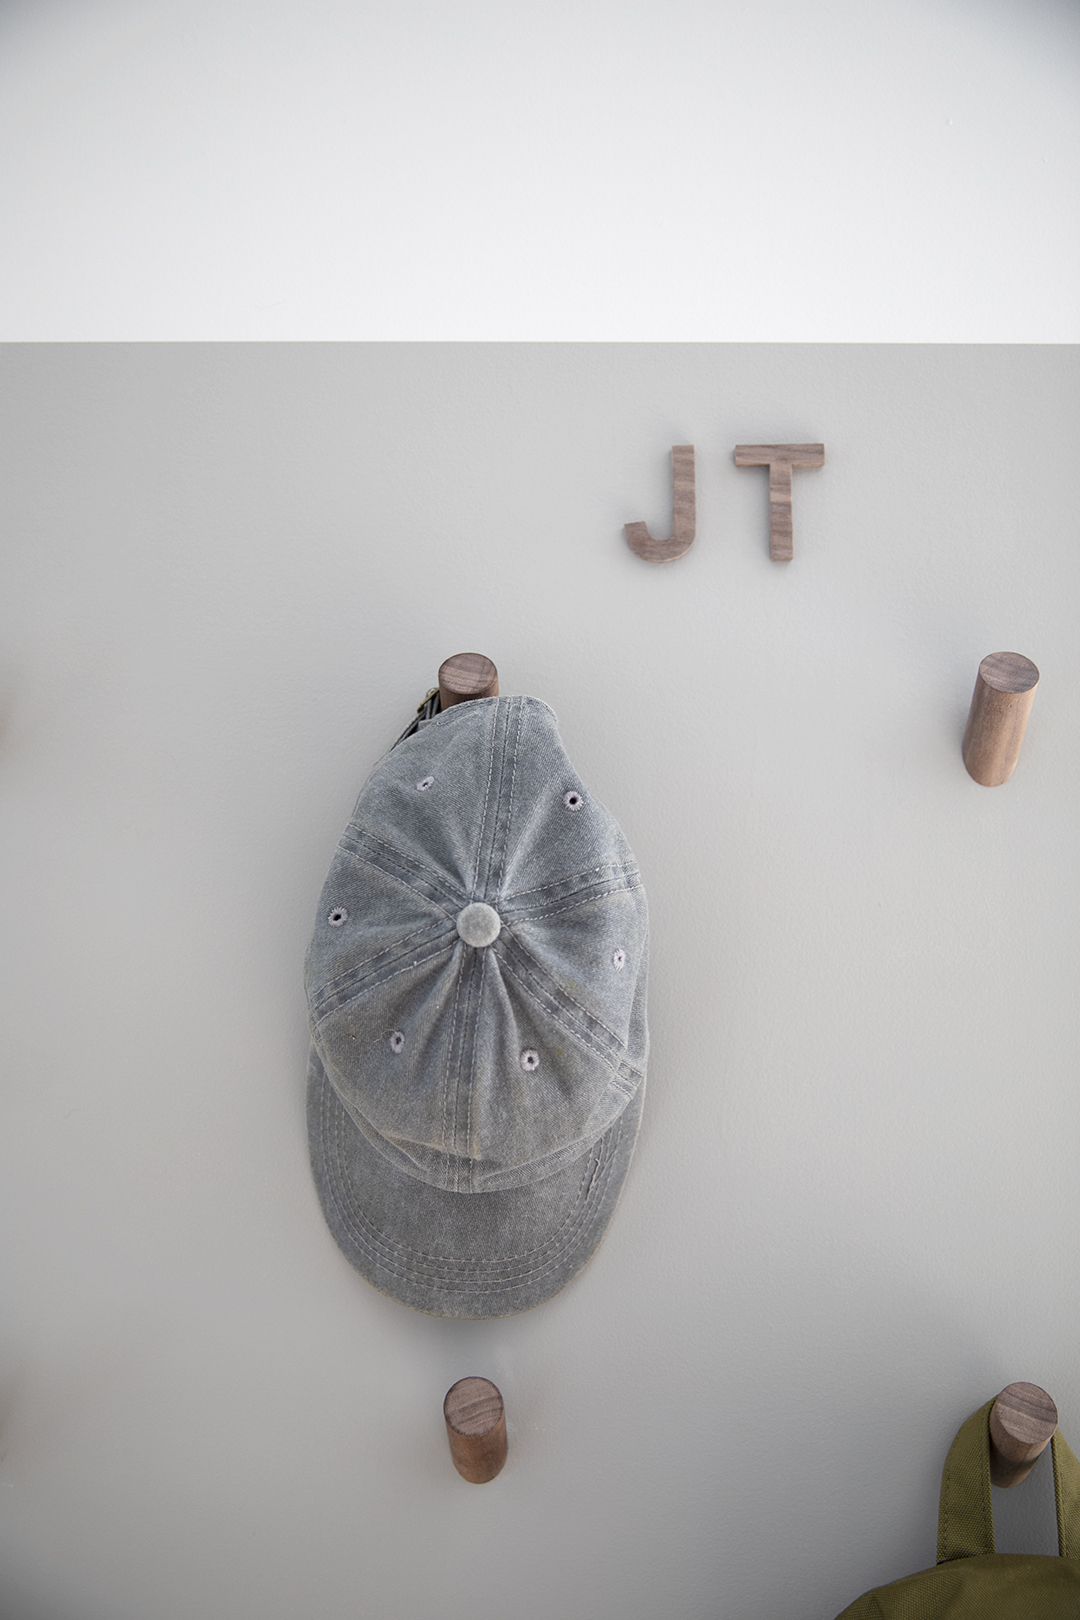
Hooks + Initials
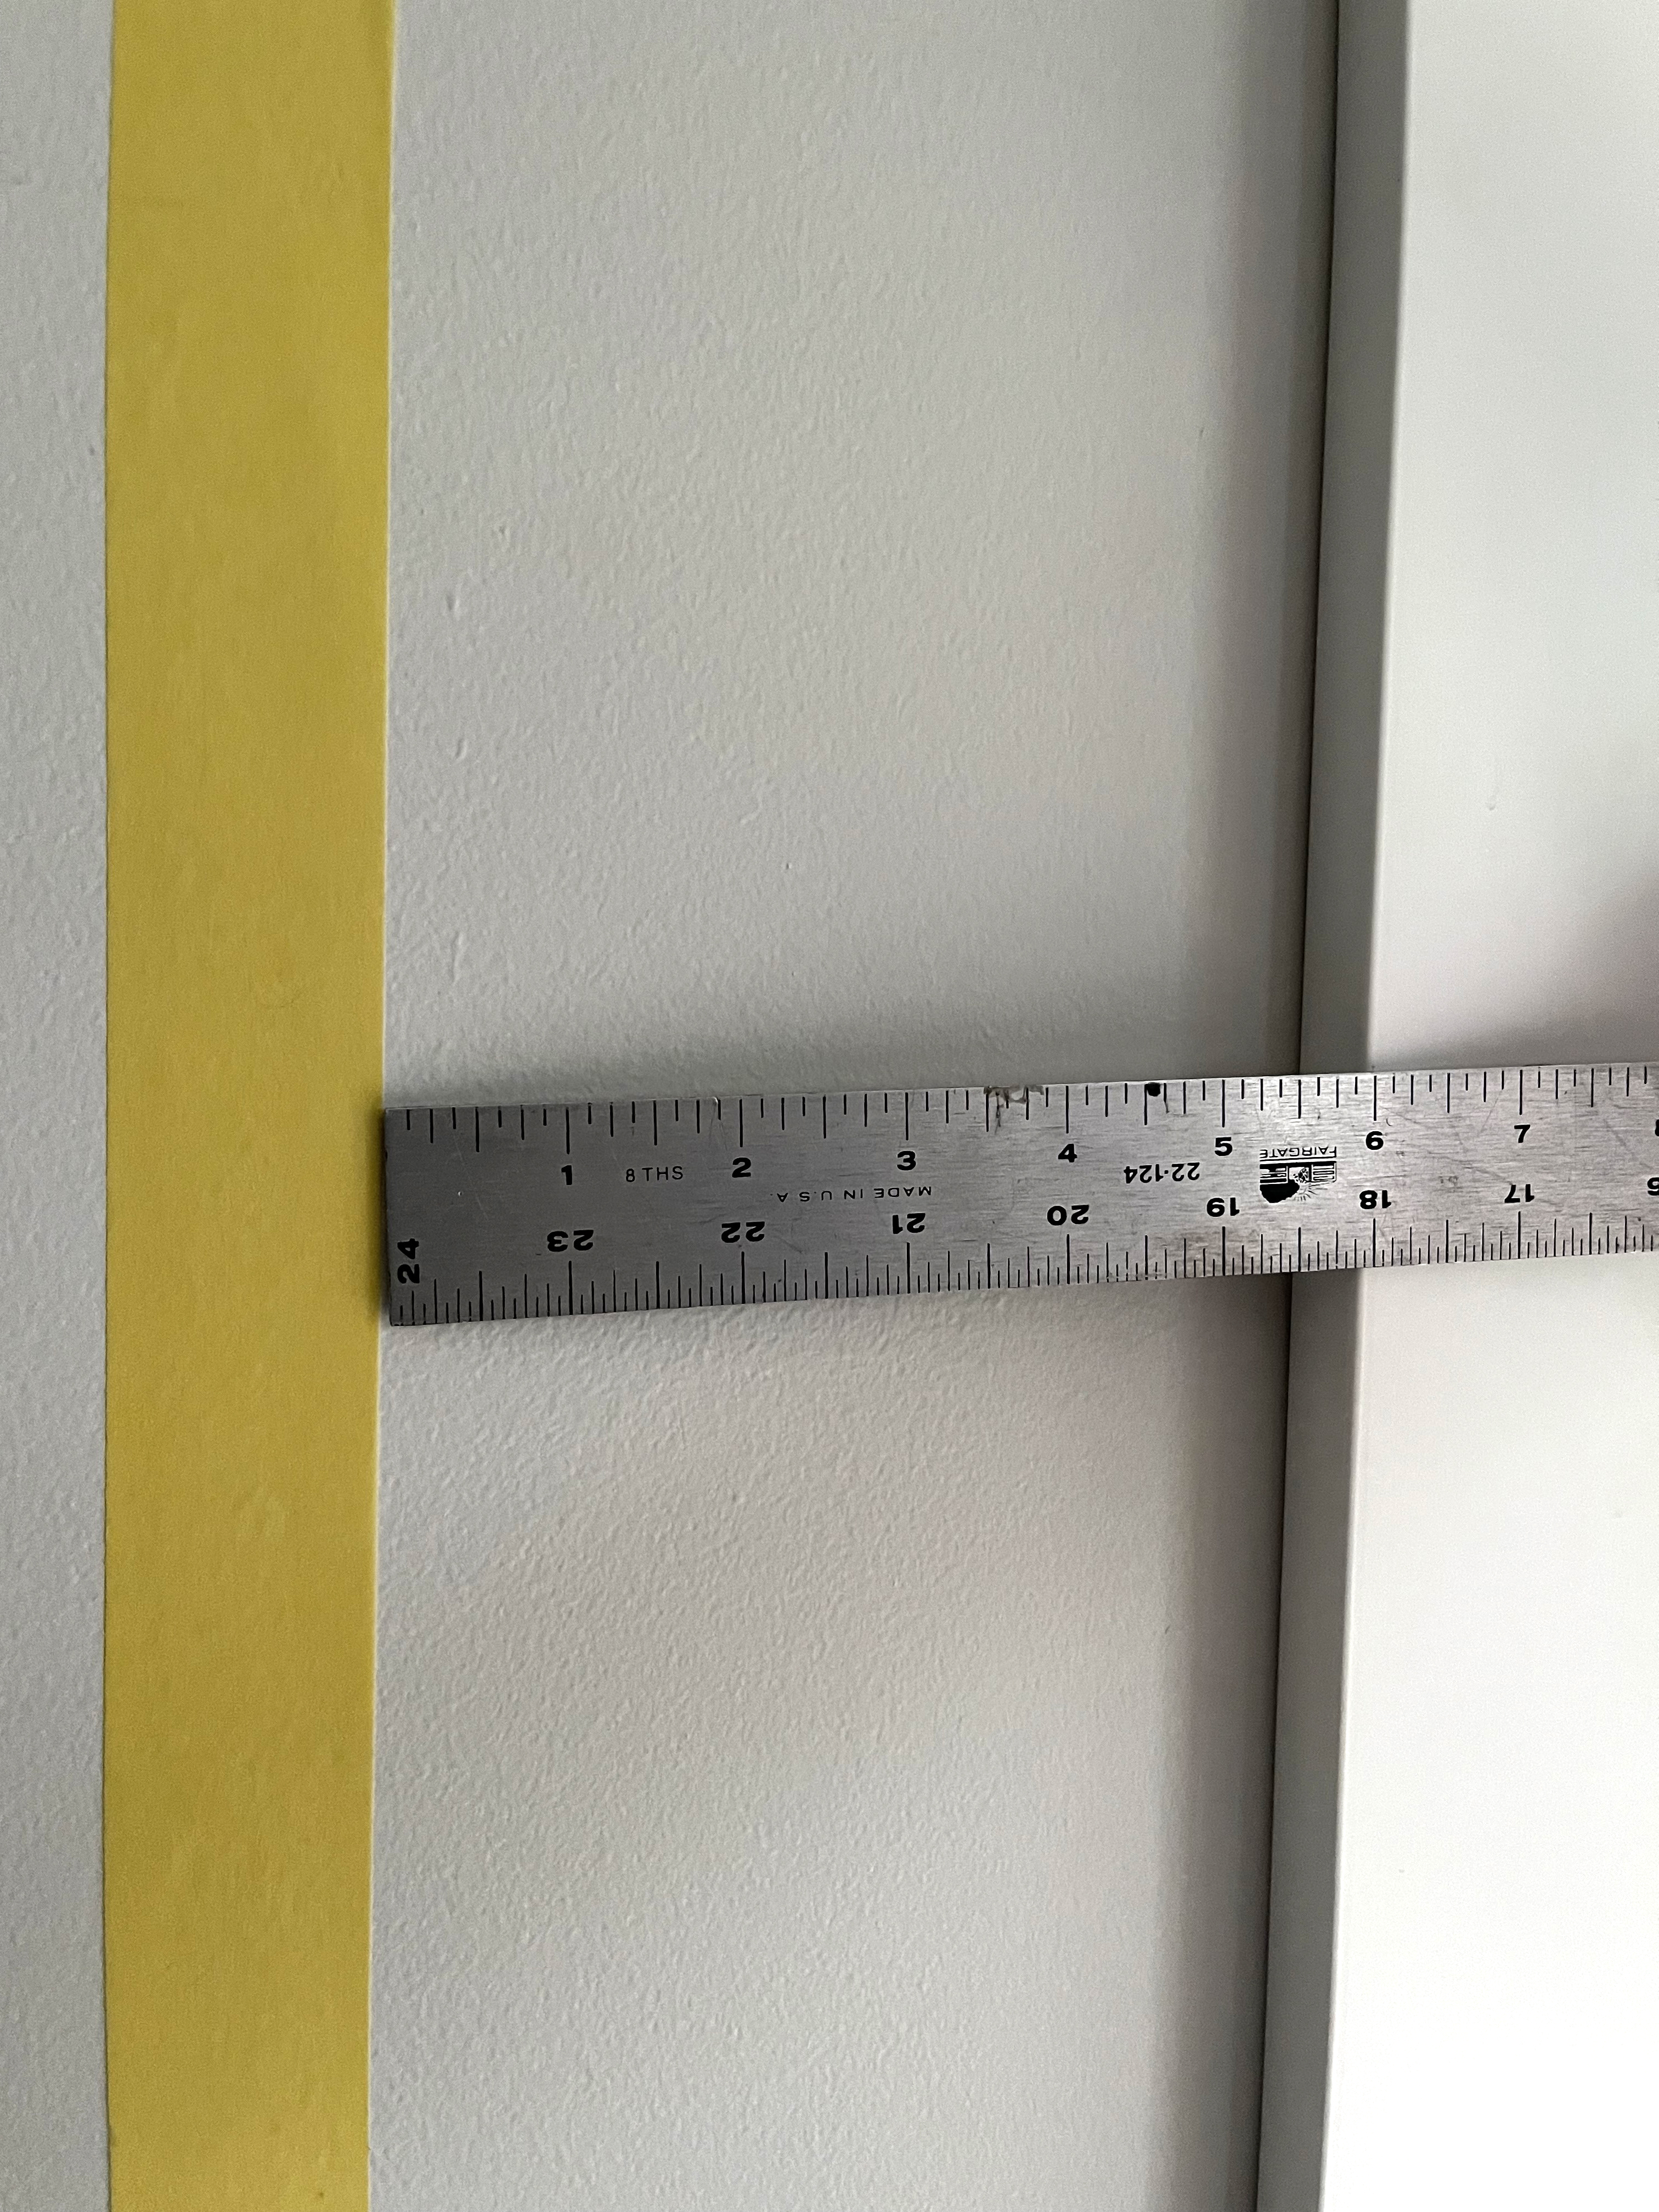
First, I painted the entire wall SW 7015 at 50%. I laid out a few options for the rectangle (using FrogTape to visualize), and ended up matching the width of the bench. I used a ruler and a laser level to place the lines. A laser level makes it easier, but isn’t necessary. If you’re using just a ruler, mark two spots and line up your tape from there.
Once you’ve laid out your FrogTape, smooth down all the edges to ensure you get a crisp line. With a smooth roller, I applied SW Dorian Gray inside the rectangle. I applied two coats.
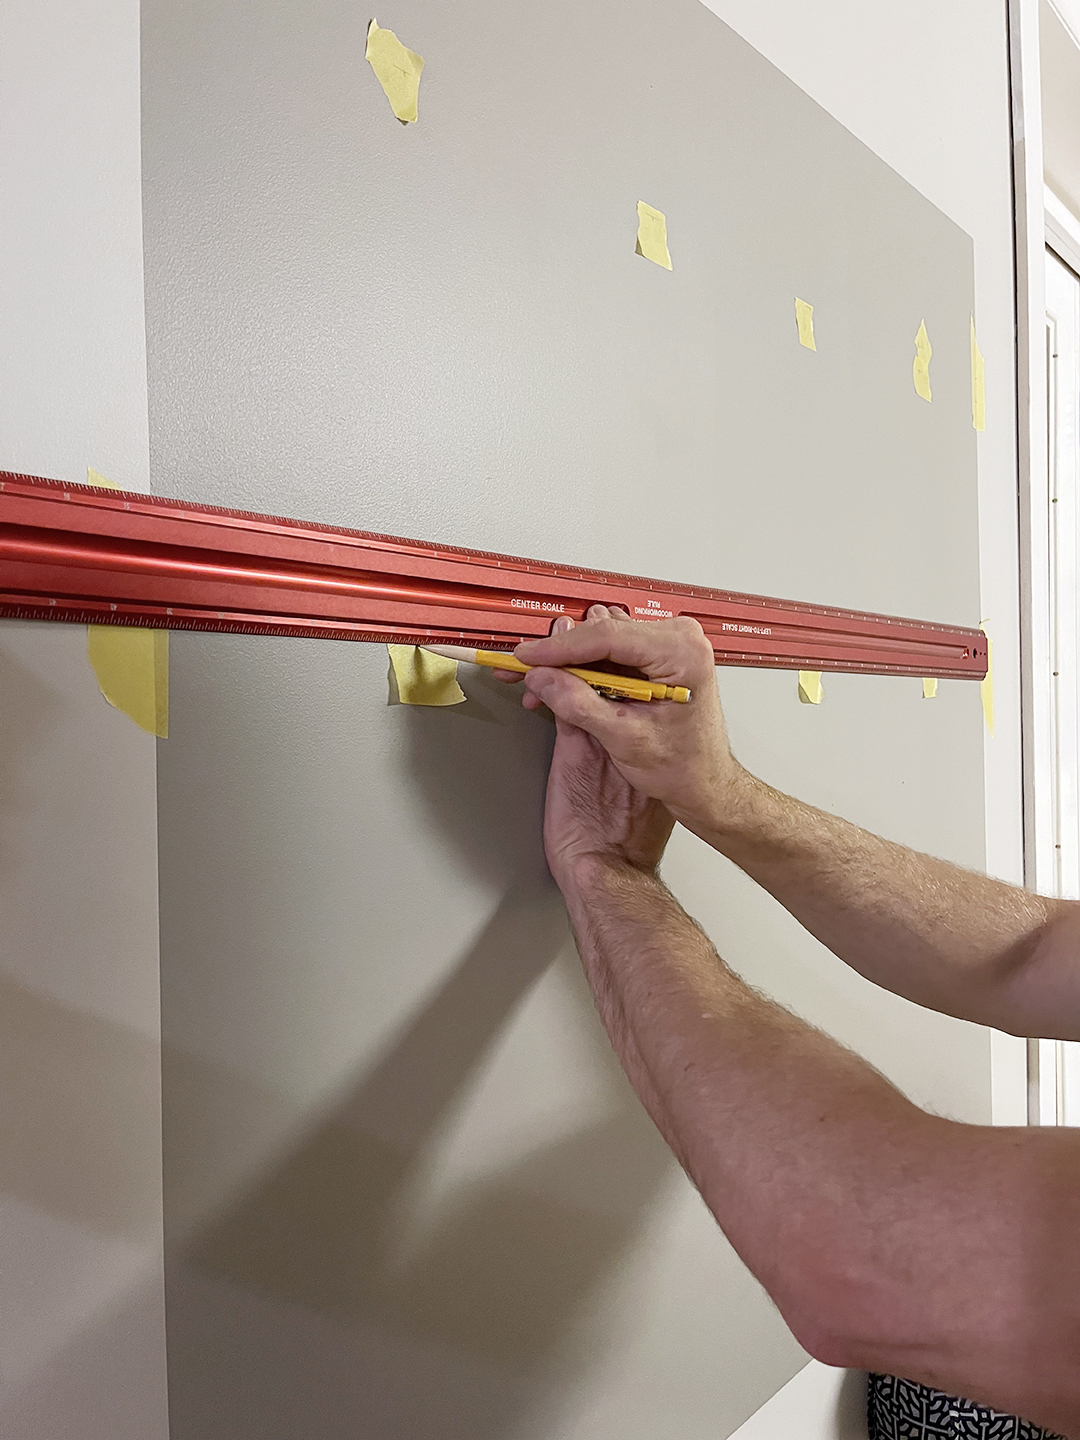
After your paint has dried, lay out your hooks. I placed FrogTape Delicate in the general area and then measured with a ruler to mark the exact placement.
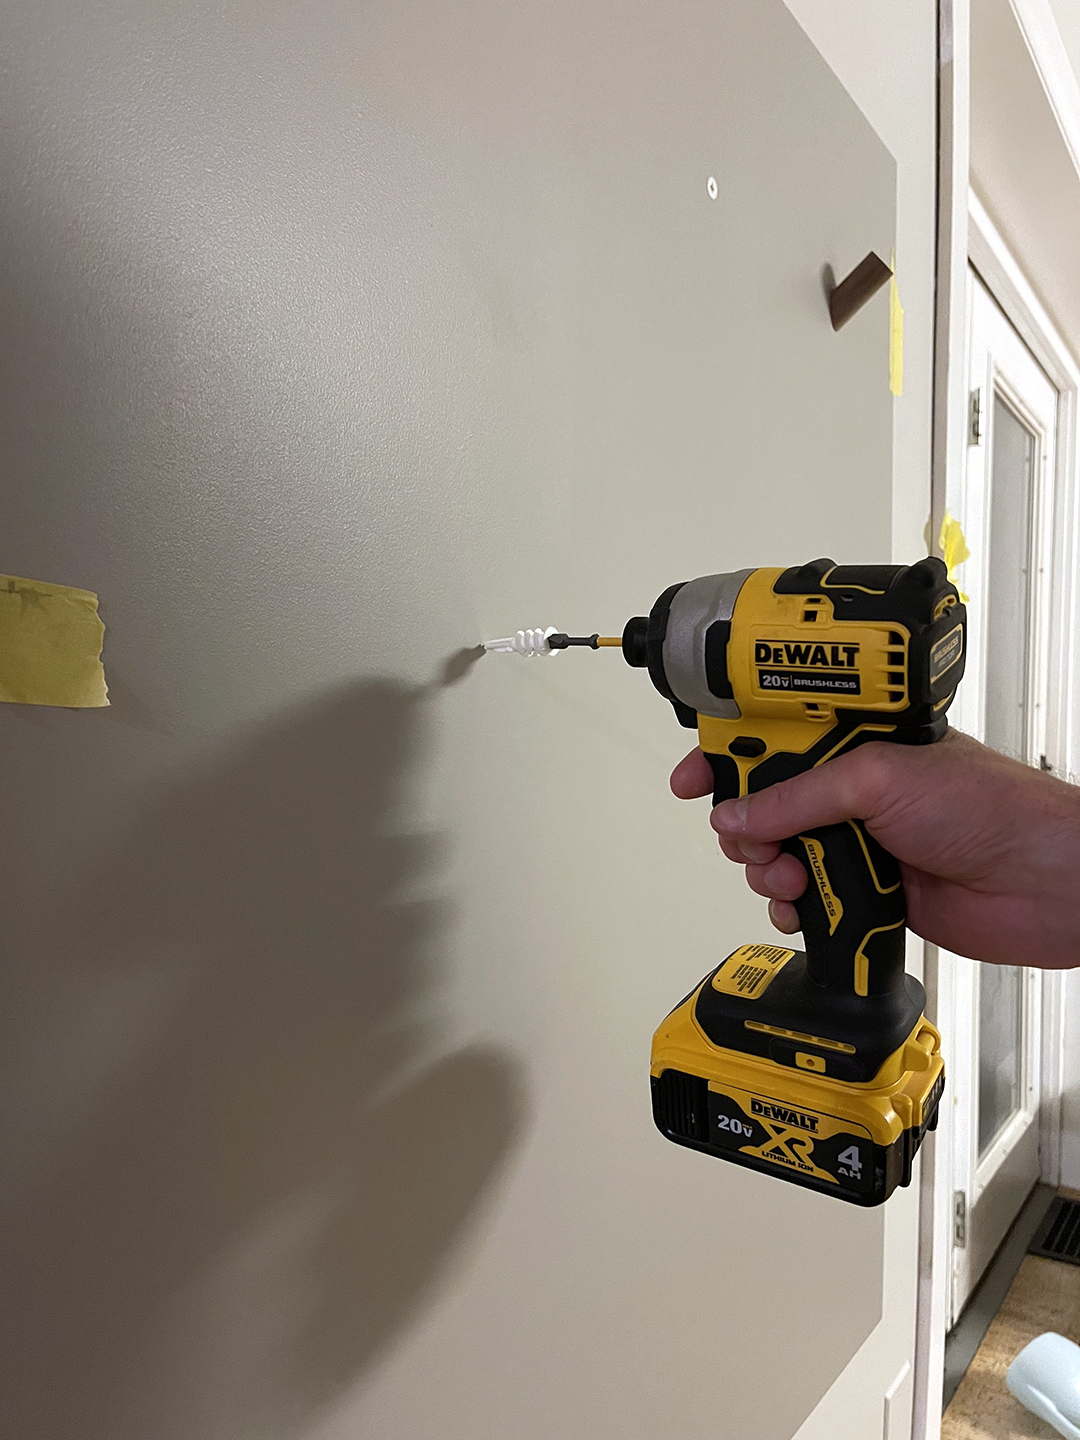
Insert drywall anchors and attach hooks.
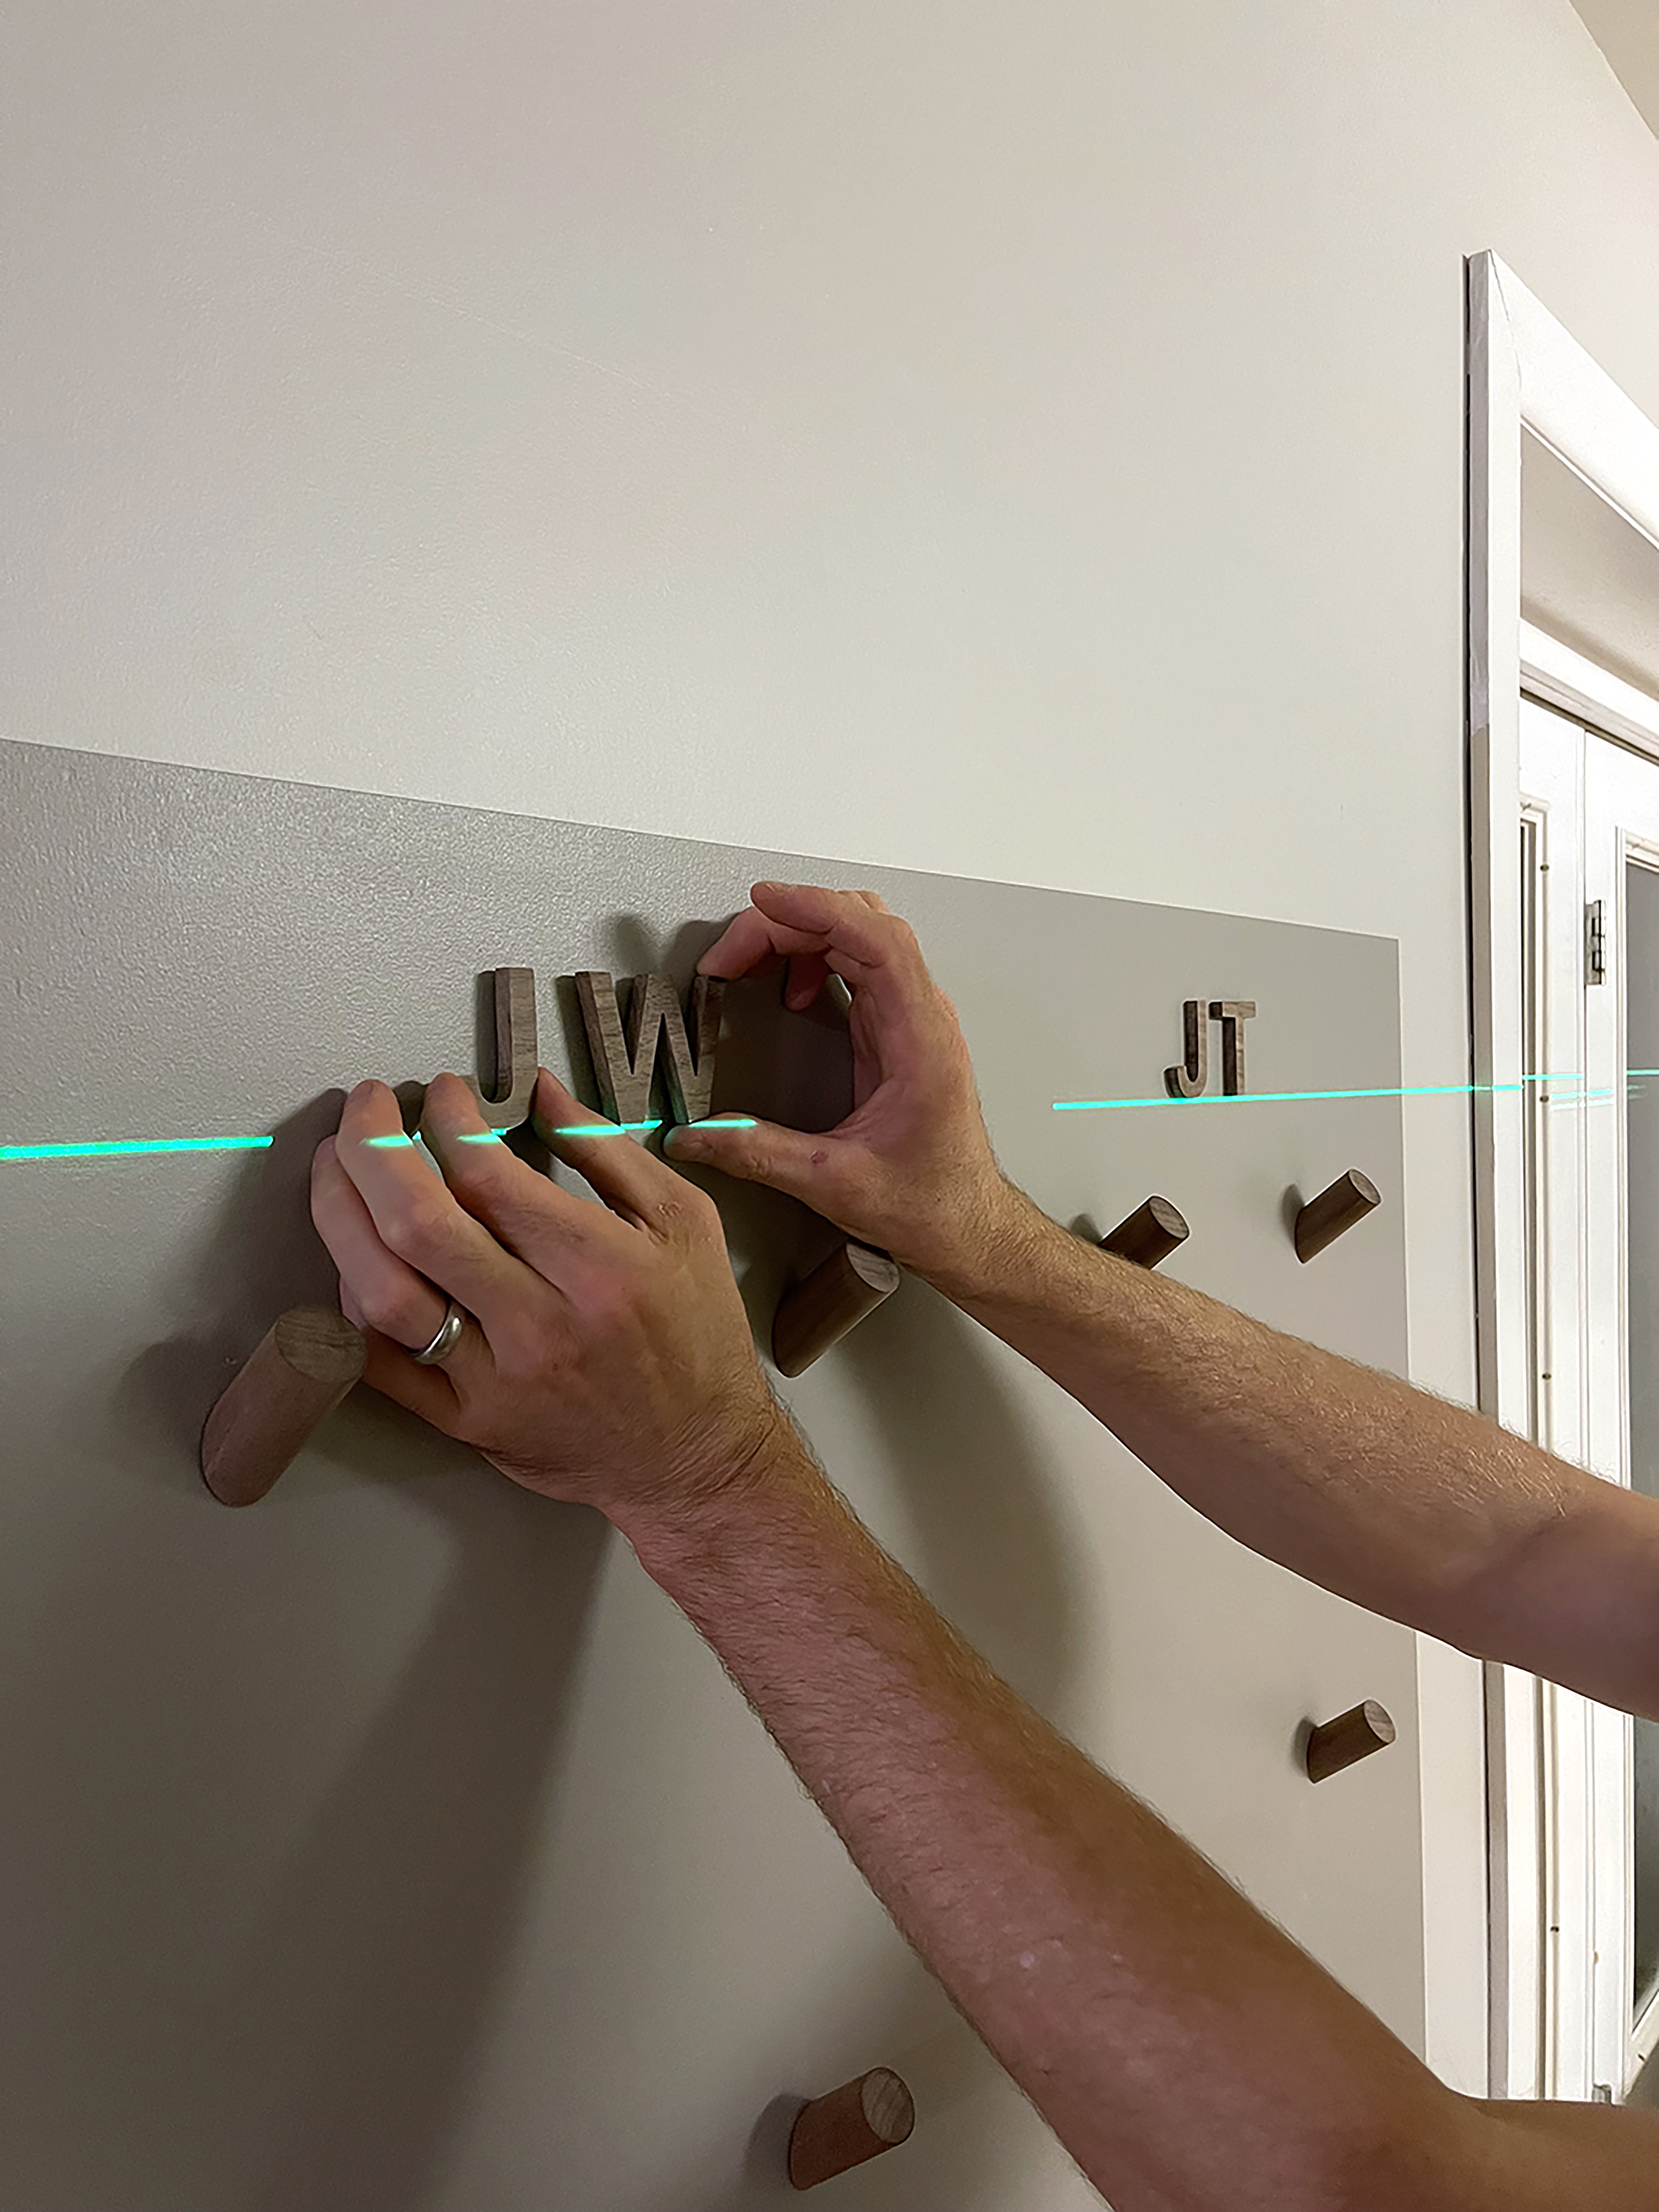
Finally, place letters! I used double stick tape to install them, but will most likely use a quick grab trim adhesive to permanently secure them. David made these with the bandsaw, but they are readily available on Etsy as well!
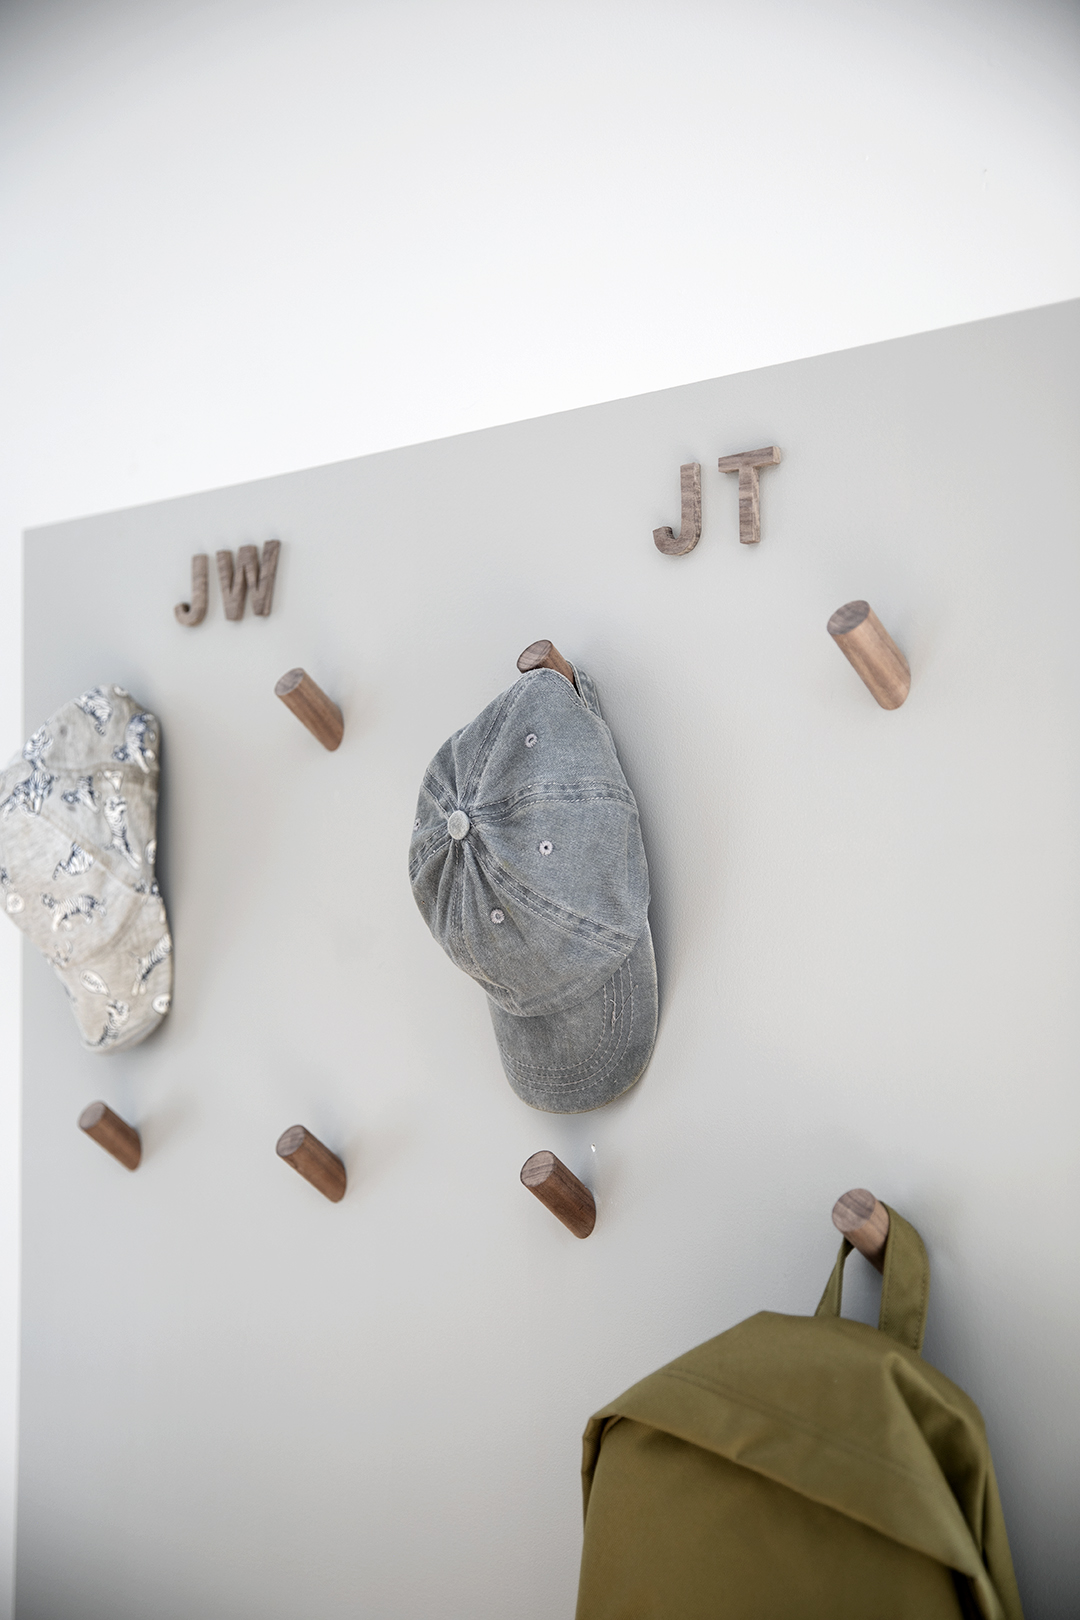
Hooks are 1″ walnut dowel rods, initials are also made of walnut.
The other side of the stairs is our TV area created for our ORC a few years ago. See post HERE We also recently painted and installed a runner on our stairs – LOVE this addition!
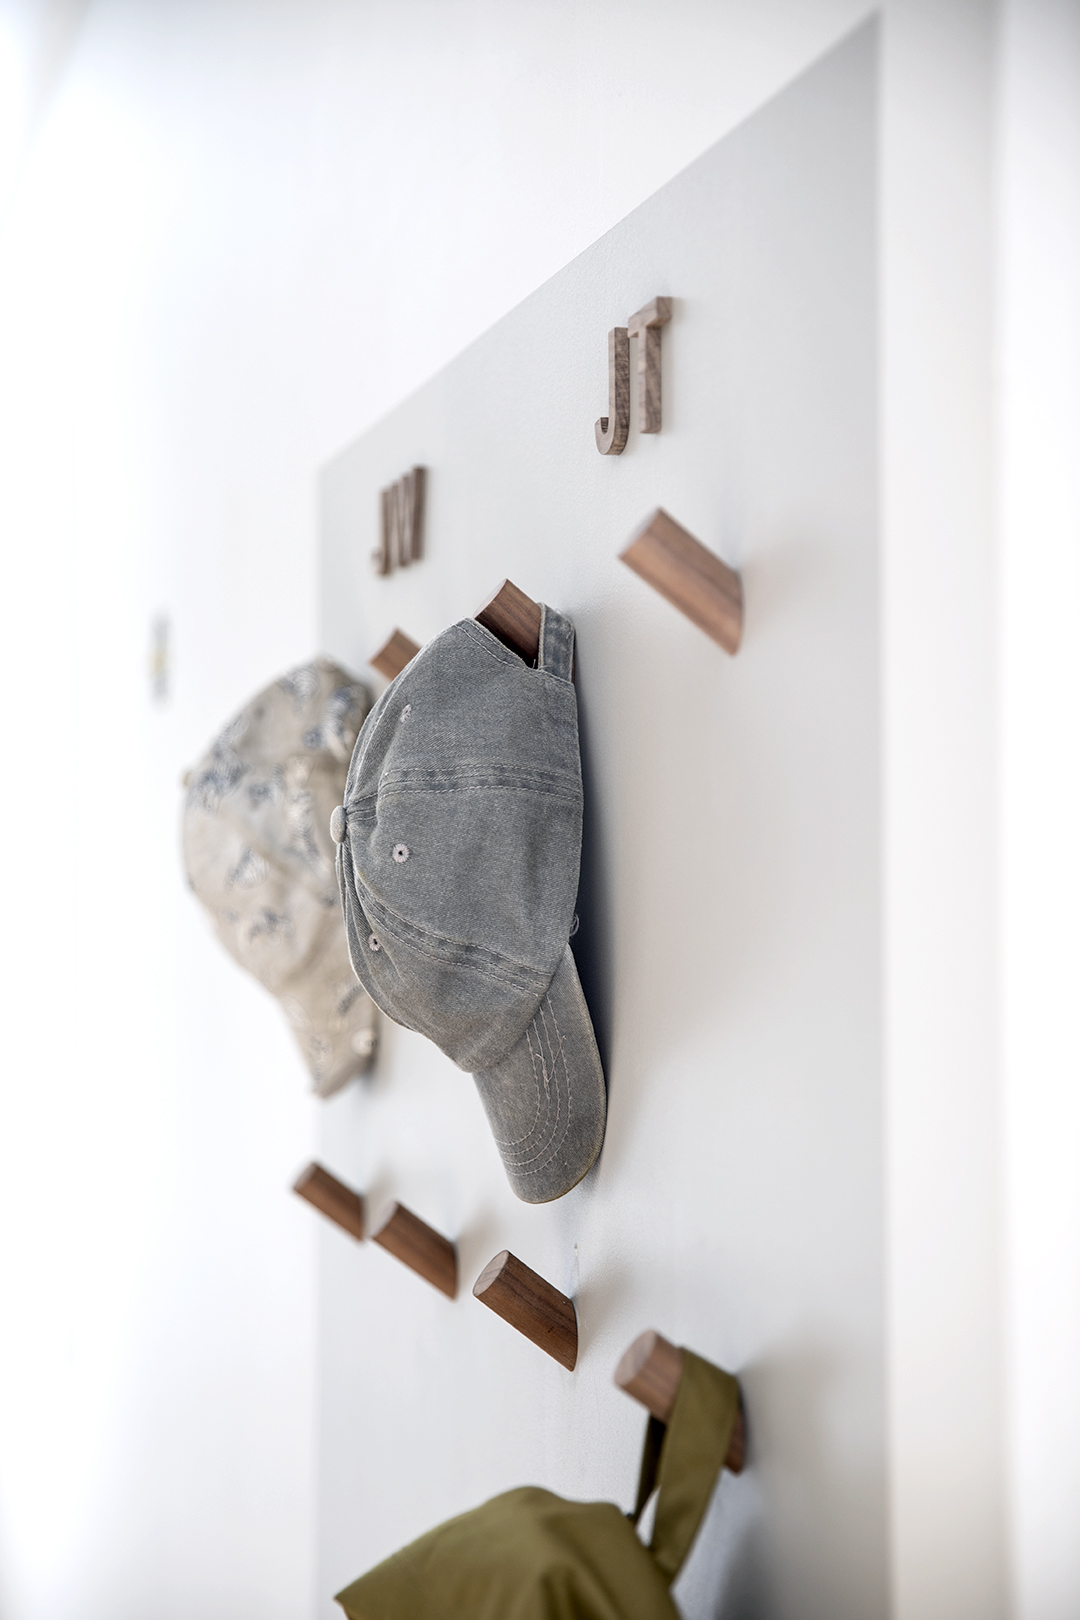
I love the personalization that the initials add!
Since we’ve had kids, I’m like give me ALL The organization!
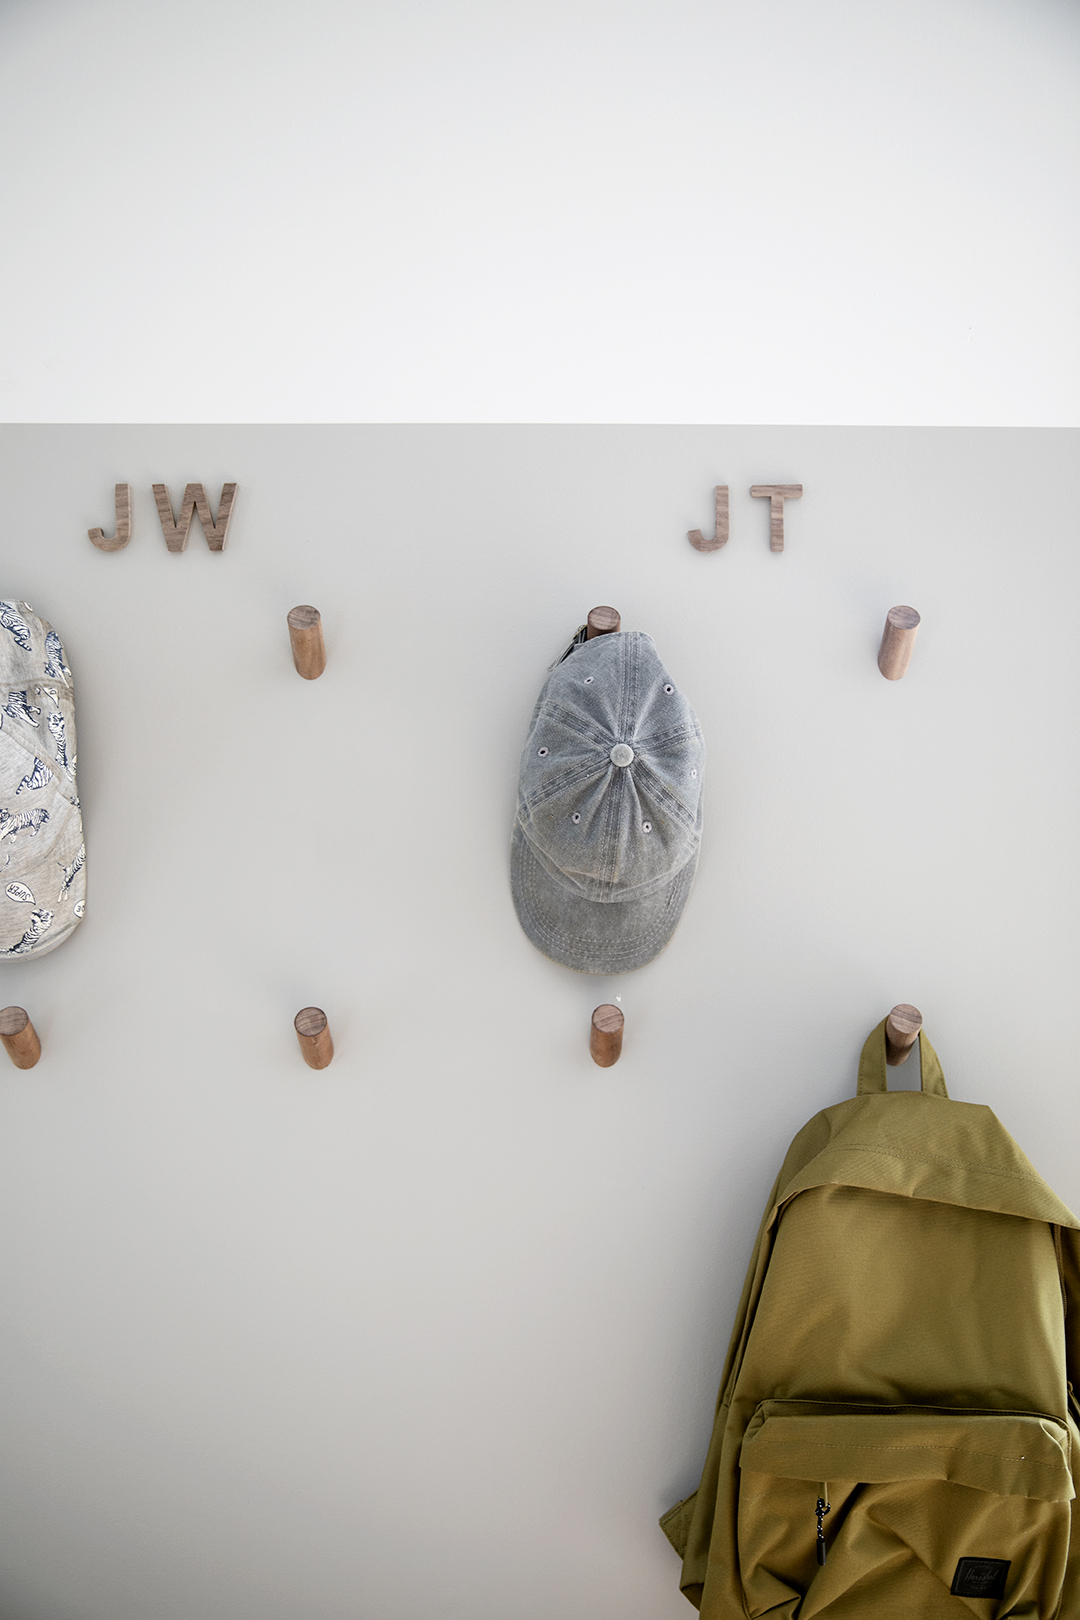
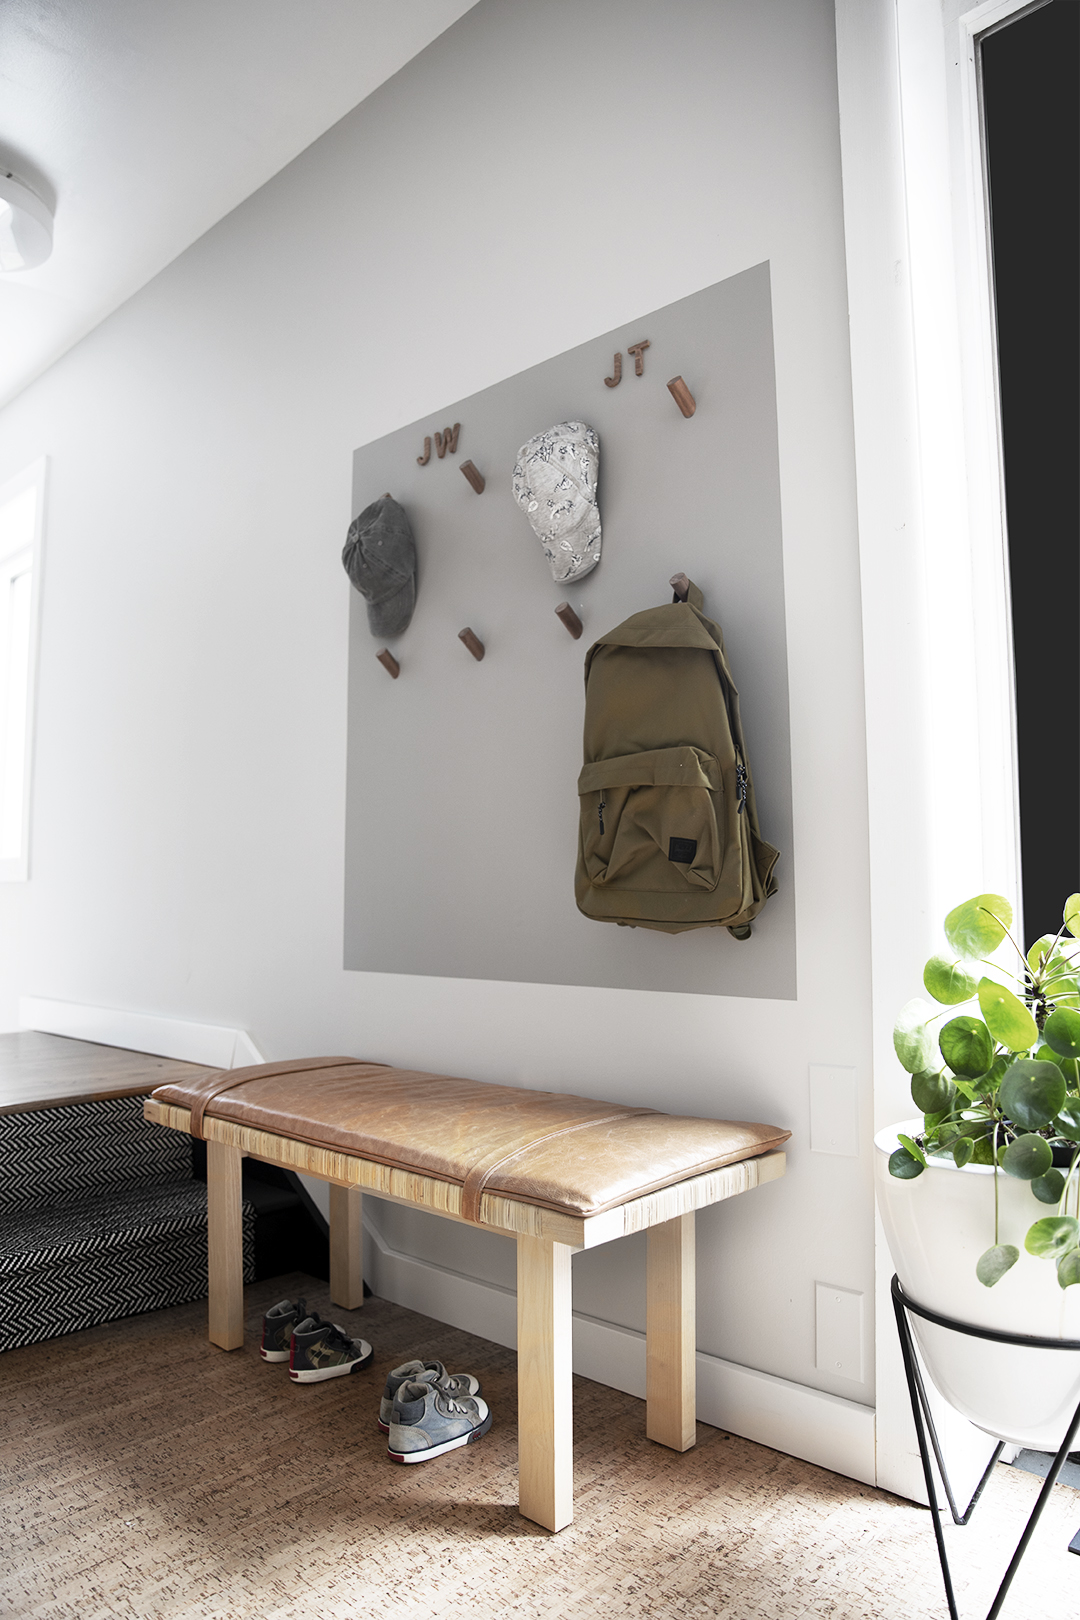
I love this corner now!! It’s so much more functional and the defined space with the darker paint!
Sending hugs to everyone out there with kiddos starting school! It honestly gives me a little anxiety, but I know that he will fly this year! Can’t wait to see how he grows!
SOURCES: leather bench
Thanks so much to FrogTape for sponsoring this project, as always, I only work with brands that I love and have had a good experience with!
Leave a Reply