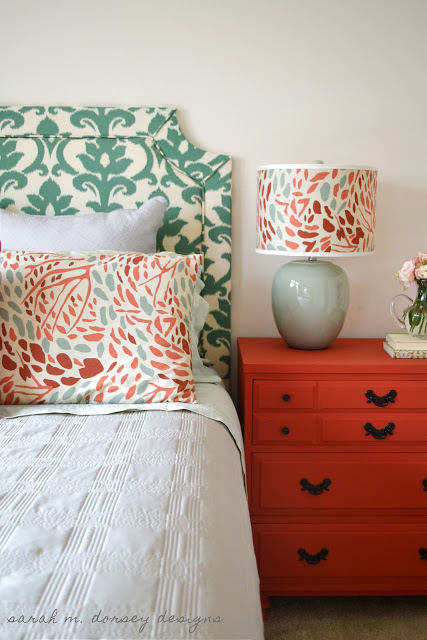
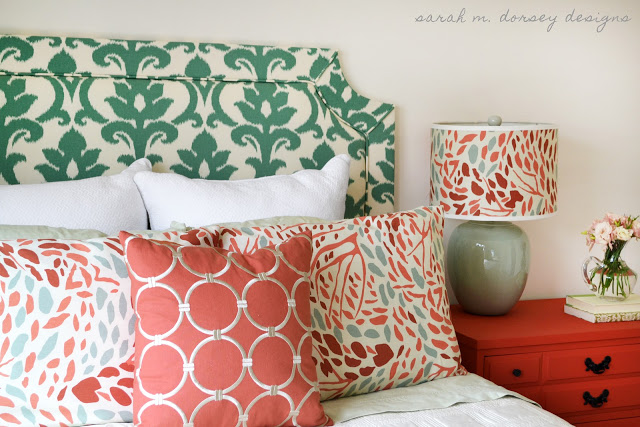
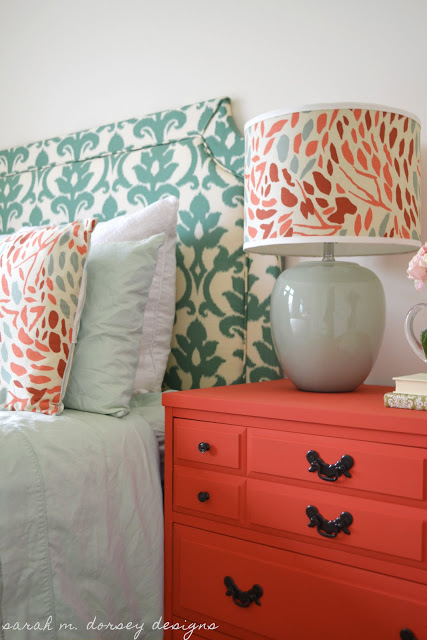
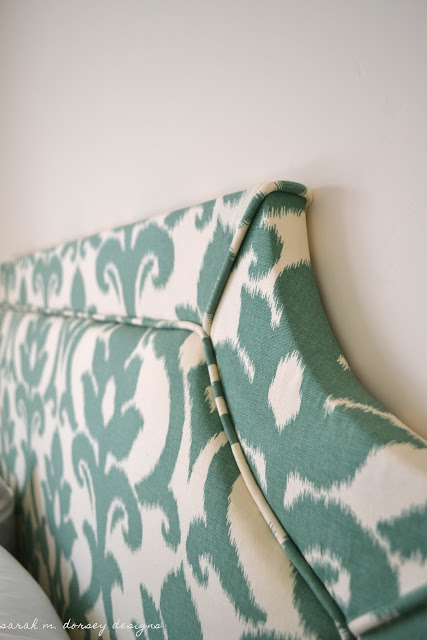
Yesterday we finished the headboard for the Guest Bedroom! and I am loving how it turned out! I decided on a belgrave style headboard since the curves would accommodate 54″ wide fabric without any awkward seams, read on to see how we did it!
After we gathered our supplies:
3/8″ plywood (2 sheets)
1x4s (frame)
1×10 (to cut top of frame out of)
fabric – 2.5 yards purchased from fabric.com
cording
batting
foam
staple gun
We got to work!
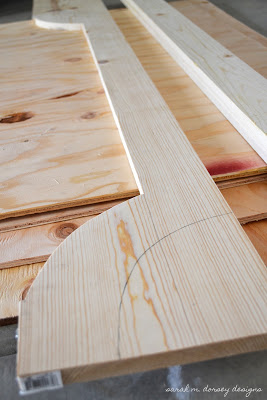
We drew a few different curves on cardboard before deciding on this one (try using a compass, paint can or other round objects for the curve)
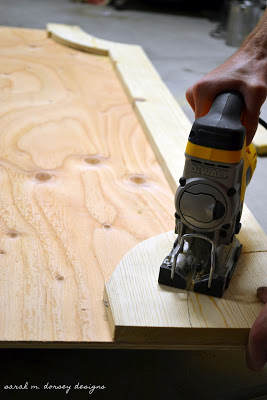
We used the cardboard as a stencil and traced on the 1×10. Then cut it out with the jigsaw.
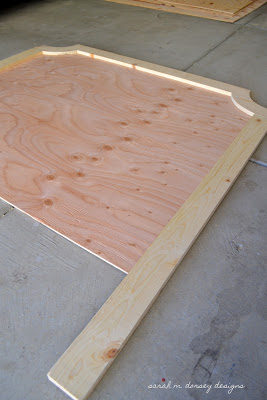
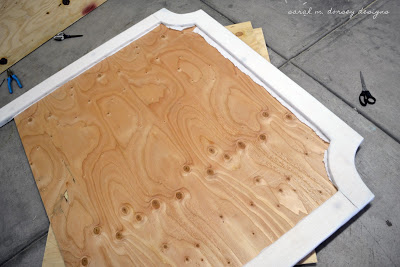
Cut the side pieces to length and attached the frame to the plywood with screws (from the back)
Wrapped the frame with batting …
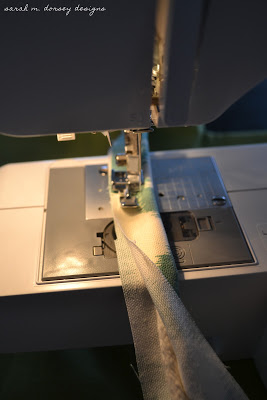
Sewed fabric wrapped cording
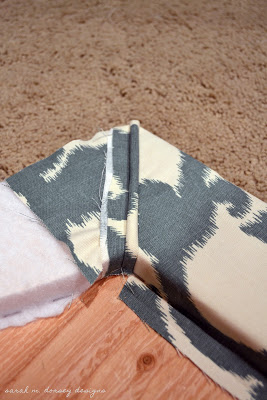
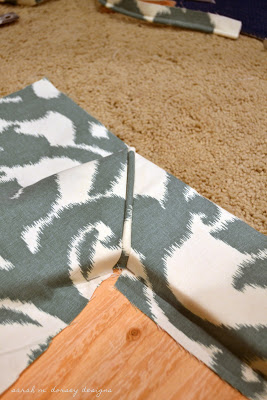
Fabric was cut for the frame – the corners were a bit tricky because the fabric was 54″ wide and the headboard was 60″ it needed to be applied in pieces across the top – cording was stapled corner to corner
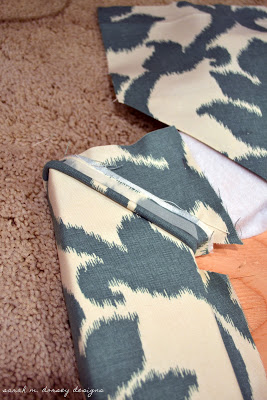
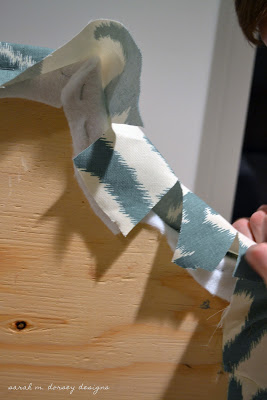
Heat n’ bond no sew adhesive was placed on top – fabric for other side of the cord was folded and ironed for a crisp edge – placed on top (creased side against the cord) and then ironed
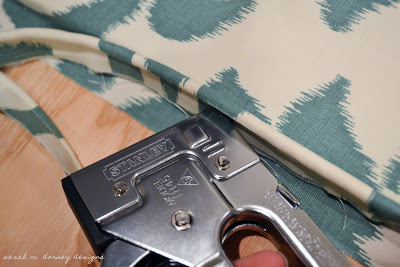
Cording was stapled along the interior of the frame
The other piece of plywood was cut to fit inside the frame – leaving extra room for foam, batting, and cording. Foam was cut to the size of the plywood, wrapped in batting and fabric
It was put inside the frame and attached with screws from the back (make sure that your screws aren’t too long!)
And there you have it! A diy belgrave headboard with cording!
Pillow shams are lampshade cover are made out of this Annie Selke fabric click here for my envelope pillow tutorial (front pillow is from Target – a year or so back)
Click to read more about the nightstand/dresser and lampshade
It was my goal to make this for as little $$ as possible and have it still look expensive – check back tomorrow for the price breakdown and how I saved some money and time!
Hope you love it as much as I do!

Again, another beautiful room. I love your choice of fabrics and how all of them go together so nicely. I think you need to come back East and help me redo a room or two or three!!!
Aunt Deb
Thanks!! I'd be glad to help any time!
It looks SUPER expensive. Beautiful job. Really impressive.
Thanks for the sweet comment Lara!!
It looks really, really great – but making that cording looks very tricky. How do you get rid of that excess fabric after sewing and stapling? I just couldn't figure it out (but I'm feeling a little extra dumb today 😉
Super look with the colors that you have already chosen for the other stuff in your guest bedroom!
Thank you!! This was my first time making cording and it was really easy! I didn't have a piping foot for my machine but I had one that was narrower and allowed the needle to be right next to the cord. The excess fabric that runs along the interior gets covered by the inset padded piece of plywood, leaving just the rounded portion of the cording. Hope that helps!
This is seriously amazing- how do you have time to do all of this?? So talented!
Katie
Oh my gosh, this is SO gorgeous. Literally looks like it came out of a magazine! Love love love!
thank you so much for your sweet comment!!
where did you get the dresser or night stand?
I redid a dresser found on craigslist. Here is a link to the post 🙂
http://sarahmdorseydesigns.blogspot.com/2012/06/coral-dresser-for-guest-bedroom.html
Gorgeous headboard. The shape is one of my favorites, and I love that you used a pattern.
Hi, just found your blog from Danielle Oakey Interiors. Love the headboard,it looks so professional and well-done. Amazing what you've accomplished, you're so talented. The cording is a nice touch and using a pattern on the fabric really makes it standout. It does look like it's come from a magazine. I may give it a try as you've so kindly outlined the steps. Thanks!
Just saw this blog…amazing, you and your husband are incredibly talented.
Hello, this is really beautiful! I am curious about how you cut the tufted part of the headboard to fit inside the frame. How much smaller did you cut the second piece of plywood to account for the cording, foam, and batting? I think I will try this out. Thanks so much for the great tutorial and very clear pictures!
Thanks so much! The center piece was traced from the piece cut out of the 1×10, just slightly smaller. The total thickness between the two layers ended up being (cording, two fabric layers) plus one layer of fabric (wrapped around the center piece) and a layer of batting. I would cut it fairly snug and then trim off excess if needed till it fits. Hope this helps! Let me know if you try it 🙂
Sarah, is this a queen size or twin? It looks awesome!
Thank you! It is a queen bed
Hi Sarah,
Love, love this headboard. I will attempt this project for my daughter's room, but have a few questions:o)
I will be making a twin size headboard would you recommend to have the headboard a bit larger than the bed size?
As for the foam, what thickness would you recommend using for this project?
Thank you so much for your help!! S :o)
so glad that you are going to try it! let me know how it goes! We made the headboard essentially even with the mattress, I would make it even with the widest part of the bed or an 1" on both sides. We used a foam mattress topper which was about an 1" thick. I would use an 1" – 2" depending on preference. Good luck!
Thank you very much for taking the time in answering my questions… greatly appreciated :o)
Did you glue the foam mattress onto the plywood?
Last question… What size of piping did you use?
Once again thank you so much for your help. Can't wait to get started (hopefully this weekend)!!
S.
We did use a thin layer of craft glue (spray adhesive would work too (just make sure not to get it on the fabric) to adhere the foam to the plywood. It isn't absolutely necessary, but it does help prevent the foam from moving when you staple the fabric. We used 1/4" piping, here is a link: http://www.fabric.com/ProductDetail.aspx?ProductID=ea0cc048-54e7-4ff3-917a-99eb7fec30c3
Let me know how it goes!
Thanks so much! I saw a padded headboard at homegoods for 400 that I fell in love with. It had a less-padded edge and pouffy padded middle like yours does. I was pretty sure I could make it for much less bur I couldn't figure out how to keep the center taut and puffy and still have the piping and less-padded frame edge. Never dawned on me to do to the frame for the edge with a separate insert for the middle. Exactly what I needed, thanks again!
I would like to know, What is the size of the Guest Bed headboard you did in the Ikat material? I so would like to do that for my Master Headboard in my room It is the PERFECT one to do…. But the instructions say you need 2 sheets of 3/8" plywood, but I didn't see what the second piece was for??? Can you please clear this up for me… Thanks,
Ptquilter
The headboard fabric is beautiful and the workmanship is excellent…Looks professionally done. I've seen other DIY headboards and they look DIY. This one looks wonderful…Great Job
Thanks so much!! 🙂 We love making headboards, definitely one of our favorites!
Just found your blog. Your headboard is fantastic! We have been wanting to redo the master bedroom and I was wondering if you could give dimensions for a king size bed?
Hi Jeanne! Thanks so much! 🙂 Ours is flush with the mattress, so I'd recommend measuring the widest part of the your mattress/frame and adjusting that measurement. The other measurements should be good. However, so you don't have any seams you will probably have to use a solid fabric and railroad it (run it horizontal across the center instead of up and down). A print could work if it looks good run that direction. Our center piece of fabric was just wide enough for a queen bed. Hope this helps! 🙂
What type of screws did you use to attach the frame to the plywood? And did you also screw the headboard frame into your metal bed frame when you were finished? What type of screws did you use to do that?
about to embark on similar project. yours looks amazing!!
Hi Rav! To attach the frame to the plywood we used 1" screws (you want to make sure that it goes into each board, but not through) We didn't attach the bed to the frame, since it goes to the floor, it rests between the mattress/frame and wall. We haven't had any issues with it moving; however, if you would like it secured, I think the easiest was would be using french cleats to attach it to the wall. Our mattresses and frame are pretty high/heavy so we haven't had any issues, but since everyone's set up is different, I'd recommend securing it.
This headboard looks amazing! I have several questions. How long were the screws that held your center piece of plywood to the larger back piece of plywood? Did you cut the foam to be exactly the same size as the center piece of plywood, or does it work better if it is slightly larger (or even slightly smaller) than the plywood? What's the easiest way to cut the foam? Can't wait to attempt this. Thanks for your help!
Hi Laura! We used 1/2" screws (you want to make sure that it goes through both sheets of plywood, but not all the way through so they don't poke out) It's best to cut the foam slightly larger so that it crushes around the edge. We cut foam with a VERY sharp kitchen knife – it cuts it like butter!