You may have noticed that my DIY project posts have been a little less frequent recently .. that’s partially because we’re working on too many at one time (we’re currently working on finishing our MD living room) Also, some projects aren’t exactly going as planned .. in TN we have the Chinese Chippendale chairs and a campaign desk in process. Both have had some hiccups .. the desk should require some sanding and one more top coat (I bought the wrong kind of paint the first time, so I’m hoping this will be it!) and I’ll talk about the Chippendale chairs below .. It’s been a few frustrating weeks, working and working with not a lot of finished results to show, but hopefully I’ll have tons to show you soon!! Thanks for sticking with me 🙂
—
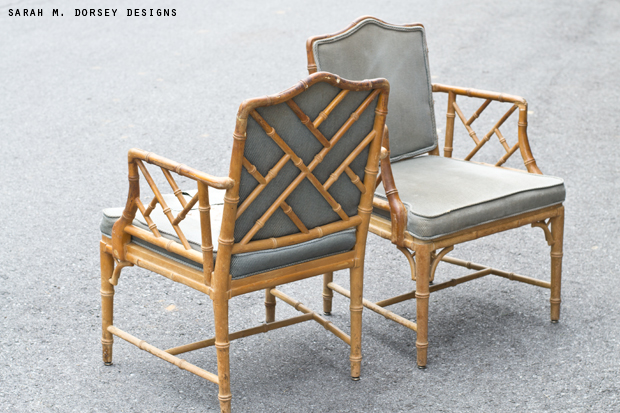
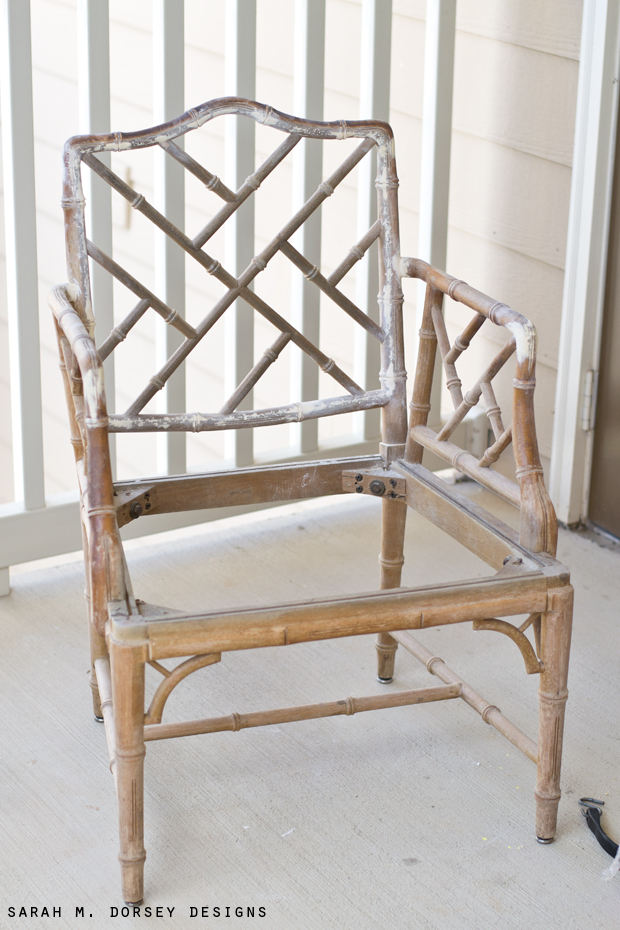
Today, I’m sharing our progress over the week for the Chinese Chippendale chairs .. (See this post for where we started)
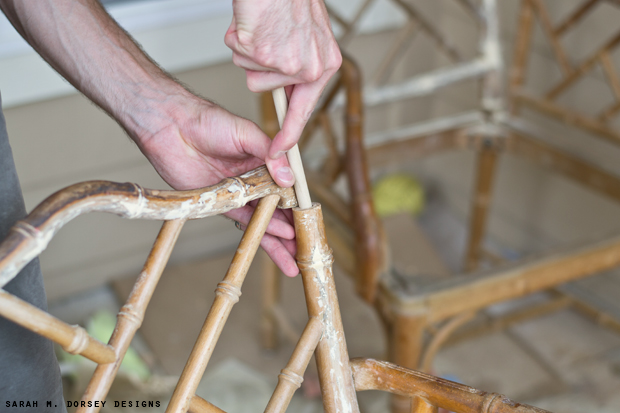
And inserted a new dowel rod with some wood glue.
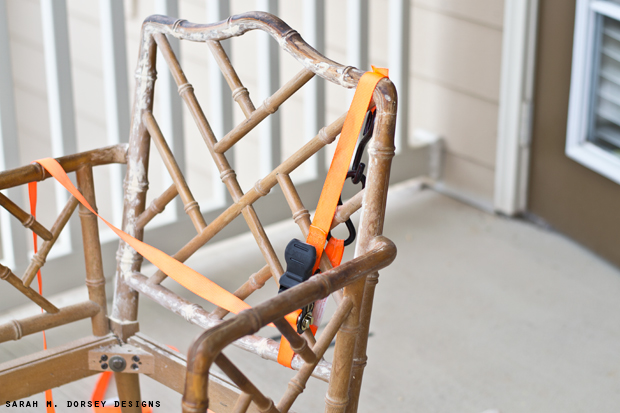
Finally, he clamped it in place with a ratchet strap – perfect for hard to reach spaces! We use these all the time when we’re hauling our furniture finds. If you’re using rope, I highly recommend picking up a set, it’s about $13 for a pack of 4 and worth every penny!!
We did some sanding before fixing the top .. but this week sanding has happened before, in between and after .. so I’ll mention it here! 🙂
If you re finish furniture, sanding is probably your least favorite part .. sanding a flat surface is bearable, but sanding a curved surface that’s hard to reach (those arms are gorgeous, but they make sanding the back around them very tricky!) makes it pretty frustrating, it requires patience and lots of breaks.
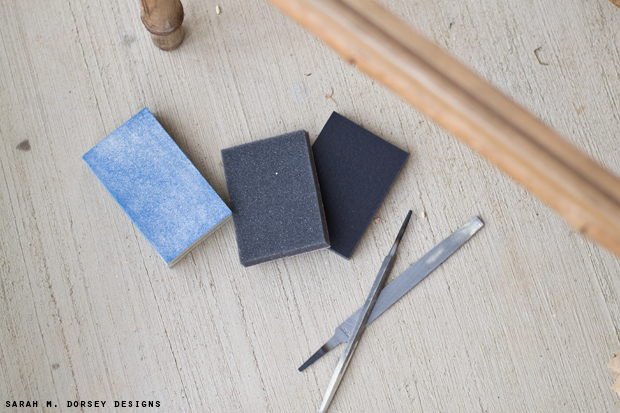
We found a few sanding tools to be helpful .. a foam sanding block (I recommend 3M, it lasts longer), thin sanding pads with a foam back (these were found at Sherwin Williams) and wood files, triangle and flat (these are designed to work with a handle, but we just used them without ..)
The foam sanding block works well for areas that are easier to reach, the foam is more forgiving for round surfaces, to help prevent over sanding.
The thin sanding pads with a foam back are good for hard to reach spots.
The wood files were something new that we used and they were great!! They stay sharp (my number one compliant with sandpaper) and easily remove the finish. The triangle file worked perfectly for cutting out the faux bamboo notches.
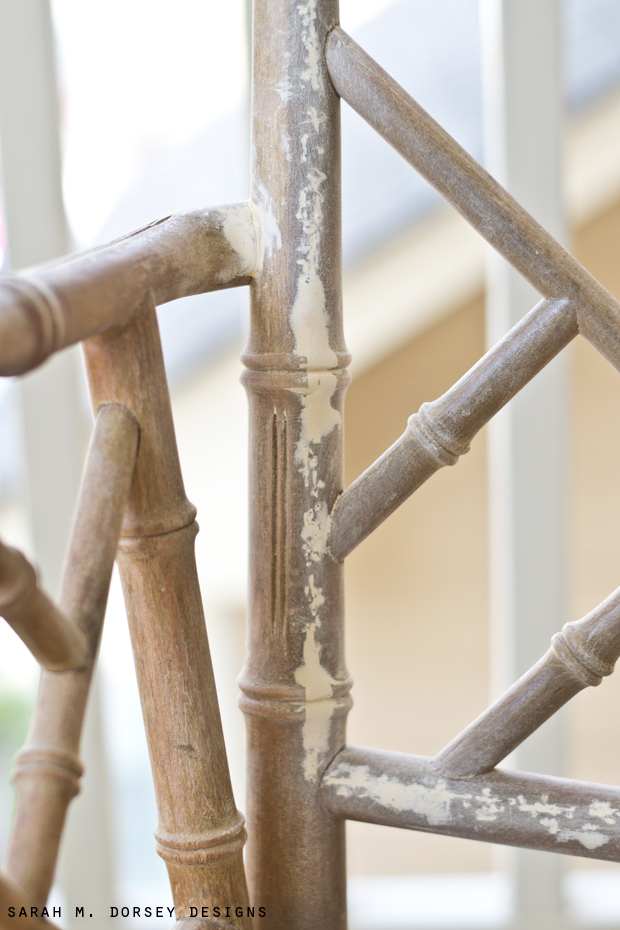
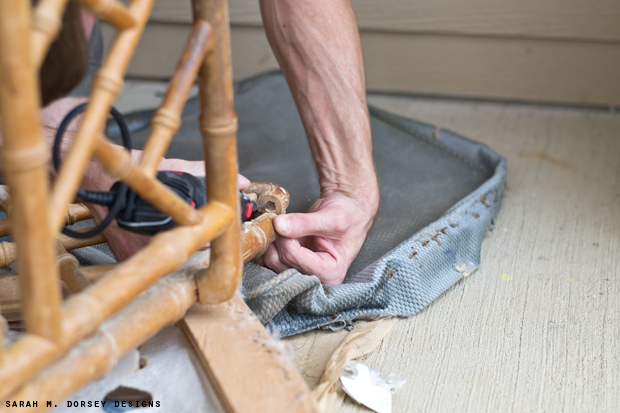
I forgot to take a close up, but the other road block this week was the finish .. it must have been sprayed on, and some areas it was pretty thick and chipping off. For the paint to look even, the uneven finish has to be removed .. there are so many facets to this chair, every time you look, you find more .. the flat file took the finish off SUPER quick .. there was just a lot to take off.
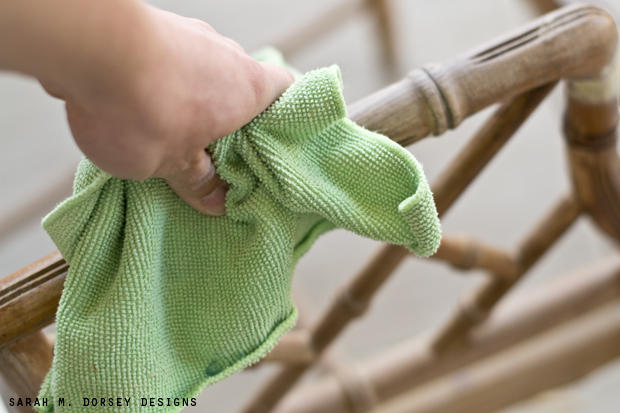
Once it was sanded, we wiped it off with a microfiber cloth to remove all the dust.
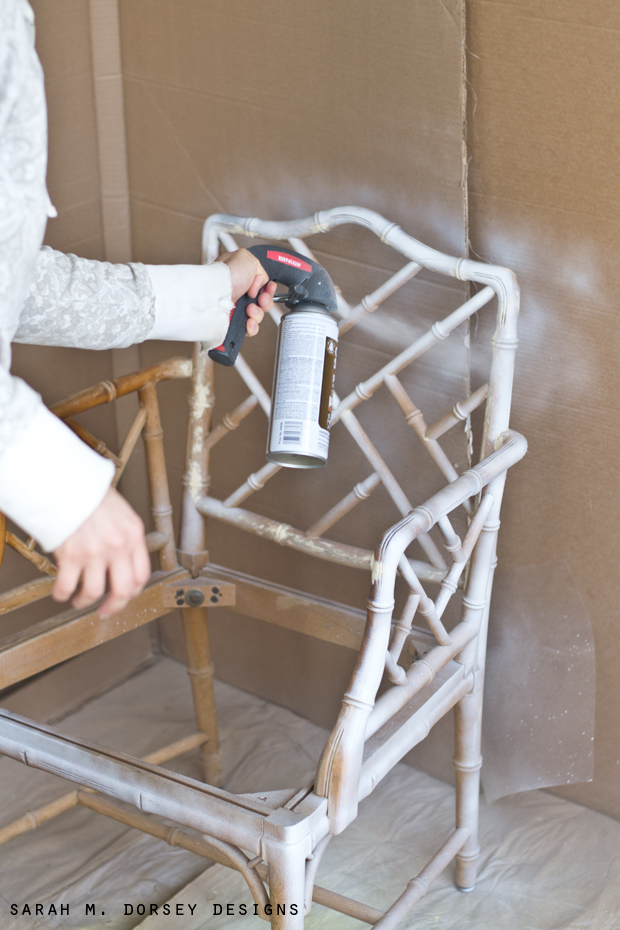
We spray primed it with Zinsser Cover Stain, using light, thin coats.
Once primed, we saw a few areas that needed some more work, so we applied more wood filler and sanded some more .. At this point, I was pretty frustrated, so it definitely helped that David was willing to help, so we both had a chair to work on!
One more coat of primer and then it should be ready for the top coat!
Time spent this week: (approximations since I broke it up a lot)
Repairing top section: 1 hour
Wood Filler: 2 hours
Sanding: 2 or 3 afternoons??
Priming: 30 minutes
Most of my projects don’t require this much repair and sanding, but since all the surfaces are round, the finish was uneven, and the faux bamboo had to be built up. It’s taking a lot longer than usual!! But the important thing is that the hardest parts are over!
I’m planning on a white frame and I’m still deciding on fabric, maybe something like this, this, this, this, this or this
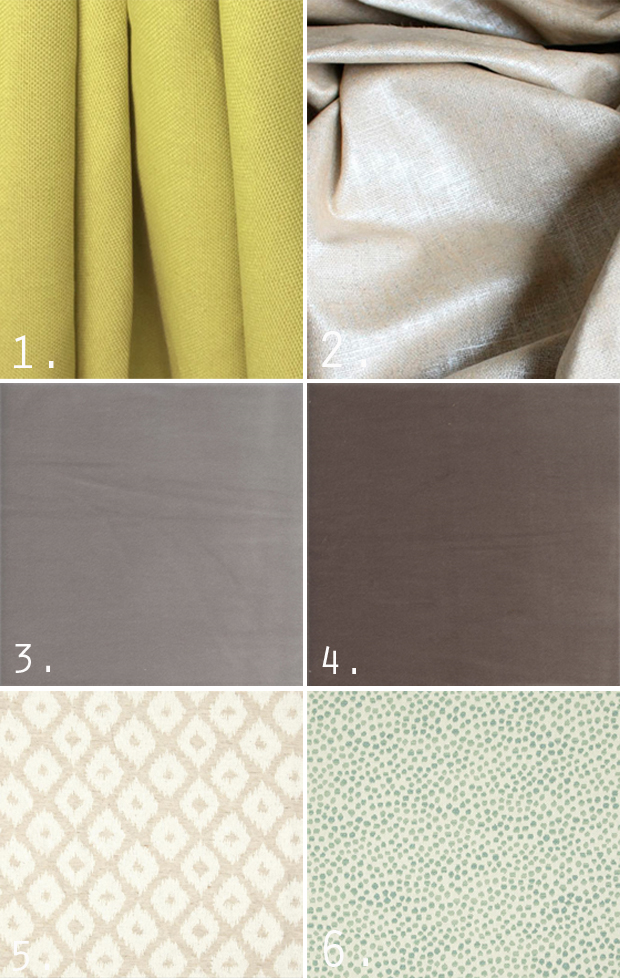
I’m not sure where the chairs will go .. so I’m deciding between neutrals and my go to colors .. If you have an opinion (from here or somewhere else), I’d love to hear it! I’ll be ordering fabric sometime this week.
I admire your diligence! I'm sure your hard work will pay off when the chairs are finished. If I were upholstering these chairs, I'd probably choose something more colorful and graphic (perhaps like this with black piping: https://www.fabric.com/buy/ul-339/waverly-pom-pom-play-confetti?cm_vc=756b1813-cbc1-43b3-84bd-29889bf8fb7b), but of the six fabrics you listed I like the solid chartreuse and the teal dots the best.
I say go for a neutral (I like 2 and 3) and you can add some pattern with pillows. Then you can change the chairs from room to room by just changing out the throw pillows.
You are so patient! The chairs will look amazing, I'm sure of it. As for fabric, I love #1 and #6!
I vote for number 6!
Your level of craft is just absolutely impeccable. Keep rockin' it! I'm likin' fabric #4 because of the contrast with the white – but I'm sure you can't go wrong!
So much work but so worth it. I'm kind of digging fabric 1 and 6
It's so frustrating when projects take forever, but this one will totally be worth it! Those chairs are amazing!
6 for sure!
So impressed by your patience and diligence here! Looks pretty tedious but I can tell they'll be one of those projects that was so worth all the time in the end.
I love this style of chair! You are making them look so good. I'm glad you're showing how long it is actually taking you.
You two! Wow you have such a can do attitude when it comes to refurbing! I really like fabric#2 and I totally agree if you are going to do all of the work, neutrals are nice so you have versatility.
Love #6. Just pinned it for future reference.
I love five or six. After all that trouble I would want it to make a statement. They would be beautiful but you could still use many different throw pillows with them or pair them with just about anything.
Thank you!