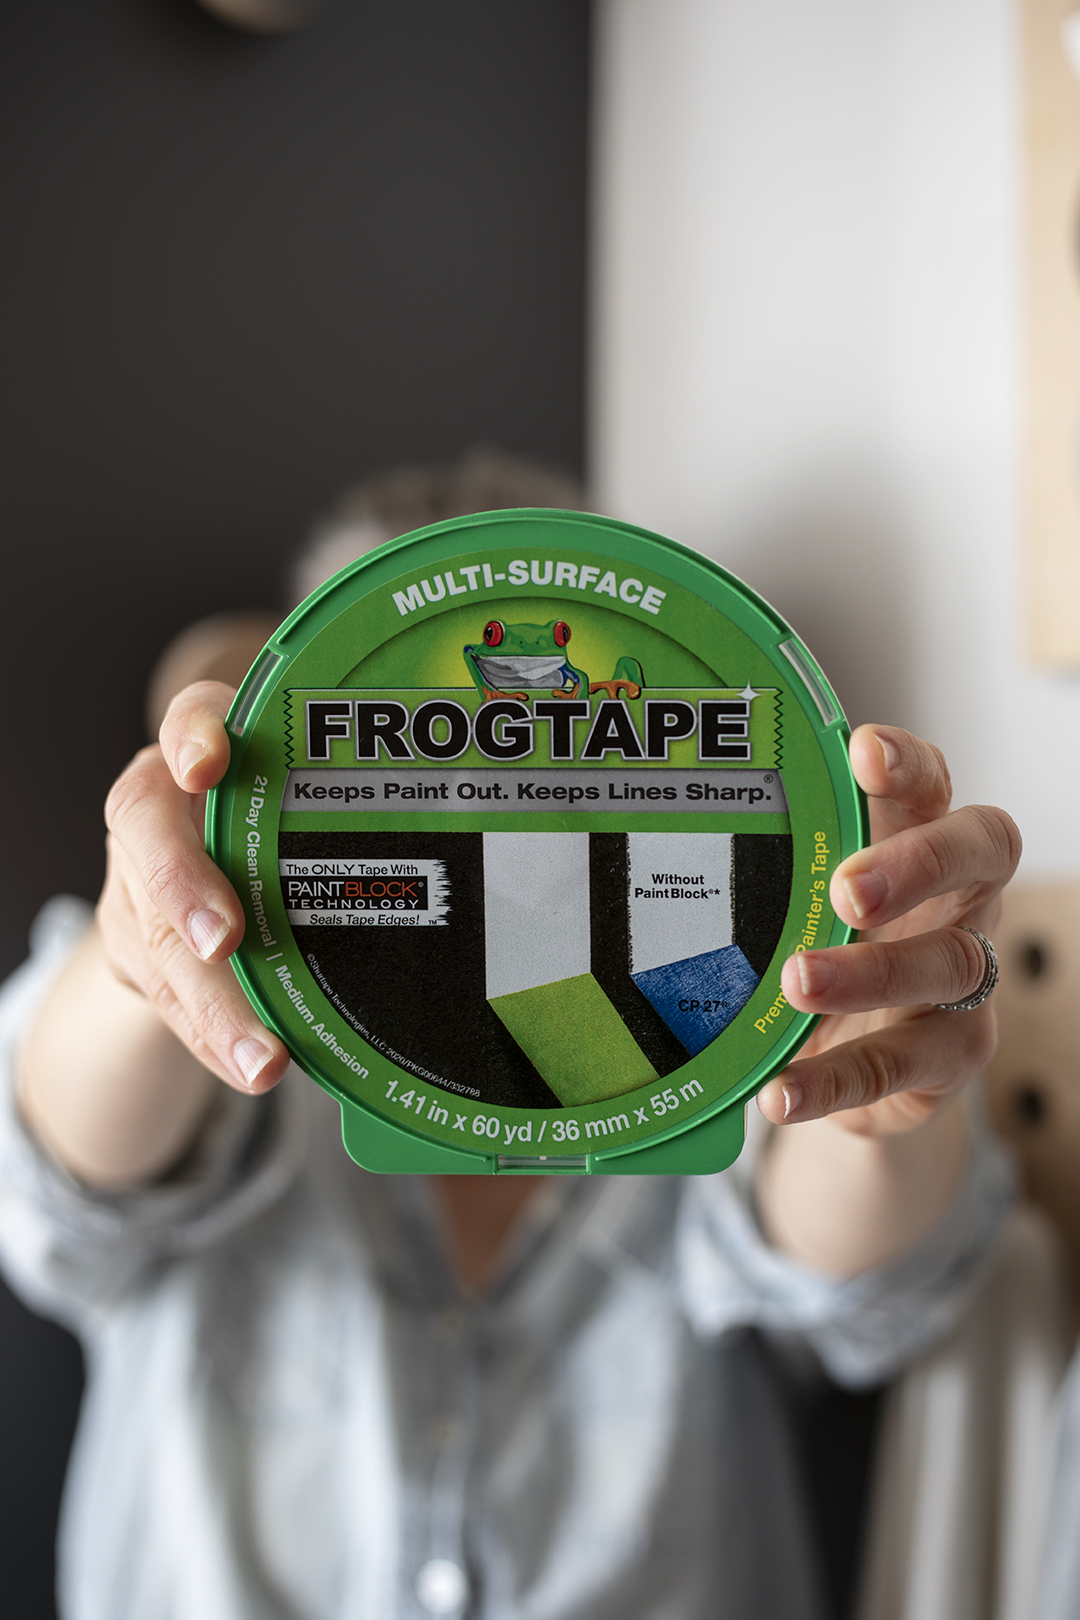
This post has been sponsored by FrogTape
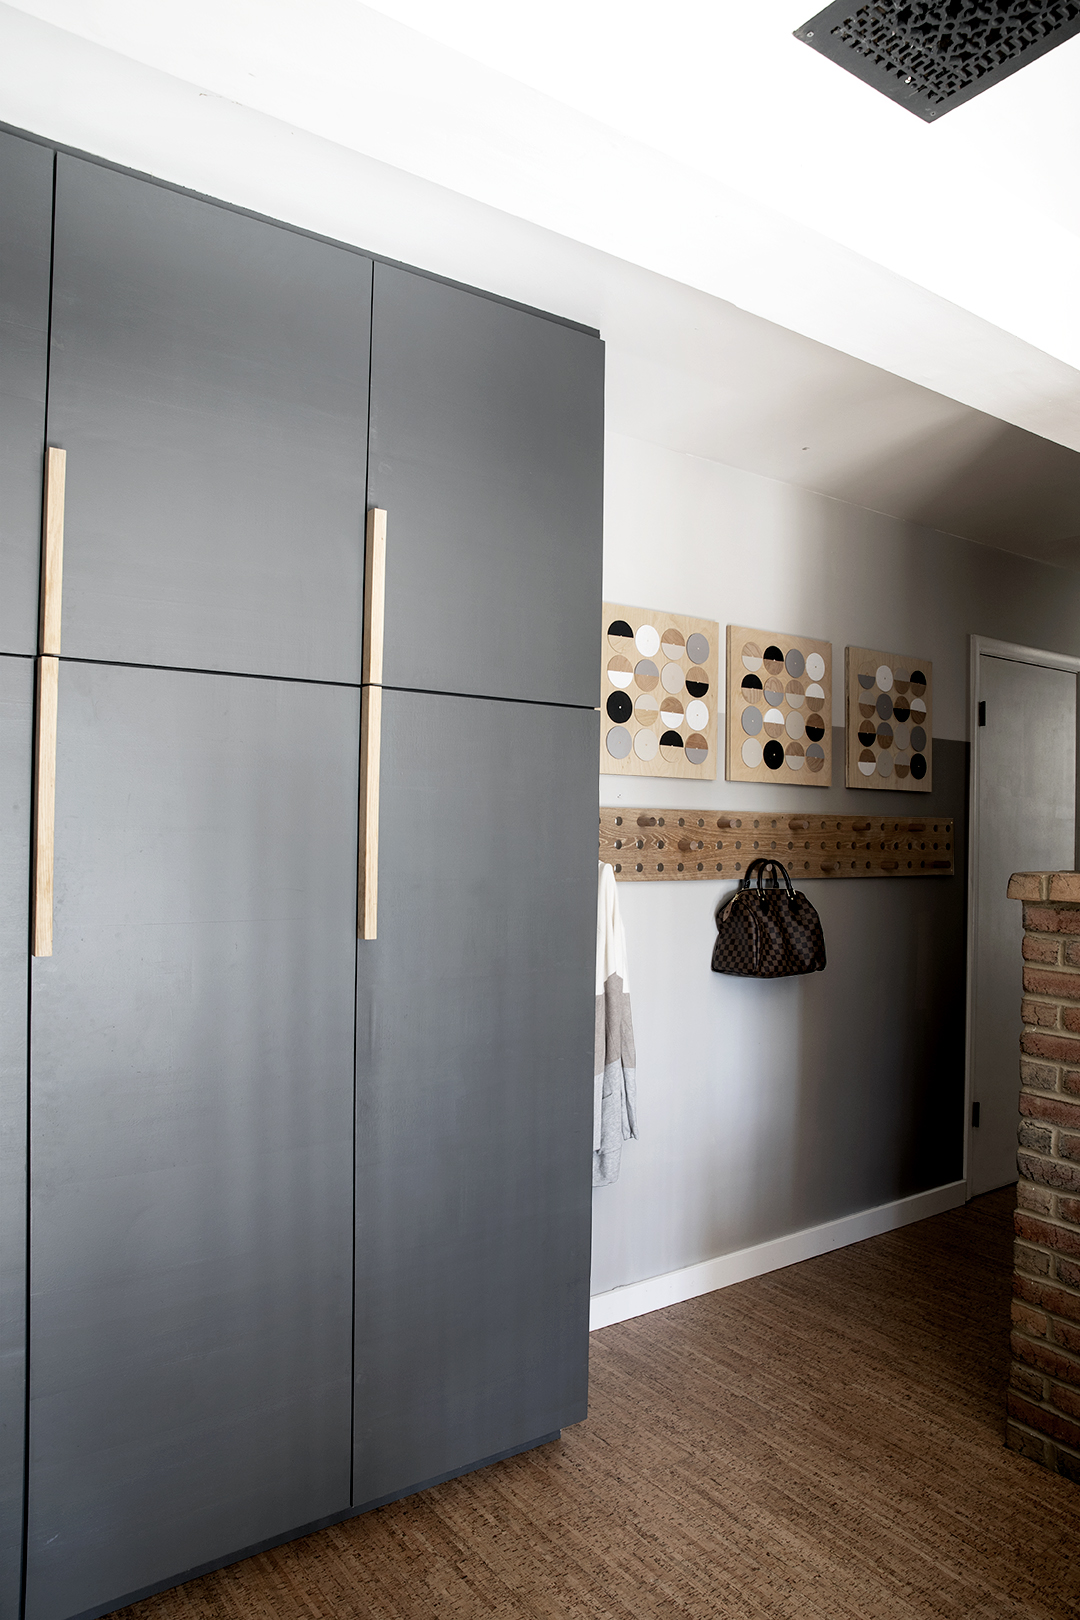
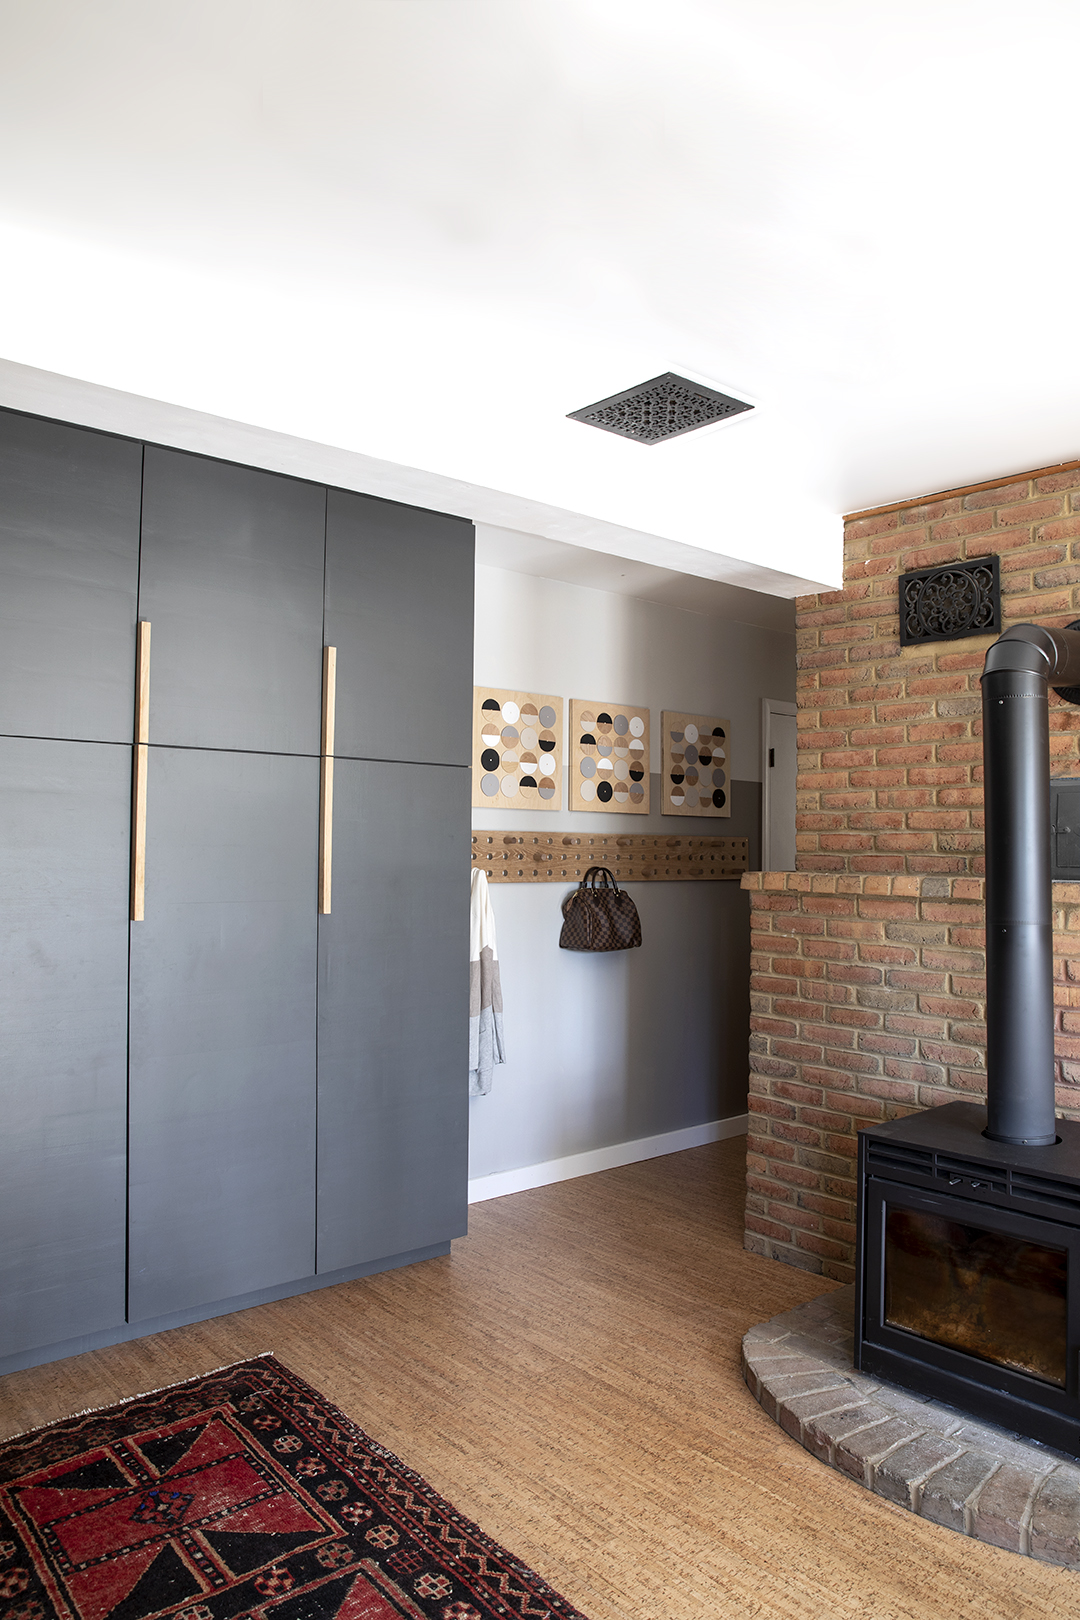
Hello friends! The drop zone in the basement is our main entry and gets a lot of traffic! It’s important to us to have a space that is functional (hello custom storage we built last year! check it out HERE) and beautiful. We created this large custom pegboard that can work for hanging storage and double as a piece of art. It’s long, adjustable and the perfect fit for this long hallway! Above, we created 3D circle art and I’m obsessed with how it turned out!
Read on to see how we transformed this space!
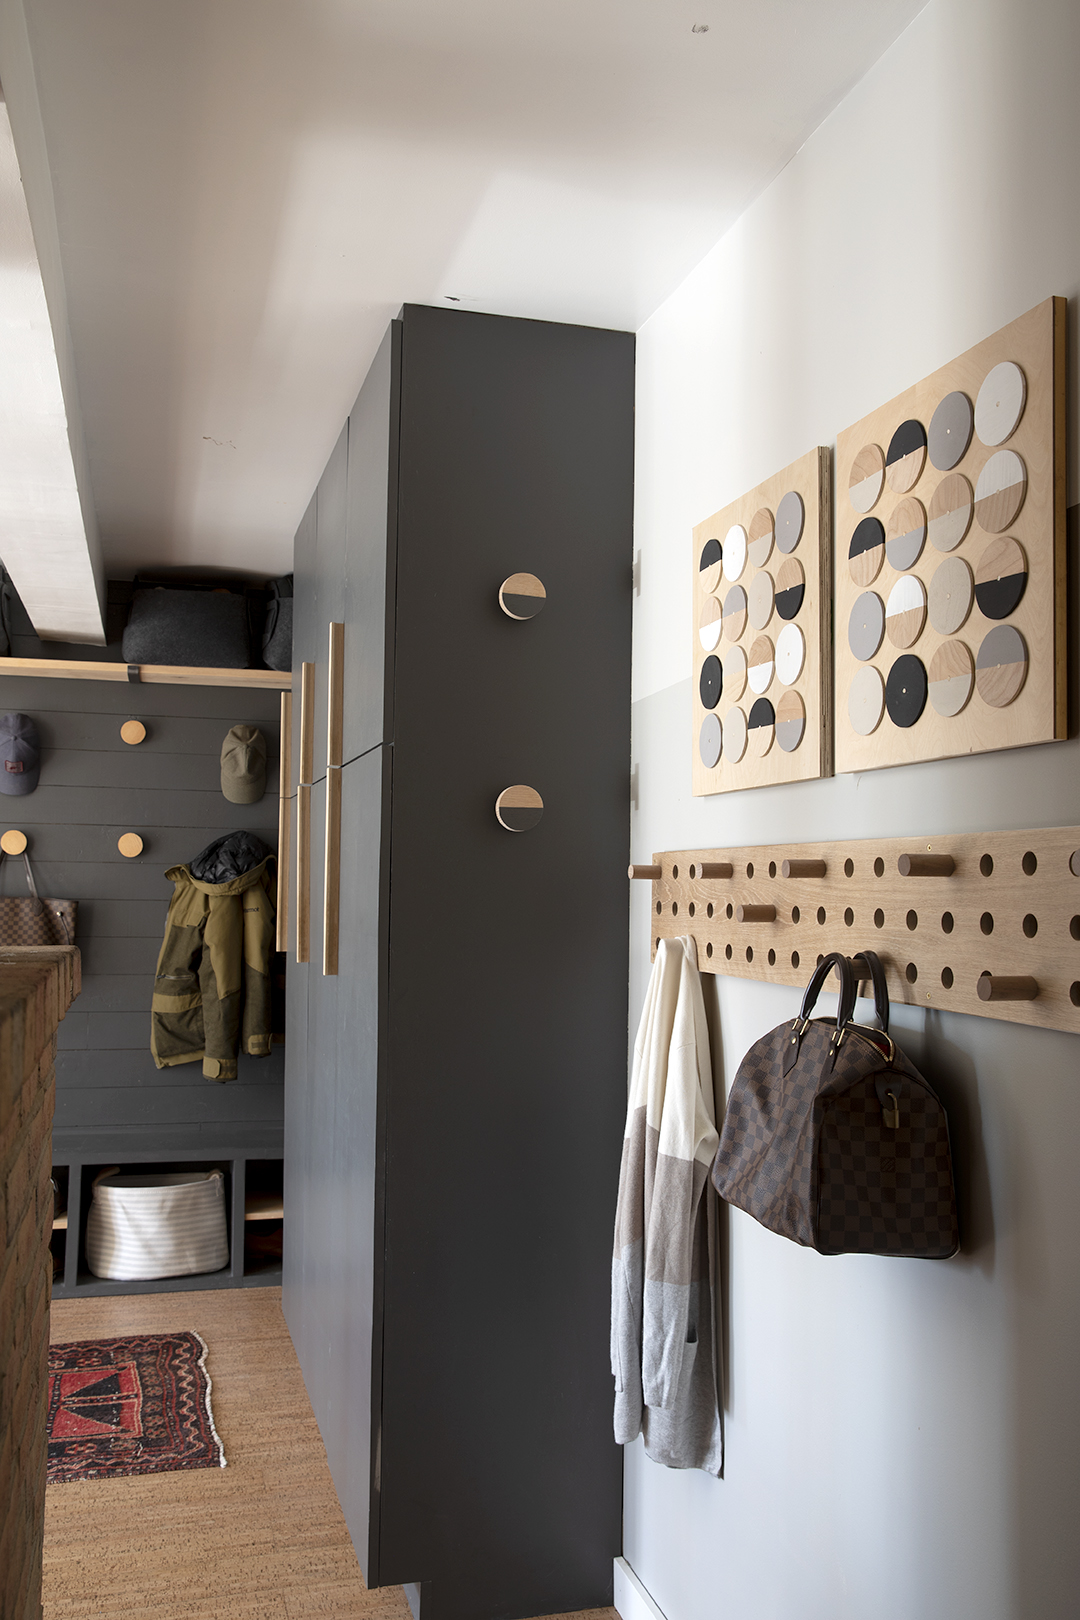
First, we added a simple color block to add a little dimension. I love how it defines the space and emphasizes the hallway!
CIRCLE ART
To get started, either purchase 3-3/8″ 1/4″ thick birch circles (qty 48) or make your own. We used the bandsaw to cut ours. Drill a 7/32″ circle through the center of all circles.
Apply clear sealant (we used shellac) to the front of the circles. Allow to dry.
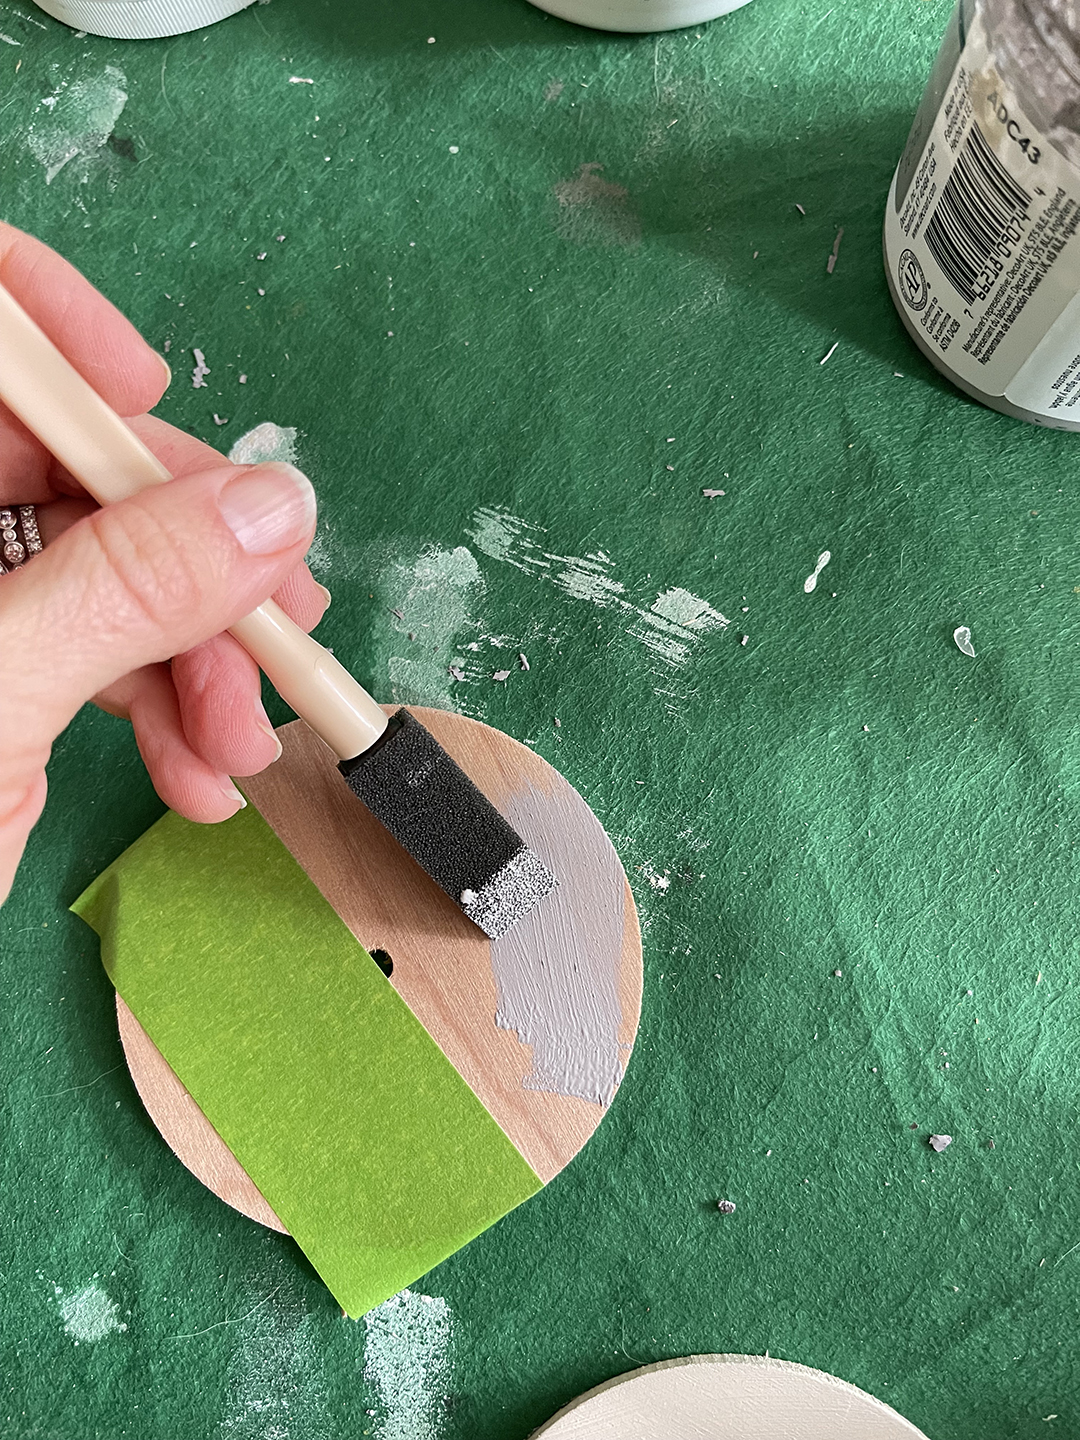
We used 16 circles per 18″x18″ (3 total) 1/2″ birch plywood backing. Tape half of the circles (or desired amount) with a piece of FrogTape multi surface in the center. Tips: 1. Approximate the tape and then hold in the light to check the circle is center. It doesn’t need to be exact to look amazing! 2. For smooth application of the tape, pull it tight around the edges and smooth on the back. You only need to paint one side.

Paint half of the circle (one side) with desired paint. I selected a black, taupe, gray and white. For the other half of the circles, paint solid. Remove FrogTape while the paint is still wet.
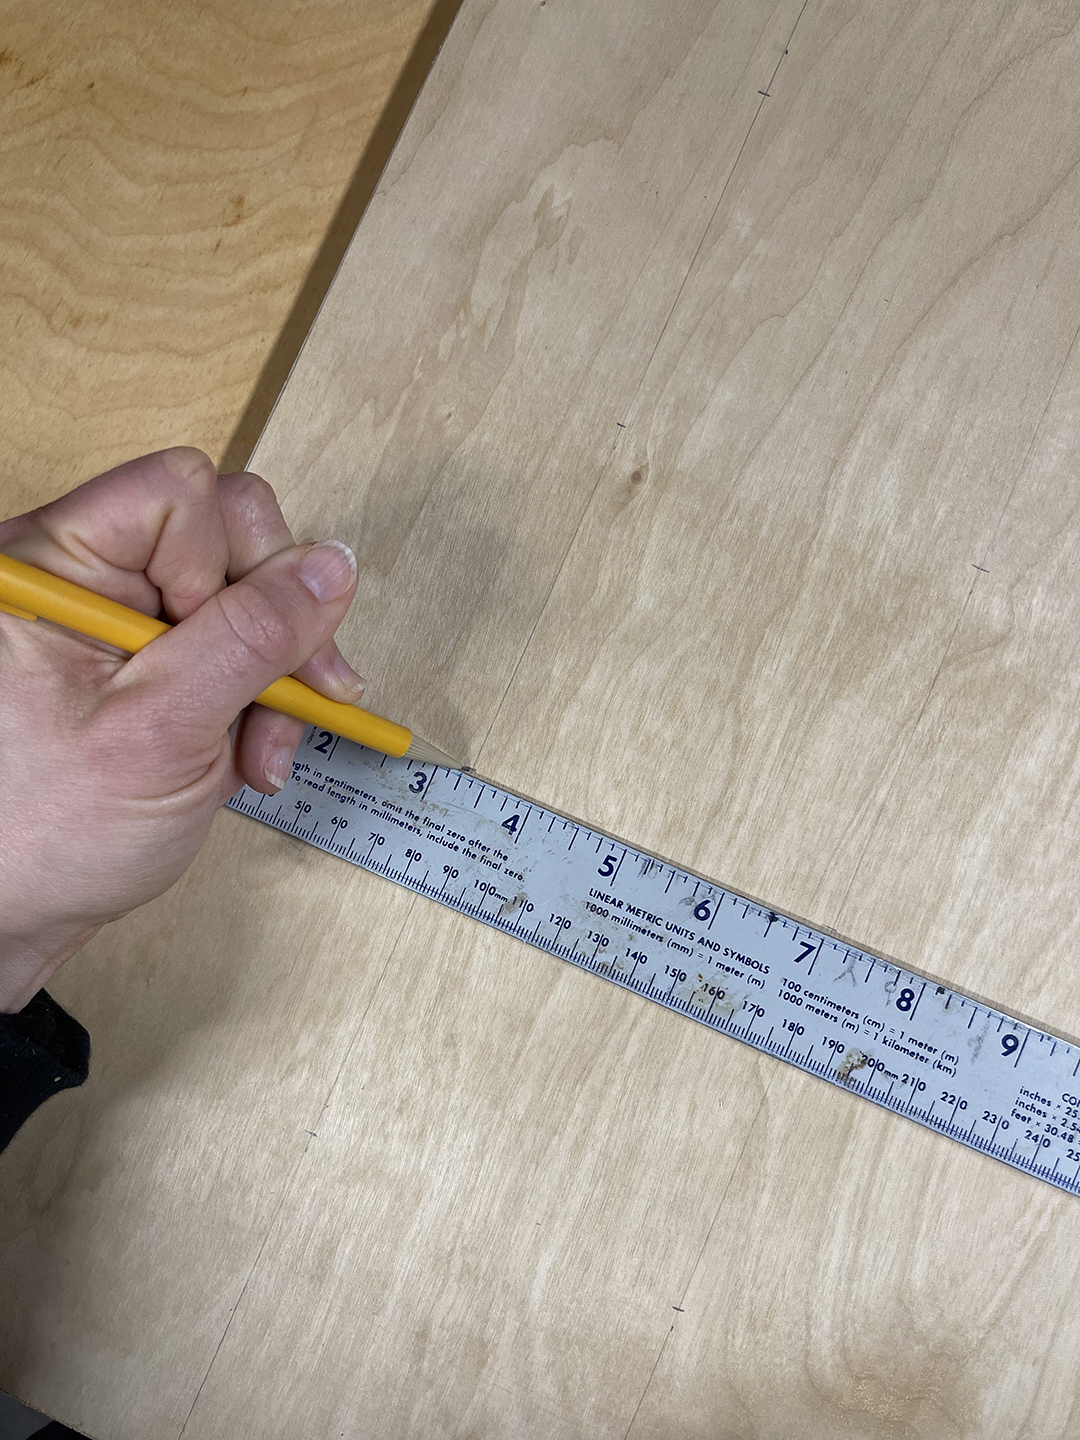
While the paint is drying, prepare your 1/2″ birch plywood backing. Cut three 18″x18″ squares. Once cut, sand any rough edges. Start to layout your circles by measuring. All sides measured 3-3/8″ (to center of circle) and the internal circles were spaced 3-3/4″ apart (from center to center of circles). Use a pencil to lightly layout and mark center for placement.
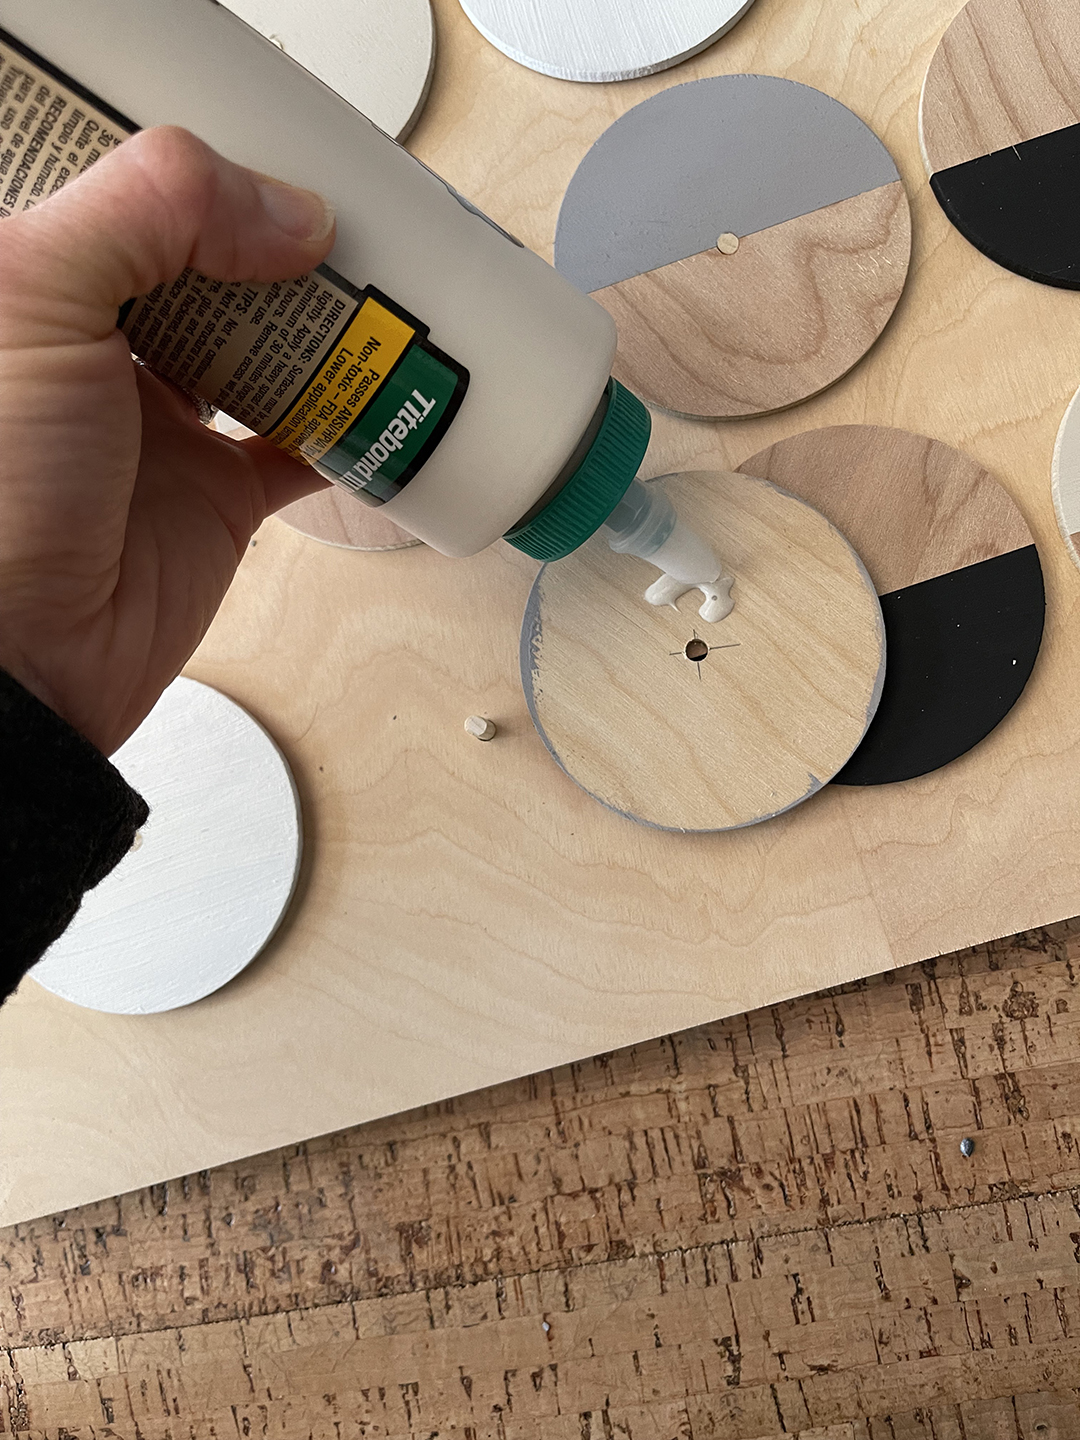
With a 7/32″ drill bit, drill completely through the 1/2″ birch on holes mark in step above – there will be 16 holes. Cut a 3/16″ dowel rod in 7/8″ pieces.
Insert the dowel rod in each hole.
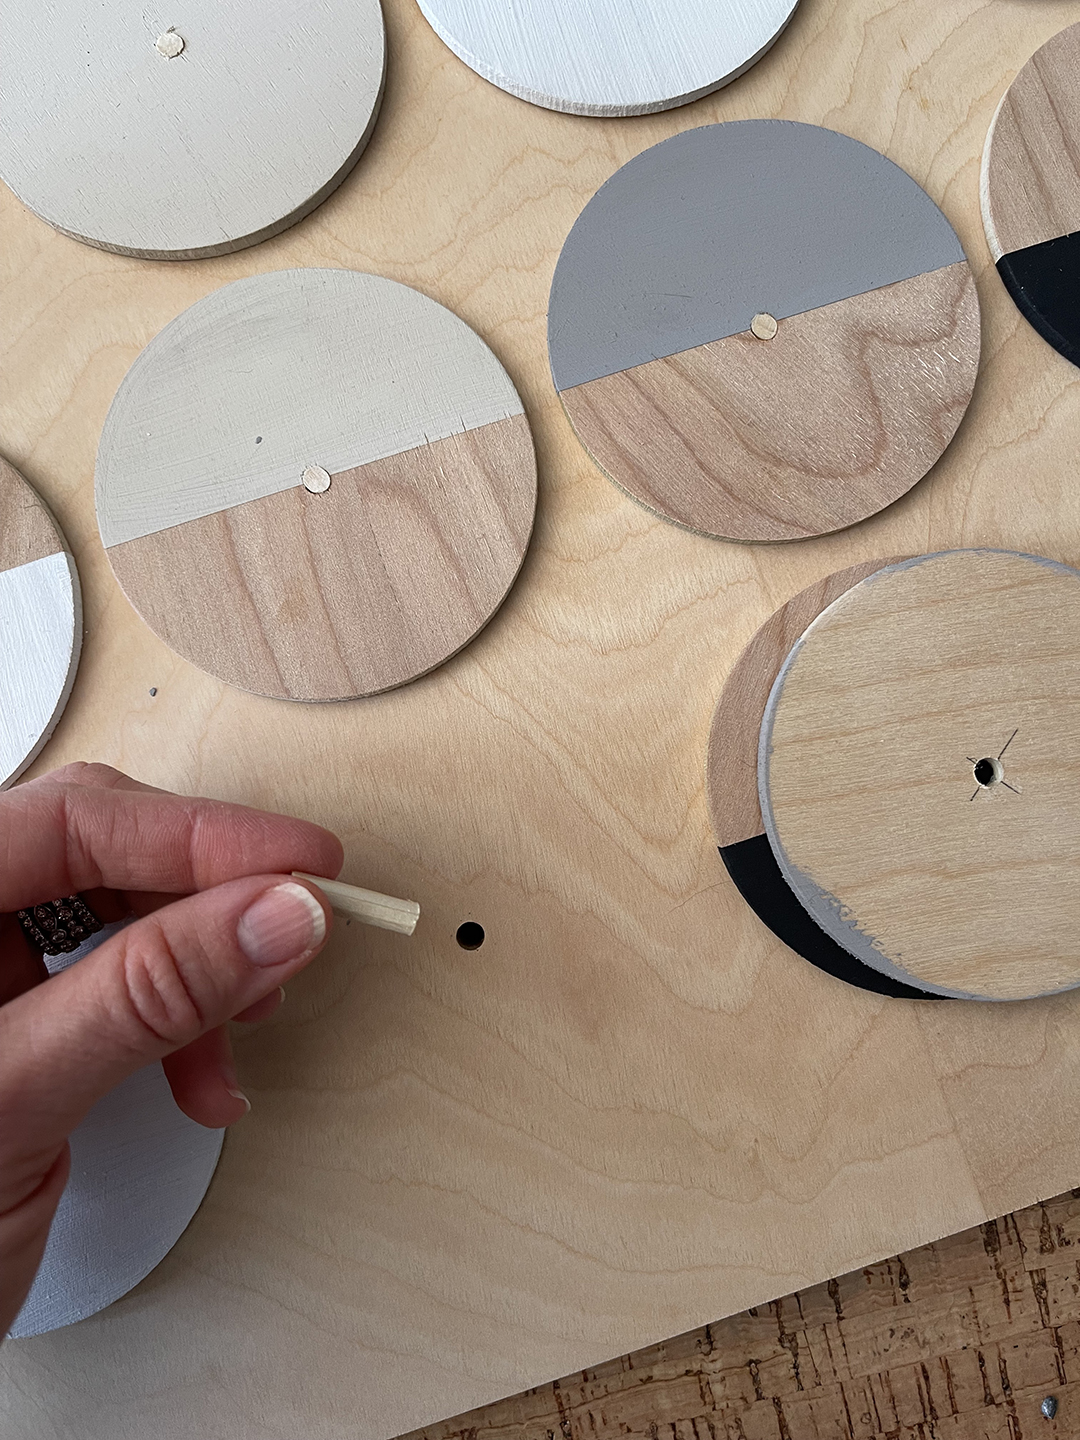
Apply a little wood glue on the back and secure with the dowel rod in the center. Note: These don’t need to be glued, if you want them to spin and be able to moved the circles around. They will stay on dowel rods (if you don’t have little kids 🙂
Secure to the wall with desired hanging method. Note: We used a piece of trim on the bottom as a spacer and FrogTape on the sides as markers to make it super easy!
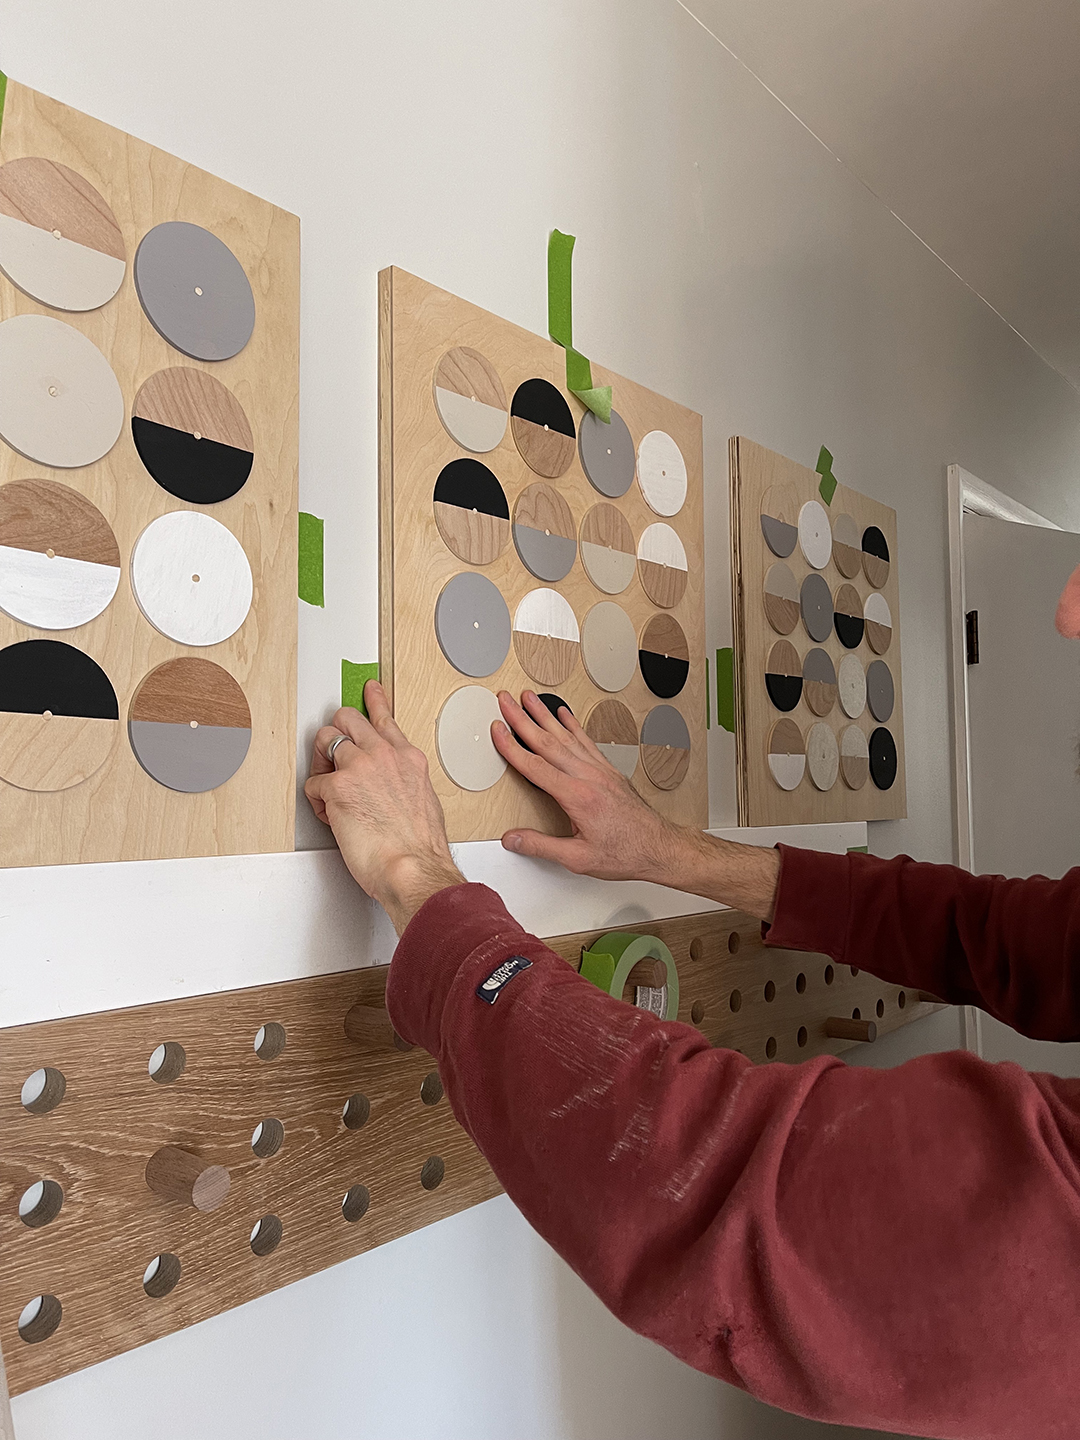
That’s it! We also made the peg board, stay tuned for a future tutorial!
I’ve been going back and forth on what to do with this wall and I’m so happy with the result! Making your own art adds a layer of personalization and is inexpensive!

Hello organization! I find myself wanting more and more organization with young kids. Definitely a process!
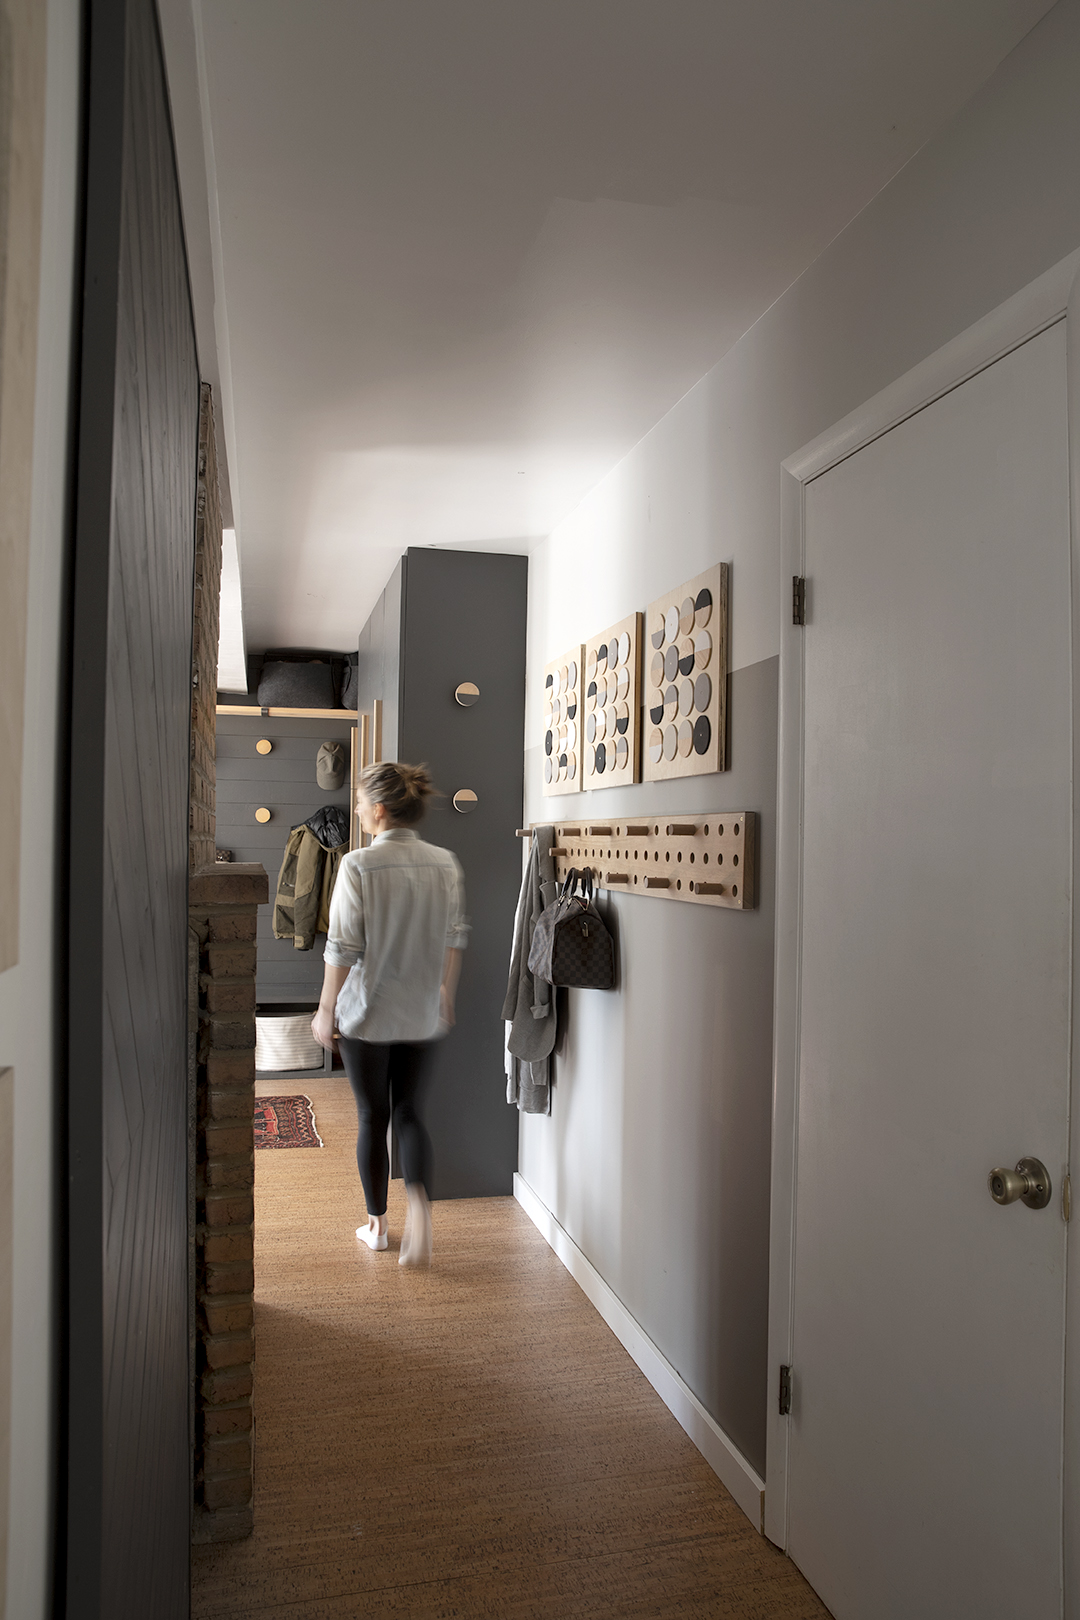
I’m soo happy with how this wall turned out!
Thanks for stopping by! If you have any questions, please leave them in the comment section!
Thanks to FrogTape for sponsoring this post! As always, I only share products and companies that I love and have had a good experience with!
Leave a Reply