This post has been sponsored by FrogTape
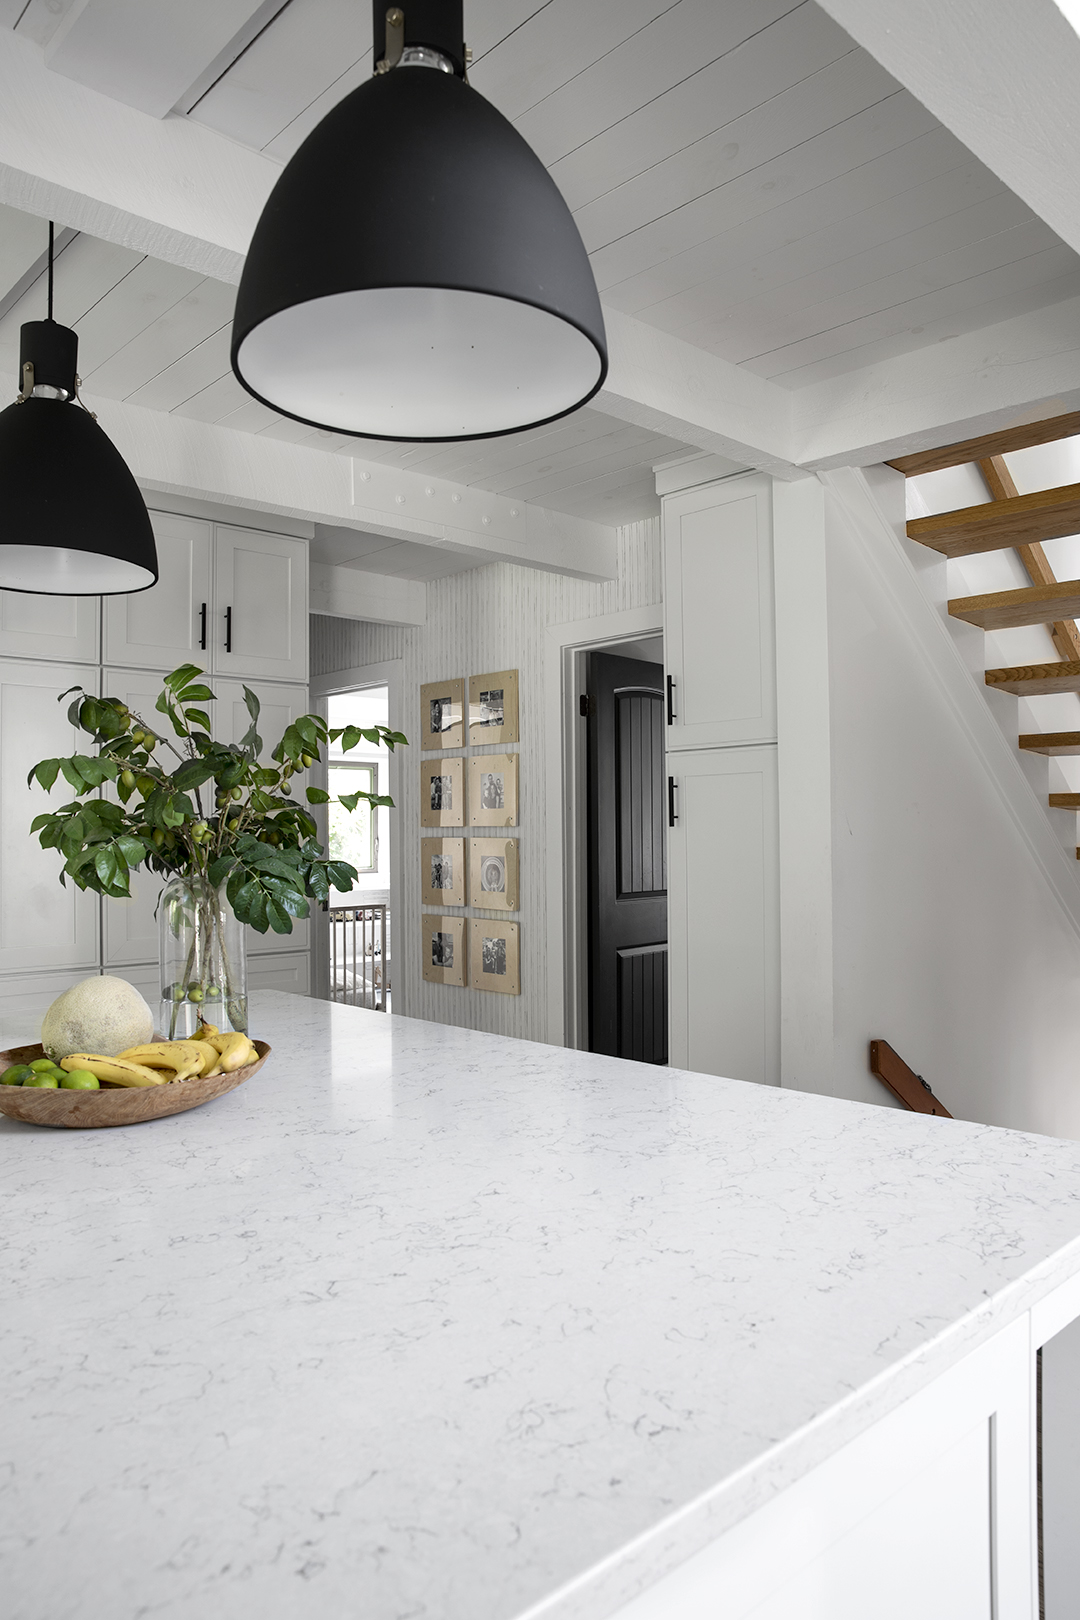
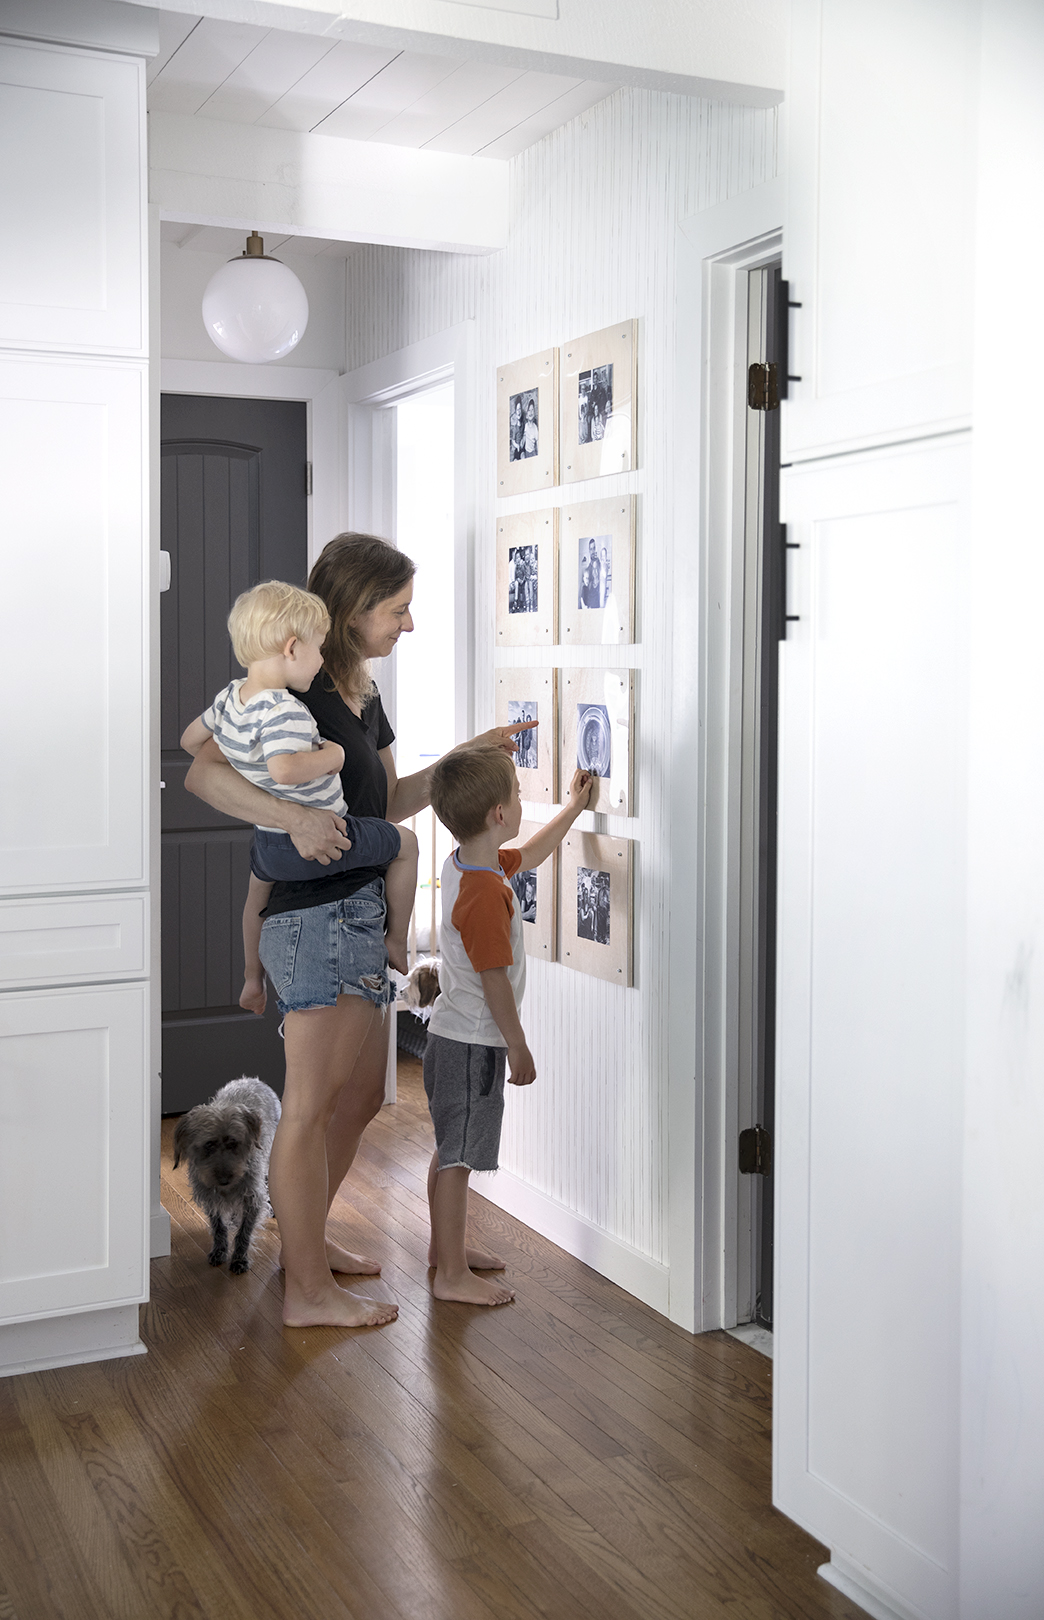
Inspired by a wallpaper I recently specified for a project, we created our own designer look wallpaper for the cost of two rolls of FrogTape! This is a busy traffic area in our home, our boys are constantly walking by and touching the wall, and as you could guess, the frames we had there were not solid, the plexiglass got pushed in and they’ve ended up on the floor a few too many times. I wanted something super rigid, and firmly secured to the wall. We designed and created a plywood plexiglass frame for our son’s room (check out that FrogTape project HERE) and decided that this was the perfect application for the hallway. They are solid and firmly attached to the wall. So far the boys haven’t been able to budge them! Plus, I wanted to create a family gallery wall, they love looking all all the pictures here! With a few hours, some creativity and little money we got the high end look I’ve always wanted for this space!
Read on to see how we did it!
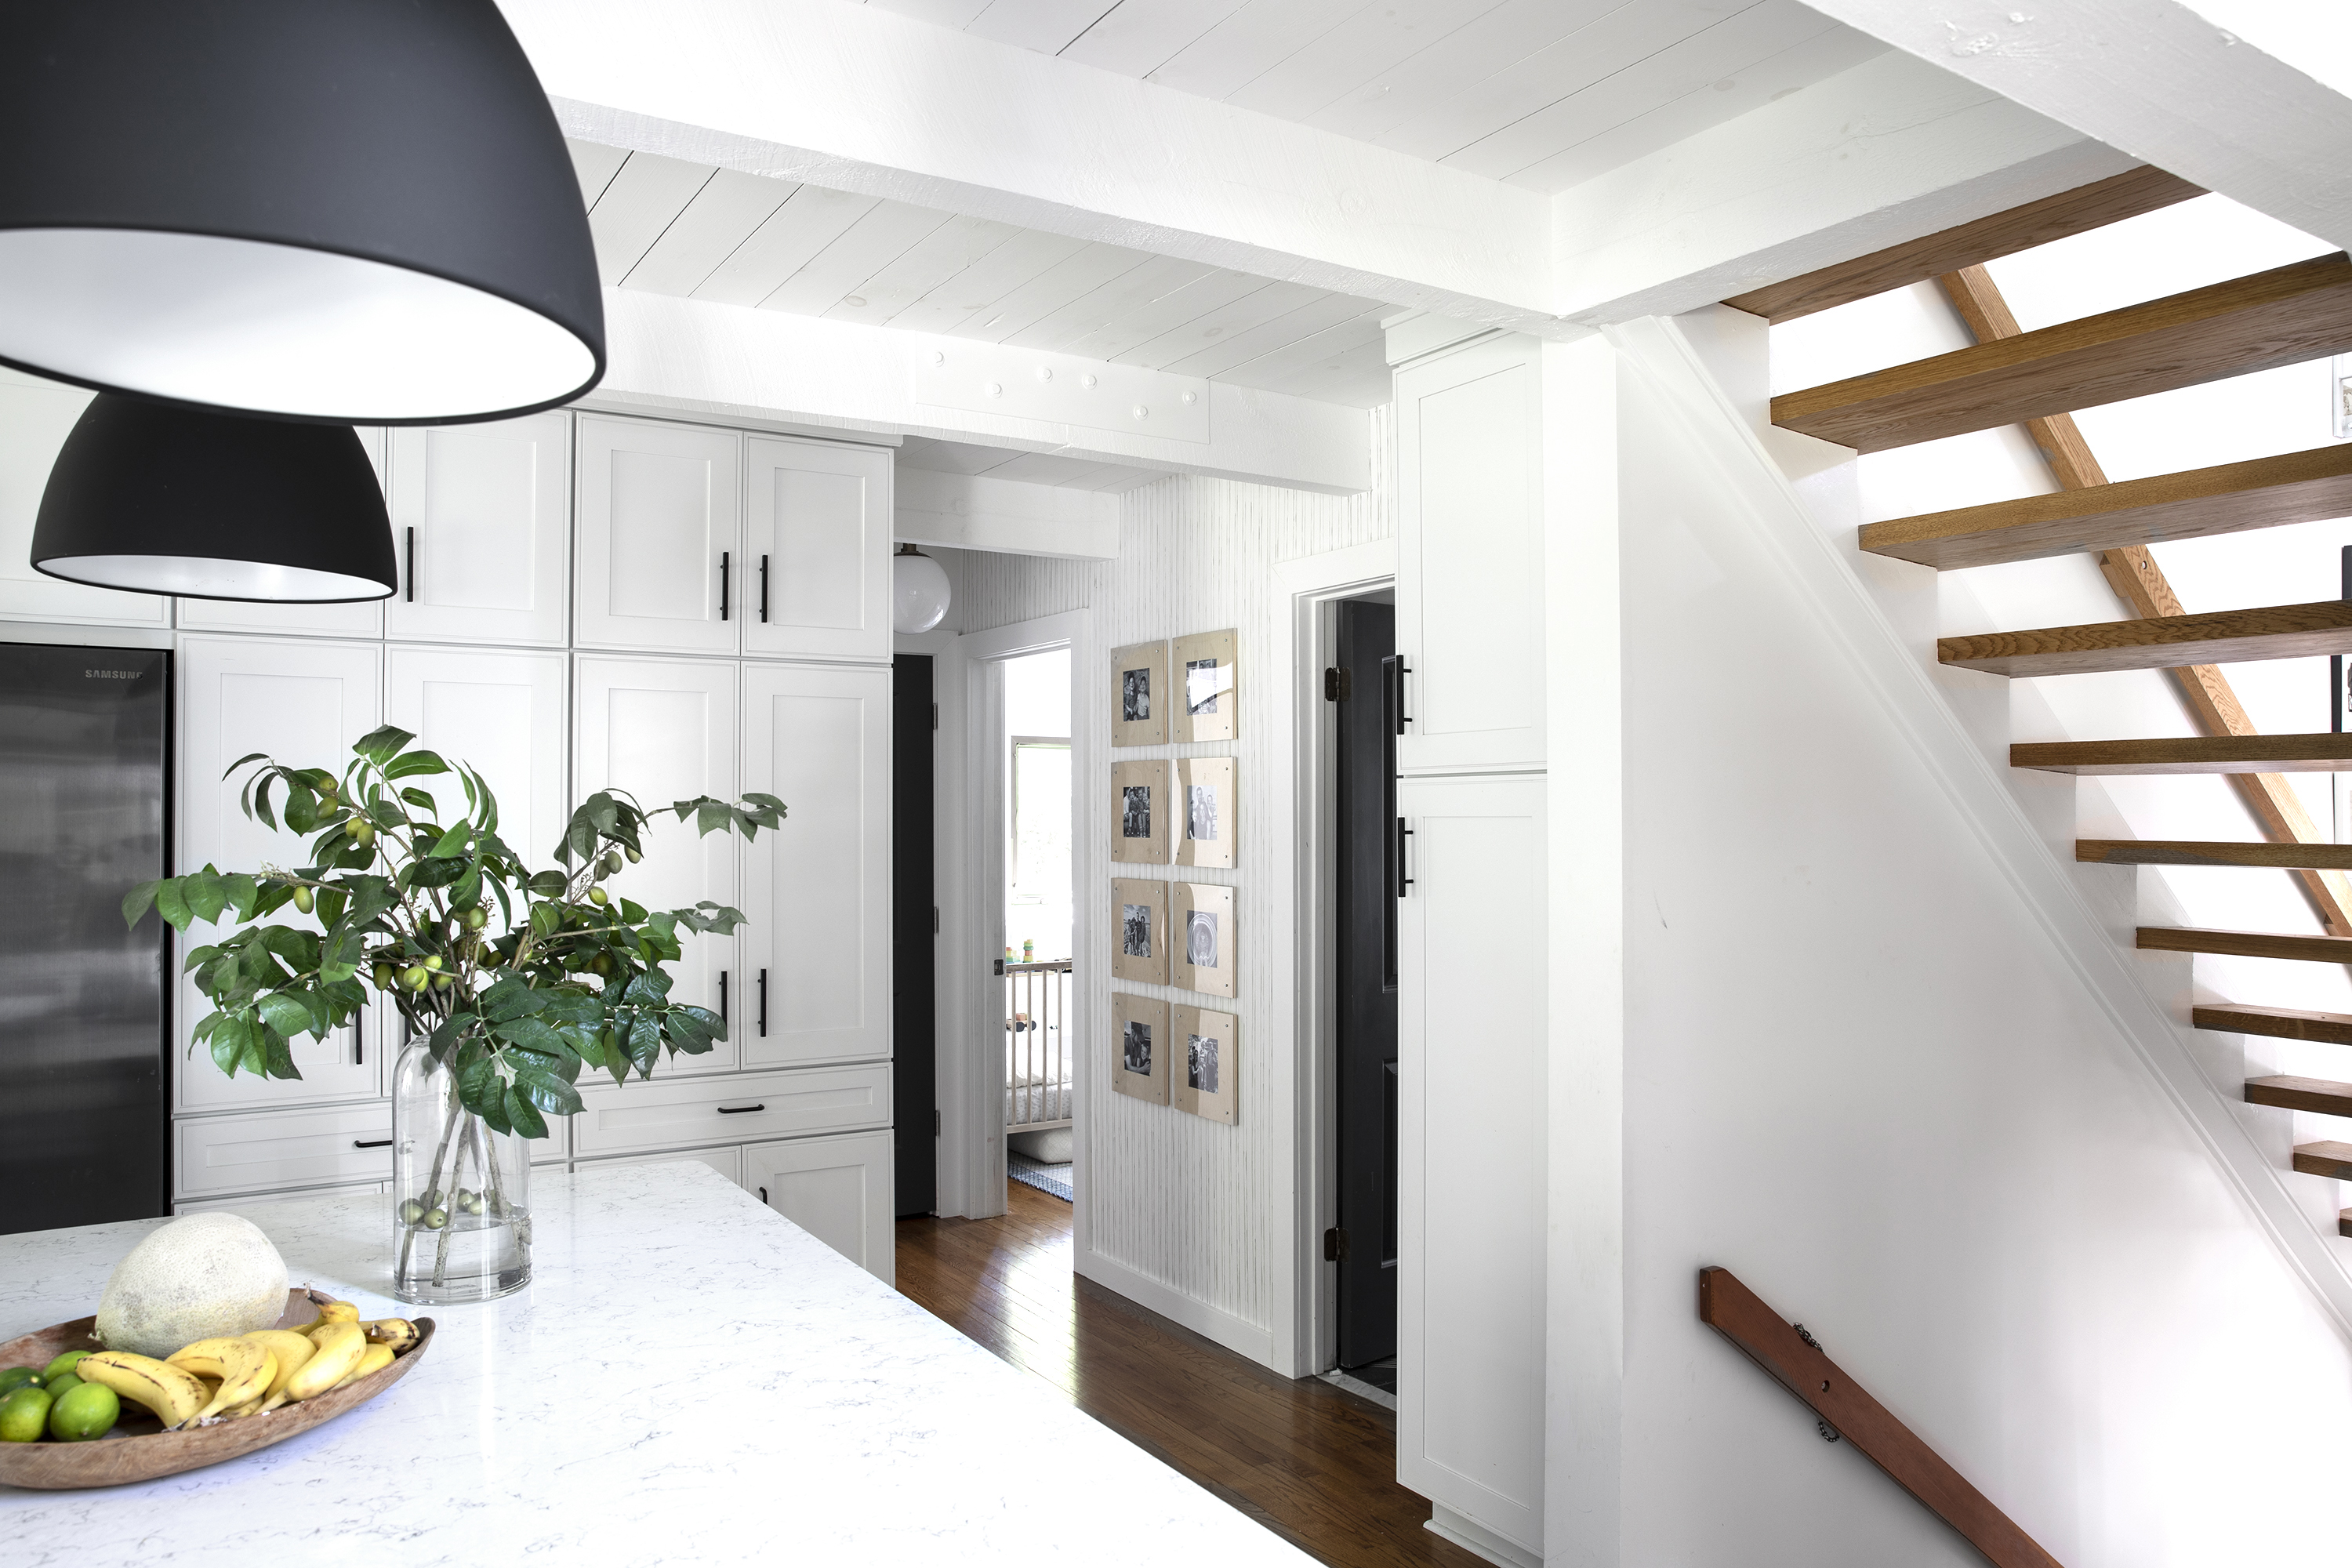

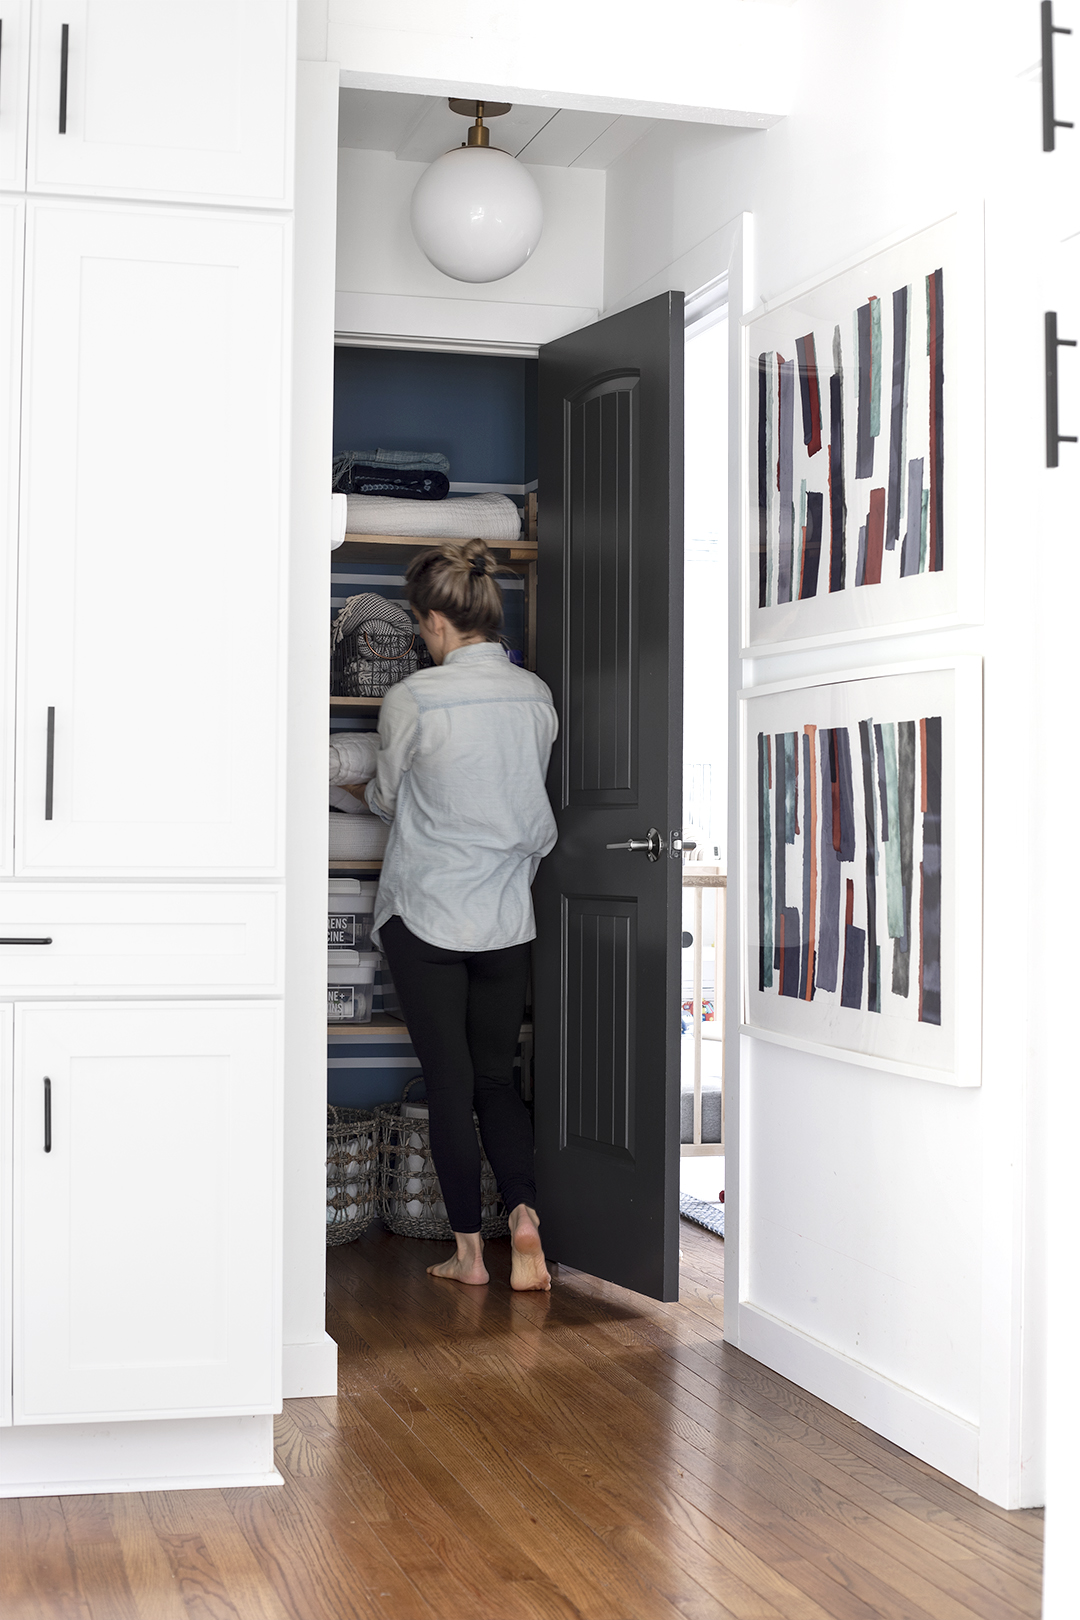
BEFORE – I liked the art, but I was ready for a change!

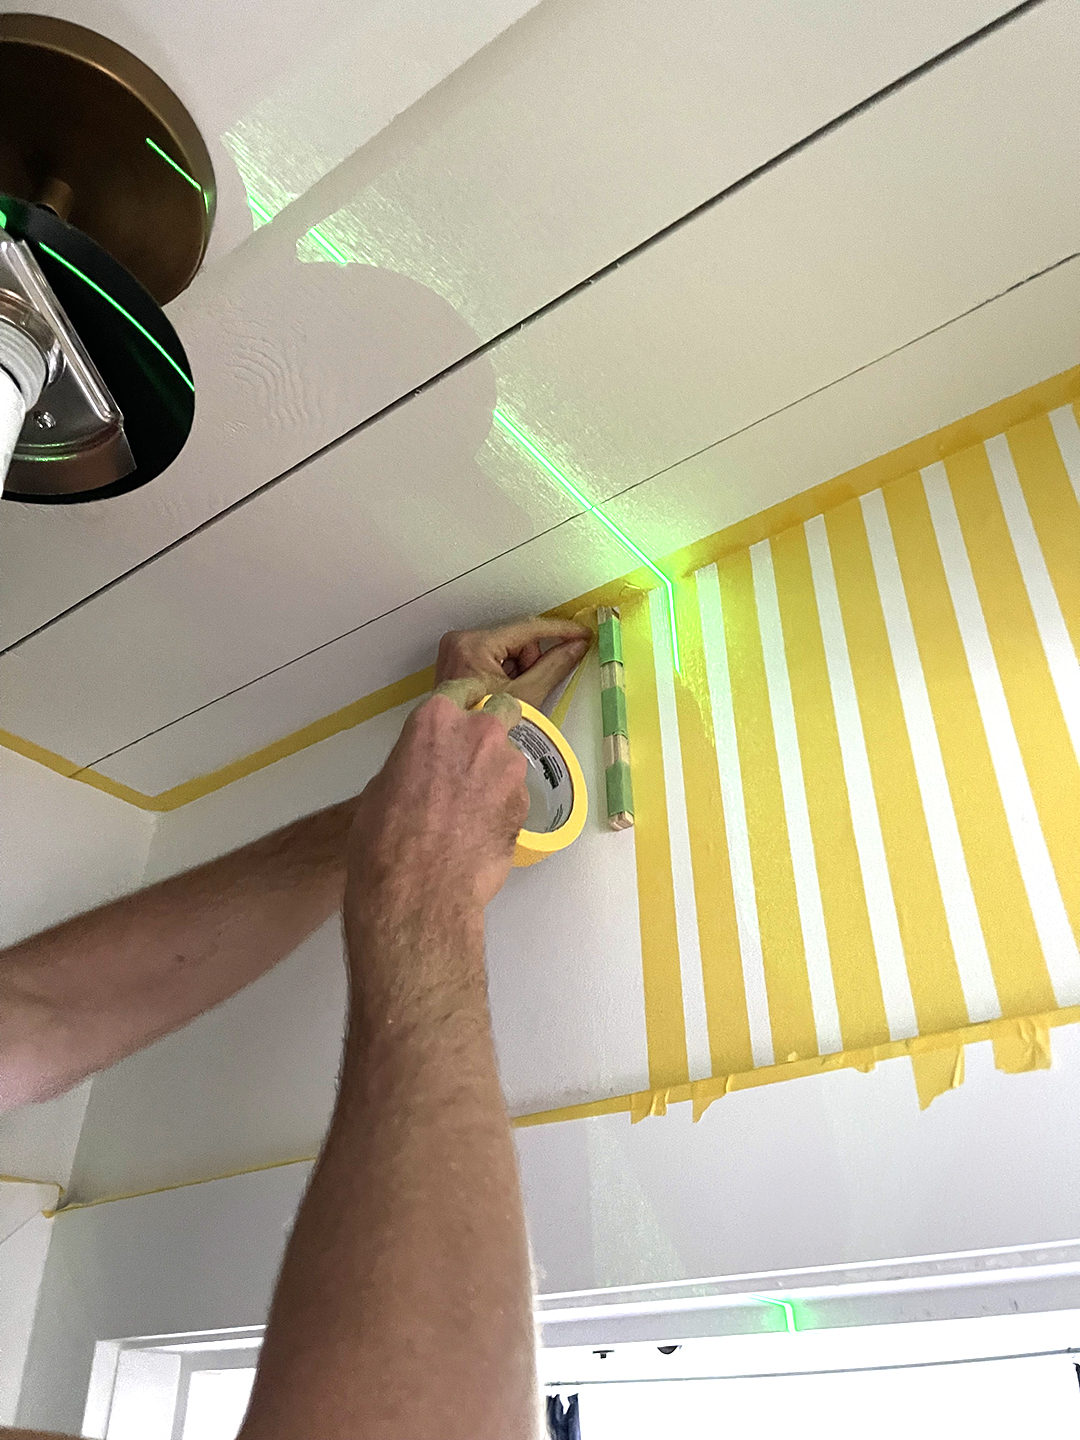
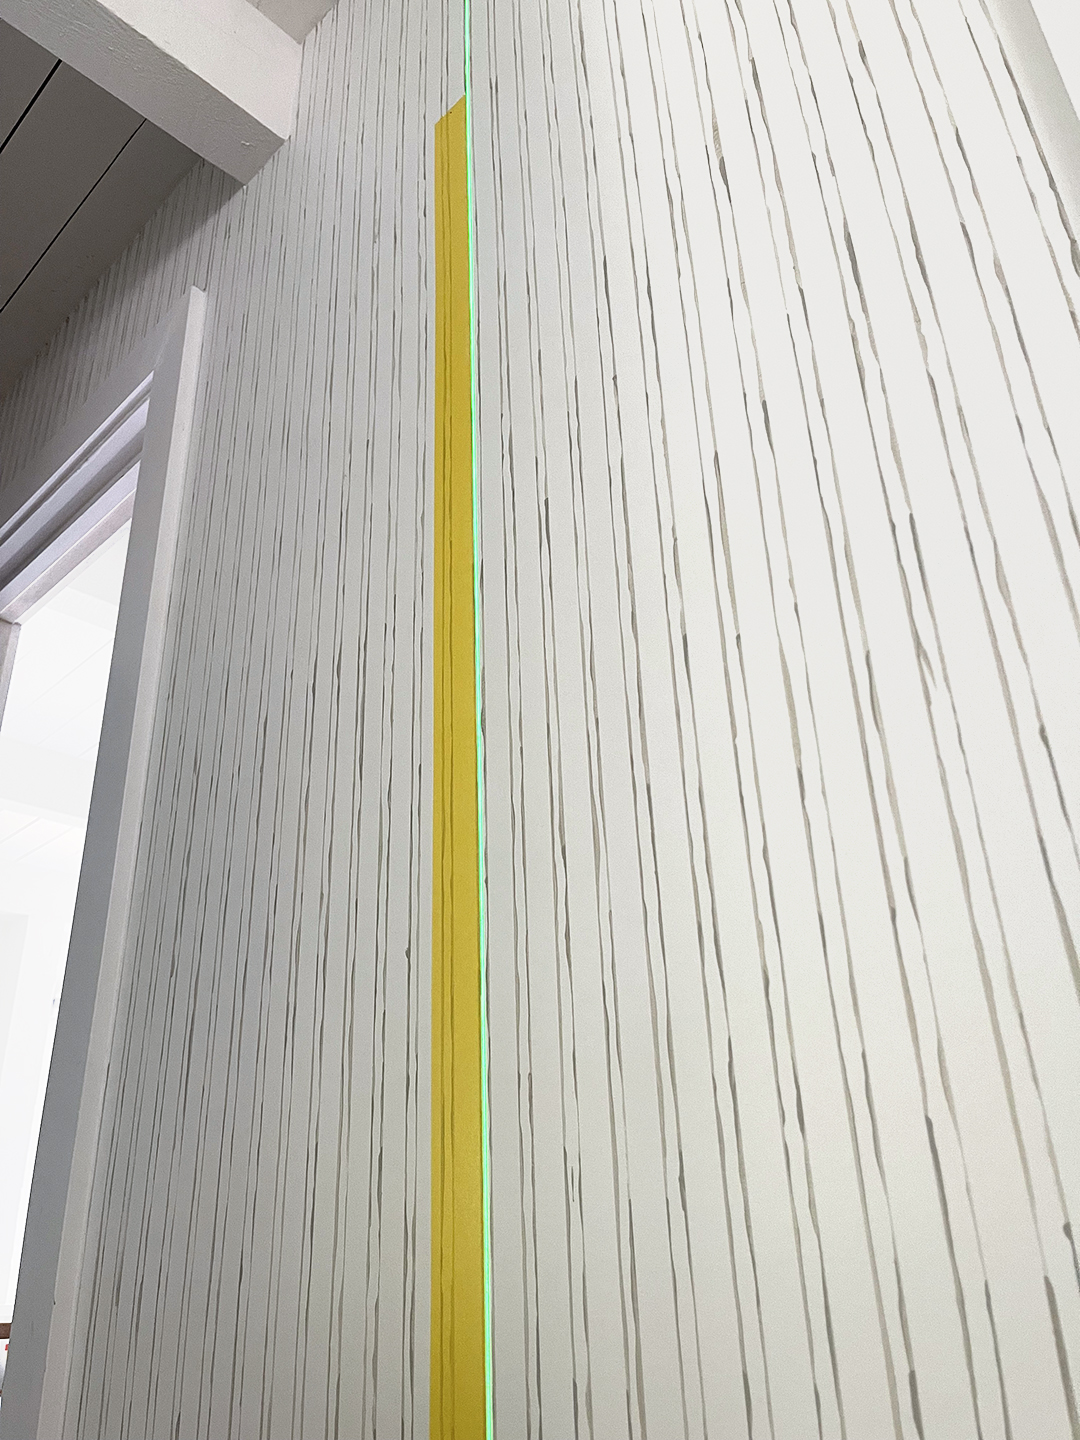
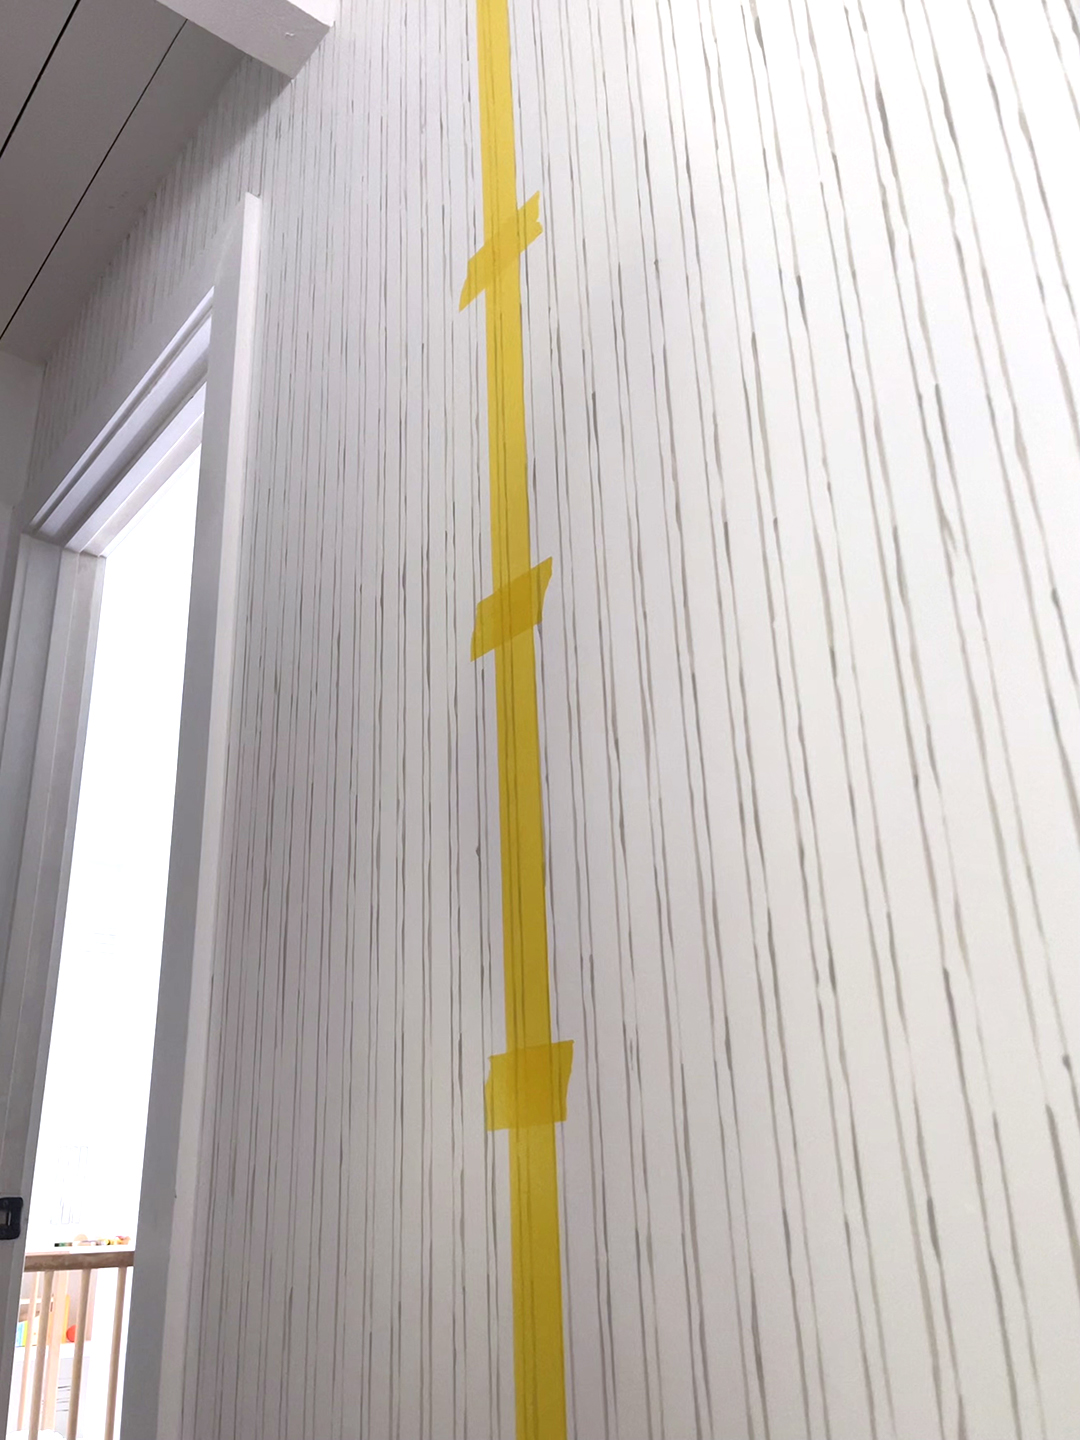
To begin, pick your starting point. It is helpful to use a laser level to start. If you don’t have a laser level, use a normal level. Next, use a spacer (we used a scrap piece of 1/2″ plywood). TIP: wrap the spacer in FrogTape Multi Surface with the sticky side out, it will stick to the wall itself (SO much easier to hold in place!)
Place against the laser line and apply the first vertical line of FrogTape Delicate .94. Press firmly to seal the FrogTape as you go. Press firmly to seal the FrogTape as you go.

Keep applying vertical lines until the entire wall is complete.
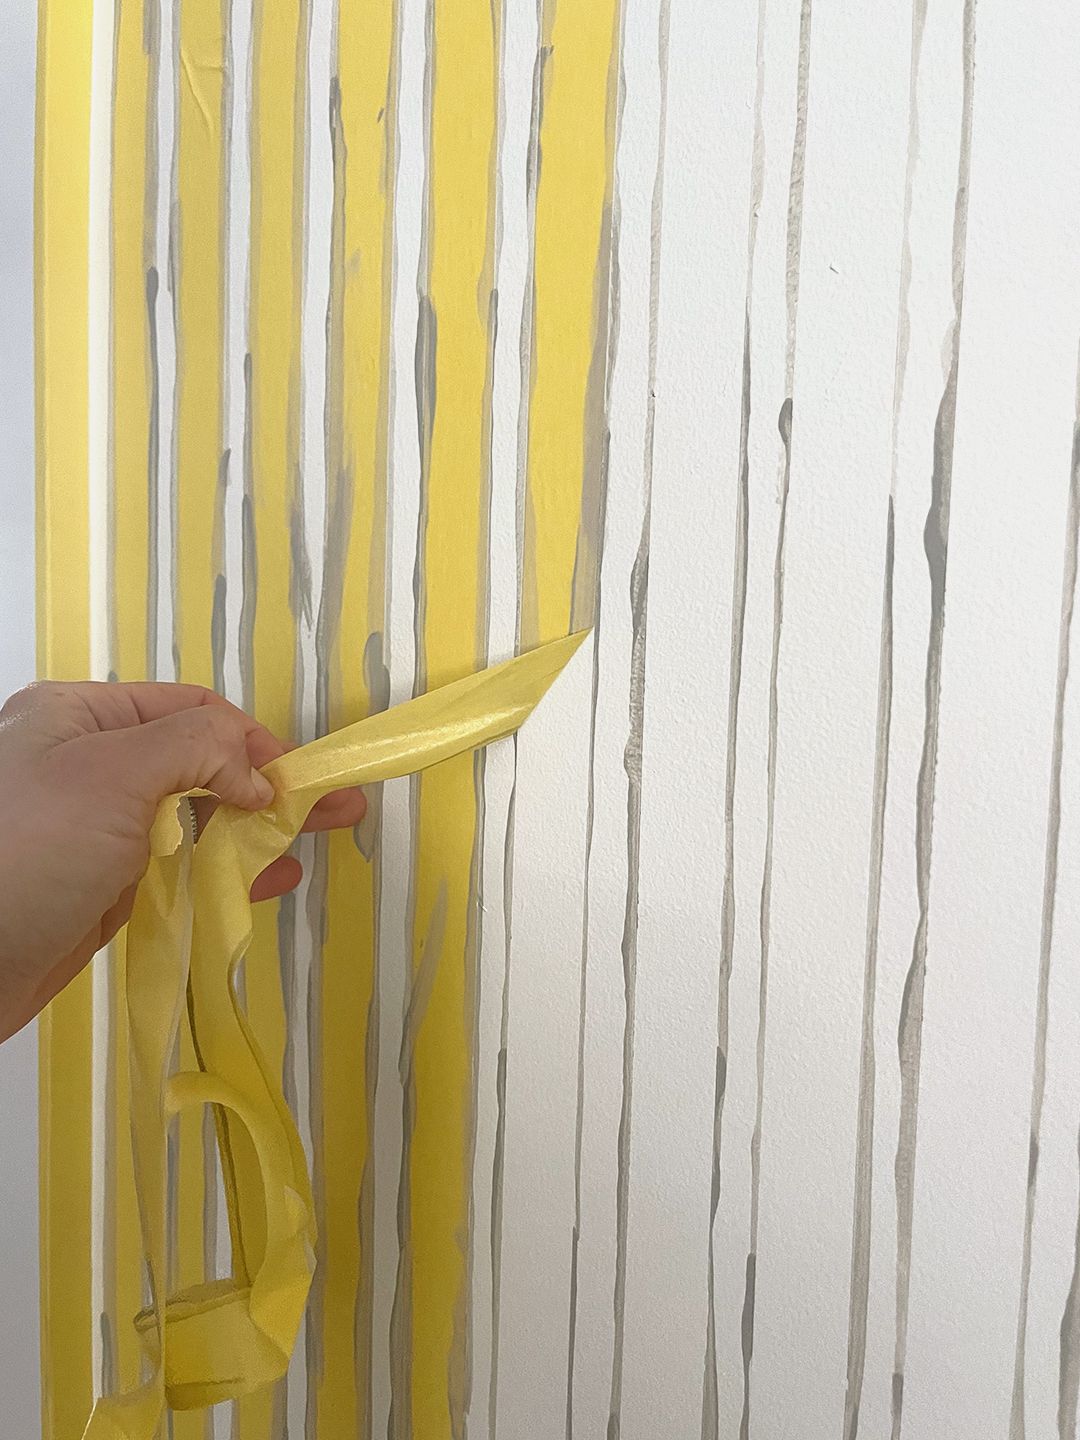
After FrogTape is applied, being painting. Using a small cup, mix paint with a little water. You want the paint to be somewhat watery – this will make applying much faster and easier and give a watercolor look. Test a few applications before starting to make check the consistency – it should glide on easily, but not drip.
Using a small firm bristle brush, paint on both sides of the tape. It helps keep a steady hand by dragging the heal of your hand on the wall. I love the hand painted look on one side the crisp paint line from the FrogTape on the other side!

Once complete, remove all FrogTape!
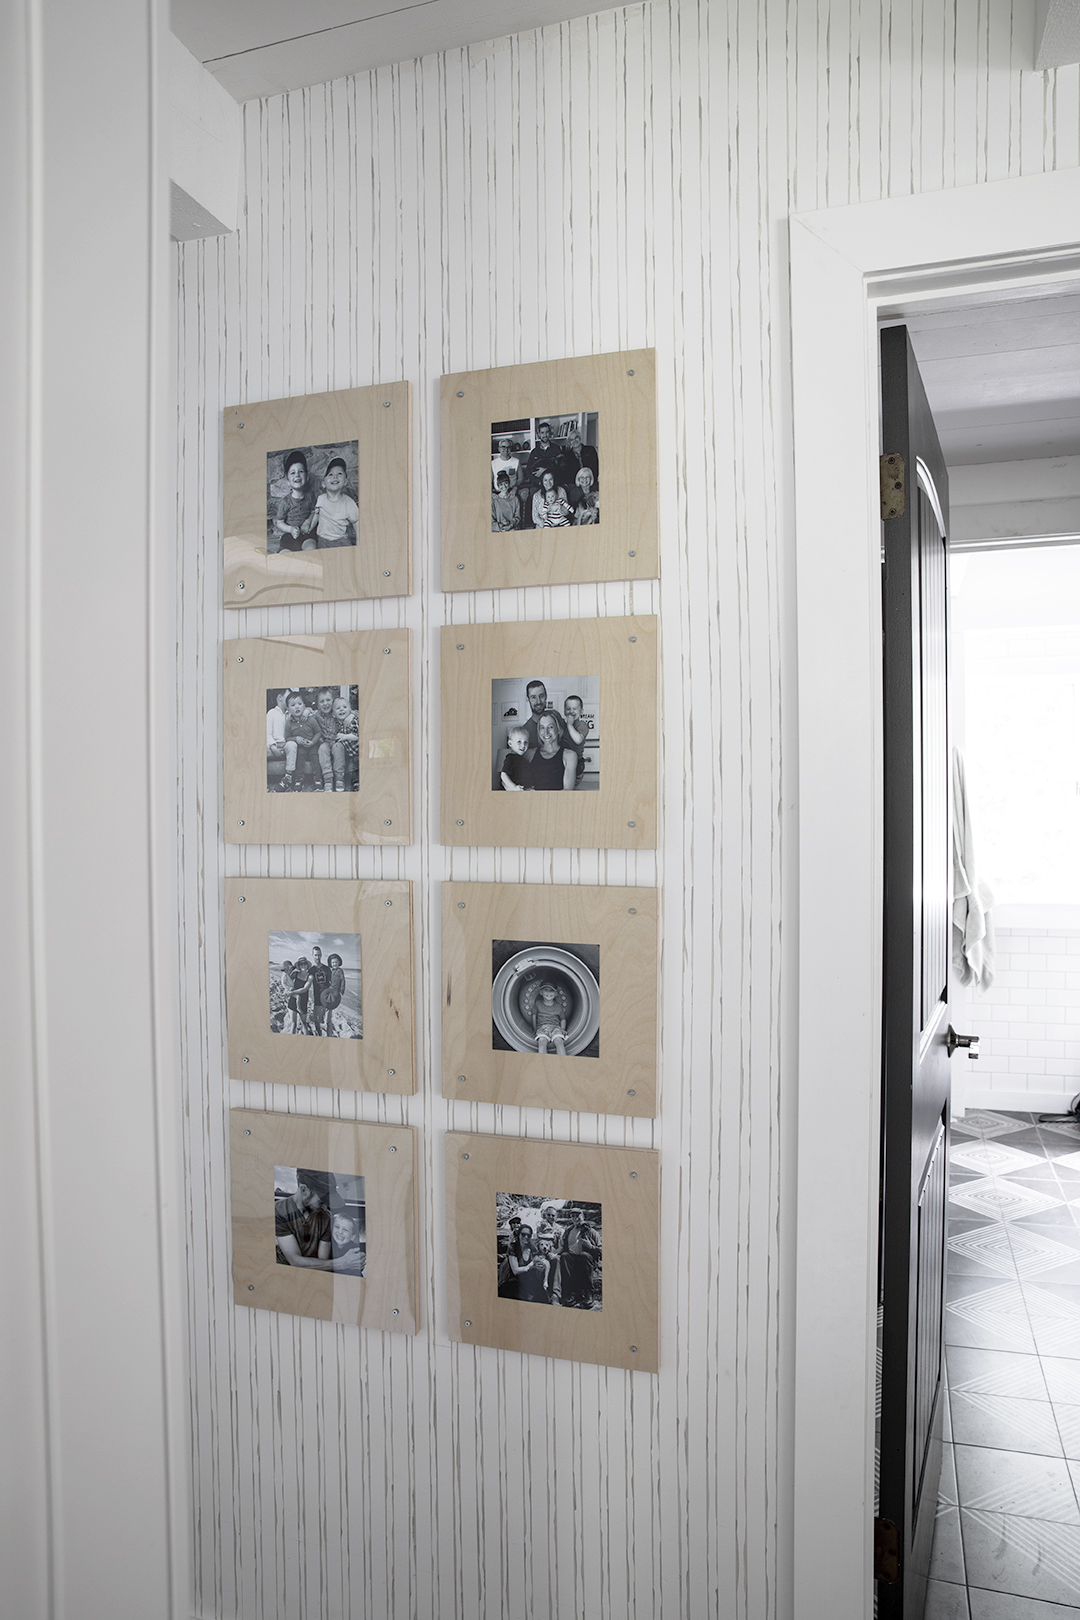
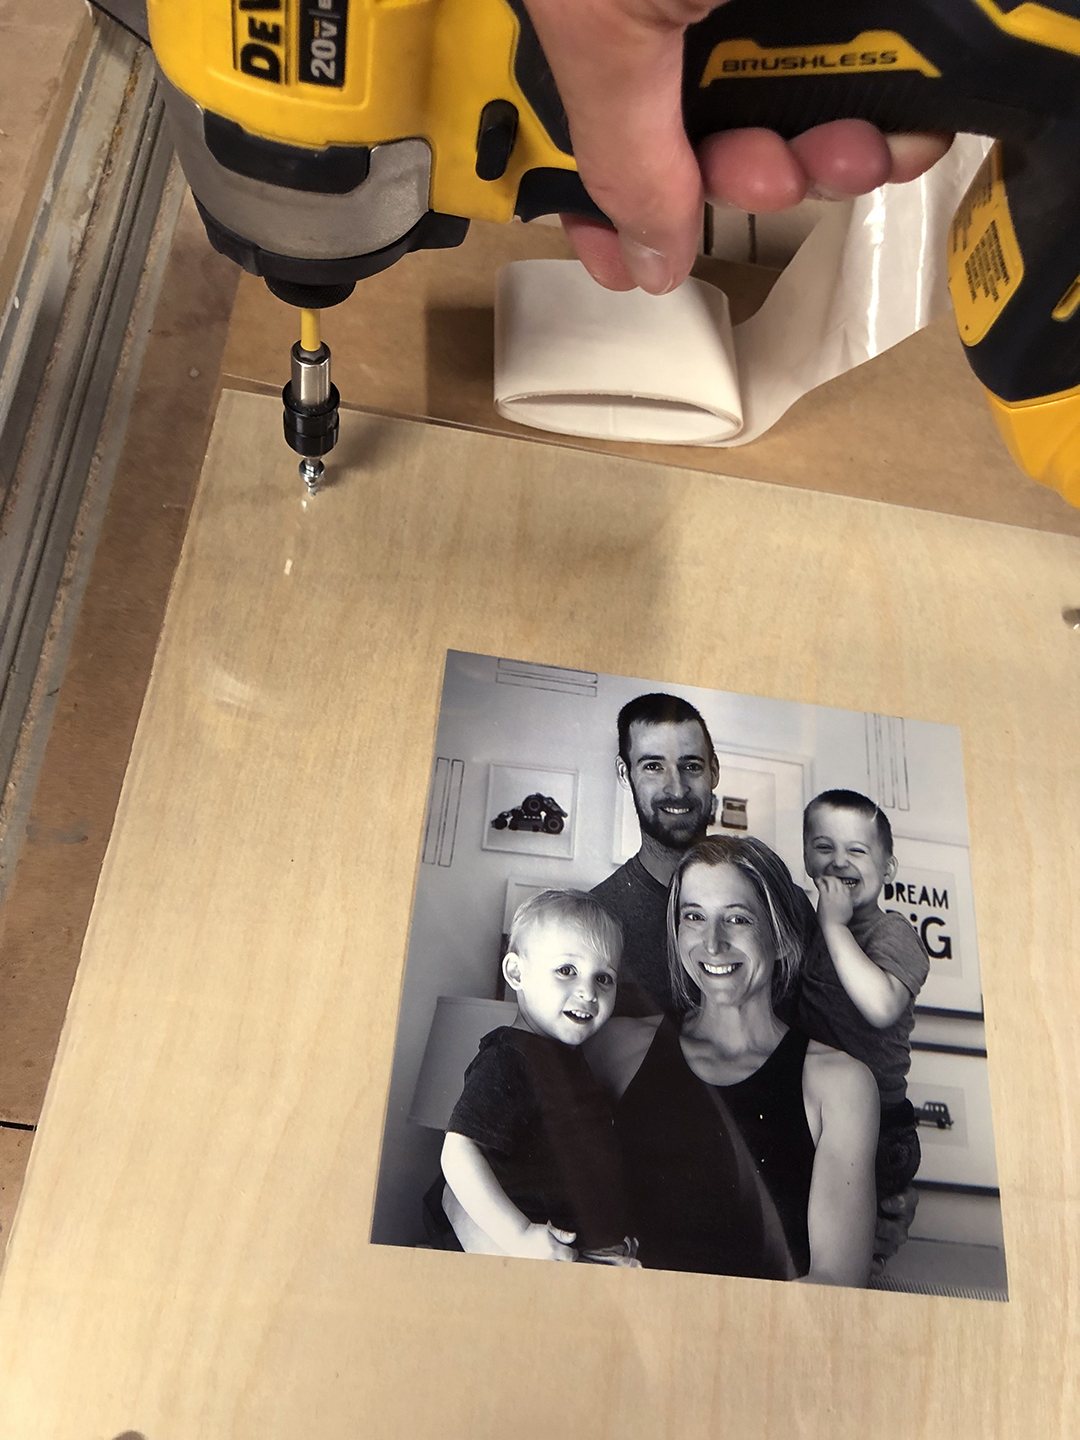
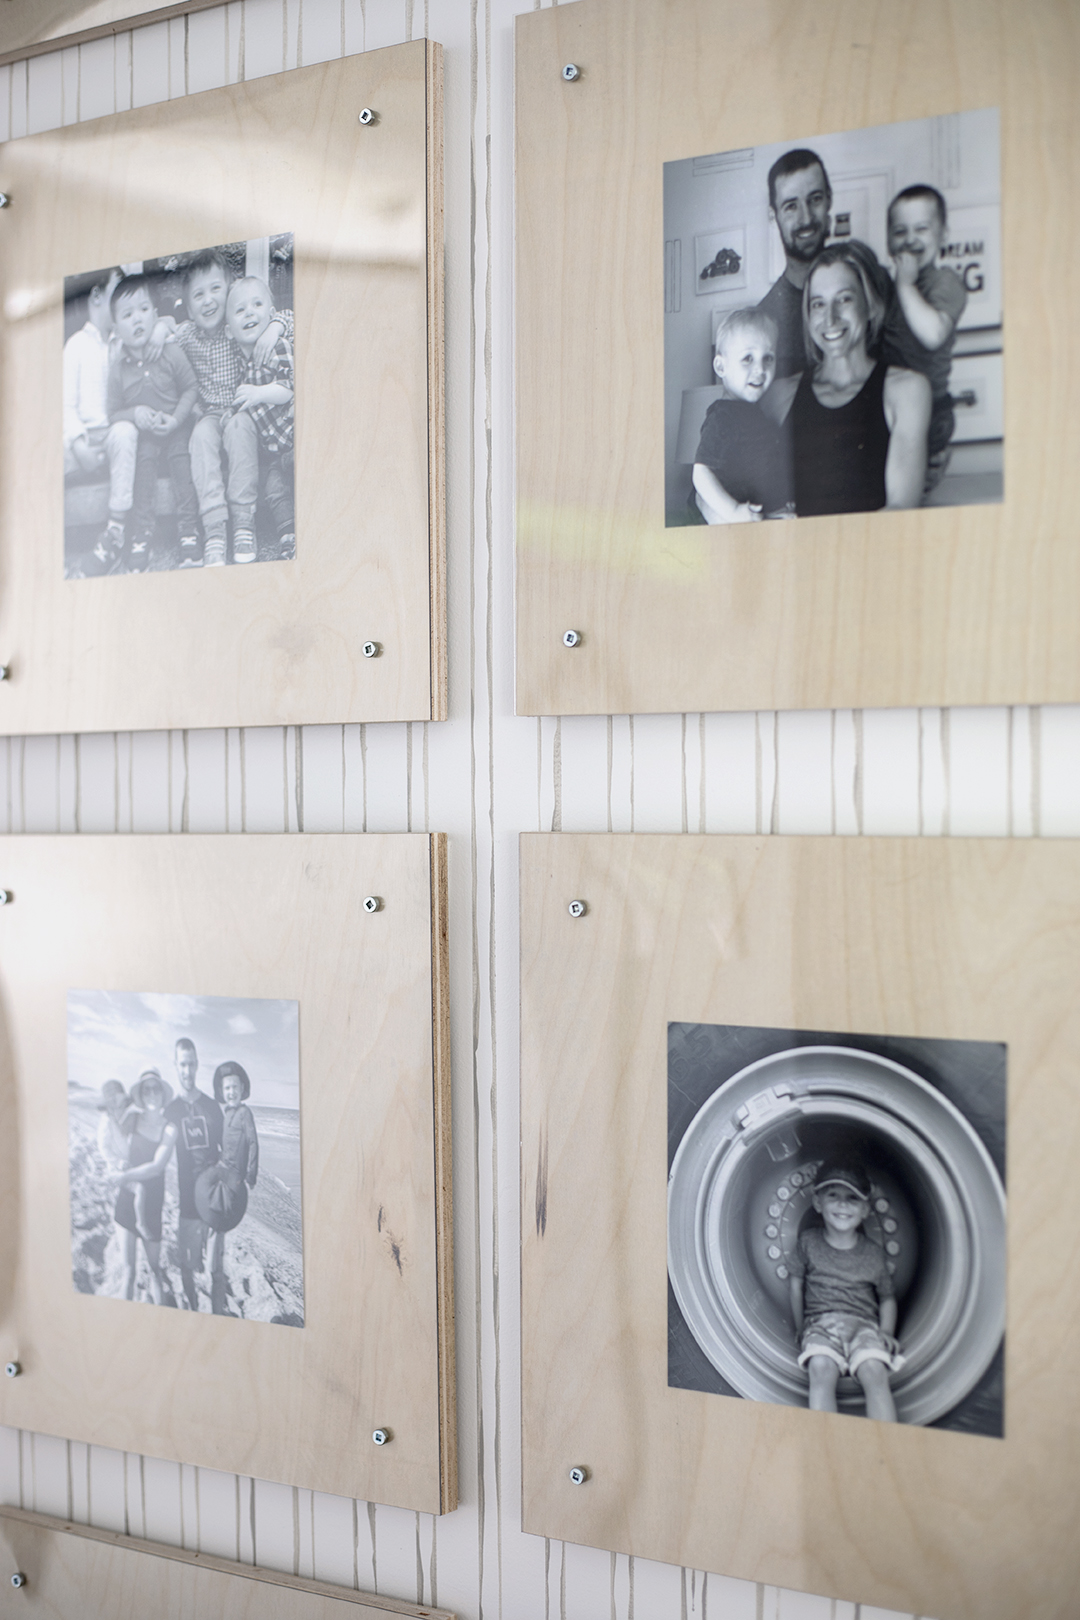
Next, to make your birch plywood frames, cut 1/2″ plywood to size (12″x12″ is size shown in photos). I ordered plexiglass online cut to size, this can also be purchased at your local home improvement store.
Measure on all four corners 1 1/4″ for the screw holes.
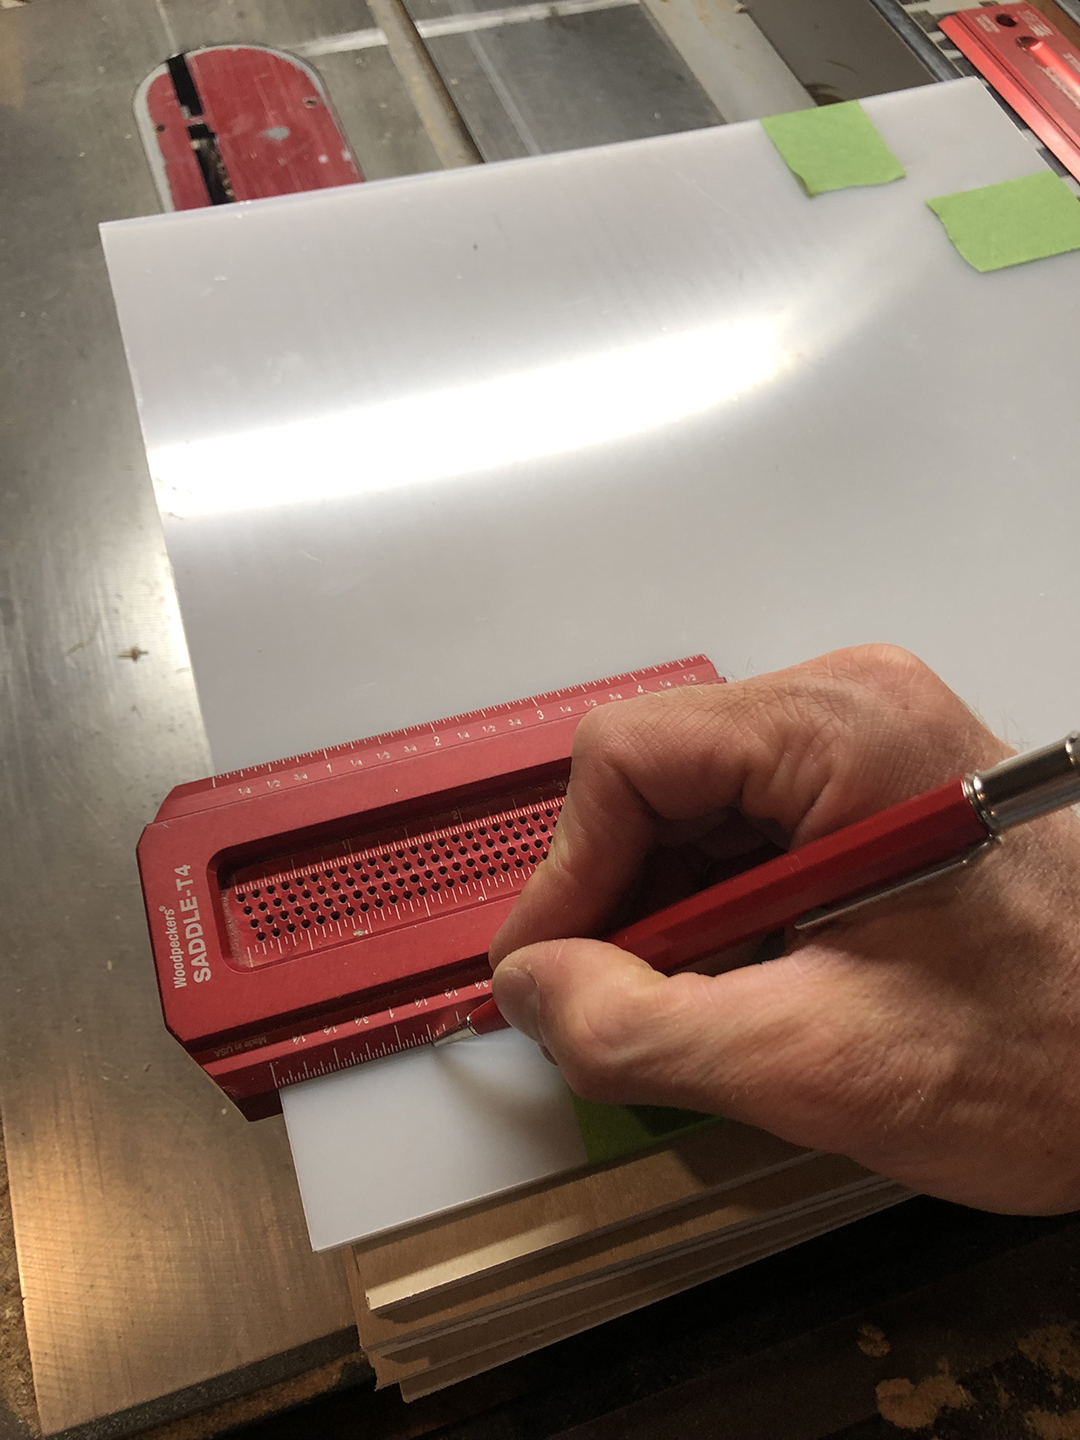
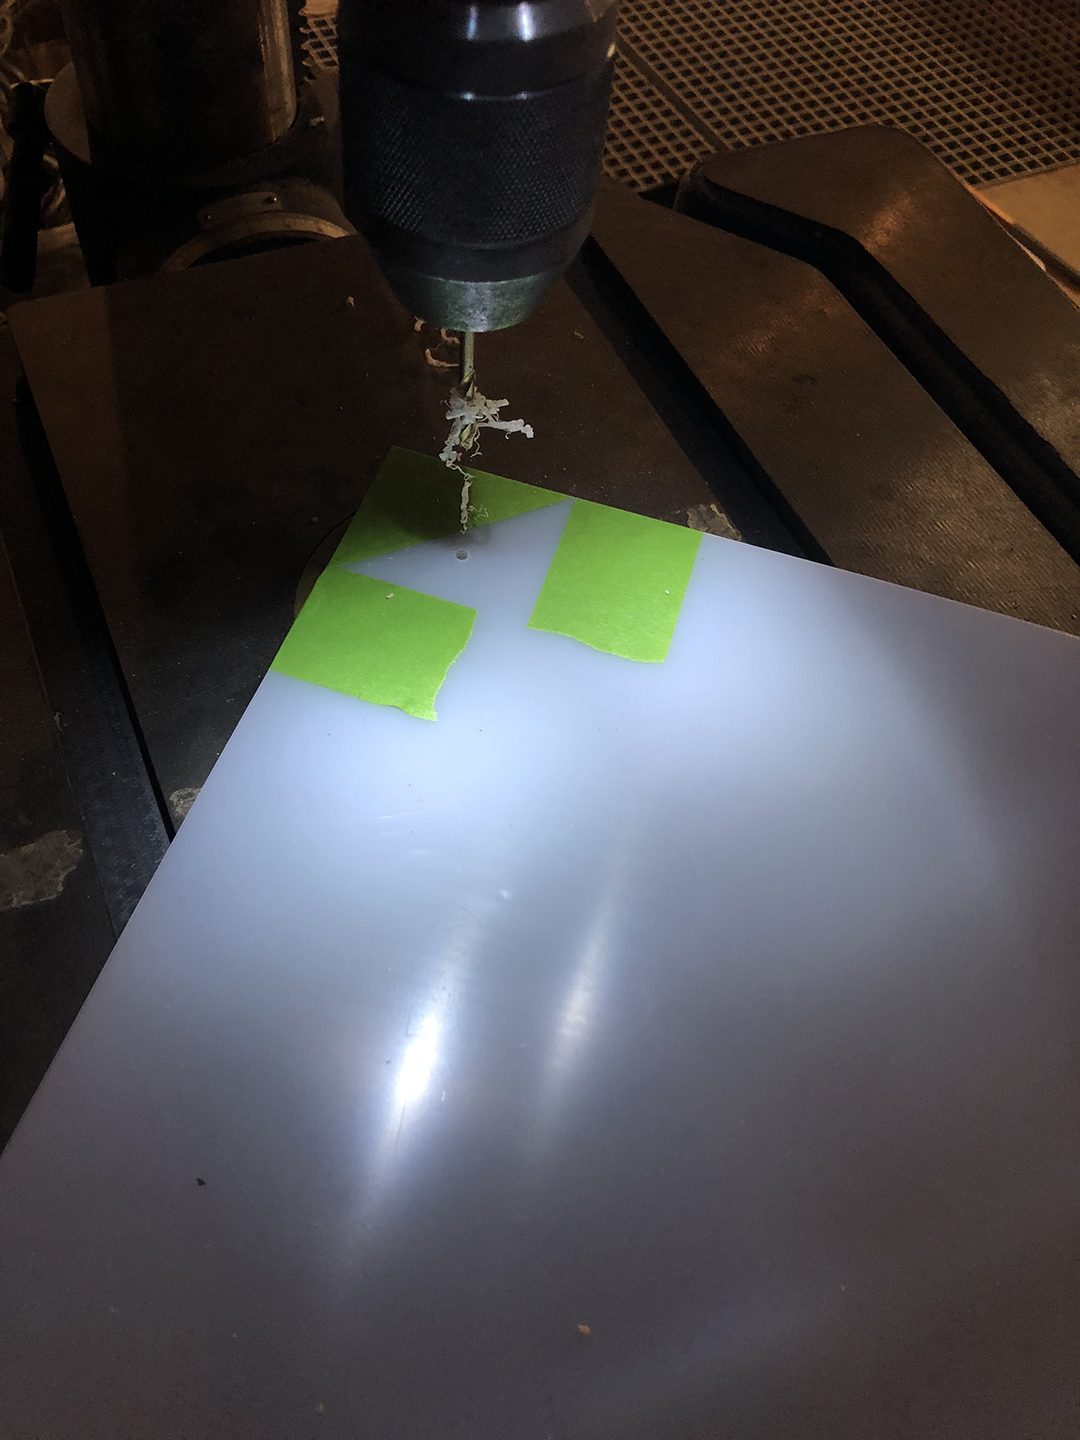
Using FrogTape Multi Surface, tape all sheets together on all four corners and drill through the plexiglass.
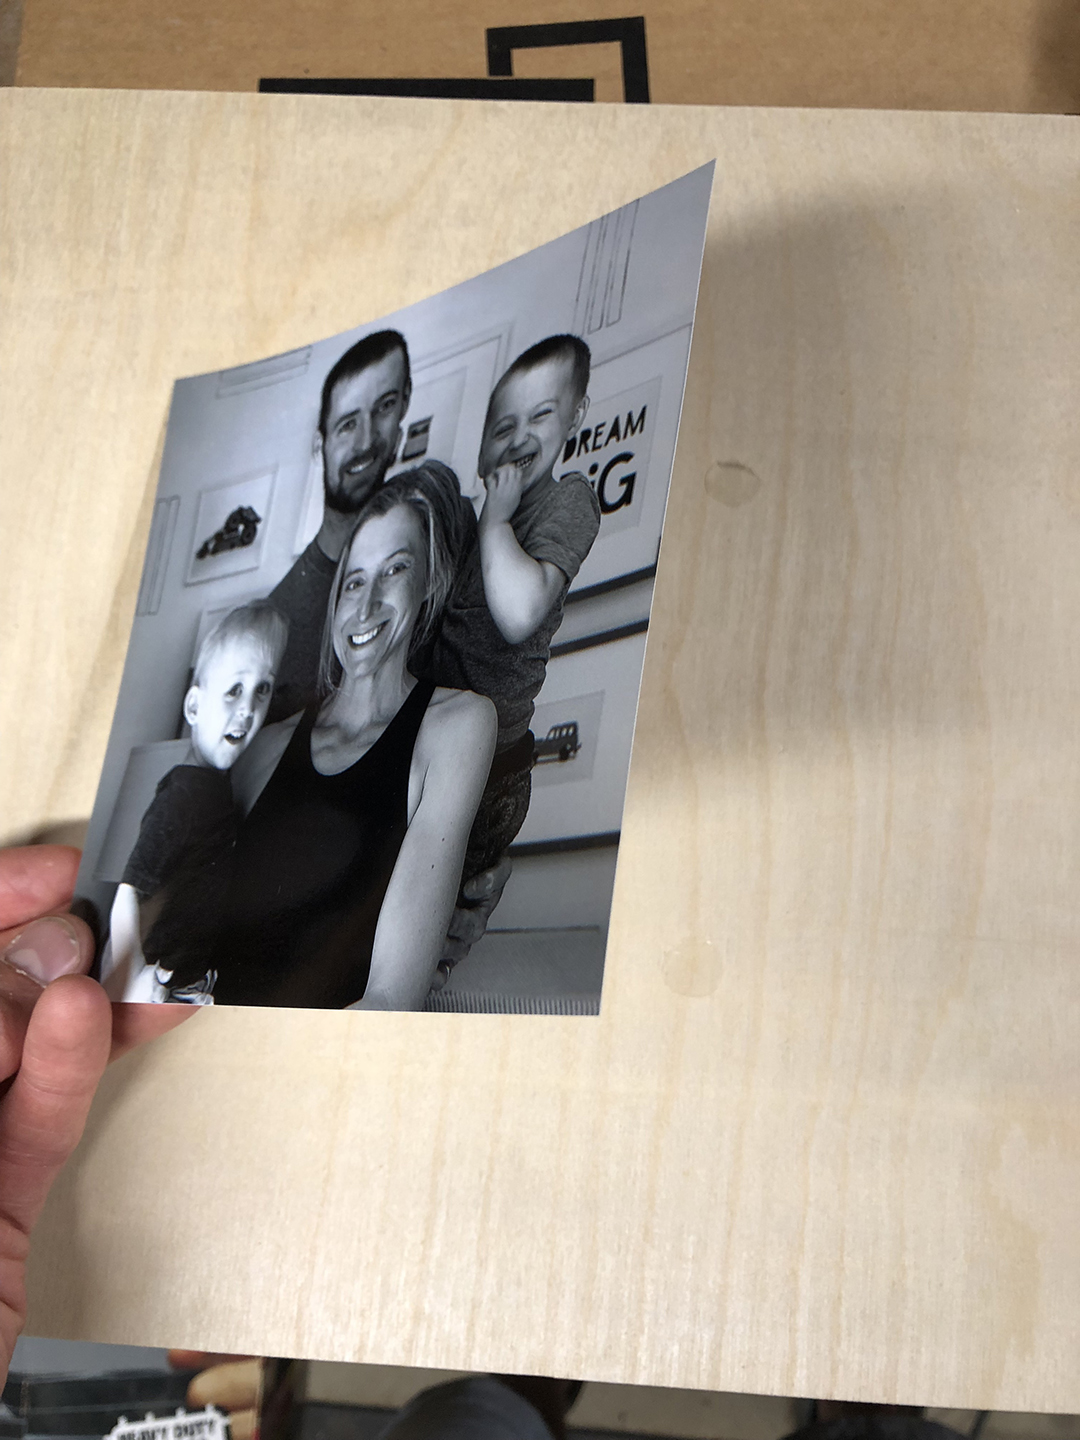
Measure and center photo using photo safe double stick tape to hold photos in place.
Finally, attach plexiglass with 1/2″ screw.
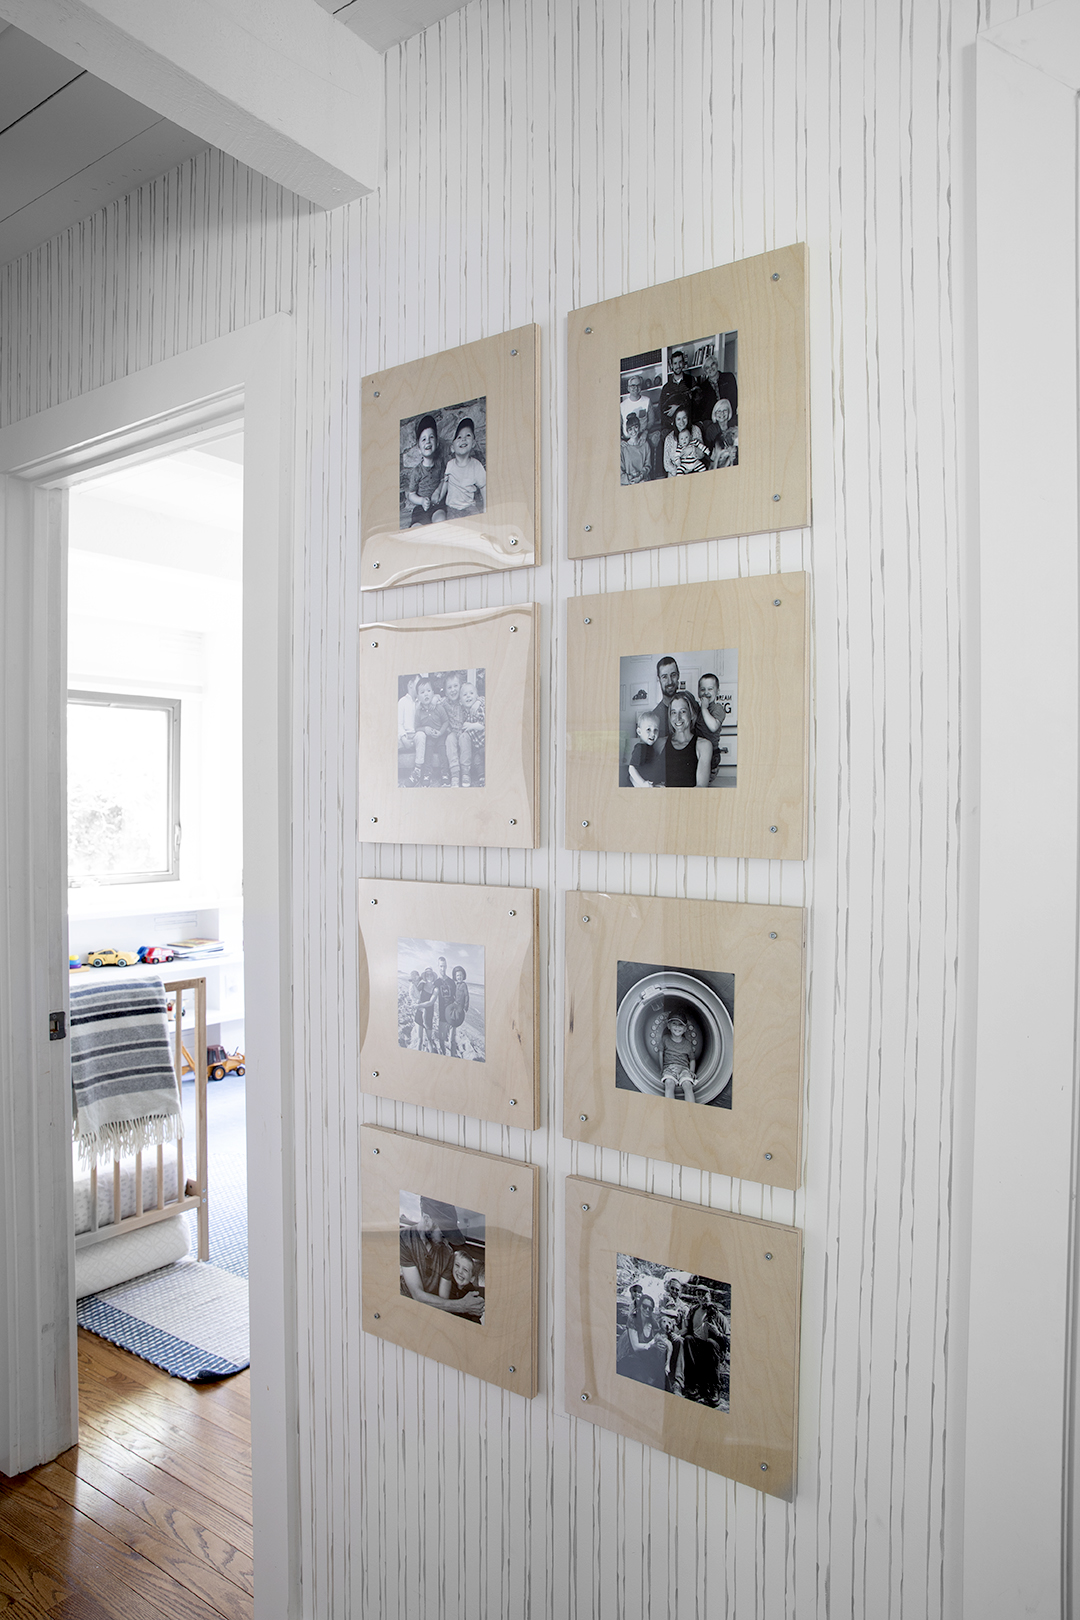
To hang your frames, find center of wall and place FrogTape Delicate 1.88″ – this will be used as the center line.
Next, measure the horizontal spacing and apply tape to all negative spaces. Having a straight line on the vertical and horizontal makes it easy to line up and mount frames.
Apply mounting strips on the back and install on the wall.
That’s it!
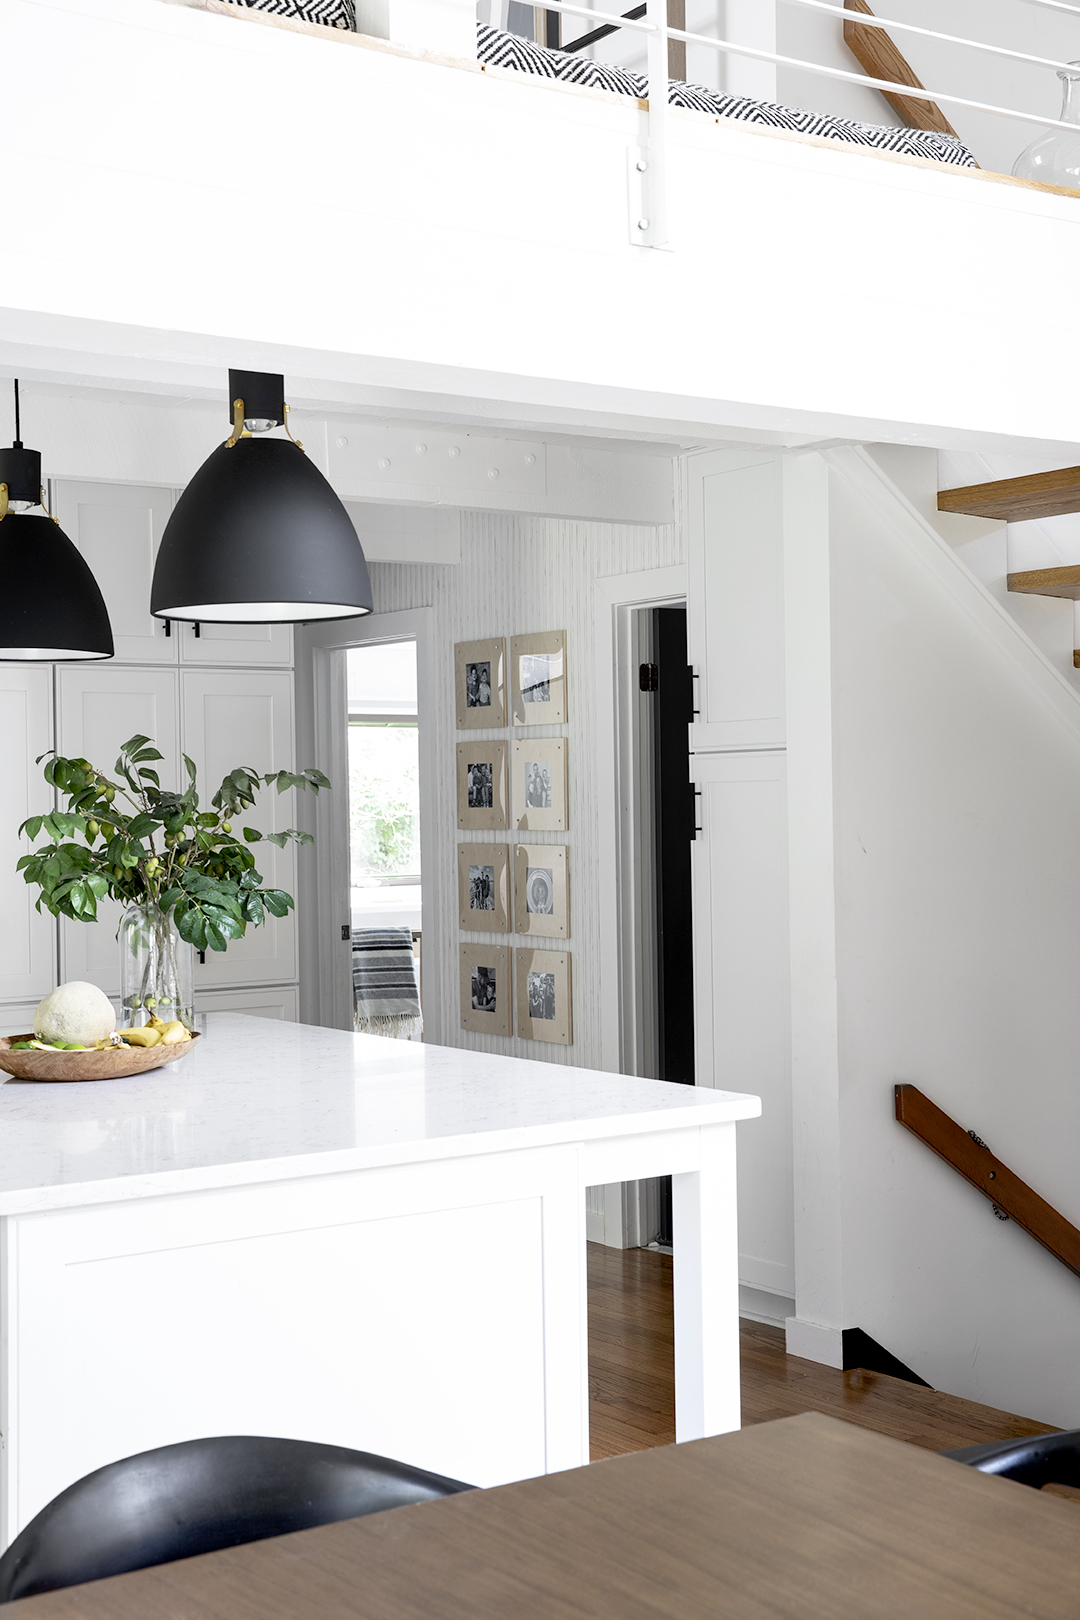
I love this corner of our home! It’s the perfect amount of pattern! I love seeing my kid’s faces light up when the see our family photos!
Questions!? Leave them in the comments!
I’ve been thinking of doing something like this for my bathroom walls. I just might try it!
Thanks for the tutorial!
Thanks! Let me know if you do!