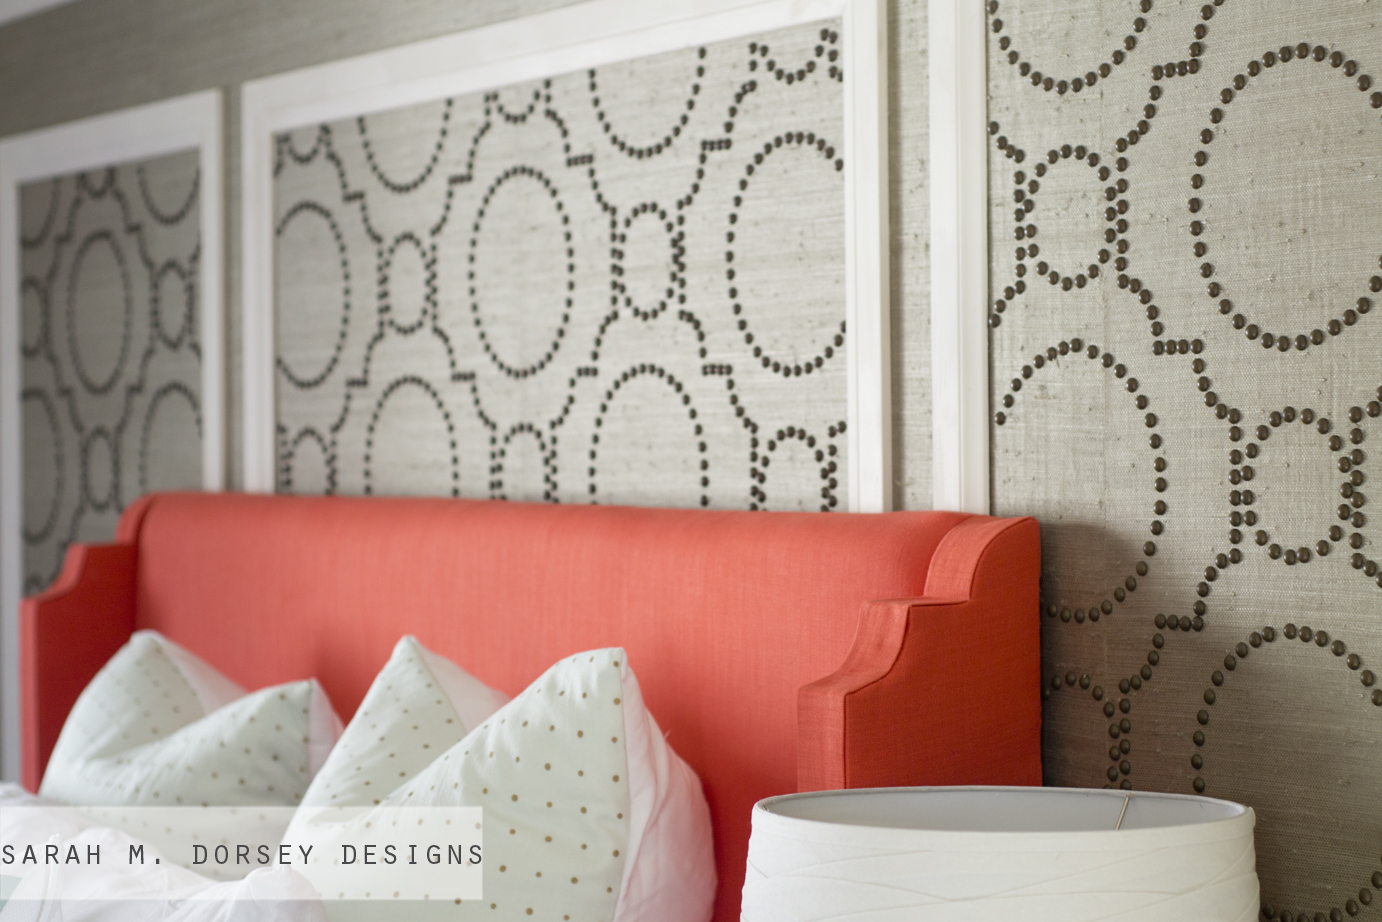
Today I’m sharing how we built our coral custom headboard. If you missed the tutorial for Creating with the Stars, read on to see how we made it!

The headboard was kinda a spur of the moment decision, I went from a wood headboard with nailhead (prior to deciding on the nailhead wall), to a black or white upholstered headboard, and then finally I decided that the room needed a punch of color. Using a coral drapery panels from Target was perfect because it was fairly heavyweight and readily available (perfect on short notice!)
We made a plan and gathered our supplies.
1/2″ plywood (1 sheet cut to width of bed frame, the 8′ side was cut to 62.5″, 4′ side left as is)
2×8″ (x2)
1×8 (x2)
I drew a few diagrams for the basic construction and dimensions of the headboard. See below for some the specifics on the upholstery. Measurements are for a queen bed frame. Note: make sure to measure your bed frame first, in case yours is different! You want to make sure that the frame will fit inside of the arms.


For the arms, we screwed a 1×8 and a 2×8 together, measured and drew the circle with a lid. We then followed the line with a jigsaw to cut it out (we did remove any screws that were in the way first!).
We were originally going to leave the arm square, but then decided that mimicking the edge of the nailhead design would tie in with the wall and give it a custom look.

For the foam, we cut a 3″ camping pad in half and attached to the plywood with spray adhesive.
Next we upholstered the back piece by wrapping in batting and then fabric. To make sure that the top was pulled evenly, we attached a thin strip of scrap wood and pulled tight. This made it much easier to get an even look!

We cut the fabric to wrap around the entire arm, starting at the inner part of the arm, we put a few staples in (on the inside so it stays in place while you attach the arm), we cut little holes in the fabric at the pilot holes (where arms attach to the frame). We then installed the arms with heavy duty screws (we used cabinet anchors) and attached it to the 1×3 frame.

Sorry for the late night, low light pictures (proof that we we’re working late into the night 🙂 The top left image shows after the fabric was placed between
the center section and the arm (fabric hanging loose) then the arm was
secured to the center section with cabinet anchors. The top right
image shows the fabric wrapped around the arm, then it was pulled tight
and stapled. The excess on the top was cut about .5″-1″ (making sure not to cut too close to the edges that would show) above the top of the arm,
folded over, stapled and ironed. It doesn’t have to be pretty on the top because that will be covered next.
We cut a band of fabric the total height of the arm (accounting for the bends) plus a few inches and the width (2.5″) of the front of arm plus enough fabric to fold under (at least .5″ on each side, so at least 3.5″ total). We folded the raw edges under and pressed with a hot iron so that the edges were crisp and attached the band to the arm with no sew adhesive (my preference is heat n’ bond) and a hot iron. Finally, the top and bottom ends were stapled to the back of the arm.
and that’s it!

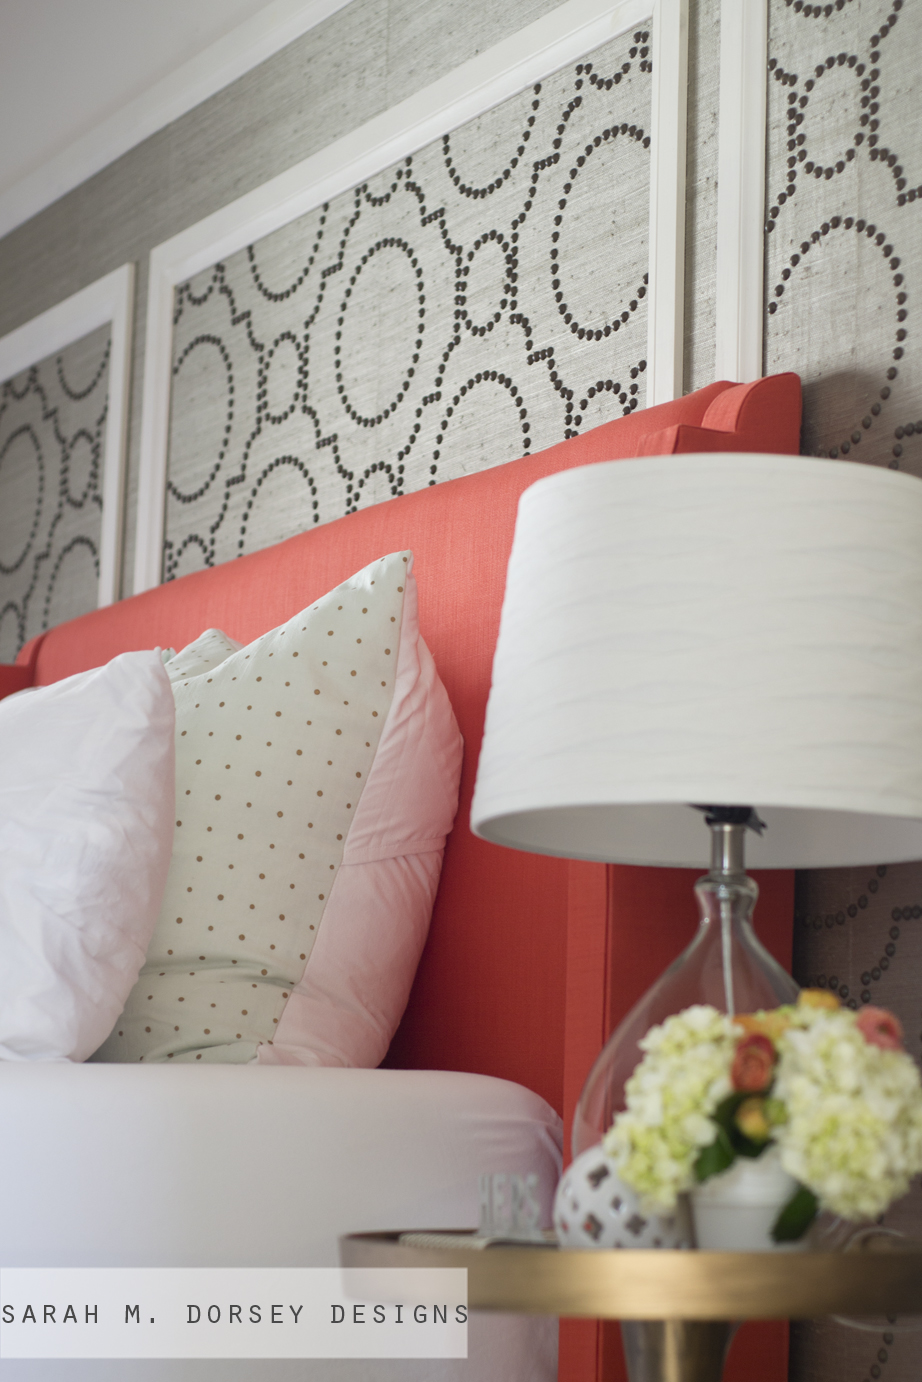
I finished the bed off with a few DIY pillows. The euro pillow shams are made from a white table cloth and a mint polka dot scarf from World Market (March 2013). Since the scarf was translucent, I doubled it up with the white table cloth. The throw pillows are white shams from Ikea, I then painted a border using painters tape and BM Bali latex paint with fabric medium. The bolster pillow is a kitchen towel from World Market (March 2013) and the left over headboard fabric.


Finally, here’s where we got everything!
Headboard: Fabric Coral drapery panel from Target (x2), Batting, 3″ camping foam from Home Depot only $20! Wood: 1/2″ plywood (1 sheet cut to width of bed frame, ours was 8′ side was cut to 62.5″), 2×8″ (x2), 1×8 (x2) , 1×3 (x4) Home Depot
Bedding: diy Euro Sham – mint and polka dot scarf from World Market, accent pillows from Ikea border painted with BM Bali with fabric medium added, bolster pillow – dish towel from World Market (like this, but in coral), Duvet cover, West Elm Organic Chevron
Want to see how we built the grasscloth + nailhead feature wall? Check out the tutorial here
You always have such attention to detail and this headboard doesn't disappoint. Love it of course!
Have a great weekend!
love those curved arms! you are so talented, sarah! julia and i were chatting about how awesome you are. 🙂
Gooooooorgeous, Sarah! This is one of my favorite projects of yours! 😉 Jesse @ Scout & Nimble
I love uphostered headboards. Yours is beautiful! xo Kristin
So pretty!!! I also love how you use all different fabrics to make pillows (curtains, scarves, etc). I never really thought about it, but it makes perfect sense! I have my eye on some cloth napkins at West Elm and Anthro for the couch 🙂
I always wondered how to finish the back of the headboard with all of the fabric. Thanks for sharing this. I think I'm going to have to take a crack at it!
I love this! I want this room in my house! I hope you don't mind, but I'll be linking to this project in an upcoming post on my blog. Thanks for more lovely inspiration!
This is absolutely gorgeous and the coral was a great color choice! I love this!
I am loving this tutorial! Great jot… the coral really pulls everything together! Also loving your nailhead wall!!
I love everything you do! We have a DIY upholstered headboard right now, but I want to update it to a new color and Coral is definitely first on my list these days. Thanks for the tutorial!
This is amazing! I loved your bed when I first saw it but was so confused on how you made those arms! Now I know 🙂 Pinning!
Coral is starting to become an exciting color for me that I did not like before. Awesome job – the headboard steals the show definitely!
You are incredible and your DIY'S are so so so good. I need a new headboard for Em's room, this just might be the winner!
Wonderful job!!! I agree with Julia- great attention to detail. Love the coral!
I found your blog recently and I LOVE your style. I want my house to be just like yours. 🙂
Thanks so much Mindy!! 🙂
Love the headboard! I am going to try something similar, I am considering the same shape you used but putting nailheads up each side piece, but not sure if it would be too much? I was also wondering if you attached the headboard to the bed frame or if it ended up being sturdy enough to stand on its own? Thanks! – Jennifer
Thanks Jennifer! I think nailhead could be a great addition. And it just sits between the bed and wall, the arms are sturdy enough on ours to support it. If it feels unstable you could always attach it to the wall. Hope this helps! 🙂
Your room is absolutely perfect. Where did you get your brass night table?
World market 🙂
I am going to attempt to make this gorgeous headboard tomorrow! I had a question about one of the steps. You said: Next we upholstered the back piece by wrapping in batting and then fabric." When you say back piece, what do you mean? Thanks for this awesome tutorial!
Hi Lauren! The back piece refers to the section between the arms.
Thank you so much for sharing! I just used this to create our DIY tufted velvet headboard! Love the side wing idea!!!
Do you know what the total amount was to make all of this? Trying to get a round about figure of what I would be spending. This is beautiful!!
Hi! I don't remember the exact number but around $100 – $130, depends on foam and fabric price/availability
Hi Sarah! I love your blog! Everything you do is so beautiful. I loved this headboard. My husband and I will try to make one. So I wanted to ask you: how difficult do you think it would be for someone that has never done something like this before? Thank you! Betina.
Sarah – this is a great project and I am planning on getting some friends together over the weekend to make one – but I've looked at the tutorial and read it several times and I am just not getting how you did the arms so tidily! I'm using a heavy linen fabric and I think it will look awesome – can you please help me understand getting around those curves? Thanks!
Hi Heather! We were on a tight deadline to complete this project, so a few additional process photos would have been helpful! The sides of the arm were two individual pieces of fabric – the edges were just stapled on the front of the arm – the staples were covered by a band of fabric which ran from the top of the arm to the bottom (with the raw edges ironed underneath) we then secured it with heat n bond to the front of the arm, fabric glue would work too – just make sure to test whatever you use on a separate piece of material to make sure it doesn't bleed through. Hope this helps!!
Thank you – I can 'see' that working! I'm so excited to try this!