• Home
  • About
  • Services
  • Shop
    • Bloglovin
    • Email
    • Facebook
    • Instagram
    • Pinterest
    • Twitter

Dorsey Designs

DIY and Interiors by Sarah + David

  • Home Tour
  • DIY TUTORIALS
  • friday favorites
  • design + build
  • art

get the latest straight to your inbox

DIY Rope Art | Tutorial

Today, I’m sharing a project that will be installed in a model home that I designed – I photographed on the floor because I didn’t want to take the time to measure and hang just for photos – though I’m pretty obsessed, so maybe I’ll make a pair for myself!

I was inspired by this gorgeous art – super pricey, so instantly I thought I could make something similar – for much much less! 
They are pretty large, 42″x42″ – so not a typical frame – I could have custom framed them – but that would have still been pretty expensive. I decided to go to Ikea – I remembered that the 19.75×19.75 Ribba frame was a shadow box style (though not all Ribba frames are like this, if you’d like to use a different size) – $120 for a framed piece at around 80″x40″ is pretty good! 
To get started, David and I spray painted a piece of 1/4″ plywood with a light, even coat of white matte paint – we wanted the wood grain to come through a little. 
We took the back off of the Ikea frame and traced it on the wood (we left a little extra room on the edges to do the final cut) We traced it 4 times – to make one large square. 
To account for the table saw blade thickness, David used a scrap piece that had been cut and spaced in between the four squares. The previous step and this step were completed a second time on the other side of the board. So we had two large squares.
We cut the two large squares out (a straight line, but leaving a little extra to make the final cut at the end) 
Next, starting at the center, we wound the rope around and glued with hot glue. I’ve never been a big fan of hot glue (due to burning myself severely in the past), but after trying a few options, this was definitely the best option. We also used a quick grab glue (purchased at Joanns) in spots, just to make sure it was extra durable, but I don’t think this step was essential, the hot glue held well. I would recommend a standard size or large hot glue gun (the mini one didn’t cut it) The rope was wound about 2″ from the edge. 
Luckily I didn’t burn myself, I was able to keep away from the glue with the thickness of the rope, but remember hot glue burns HURT, so please be careful, or you’ll be icing your finger all day! 
Each circle took about 250 ft of 3/8″ rope. (Tip: look online to see if that is a better price than Home Depot / Lowes) A bag of 40 standard glue sticks was sufficient. 
Also, I’d recommend placing the board on a tall surface so you aren’t hunched over – your back will thank you. 
Once the glue dried, we lined the center up with the table saw blade and cut down the center. Remember to wear your hearing, eye, and respiratory protection! 

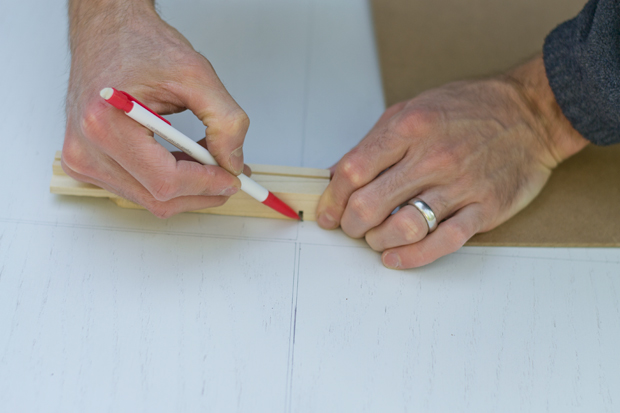
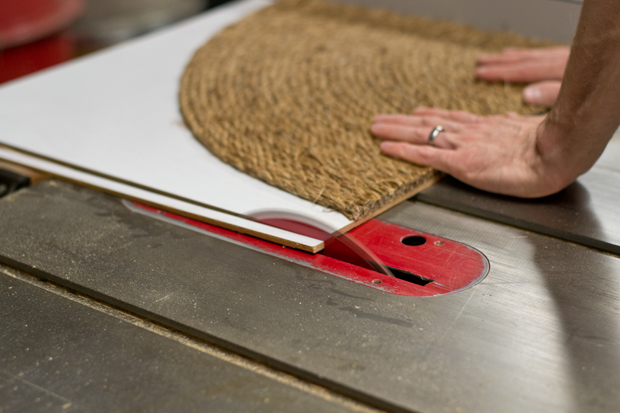
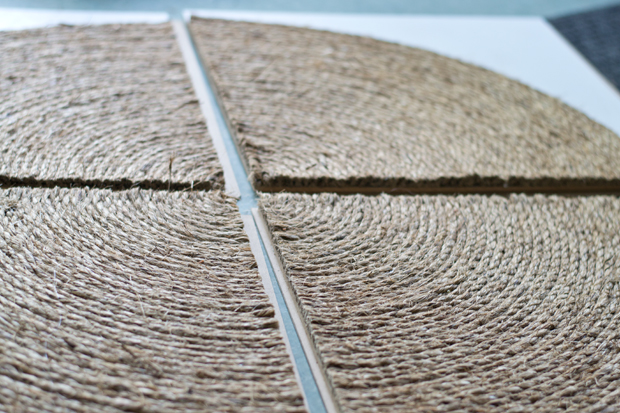
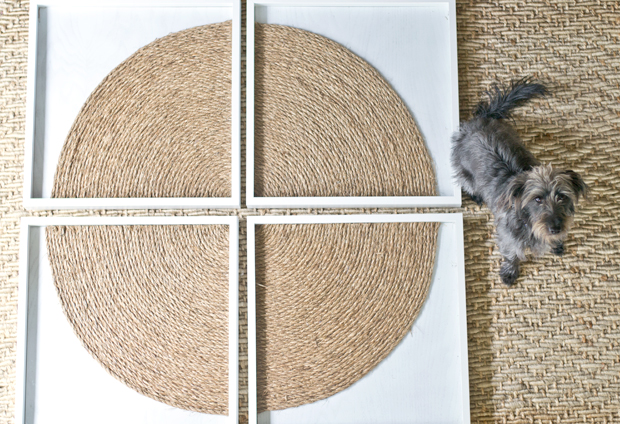
Repeated again to make quarters.

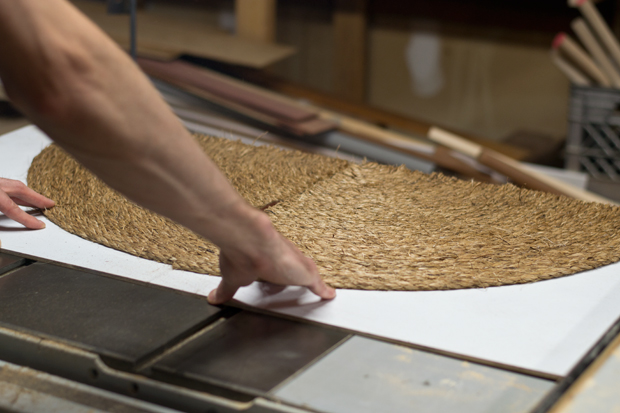
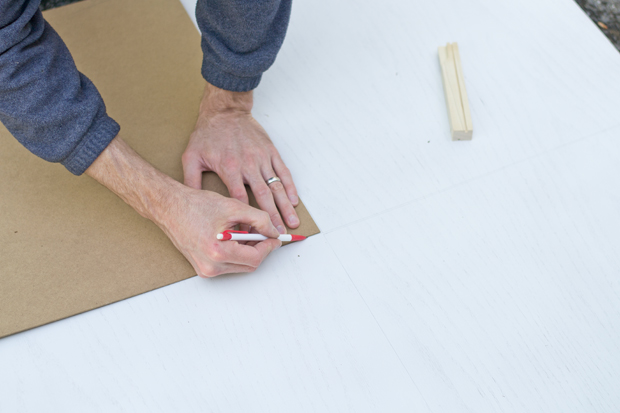
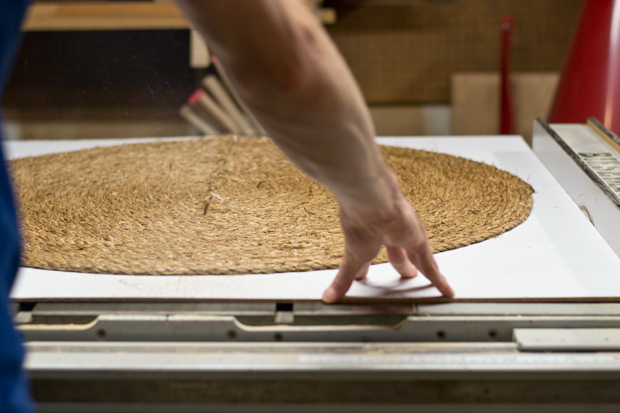
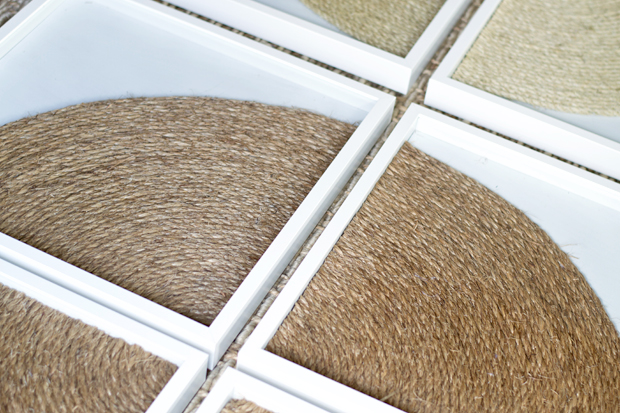
To make the final cut, we removed the square insert from the Ikea frame (pictured in photo below) held it in the corner and marked the edges – it should sit perfectly flush inside the insert. We just cut the outer edges (without the rope)

Next, the plywood/rope will be glued to the back of the Ikea frame – we placed a heavy duty adhesive on the inside side of the back of the Ikea frame – we roughly centered it and then placed the insert from the frame around the plywood/rope to make sure it was perfectly centered. The insert does not need to be glued to the back – it will float in the frame. We placed weights on it to make sure it dried evenly (check to make sure it didn’t shift!)

(Tip: before attaching to the back of the frame, take notice of the hanger and keep the wood grain of the plywood in the same direction – lay all four pieces of the circle out together before gluing)

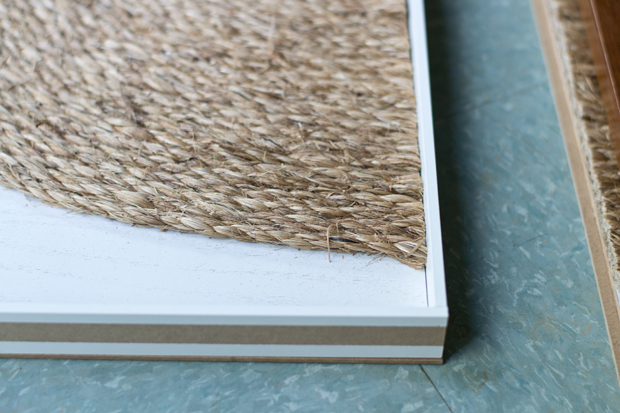
You’ll notice below that the back of the Ikea frame sits out slightly – it will rest on the insert.

To frame – place the insert back in the frame and make sure all the tabs are straight – vacuum the rope (it will probably still leave a little mess when framing, but that didn’t bother me) and place the back on the frame – you will have to wiggle the frame a little – I suggest getting two sides in and then gently tug the other sides until it is flush.

It’s hard to get a sense of the scale without seeing it with furniture, so Charlotte graciously offered to model (for a treat!)

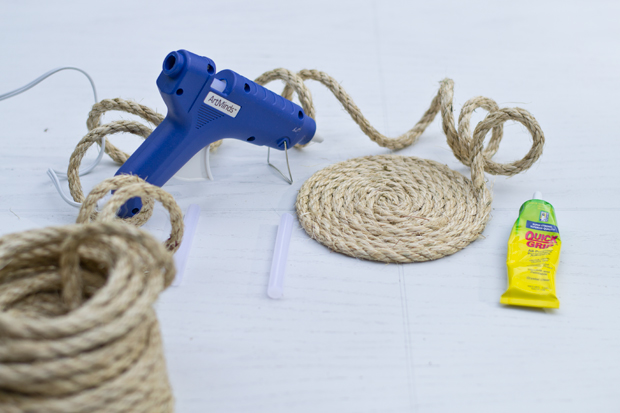
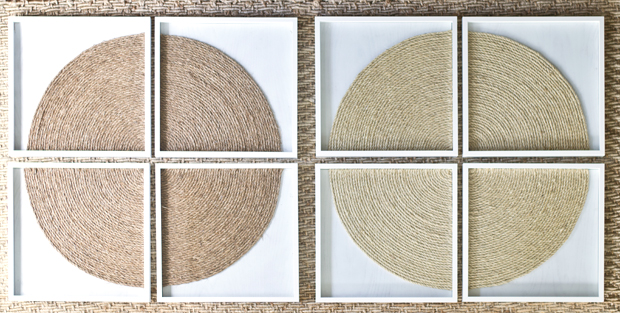
We used Manila rope (left) and Sisal rope (right) a cotton clothesline would be a good option too!

That’s it!

I hope you’ll give this a try or that it will inspire you to use something basic and turn it into something unique!

art// DIY TUTORIALS// Uncategorized// Uncategorized8 Comments

Subscribe

get the latest straight to your inbox

« Friday Five | 05.13.16
Friday Five | 05.20.16 »

Comments

  1. Cassie @ Primitive & Proper says

    May 16, 2016 at 10:45 am

    those are awesome! i can't believe the $5k price tag on the inspiration!

    Reply
  2. Karen @ a house full of sunshine says

    May 17, 2016 at 3:35 am

    These are gorgeous, Sarah! You are so clever! I love them.

    Reply
  3. Brynne Delerson says

    May 17, 2016 at 2:17 pm

    Wow! These are incredible! I love your take on the design – I think I love the circle split into quarters even more than the original inspiration!

    Reply
  4. Gwen, The Makerista says

    May 17, 2016 at 11:42 pm

    Very fun and creative, Sarah!

    Reply
  5. alidesigns says

    May 18, 2016 at 6:37 pm

    Viewed the original "five f***ing grands for that?!" :O

    Reply
  6. White Cabana says

    May 20, 2016 at 11:35 am

    Wow! Great effect!

    Reply
  7. Mindy says

    April 16, 2018 at 8:36 am

    Beautiful!

    Reply
    • Sarah Dorsey says

      April 20, 2018 at 12:28 pm

      Thank you so much!!

      Reply

Leave a Reply Cancel reply

Your email address will not be published. Required fields are marked *

Contact Me

sarahmdorseydesigns{@}gmail{.}com

Stay Updated!

Get all the latest goods straight to your inbox!

This error message is only visible to WordPress admins

Error: No connected account.

Please go to the Instagram Feed settings page to connect an account.

Must Reads

Custom Peg Board + DIY Circle Art | FrogTape

Custom Peg Board + DIY Circle Art | FrogTape

Main Level Refresh with The Home Depot

Main Level Refresh with The Home Depot

Sponsor

2016 Daily Simplified Planner

Popular Projects

Large Black and White Abstract Art for the Office

Large Black and White Abstract Art for the Office

August 5, 2013 By Sarah 30 Comments

Tufted Headboard with Nailhead | How To

Tufted Headboard with Nailhead | How To

September 30, 2013 By Sarah 59 Comments

Upholstered Louis Chairs | Before + After

Upholstered Louis Chairs | Before + After

June 1, 2015 By Sarah 6 Comments

I Love Pinterest – Art Above Headboard Progress + Ikat Dress

I Love Pinterest – Art Above Headboard Progress + Ikat Dress

May 9, 2012 By Sarah 8 Comments

DIY Belgrave Headboard with Ikat Fabric for the Guest Bedroom

DIY Belgrave Headboard with Ikat Fabric for the Guest Bedroom

June 12, 2012 By Sarah 32 Comments

  • DIY TUTORIALS
    • design + build
    • furniture redo
    • diy in 1 hour or less
  • free printable
  • friday favorites

Disclosure

Occasionally, affiliate links are used when they are available. I do earn a small commission when items are purchased using those links. As always, I only link to things that I truly love. I also link to items that I love when an affiliate link is not available. Thanks so much!

  • Home
  • About
  • Services
  • Shop

Copyright © 2025 Dorsey Designs

MENU
  • Home
  • About
  • Services
  • Shop