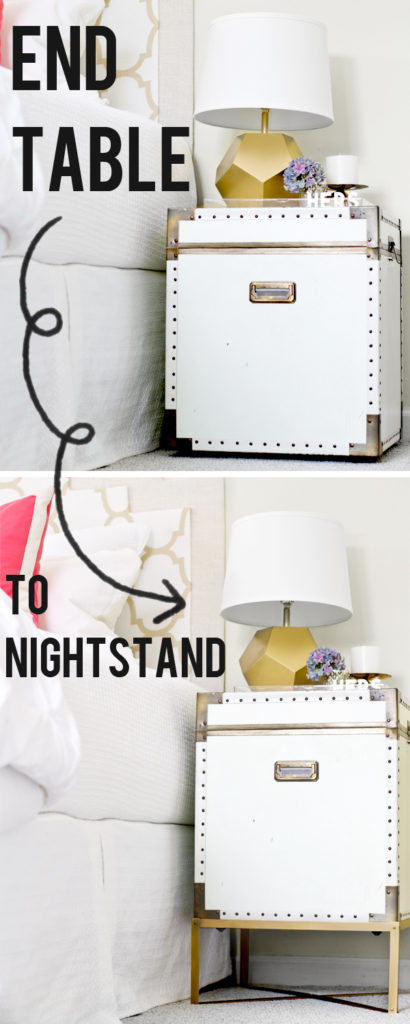
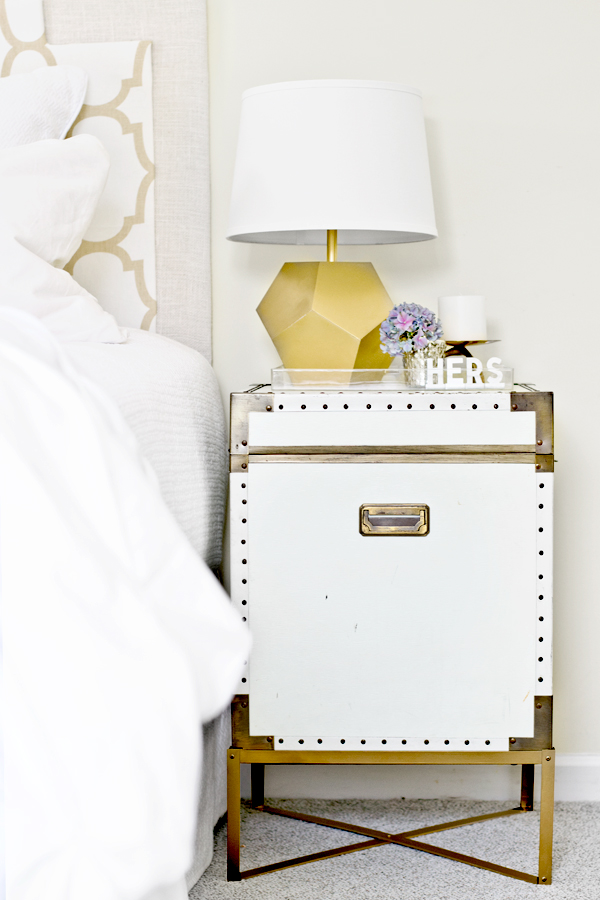
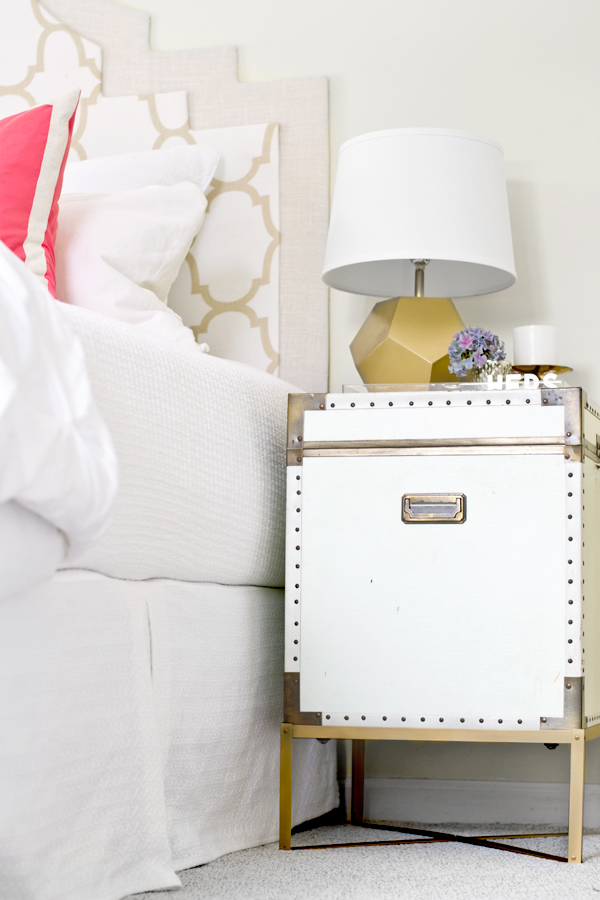
Yesterday, you may have noticed that our campaign chest got a little lift!
Today I’m sharing how to make a simple metal base for a table – using aluminum strips and rivets. This would be perfect to make a trunk or chest a little higher or if you have a top and need a simple base. My chest is pretty light so aluminum was a good option. For something heavy, you probably want to use steel and screws and nuts (like the base for our herringbone driftwood table) If you missed the original tutorial at Infarrantly Creative, see how we did it!
For the past month or so I’ve been using my campaign chest as an end table in my living room. I loved the idea of it as a nightstand, but I prefer my nightstand about level with the mattress. Inspired by Pottery Barn’s Ludlow Trunk, (thanks diydeeds on instagram for mentioning that!) adding a simple metal base, made it the perfect nightstand height!
Want to make your own? Here’s how we did it!
Materials needed:
3/4″ aluminum angle (36″ x3)
1″ aluminum straight (36″)
Rivet gun
1/8″ Rivets
Gold spray paint
Dark wax
Jig saw with fine metal blade
Drill
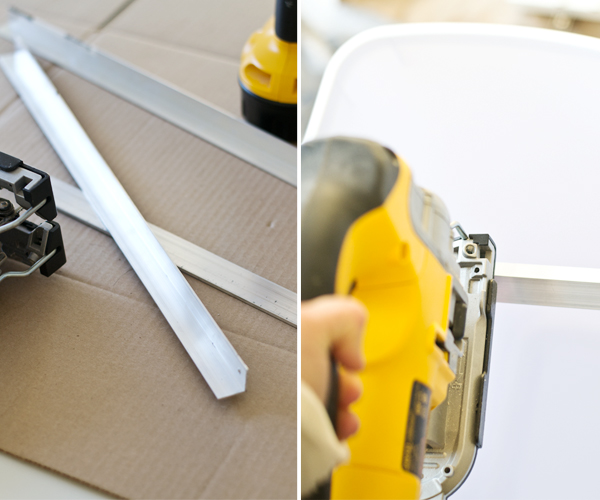
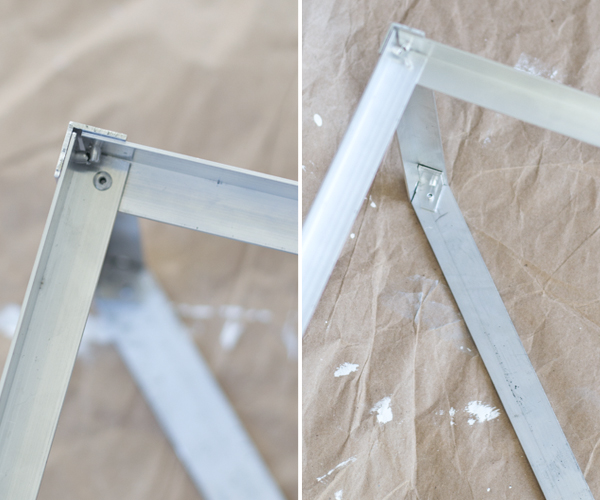
First, we measured the cuts needed for the angle pieces (4 to go around the base (the chest sits in the angled pieces + the 4 legs.)
With a blade designed to cut metal, we made the cuts with the jigsaw. Ideally we would have used a chop saw (with a blade designed to cut metal) but we currently don’t have one, so the jigsaw was a good substitute.
Next, on the 4 legs, we measured and drilled holes for the rivets to go through. Then we taped (to hold them in place) the base on the bottom of the chest and held the legs up and marked the holes. Then we drilled the holes to connect the base to the legs.
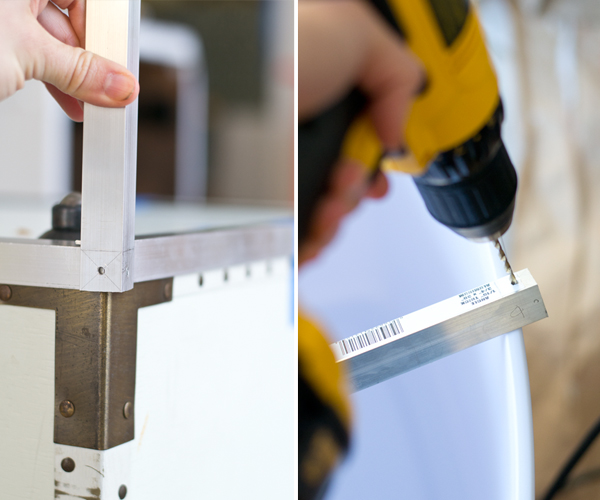
Next, we connected the 4 legs with an x at the bottom. We used 1″ straight strips of aluminum – since it goes diagonally to the 3/4″ angle, the 1″ fills the space best. We held the straight piece under the angle and marked the cut, so it fit perfectly. We cut a small angle piece to connect the straight piece to the angle legs, and drilled a hole at each end to connect them.
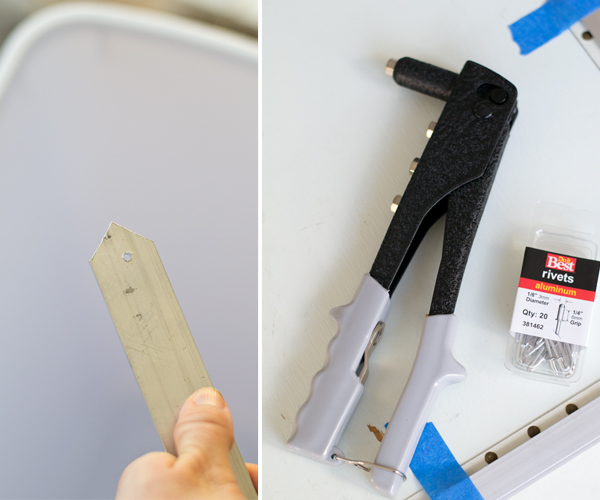
We used a rivet gun to connect the pieces together – it’s super easy to use!! I can’t wait to try it on more projects!
To finish it, I spray painted it gold and once dry, I mixed a little stain with wax to deepen it.
And that’s it! The chest fits perfectly inside and it’s completely removable so if I want to use it as an end table again, all I have to do is pull it out. Super easy!

Cost for the metal was ~$16 and rivets were ~$2.50 (used 20) so total cost for the base was about $18.50 depending if you have the rest of the materials on hand.
I love our new nightstand!
Now our room is completely bare .. the movers came yesterday and cleared out most things. I made sure to tell them how the chest pulls out of the base, so it wouldn’t go flying. I’m sure they thought I was a little overprotective crazy since I did this for almost everything, but I think they would understand if they knew how many hours we’ve put into everything 🙂
Also, at noon today, I’m sharing my knockoff project at East Coast Creative, you won’t want to miss it!
VERY cool! Looks fab …
It works perfectly – like it was always apart of the trunk. Love it.
I saw those nightstands in yesterday's post and thought you might have added the base. They are gorgeous!
love it- what a clever idea!
i LOVE this! i have a piece in the garage that needs a similar treatment!
You know already how much I love this and I can't wait to see your new knock off project. Heading on over now.
So good once again.
Ack, you guys are so flippin' talented! LOVE this!!!!
Incredible! And you make it look easy!
Incredible! And you make it look easy!
great idea Sarah! I love the way it turned out!
Really gorgeous!
I loved it before, and I still love it now! Such a great way to showcase the trunk. I'm dying to make a metal-base…anything, really. But probably a coffee table the most 🙂
This is awesome! Thanks for the tutorial!!!