• Home
  • About
  • Services
  • Shop
    • Bloglovin
    • Email
    • Facebook
    • Instagram
    • Pinterest
    • Twitter

Dorsey Designs

DIY and Interiors by Sarah + David

  • Home Tour
  • DIY TUTORIALS
  • friday favorites
  • design + build
  • art

get the latest straight to your inbox

Guest Room Reveal | Before + After

Hey! I hope that you’re having a great week! I wanted to to pop in share some photos and sources of our guest room!

First, here’s a photo from the old owner.

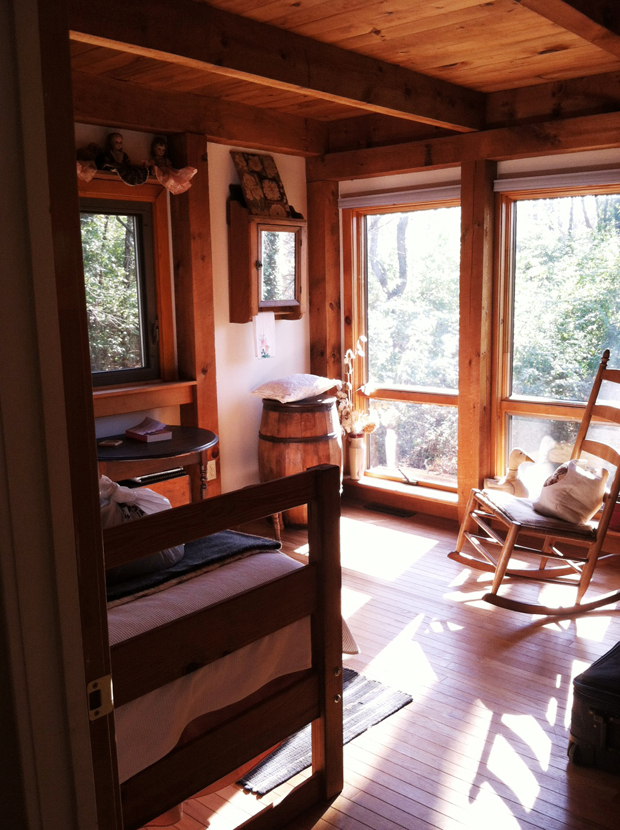
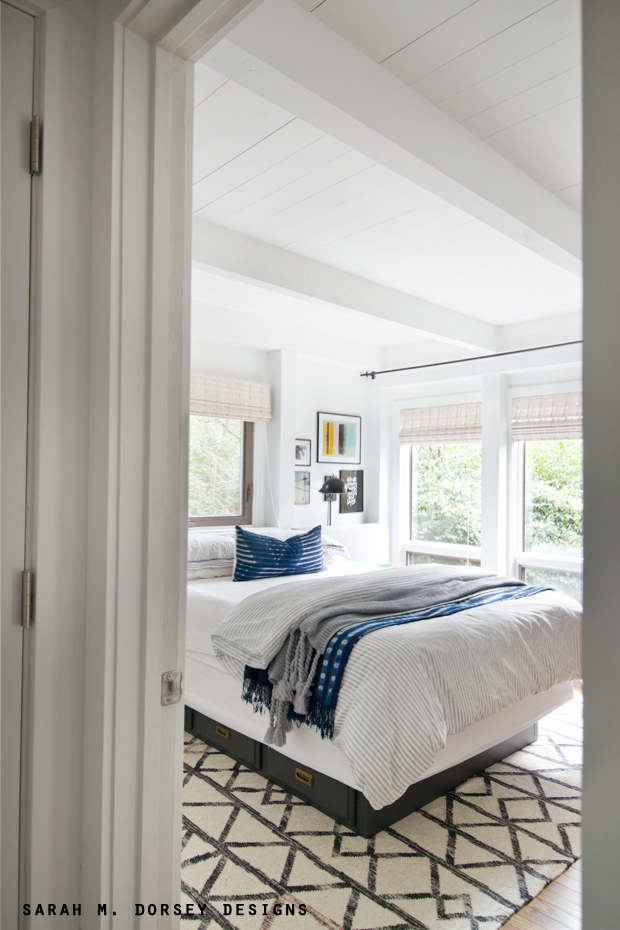
and from when we moved in. I know it’s controversial to paint wood, but I have zero regrets, it is SO much brighter!! And that makes me smile, do what makes you smile 🙂

First up, the bedding! It’s layered and cozy – perfect for a guest room! Striped duvet is from Target (a great price and the quality is great too!) The gorgeous indigo throw is from Danielle Oakey – I have my eye on a few other throws in her shop (we might reuse our old sofa that needs to be reupholstered, love the idea of layering a throw overtop to refresh it!)

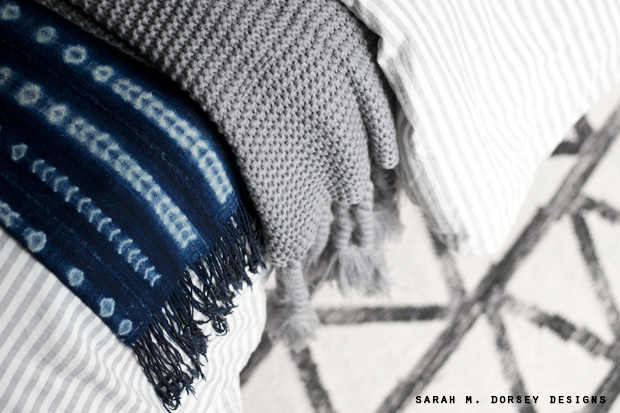
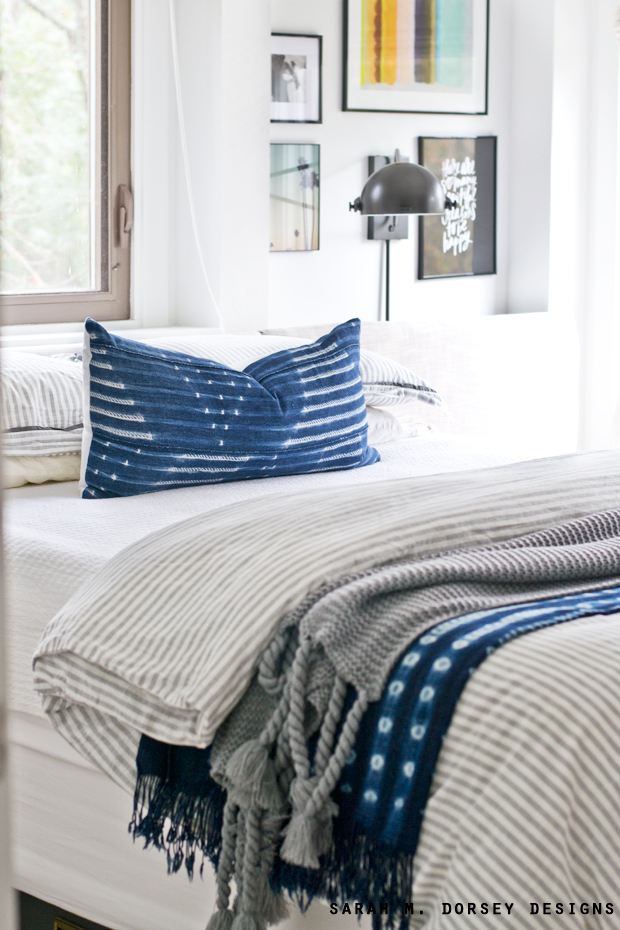
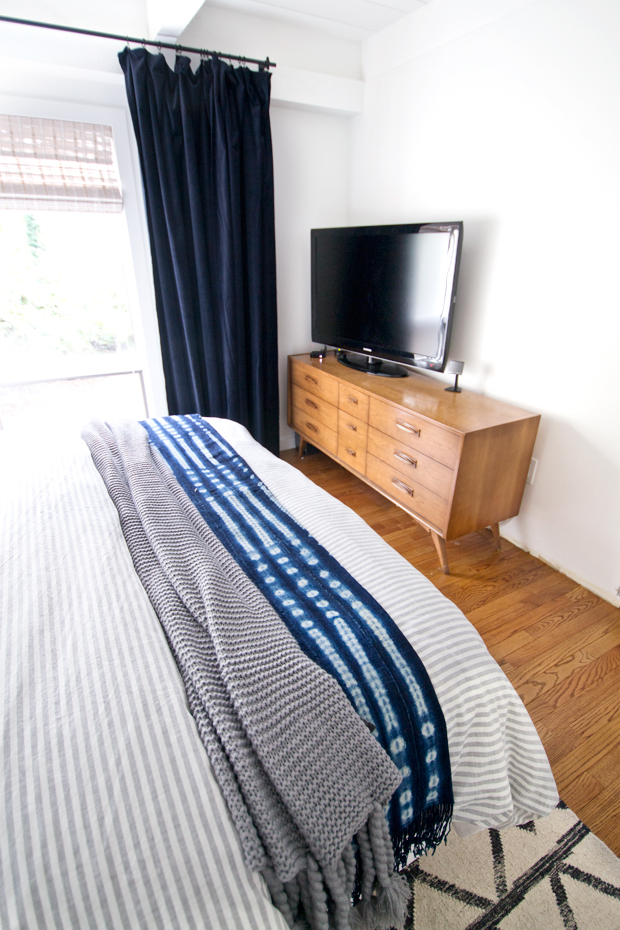
The gray tassel throw is from Home Goods, love the texture that it adds!

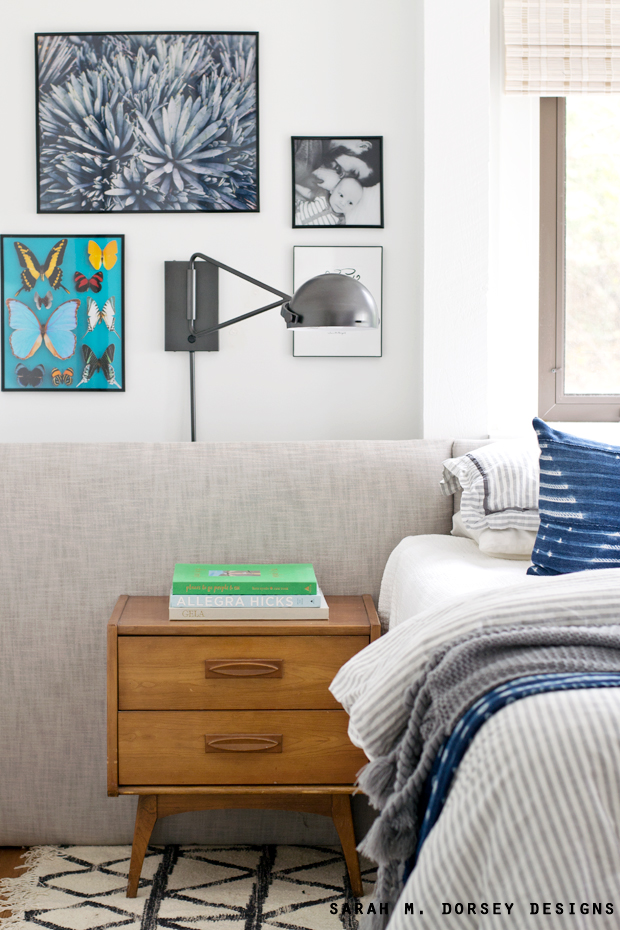
Long lumbar is also from Danielle Oakey! The low DIY headboard works perfectly with two standard pillows.

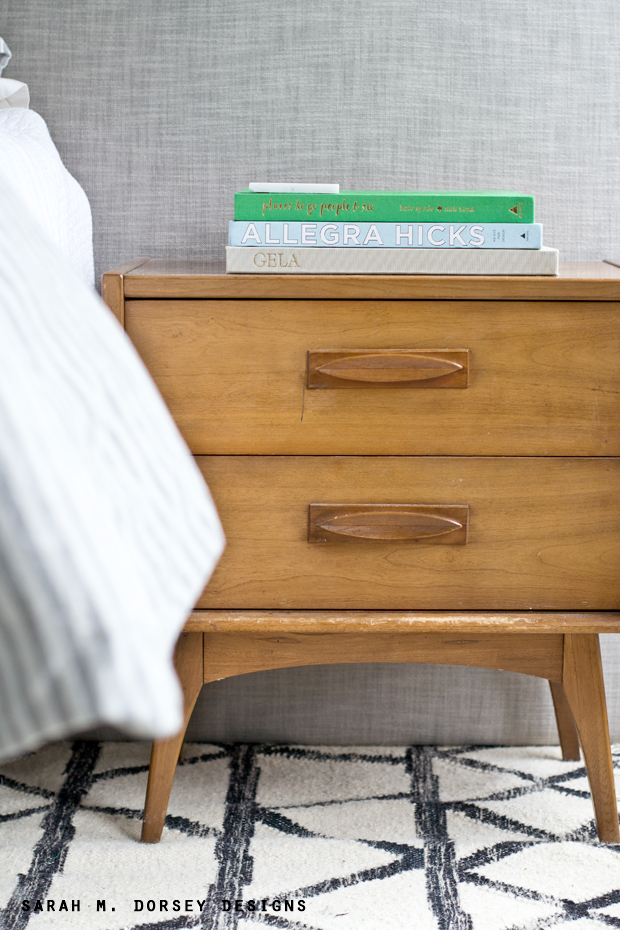
Nightstands and dresser are from my Grandparents.

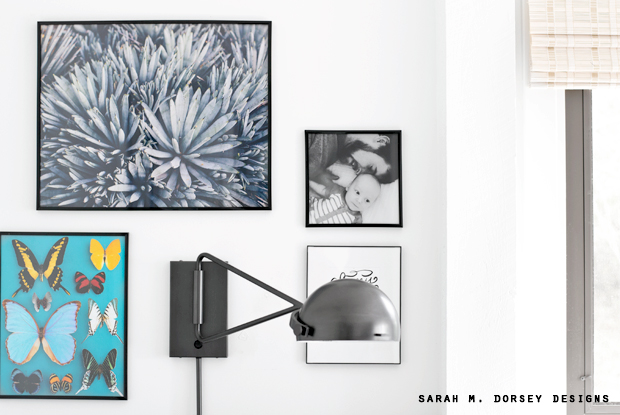
Gallery wall frames are from Michaels – prints are from Jenny’s Print Shop and my phone.

Took this photo before the dresser came crashing down after sitting on the edge for a photo. Whoops!! You can see here that the leg was already coming out (at least, that’s what I’m telling myself 😉 ha! I’m planning a gallery wall on this wall, but would love a smaller tv for the room, so waiting .. I’ll probably make the current one work though. 
Draperies are two panels pushed together to look like one large panel. I cut off the top grommets to hem and used small clip rings. Rod is a DIY – it’s inexpensive and heavy duty for longer stretches. Let me know if you’d like to see a tutorial for that. 

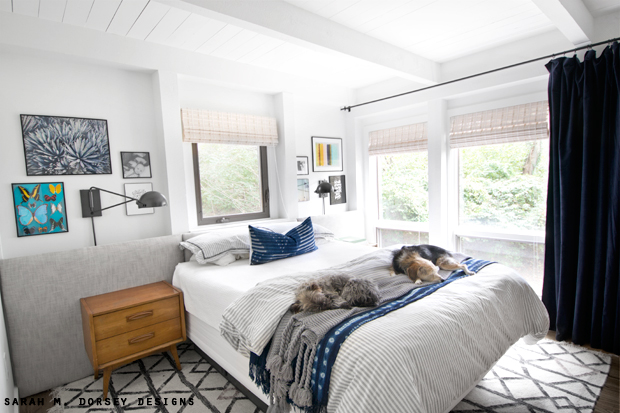
Finally the headboard! It’s a DIY and goes wall to wall – we used a similar technique to this tutorial, just didn’t attach legs. So that it would be easier to move, we made it in three sections.

The pups love this room – it gets lots of sunshine!

Nightstands, dresser and base are vintage (from my Grandparents) we did paint the base with left over sample paint – when we were deciding on a color for the exterior of our house. I share my furniture painting tips here, but I think I need to do an updated post – I really liked using Benjamin Moore’s Arbor Coat exterior siding and decking paint. We cleaned off the surface and applied without sanding – two coats. It went on great, leveled out and didn’t leave brush marks – it’s super durable too! 
white wash bamboo shades // art  art // pillow // duvet // throw // rug // draperies // sconces
I’ll keep you updated on the closet and additional art, but for now, I’m calling this room done! Nursery AND kitchen reveal soon!! We’ve been busy!  

house// Uncategorized// Uncategorized9 Comments

Subscribe

get the latest straight to your inbox

« Holiday Decor Round Up!
Friday Five | 11.17.17 »

Comments

  1. Cassie Bustamante says

    November 15, 2017 at 7:20 pm

    oh sarah, i love it! the colors are so soothing and it's such a great retreat with those windows!

    Reply
  2. Deb and Charlie says

    November 16, 2017 at 1:15 am

    Absolutely beautiful! Such a bright and welcoming room!

    Reply
  3. Jana Bek says

    November 16, 2017 at 6:26 pm

    Wowsa Sarah, you are a genius! Obsessed with the headboard, and what gorgeous transformation!!

    Reply
  4. Jessica | Petal + Ply says

    November 16, 2017 at 10:27 pm

    So pretty! I love that headboard!! Looks great! Also, so glad to see a picture of those blinds in a room. I've had them pinned but wasn't sure how they'd look in real life.

    Reply
  5. Gail Becraft says

    November 19, 2017 at 11:07 am

    I love this guest room! A question about the drapes…after you cut at the hem below the grommets, did you do any additional sewing/hemming to keep from fraying? Thank you!

    Reply
    • Sarah says

      November 19, 2017 at 1:48 pm

      Yep! I used a no sew tape – it was heat free so super sticky tape! I’ve also used the iron on kind before too

      Reply
  6. Gail Becraft says

    November 19, 2017 at 11:13 am

    I love this room! A question about the drapes…after you cut below the grommets at the hem, did you do any sewing/hemming to keep from fraying? Thank you for sharing any info you can on this!

    Reply
    • Sarah Dorsey says

      December 12, 2018 at 4:08 pm

      No sew hem tape worked great!

      Reply
  7. Gail Becraft says

    November 19, 2017 at 2:41 pm

    Perfect (since I can't sew ��)…thank you! Enjoy your first Thanksgiving with your precious baby boy!

    Reply

Leave a Reply Cancel reply

Your email address will not be published. Required fields are marked *

Contact Me

sarahmdorseydesigns{@}gmail{.}com

Stay Updated!

Get all the latest goods straight to your inbox!

This error message is only visible to WordPress admins

Error: No connected account.

Please go to the Instagram Feed settings page to connect an account.

Must Reads

Custom Peg Board + DIY Circle Art | FrogTape

Custom Peg Board + DIY Circle Art | FrogTape

Main Level Refresh with The Home Depot

Main Level Refresh with The Home Depot

Sponsor

2016 Daily Simplified Planner

Popular Projects

art above the headboard finished!

art above the headboard finished!

May 15, 2012 By Sarah 27 Comments

Weekend Find: Cane Chair

Weekend Find: Cane Chair

August 20, 2012 By Sarah 9 Comments

Cane Chair Peek

Cane Chair Peek

August 27, 2012 By Sarah 2 Comments

Blogging 101 | How to Make Money Blogging

Blogging 101 | How to Make Money Blogging

October 21, 2015 By Sarah 4 Comments

Master Bedroom Trellis Stencil Wall Complete

Master Bedroom Trellis Stencil Wall Complete

April 3, 2012 By Sarah 13 Comments

  • DIY TUTORIALS
    • design + build
    • furniture redo
    • diy in 1 hour or less
  • free printable
  • friday favorites

Disclosure

Occasionally, affiliate links are used when they are available. I do earn a small commission when items are purchased using those links. As always, I only link to things that I truly love. I also link to items that I love when an affiliate link is not available. Thanks so much!

  • Home
  • About
  • Services
  • Shop

Copyright © 2025 Dorsey Designs

MENU
  • Home
  • About
  • Services
  • Shop