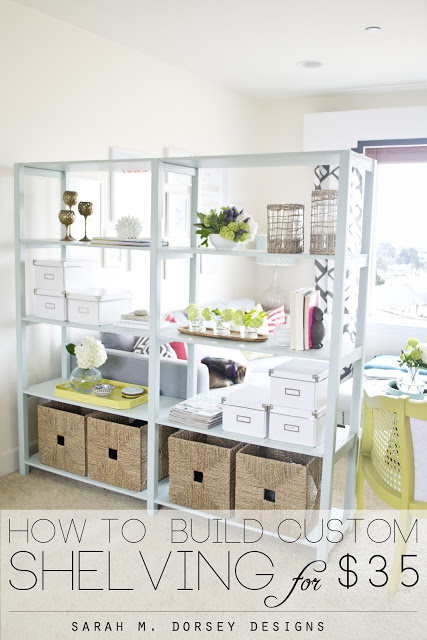
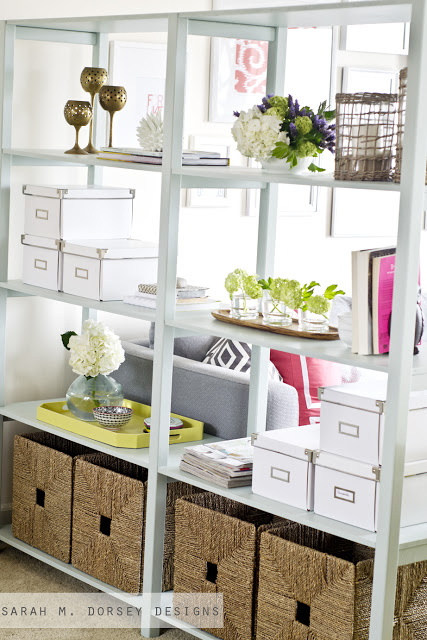
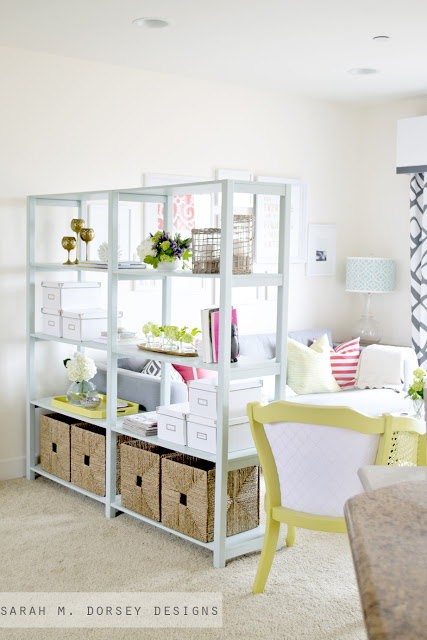
Want to know how we built this shelving unit for $35? Read on to see!
First a little background info and why we decided to build instead of buy and why we selected the materials that we did …
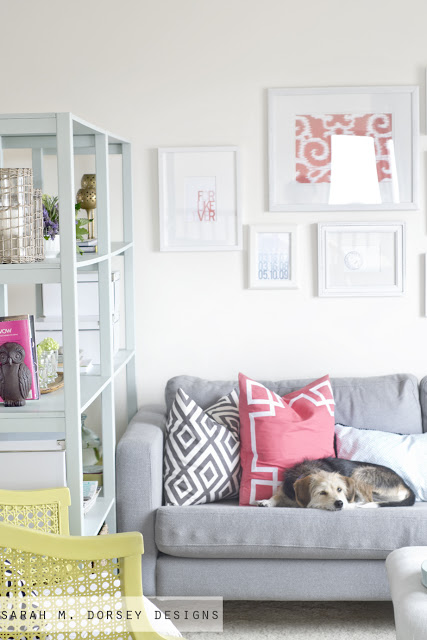
We decided on an open shelving unit for between the office and living room because a. we needed more storage b. we wanted it to feel open, but still have something to divide the spaces
We decided to make our own instead of purchasing Ikea’s Vittsjo, because a. the Vittsjo wasn’t quite long enough and two was too long b. we are 4 hours from Ikea … c. it was cheaper by about half
Pretty convincing, huh? 🙂
We opted for MDF shelves instead of using 1x12s because we needed it to be about 14″ wide to fit our baskets (on bottom shelf) and it ended up saving SO much money! We got two large sheets of MDF at Habitat Restore for only $7! (they aren’t always there, but hopefully yours will have some too!) One 1x12x6 starts at about $12 and goes up depending on quality. So we were able to save about $53 on the shelves and get them the width that we wanted!
We then purchased 2x2x8 (x6) redwood pieces from Ace Hardware for about $4.50 each for the other wood. We could of saved even more money and went with pine, but we wanted it to be a little stronger and they were more finished, which required less sanding! ALWAYS a plus!
Ok, now here’s how we did it:
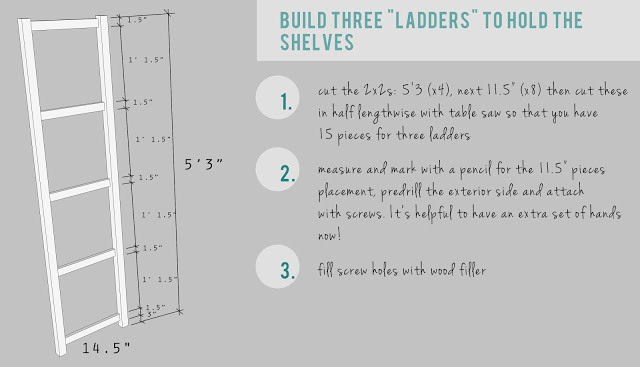
The overall height was 5’3″ and width was 14.5″. The drawing and photos don’t really show it, but for the center rods we cut a 2×2 in half with a table saw, this allowed us to save on wood and less wood = sleeker appearance (which we were going for).
For the two end ladders, the 2x2s (cut in half) were placed on the edge and the center ladder had them centered.
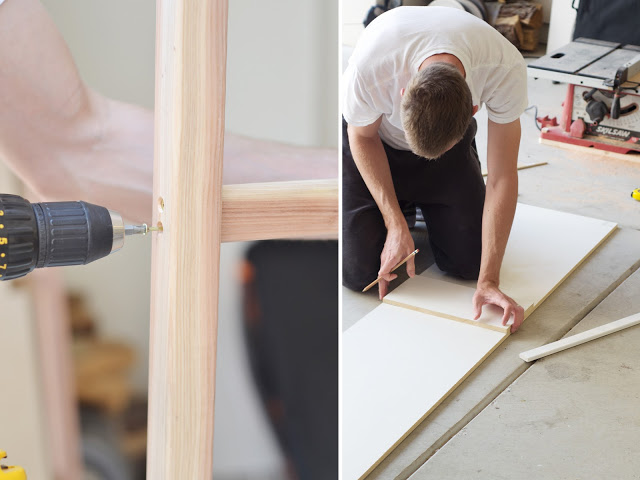
While building the ladders, it was helpful to have one person hold the pieces in place, while the other attached them.
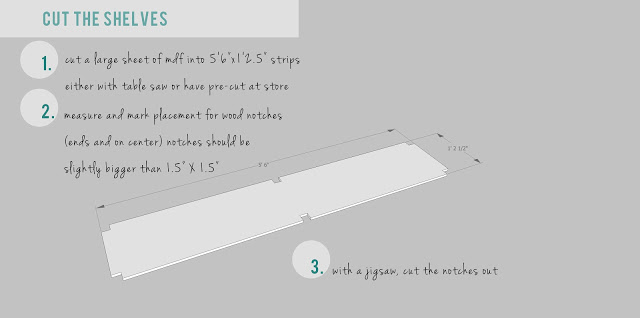
Next we moved onto the shelves. We had them cut to 14.5″wide at Ace Hardware (before we got the table saw) when we picked up the 2x2s. We then measured where the 6 notches went (on the ends and centered)
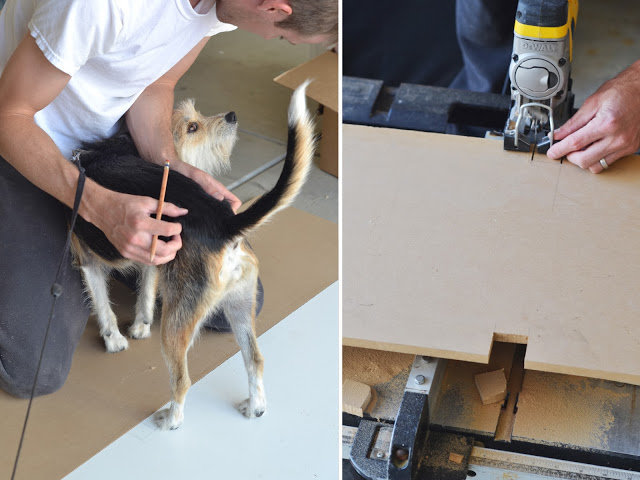
Annabelle visited … this is how she tells us that she is bored and wants back inside 🙂 Inside she went, and David cut the notches with the jigsaw.
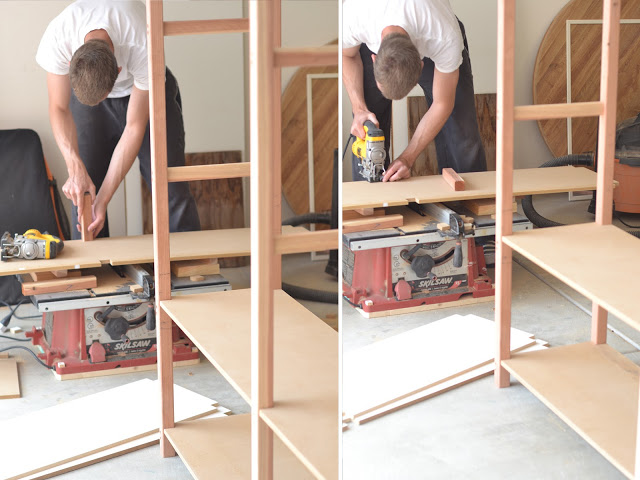
He tested to see if the 2×2 would easily fit inside and then cut off a little more if needed. Since the shelves are pretty tight to get in there (more on that later) we wanted the cuts to be slightly big so that they would fit.
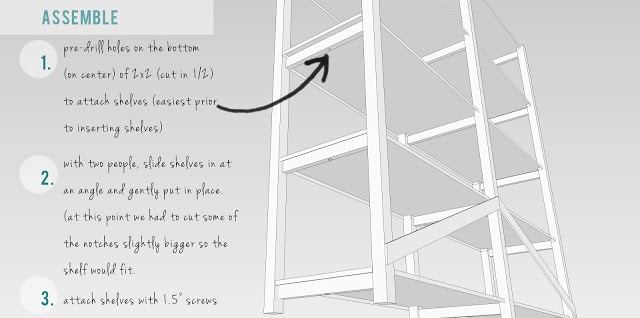
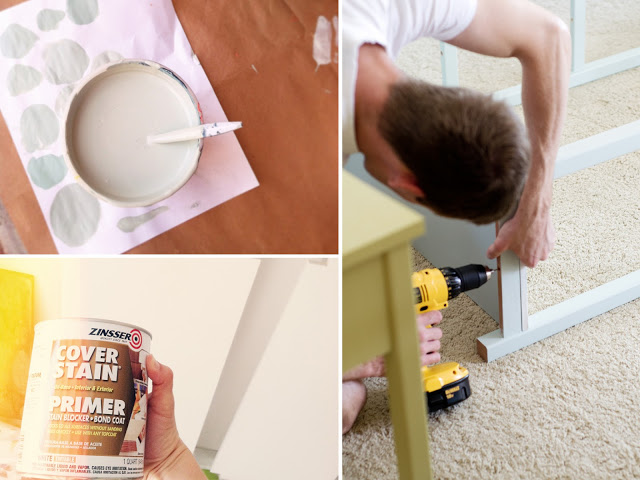
Now we started assembling. We predrilled holes in the center of the ladder pieces for the shelves to attach to. (This would of been easier before the ladders were assembled). Balancing the three ladders (you need at least two people 🙂 we carefully slide the shelves in at an angle and placed them and then attached them with screws. We did have to cut a few of the notches slightly bigger at this point so that the shelf would fit.
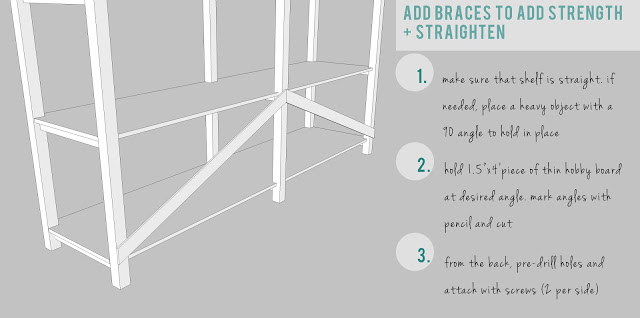
and then we added braces at the bottom for extra support and to ensure that it is straight. We used a thin piece of poplar hobby board.
We actually painted the pieces separately prior to assembling since we had to install in place (our stairs are too narrow for it to fit). So paint prior to assembling or after, whichever work best for you! I used Zinsser cover stain oil based primer because it bonds to shiny surfaces like laminate (works great!) and a custom mixed light minty blue for the top coat.
and that was it!
Total Cost:
MDF sheets $7 (Habitat Restore)
2x2x8 Redwood $4.50 x6 (Ace Hardware)
Paint (already owned)
Primer $8
Total Cost for wood $34
plus primer = $42
I still can’t believe that we got all of the wood for about $35!! Make sure to keep your eye’s peeled at Habitat Restore or other similar stores to cheap building supplies, it can save SO much money!
love the look and the color of the shelves!
Thanks Andrea! 🙂
Awesome colour, great styling and they look so much better (and more expensive) than the IKEA shelves!!!
Well done tutorial! And the paint color and styling is gorgeous too.
I think I could handle building that shelf. Doesn't look too hard but I just need to get my Restore to sell some cheaper supplies. Ours stinks big time!
Absolutely beautiful! It's so fresh feeling!
OK I had to jump to this post, because these shelves are incredible! you make me want to build some right meow!
Tudo muito lindo e criativo!