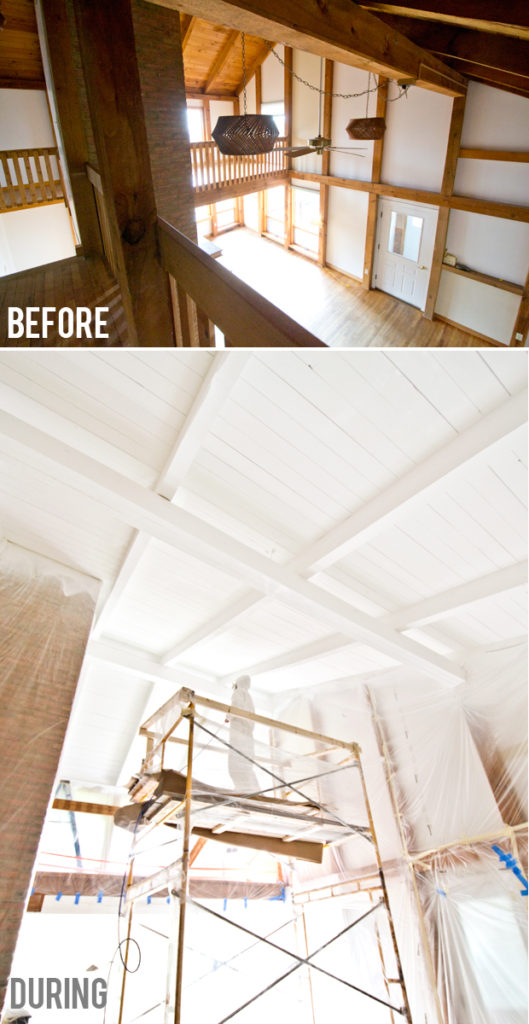
Last weekend, we finished painting the ceiling in the great room of our house – the dining room, living room and two loft areas. It’s something that we that we’ve thought about since we bought the house and have planned for the past year or so. If you missed why we decided to paint, see here and here (before photos in the link and at the bottom of the post)
After a lot of trial and error – the game changers were Kilz stain blocking primer and the right sprayer set up. Read on to see how we did it!
We painting our entry and primed our living room – no post because both experiences were extremely painful!
Today, I’m so happy to share what worked for us – even though this room was a lot larger, it was bearable because 1. We were prepared 2. We had the right materials 3. We learned from our previous mistakes!
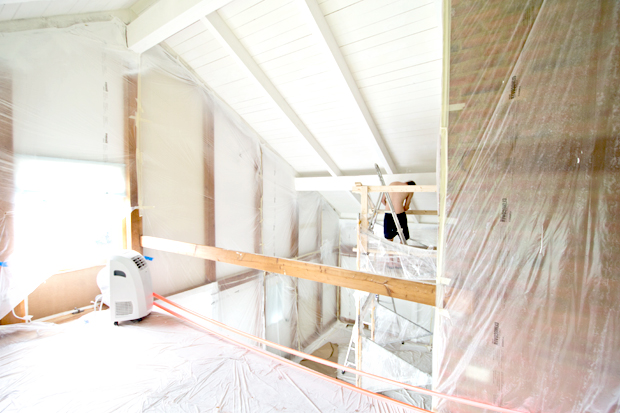
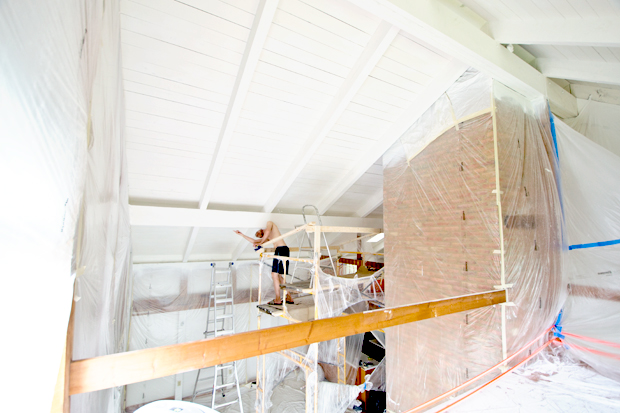
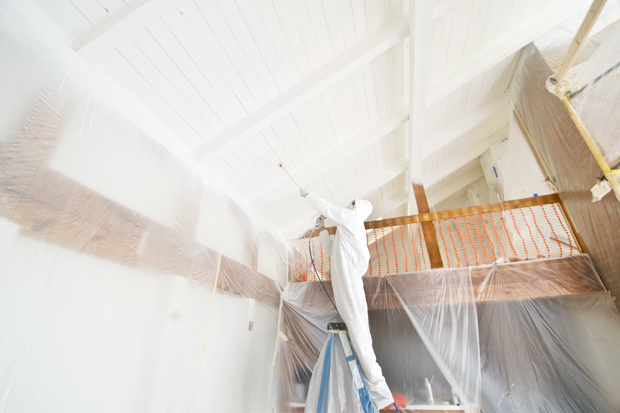
First, spraying versus rolling. Spraying sounds a lot easier since the process is lot quicker. But, it’s A LOT more set up and in general it’s a pain. The paint gets everywhere, so you have to seal and protect everything, including the house and yourself (unless you want to be covered in paint) and it’s super hot in the suit! We sprayed our ceiling because rolling alone can’t get in the crevices between the planks. Spraying ensured even coverage.
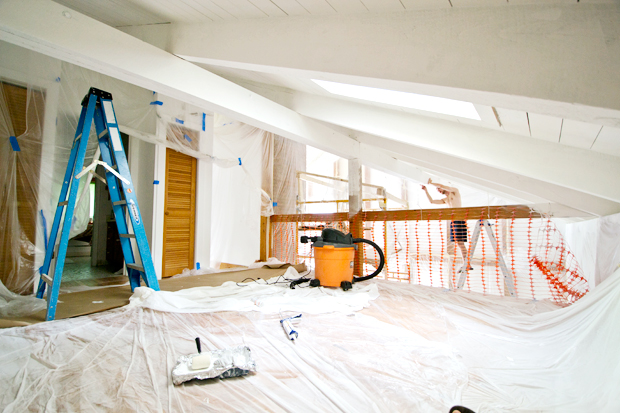
We taped off our walls to prevent the overspray from building up on the walls. Since we will be painting the walls white too, we might have been able to get away with holding a shield up (on the walls) as we went, but to be safe, we applied plastic to all the walls (definitely don’t want to sand all the walls ..)

Here’s our process. First, we vacuumed the wood the best we could. Next, we sprayed the ceiling, then we rolled/brushed all of the beams (the wood on the beams is rough, and the spray wouldn’t get in all the crevices, so areas looked dark), caulked the seams where the beams met the ceiling, sprayed another coat of primer, sprayed a top ceiling coat. In between coats, we looked for drips (it’s easy to do if the paint is applied too heavily)
Sounds fun? No, not really. But, after getting a few quotes around $14,000 for this room and the bedroom, we decided to give it a try ourselves. It was bearable and basically stress free, because we took our time to research, get the right materials, and spread it out over a few weeks.
Most importantly, a good, stain blocking primer and paint sprayer. Both functioned exactly as planned!
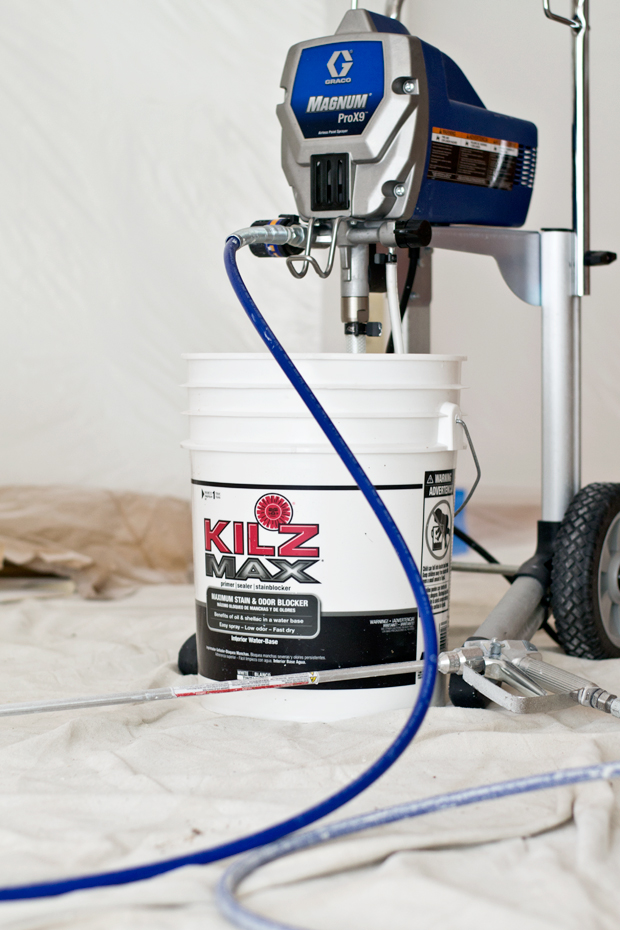
The wood in our house needed a good, stain blocking primer. Typically, oil based is the way to go. But since we’re living here while we paint, the oil based would have been unbearable. It’s a pain to clean up and it STINKS.
We used Kilz Premium Stain High Hide Stain Blocking Primer in our entry and living room – both times, it covered well with two coats and a year later, there is no bleed through. So, I reached out to Kilz and decided to try Kilz Max in our great room – it’s low VOC and covered so well! I didn’t notice a huge difference in coverage, compared to Kilz Premium Stain High Hide Stain Blocking Primer (zero VOC), so I’d recommend either one.
Next, having a good sprayer will save a lot of headaches. We rented a Graco sprayer from Home Depot for the living room, but decided to buy one since we’d need it for several days. Plus, we will be painting the rest of the interior and the exterior of our house soon, so buying was definitely worth it for us.
When we painted the living room, the problem was that the tip was on the larger side of the recommend range for the primer. Which resulted on lots of paint coming out .. it made a huge mess and wasted paint. I think we used 7 gallons in the living room and about 10 gallons in the great room (which included another coat in the living room too). The great room is at least 5 times larger, so having a smaller tip the second time was definitely worth it! We’d recommend using the smaller tip recommended for your primer. We used the tip that came with the sprayer, .015″ You can use .015″ – .021″ with the Kilz primers listed above. I would definitely recommend using the smallest tip recommended for the primer!! We didn’t dilute the paint and it worked perfectly.
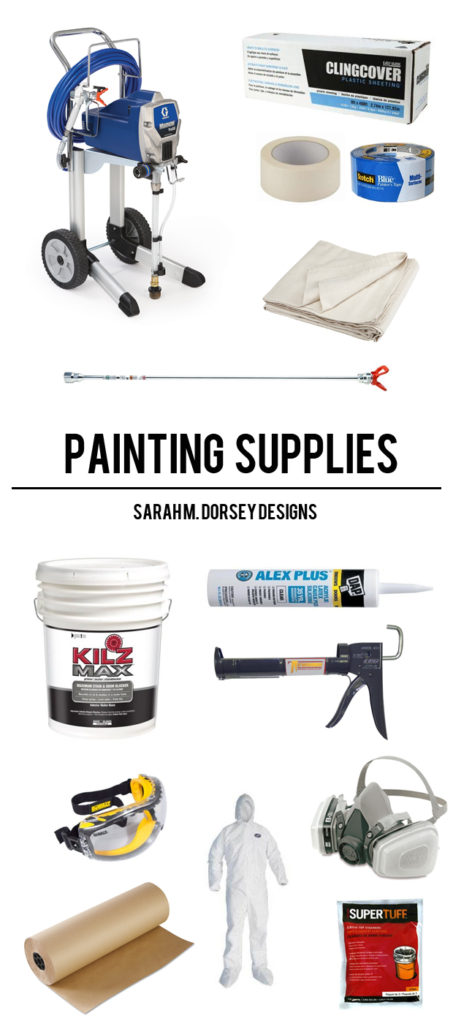
Here are our must have supplies when spray painting!
** With the sprayer, be sure to take care of it! Follow the instructions. There was a video from the 90s, but it was helpful! Be sure that it is cleaned properly so that it works well the next time you use it ** Also, be sure to keep the sprayer outside of the spray area and run the hose in – this will keep the motor away from the paint particles.
Also, we are planning to replace the railing, so that why it’s partially down. David bought a welder to do it ourselves. Hopefully it goes smoothly!
Thanks so much to Kilz for providing the primer for this project! I’ve used their primers for years – so I was thrilled to partner with them! As always, I only share products that I love.
I love your tutorials! This looks awesome!
XO Ellen from Ask Away
http://www.askawayblog.com
what a tremendous result! Looks fantastic ~ great job
We sprayed our back porch last year and that was a tough job – I can't imagine spraying a massive ceiling! It looks incredible though. The light must just bounce around the room now!
I imagine that was a bear of a job, but WOW! It looks so light and fresh. You must be thrilled. Congrats.
Definitely worth the work! Wow! It looks amazing!!
Wow you guys deserve a trophy or medals for this. We know how hard it is just to roll a large room and ceiling – but this looks like 100x more work! It looks great though. Can't wait to see it finished!
How much work and I can't believe the quote you got. But it's so worth it. Looks so light and bright. I totally love it.
Wow! You are a great team 🙂 I bet you can't even believe the difference in brightness. Were you outside with the puppies while David sprayed?
The puppies stayed with David's parents that week 🙂
It looks soooo good Sarah!!
Your project looks fantastic!
When painting the ceilings vs the walls white, what paint finish did you use for the ceilings vs the walls? (flat, semi gloss, gloss, eggshell?)
Also, what color white did you decide on and what brand of paint did you use for your finish coats? (Love Kilz primer!)
Thanks a million and BRAVO!
Mary Fae
On ceilings, we always use flat paint – it reduces imperfections. We used Sherwin Williams HGTV ceiling paint (purchased from Lowes on 4th of July for half off) and it worked great! We haven't decided on a top coat for the walls yet, but it will either a pure white or very close. We typically use Sherwin Williams (Super Paint, satin or eggshell), but will probably only if they are having a 40% off sale.
I am in awe at the amount of work you are doing by yourself! Big, huge pat on the back to the both of you. It looks a thousand times better already!
What a huge difference already! I can't wait to see the full reveal!
What did you use for your top coat?
Hi Amy! We used Sherwin Williams ceiling paint – flat white. Happy painting!