• Home
  • About
  • Services
  • Shop
    • Bloglovin
    • Email
    • Facebook
    • Instagram
    • Pinterest
    • Twitter

Dorsey Designs

DIY and Interiors by Sarah + David

  • Home Tour
  • DIY TUTORIALS
  • friday favorites
  • design + build
  • art

get the latest straight to your inbox

Ikea Hemnes Shoe Cabinet Renovation

Follow my blog with Bloglovin
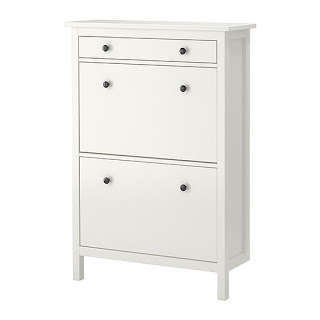
Ikea offers a lot of great products at lower price points. Shortly before moving to CA we purchased this Hemnes shoe cabinet.
source
source

It holds a lot of shoes, and looking at it closed you would never know! 

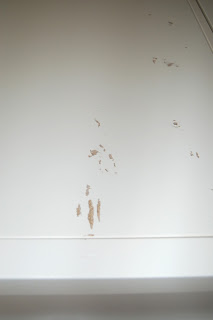
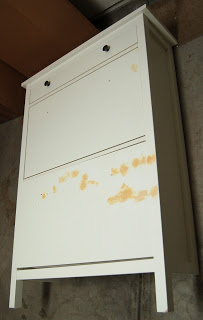
Moving to CA was our first experience with a moving company … and it wasn’t a great one. We sold some of our furniture prior to moving and brought the rest. What we did bring was damaged …

Initially I was upset, but insurance covered it all – so now we can fix it for free!

I applied wood filler, sanded, coat of thinned primer, sanded, and one top coat – Sherwin Williams Big Chill with XIM Extender to even out the brush strokes

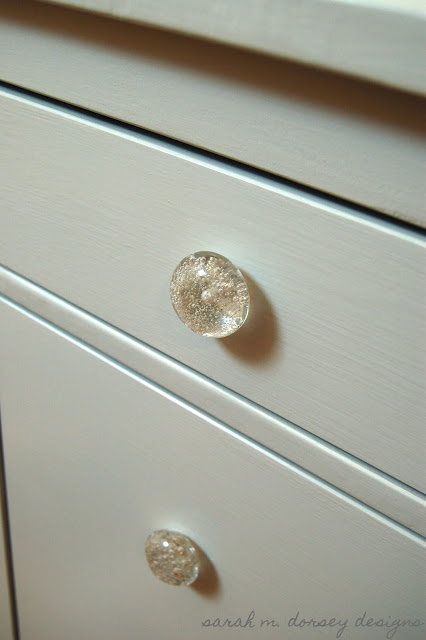
I swapped the dark knobs for these bubble glass knobs from World Market.

We still need to attach the shoe cabinet to the wall, but it is currently where it will be staying – on the 2nd floor landing – down the hall from the bedrooms, so great for grabbing shoes on the way out.

The quatrefoil mirror will be moving to the bedroom, once we build the headboard (foam is on the way!) I am currently in the process of repairing the mirror that will go over the shoe cabinet – and will post more pictures when it is up.

I am almost done with the bookcase I started painting on Monday – top coat is almost dry – then I will be attempting to stencil it – it is my first time – wish me luck!
Landing// Uncategorized// Uncategorized2 Comments

Subscribe

get the latest straight to your inbox

« Ombre Frames and Graphic Prints
Bookcase Progress »

Comments

  1. Jamie says

    January 14, 2014 at 7:17 pm

    I'm curious how you attached this to the wall? The directions don't offer any measurements.

    Reply
    • Sarah says

      January 14, 2014 at 7:49 pm

      Hi Jamie! There are a few horizontal supports on the back – before the drawers are inserted, you can use screws/cabinet anchors to secure it to the wall through the MDF. Hope this helps 🙂

      Reply

Leave a Reply Cancel reply

Your email address will not be published. Required fields are marked *

Contact Me

sarahmdorseydesigns{@}gmail{.}com

Stay Updated!

Get all the latest goods straight to your inbox!

This error message is only visible to WordPress admins

Error: No connected account.

Please go to the Instagram Feed settings page to connect an account.

Must Reads

Custom Peg Board + DIY Circle Art | FrogTape

Custom Peg Board + DIY Circle Art | FrogTape

Main Level Refresh with The Home Depot

Main Level Refresh with The Home Depot

Sponsor

2016 Daily Simplified Planner

Popular Projects

New Prints Insprired by the Gallery Wall

New Prints Insprired by the Gallery Wall

July 24, 2012 By Sarah 2 Comments

Dyeing an Upholstered Eames Shell Chair

Dyeing an Upholstered Eames Shell Chair

September 16, 2013 By Sarah 28 Comments

TV Stand with Pivoting Door to Hide Electronics

TV Stand with Pivoting Door to Hide Electronics

July 27, 2012 By Sarah 11 Comments

Large Black and White Abstract Art for the Office

Large Black and White Abstract Art for the Office

August 5, 2013 By Sarah 30 Comments

DIY Headboard Complete!

DIY Headboard Complete!

April 11, 2012 By Sarah 164 Comments

  • DIY TUTORIALS
    • design + build
    • furniture redo
    • diy in 1 hour or less
  • free printable
  • friday favorites

Disclosure

Occasionally, affiliate links are used when they are available. I do earn a small commission when items are purchased using those links. As always, I only link to things that I truly love. I also link to items that I love when an affiliate link is not available. Thanks so much!

  • Home
  • About
  • Services
  • Shop

Copyright © 2025 Dorsey Designs

MENU
  • Home
  • About
  • Services
  • Shop