• Home
  • About
  • Services
  • Shop
    • Bloglovin
    • Email
    • Facebook
    • Instagram
    • Pinterest
    • Twitter

Dorsey Designs

DIY and Interiors by Sarah + David

  • Home Tour
  • DIY TUTORIALS
  • friday favorites
  • design + build
  • art

get the latest straight to your inbox

Lack Tables to Upholstered Ottomans

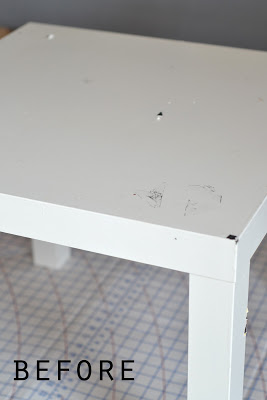
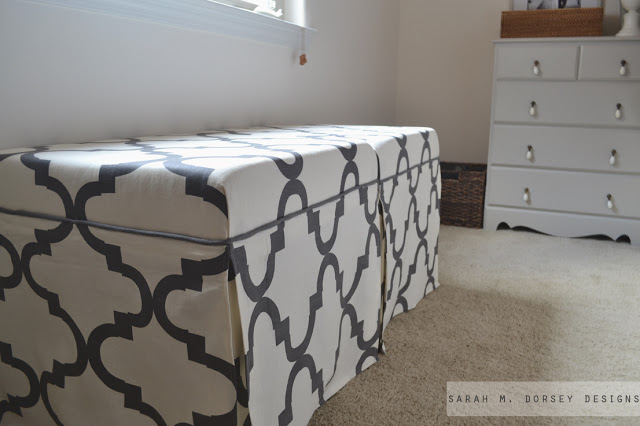
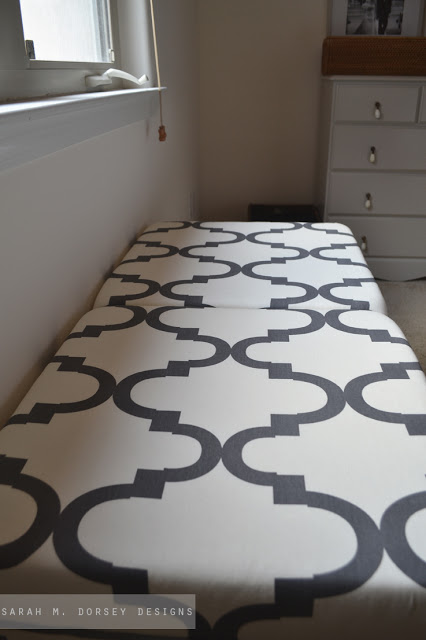
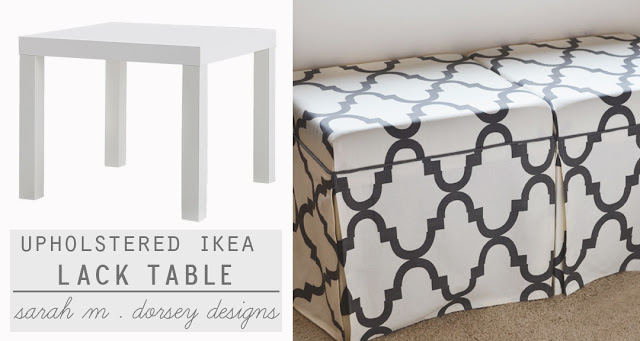
This weekend we finished upholstering our old Ikea Lack tables into skirted upholstered ottomans.

As you can see, they were in rough shape. This was the first piece of furniture that I painted before I did some research. This is proof that using the right paint and good techniques are important! See this post and this post for some tips that I’ve picked up along the way.

Back to upholstering! I’ve wanted to do this project for a long time, since we moved the desk into the guest room. That spot in our bedroom has been begging for something! Once we built the credenza and moved the printers off of the lack tables, it was definitely time!

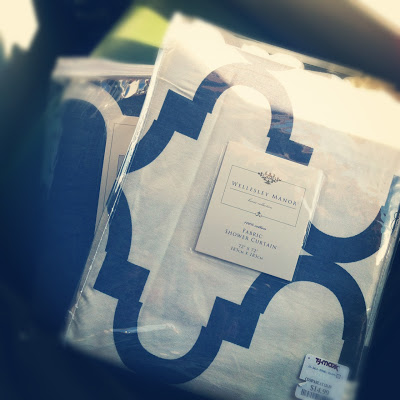
I found two of these shower curtains at TJ Maxx for $14.99 and thought that they would be perfect for the ottomans. At 72×72, $14.99 is a great price for 2 yards of fabric (at a larger width than normal too!)

Here’s how we did it:

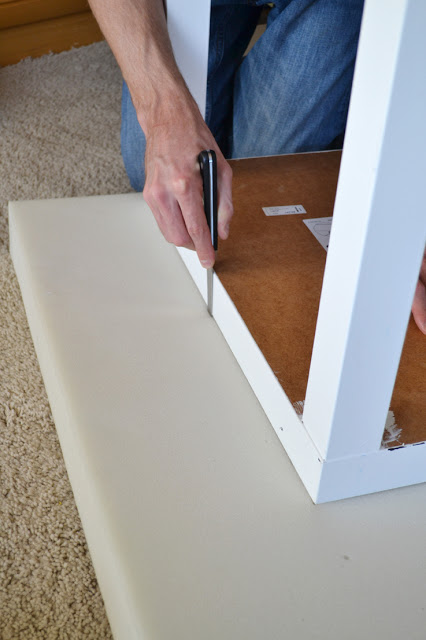
The table was placed on the foam, and cut out with a sharp knife. David’s knife of choice is the filet knife since it is sharp and gives a straight cut. This is by far the easiest and most accurate way that we’ve found to cut foam.

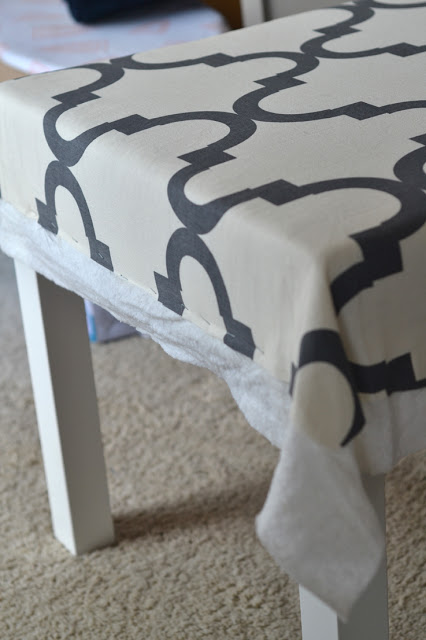
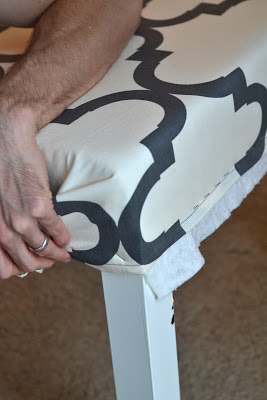
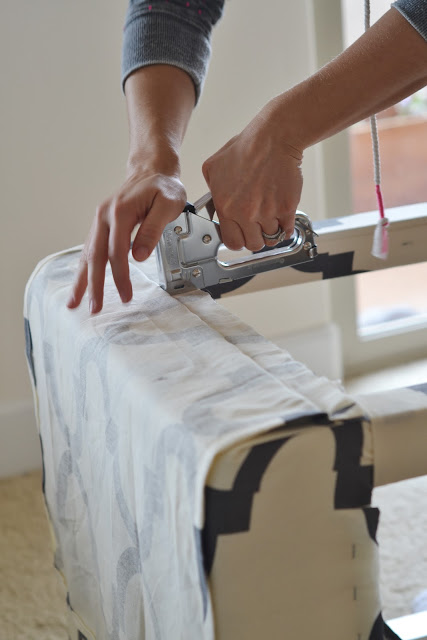
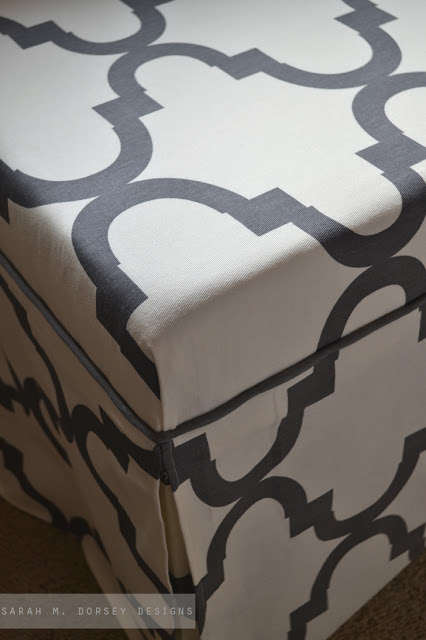
The fabric was centered on the top so that the pattern was even, thick batting was placed underneath (you want the kind that you can’t see straight through, so it isn’t too stretchy). These were cut to size and stapled in place. We stapled in the center on all four sides first (pulling enough to round the corner, but not too hard because we still wanted it square), and then stapled the rest of the way to the corners, pulling down evenly as we went.

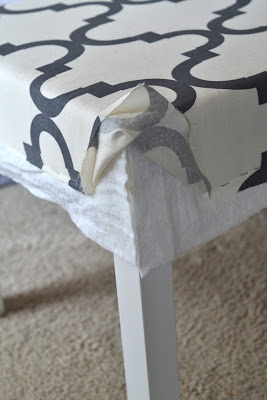
Here’s how we did the corners:

the excess batting was cut off
 
fabric was folded back
and then folded down and stapled. 
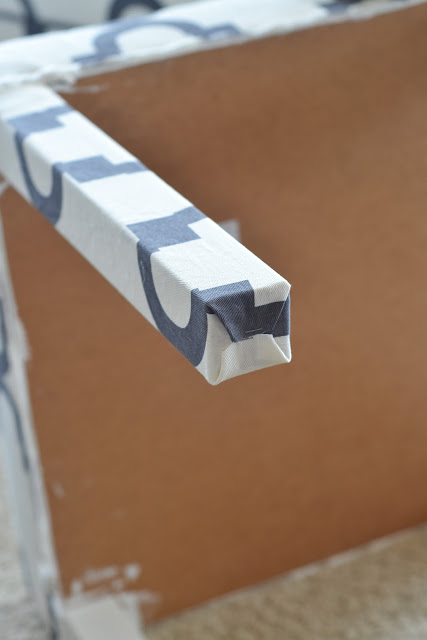
Legs were wrapped in fabric (like a present 🙂
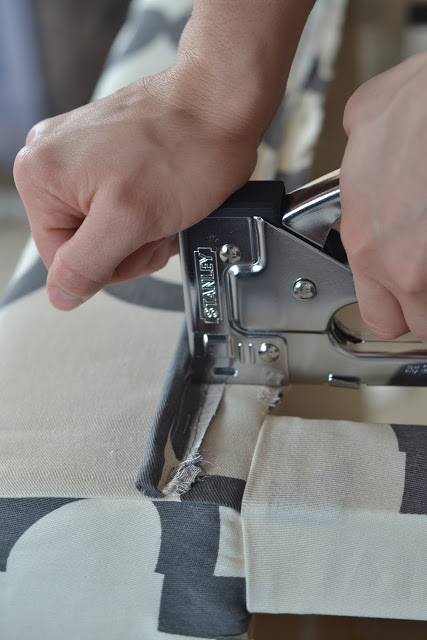
A simple cording was made out of the top part the shower curtain which was solid gray. I was able to get enough, but cutting the gray part in half (lengthwise) and then sewing together to get the 88″ needed to go all the way around. The cording was stapled on the side of the table where we wanted the skirt to start (3.5″ from top) 
Typically you want to cut fabric for cording on a diagonal, so that it bends easily around the corners. Since this fabric is a twill (weave that runs diagonally) and the corners weren’t too extreme, it bent fine for us. 
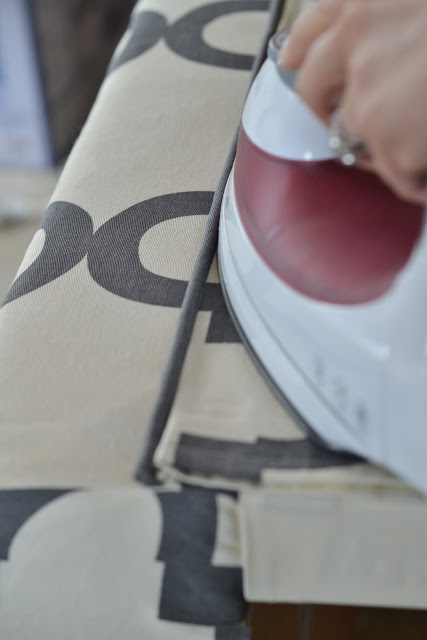
We laid the fabric on the side (with a piece of cardboard underneath to hold it in place) lined up the pattern, marked the finished size by folding the fabric and pressing with an iron and then cutting out with 1″ seam allowance. The raw edges were sewn and the panel was stapled just underneath the cording.
The panel was folded back down and pressed. We used the iron a lot in this project, it helps with accuracy and giving professional looking results. 
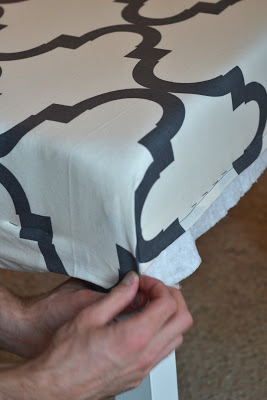
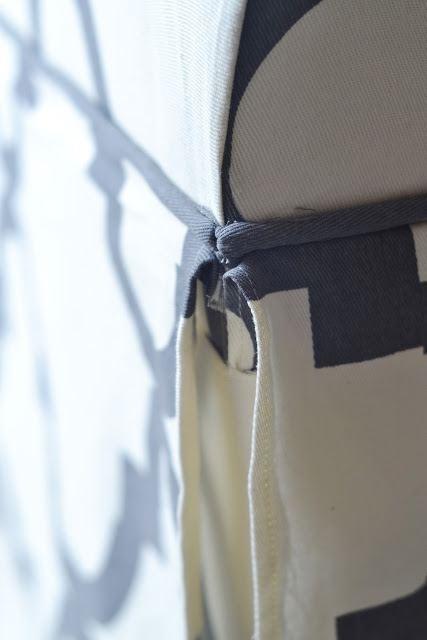
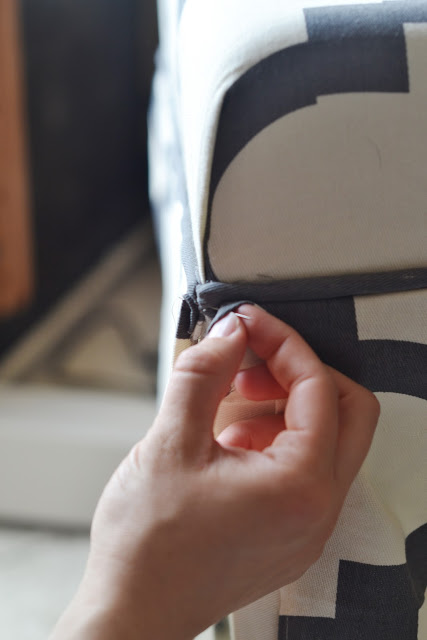
Finally, the corners were left looking like this.
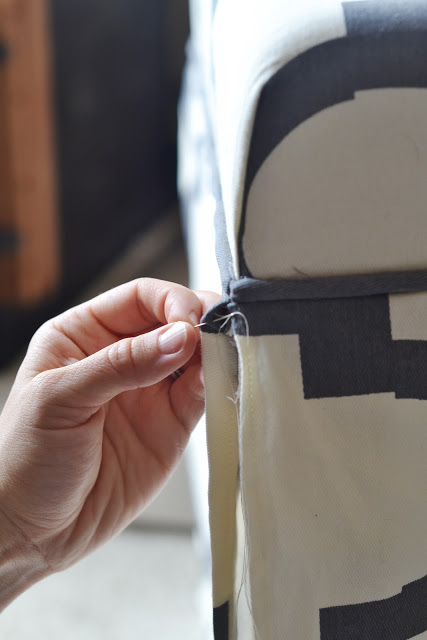
So with a needle, I went up through the underside of one panel through the bottom of the cording and down through the inside of the other panel and made a loop.
Then I sewed down the panel for about 2-3 inches until the skirt wasn’t gaping. I sewed on the inside, hiding my stitches, only going through the first layer of fabric.
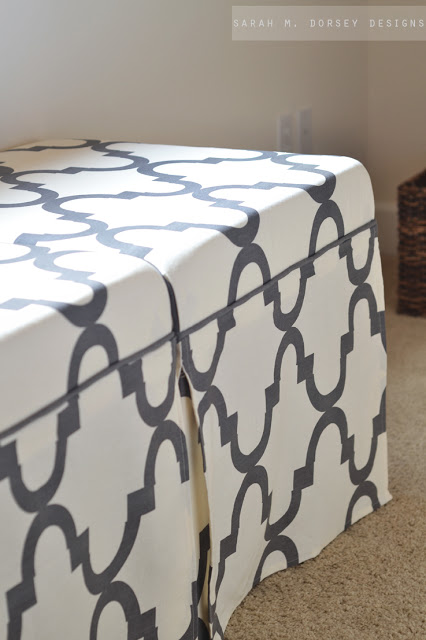
and done! whew!
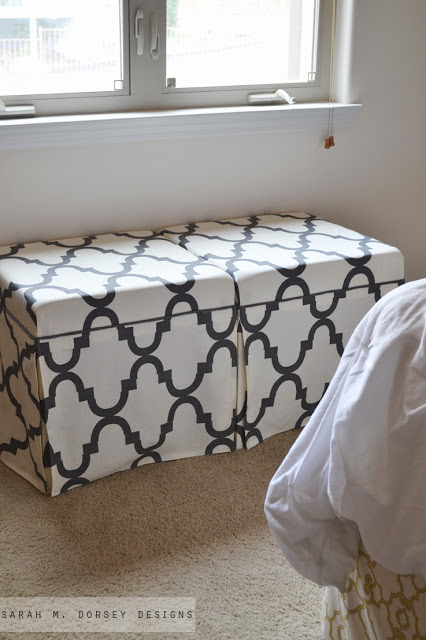
I think Annabelle is going to like looking out the window here …
Each ottoman probably took around 3-4 hours. This would of been faster if we didn’t line up the pattern (use a smaller print to avoid) but we felt with such a large pattern, it needed to line up. and I love the result!!
Total cost:
Shower curtains: $14.99 x2 = $30
Foam: $20 (camping pad at Home Depot, we only used about half) 
$50 total
We had a lot on hand, but if not Ikea lack tables are $7.99 ($5.99 for Black Friday I hear), I like the batting from here and the cording from here  
Also, this could easily be turned into a no sew project by using no sew adhesive. I like heat n’ bond
I’ve found at Joann Fabrics and Wal Mart. Just make sure to test on a scrap piece of your fabric, since sometimes you can see through it once ironed.
 
 I love love love our new ottomans! I’m hoping to add a few more things to this wall (especially draperies) stay tuned! 
— 
Linking up to!

TDC Before and After
The 36th AVENUE

Bedroom// DIY TUTORIALS// Uncategorized// Uncategorized31 Comments

Subscribe

get the latest straight to your inbox

« Weekend plans – fun and not so fun
Healthier Apple Crisp »

Comments

  1. Sarah Tucker says

    November 19, 2012 at 4:54 pm

    You are so talented! Amazing work! They look so expensive!

    -Sarah {tuckerup.blogspot.com}

    Reply
    • Sarah says

      November 19, 2012 at 6:10 pm

      Thanks Sarah 🙂 at $25 each it was totally worth it!

      Reply
  2. Cocalores says

    November 19, 2012 at 6:44 pm

    Pretty – I love the idea and the finished product! Might do something like that too, the only problem is that foam here seems to be super expensive (I always wonder why)! Thanks for the inspiration!

    Reply
    • Sarah says

      November 19, 2012 at 8:08 pm

      Foam can be very pricey! You may want to see if buyfoam.com will ship internationally. Their prices are pretty good, shipping is pricey though so you may want to order for a few projects at one time.

      Reply
  3. Meg Stevens says

    November 19, 2012 at 6:55 pm

    Sarah! Another homerun…you guys are such an amazing DIY couple! Love love…just wish I had more time to devote to such pretty projects! 🙂

    Reply
    • Sarah says

      November 19, 2012 at 8:08 pm

      Thanks Meg! 🙂

      Reply
  4. Jennifer {The Chronicles of Home} says

    November 19, 2012 at 7:04 pm

    Sarah, they look great! The pattern matching looks so professional. Beautiful accent for the room.

    Reply
    • Sarah says

      November 19, 2012 at 8:09 pm

      Thanks Jennifer! I love it too! Worth the extra time to line it up!

      Reply
  5. Genevieve says

    November 19, 2012 at 7:44 pm

    Thanks for sharing! I recently bought some lack tables for the to make ottomans for my mom. I've been wondering about what foam to purchase and how I can save money on it since foam tends to be expensive. Is the camping pad pretty firm? I have an old egg crate mattress topper (which is what I used for my headboard), but I'm thinking its too soft and will get crunched after having feet up on it over time.

    Thanks again!

    turnedtodesign.blogspot.com

    Reply
    • Sarah says

      November 19, 2012 at 8:03 pm

      Yes, actually the firmest foam that I've found! and you can't beat the price for 3" foam!

      Reply
    • Genevieve says

      November 20, 2012 at 9:10 pm

      Awesome. Thanks for the tip! 🙂

      Reply
  6. Chelsea Asermely says

    November 19, 2012 at 8:35 pm

    Sarah you blew it out of the water with this one! They look so amazing, professional and expensive! I'm thinking two together to replace my current coffee table, thanks for the inspiration!

    Reply
  7. Julia Konya says

    November 19, 2012 at 8:41 pm

    I love them! The way the pattern matches is so professional!
    You are so talented!

    Reply
  8. rachael says

    November 20, 2012 at 2:01 pm

    These look amazing! And surprisingly doable! I never thought to use those lack tables for this – awesome DIY!

    Reply
  9. Dacia @ Lemon Drop Life says

    November 20, 2012 at 7:27 pm

    You are a rockstar! These look phenomenal!!

    Reply
  10. osmanliansiklopedisi.blogspot.com/ says

    November 25, 2012 at 6:10 pm

    Thanks 🙂

    Reply
  11. Judy @ house and home furniture says

    January 4, 2013 at 7:45 pm

    AMAZING!! I love the cording effect you did using the solid grey part of the fabric. It really puts it together nicely. You make the upholstering sound so easy but if it took 3-4 hours, I'm sure it would be very challenging for me lol Thanks for the tutorial! Great job.

    Reply
    • Sarah says

      January 4, 2013 at 9:36 pm

      Thanks Judy! I hope I didn't make it sound too easy 🙂 The hardest thing was making sure that the pattern lined up, since we didn't have extra fabric, we couldn't mess up any cuts!

      Reply
  12. kyasdesign says

    March 12, 2013 at 7:04 am

    sarah – i love this! how much fabric would you suggest if we were buying by the yard… it's not easy finding shower curtains as fab as yours!

    thanks
    kelli

    Reply
    • Sarah says

      March 12, 2013 at 4:23 pm

      Hi Kelli, I used almost all of two shower curtains (about 70×70) so probably about 2-3 yards per ottoman 🙂

      Reply
  13. masak-masak sukumei says

    July 20, 2013 at 8:11 pm

    wow…. u r so talented and clever! i love these ottomans so so so much. Gonna make it for my living room… thanks for sharing!

    Reply
  14. masak-masak sukumei says

    July 20, 2013 at 8:12 pm

    wow…. u r so talented and clever! i love these ottomans so so so much. Gonna make it for my living room… thanks for sharing!

    Reply
  15. Anonymous says

    August 1, 2013 at 2:45 am

    This is absolutely amazing the ottomans came out beautiful. I went to Home Depot today to try and find the foam and they had no idea what I was talking about. Do you have have any suggestions foam is really really expensive lol…

    Reply
    • Sarah says

      August 4, 2013 at 4:52 pm

      Hobby Lobby with a 40% off coupon is also a great option. I don't have one close to me now, but I have purchased foam there before and remember that it was pretty cheap!

      Reply
  16. Amy says

    August 10, 2013 at 6:01 pm

    Did u cut your legs down?

    Reply
    • Sarah says

      August 10, 2013 at 6:12 pm

      We didn't cut the legs down, so the overall height ended up ~20". Best for a side ottoman, not coffee table.

      Reply
  17. Jordan Embree says

    October 31, 2013 at 4:47 pm

    Oh. My. Goodness… I started looking up Rast hacks on Google, ended up here over an hour and half ago and CAN'T STOP LOOKING!! You have absolutely AMAZING ideas, design style, DIYs… I mean, your blog is awesome. Thank you for sharing!

    Reply
  18. Anonymous says

    November 21, 2013 at 12:53 pm

    Amazing amazing amazing! You are genius!

    Reply
  19. Anonymous says

    June 3, 2014 at 4:53 am

    Are these table sturdy enough if someone sits one them?

    Reply
    • Sarah says

      June 3, 2014 at 12:16 pm

      We've sat on them with no problem. The base is cheap fiberboard, so you wouldn't want to jump on them or drag them as the legs can easily become loosened, but as long as a person of average weight sits normally on them, it should be good. You could also make a simple wood base, if you would prefer something stronger. Hope this helps!

      Reply
  20. Paint It White says

    January 22, 2016 at 10:16 am

    Wow I'm only finding this now and so glad I did. They are fabulous well done..Marie

    Reply

Leave a Reply Cancel reply

Your email address will not be published. Required fields are marked *

Contact Me

sarahmdorseydesigns{@}gmail{.}com

Stay Updated!

Get all the latest goods straight to your inbox!

This error message is only visible to WordPress admins

Error: No connected account.

Please go to the Instagram Feed settings page to connect an account.

Must Reads

Custom Peg Board + DIY Circle Art | FrogTape

Custom Peg Board + DIY Circle Art | FrogTape

Main Level Refresh with The Home Depot

Main Level Refresh with The Home Depot

Sponsor

2016 Daily Simplified Planner

Popular Projects

Anthropologie Inspired Ruffled Draperies + Master Bedroom Update

Anthropologie Inspired Ruffled Draperies + Master Bedroom Update

March 9, 2012 By Sarah 1 Comment

art above the headboard finished!

art above the headboard finished!

May 15, 2012 By Sarah 27 Comments

Upholstered Louis Chairs | Before + After

Upholstered Louis Chairs | Before + After

June 1, 2015 By Sarah 6 Comments

Master Bedroom Trellis Stencil Wall Complete

Master Bedroom Trellis Stencil Wall Complete

April 3, 2012 By Sarah 13 Comments

Chinese Chippendale Chairs | Real Time Progress – Fabric Selection

Chinese Chippendale Chairs | Real Time Progress – Fabric Selection

November 13, 2014 By Sarah 9 Comments

  • DIY TUTORIALS
    • design + build
    • furniture redo
    • diy in 1 hour or less
  • free printable
  • friday favorites

Disclosure

Occasionally, affiliate links are used when they are available. I do earn a small commission when items are purchased using those links. As always, I only link to things that I truly love. I also link to items that I love when an affiliate link is not available. Thanks so much!

  • Home
  • About
  • Services
  • Shop

Copyright © 2025 Dorsey Designs

MENU
  • Home
  • About
  • Services
  • Shop