This post has been sponsored by FrogTape
I’m SO excited to say that our laundry room part 1 is complete! This project has been years in the making! I originally thought this would be completed in the first year of owning our home, but years later, we are finally getting started. This room started off rough, it was definitely NOT a room that I wanted to spend time in. Now, it makes me smile when I walk in 🙂 First up, custom built in cabinets and a hook wall, with the help of FrogTape!
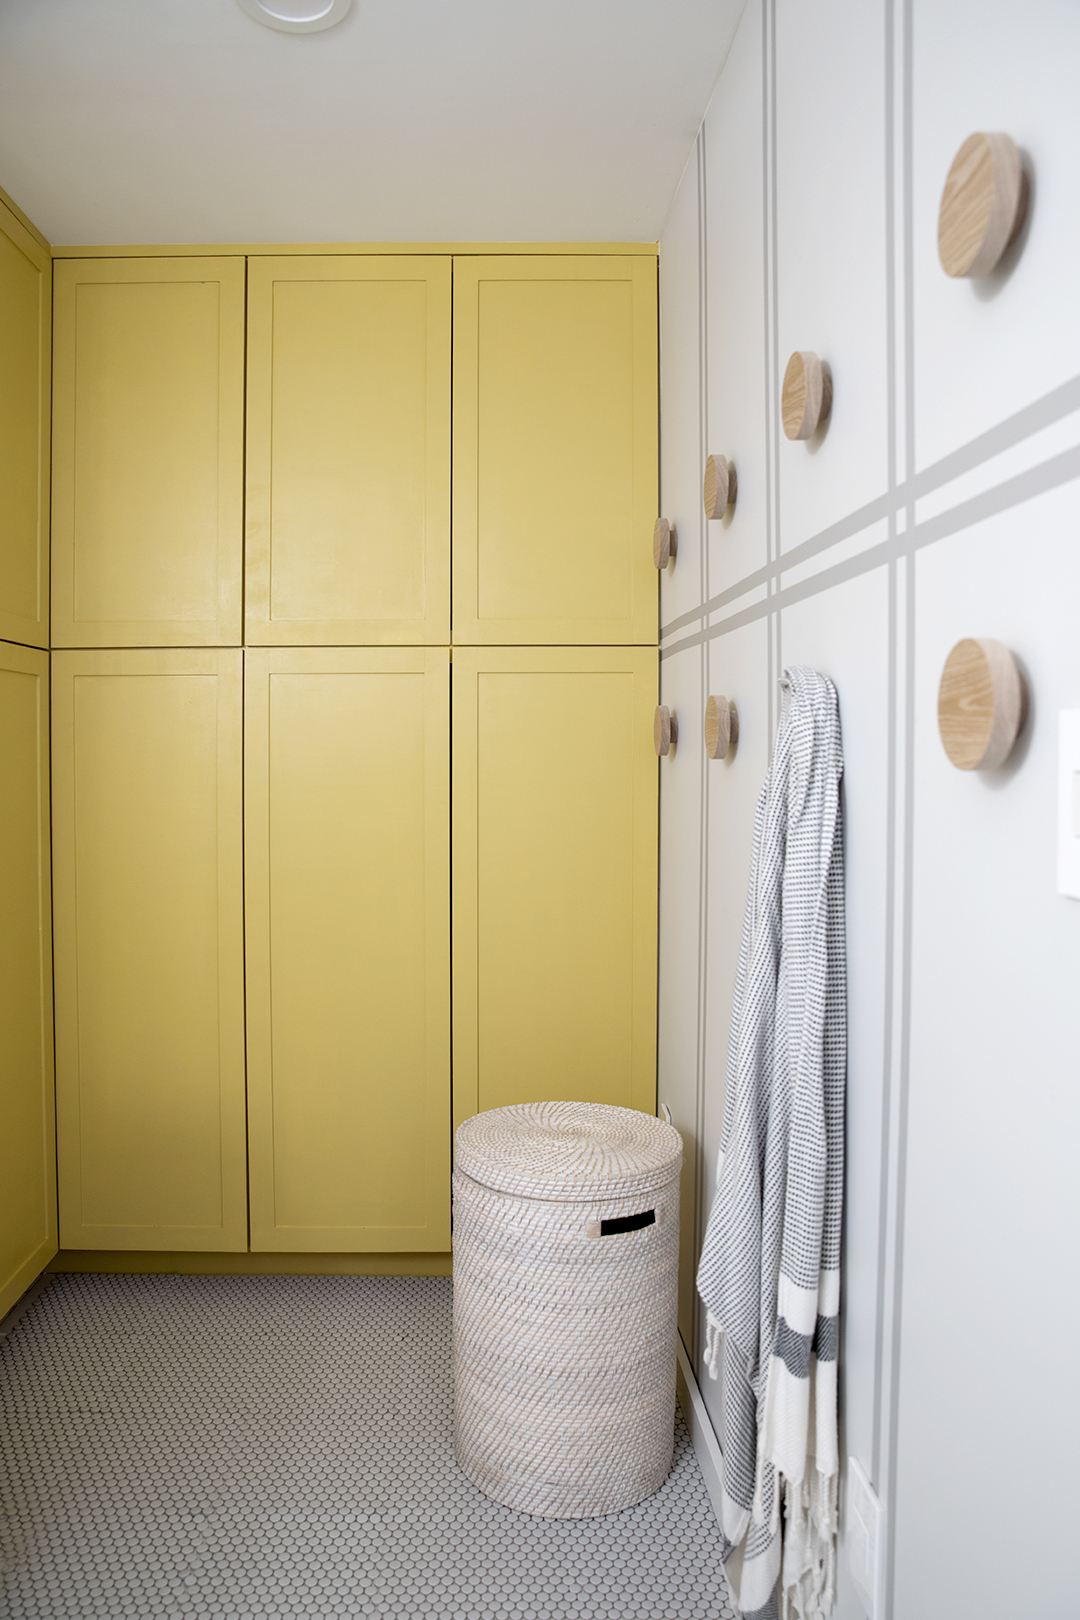
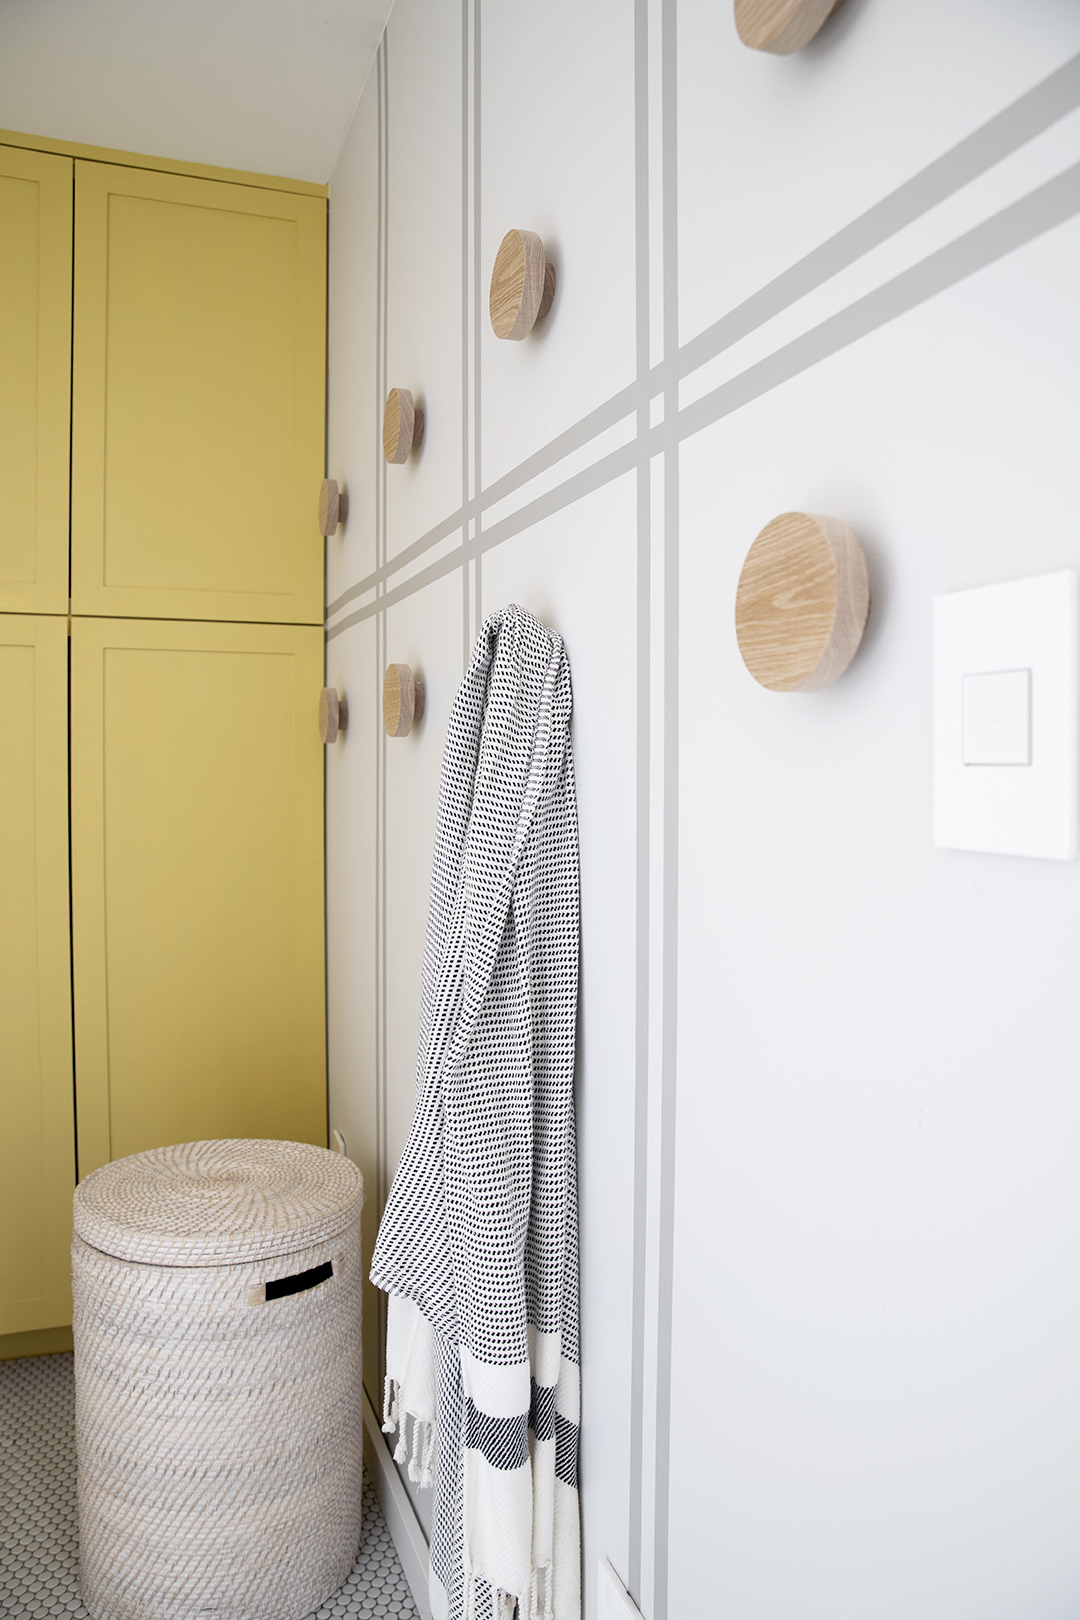
Continuing the horizontal line from the cabinet, we created a plaid inspired grid for our wall hooks. I love how it elongates this line and makes a small room feel larger! It also has big impact with minimal time and doesn’t involve any complicated math!
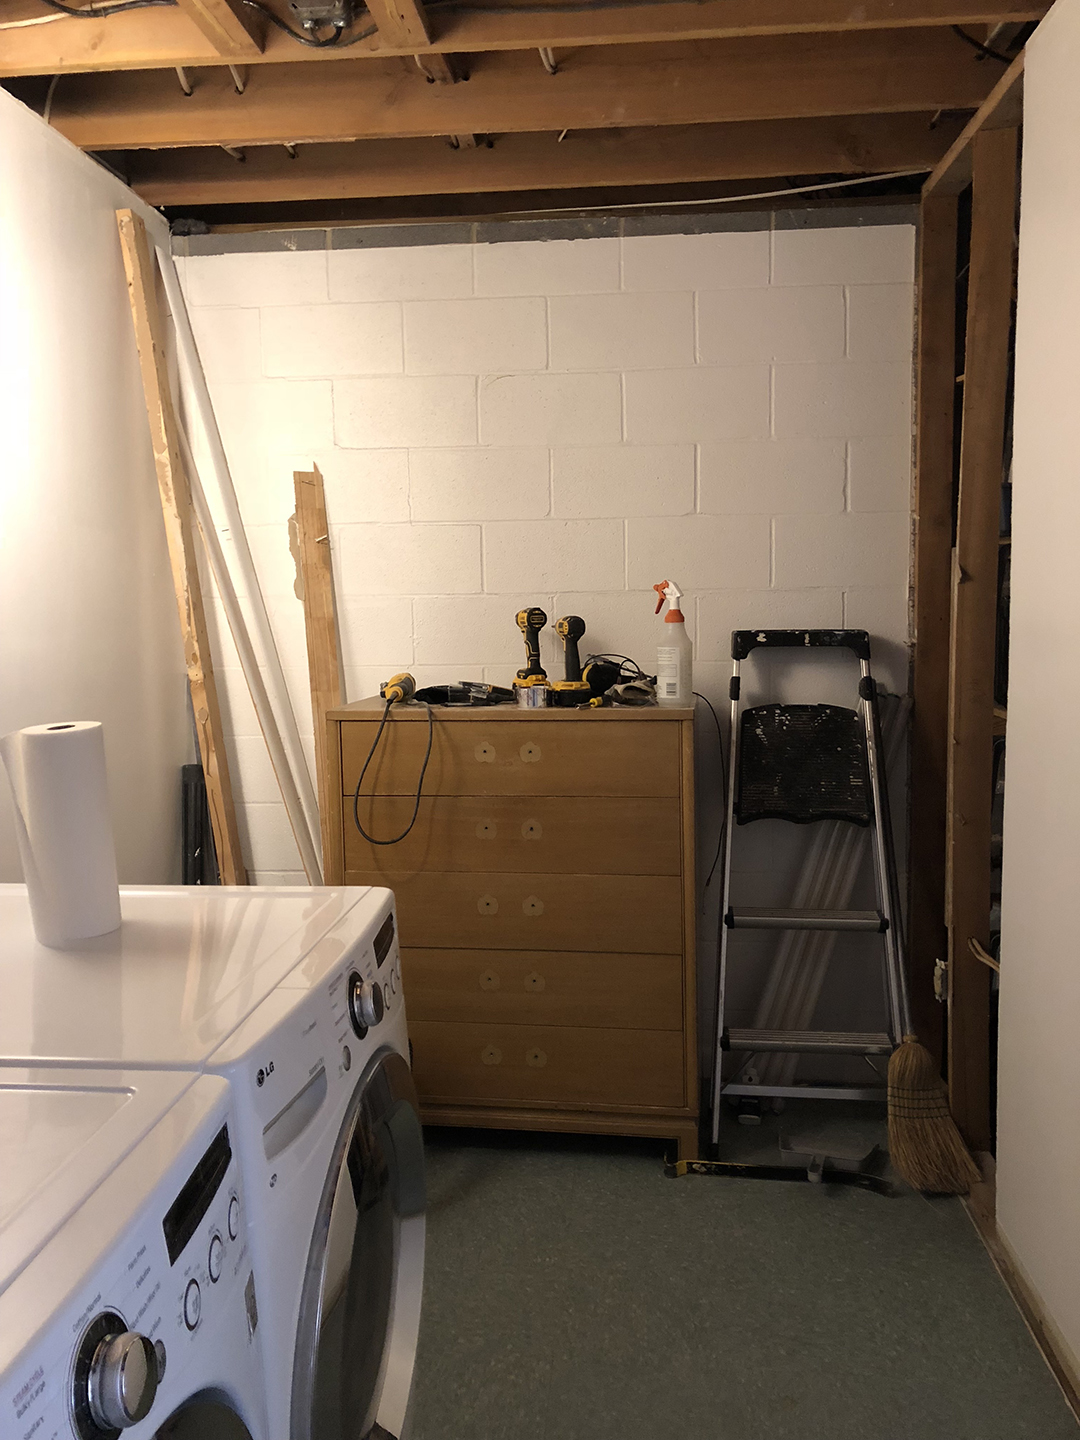
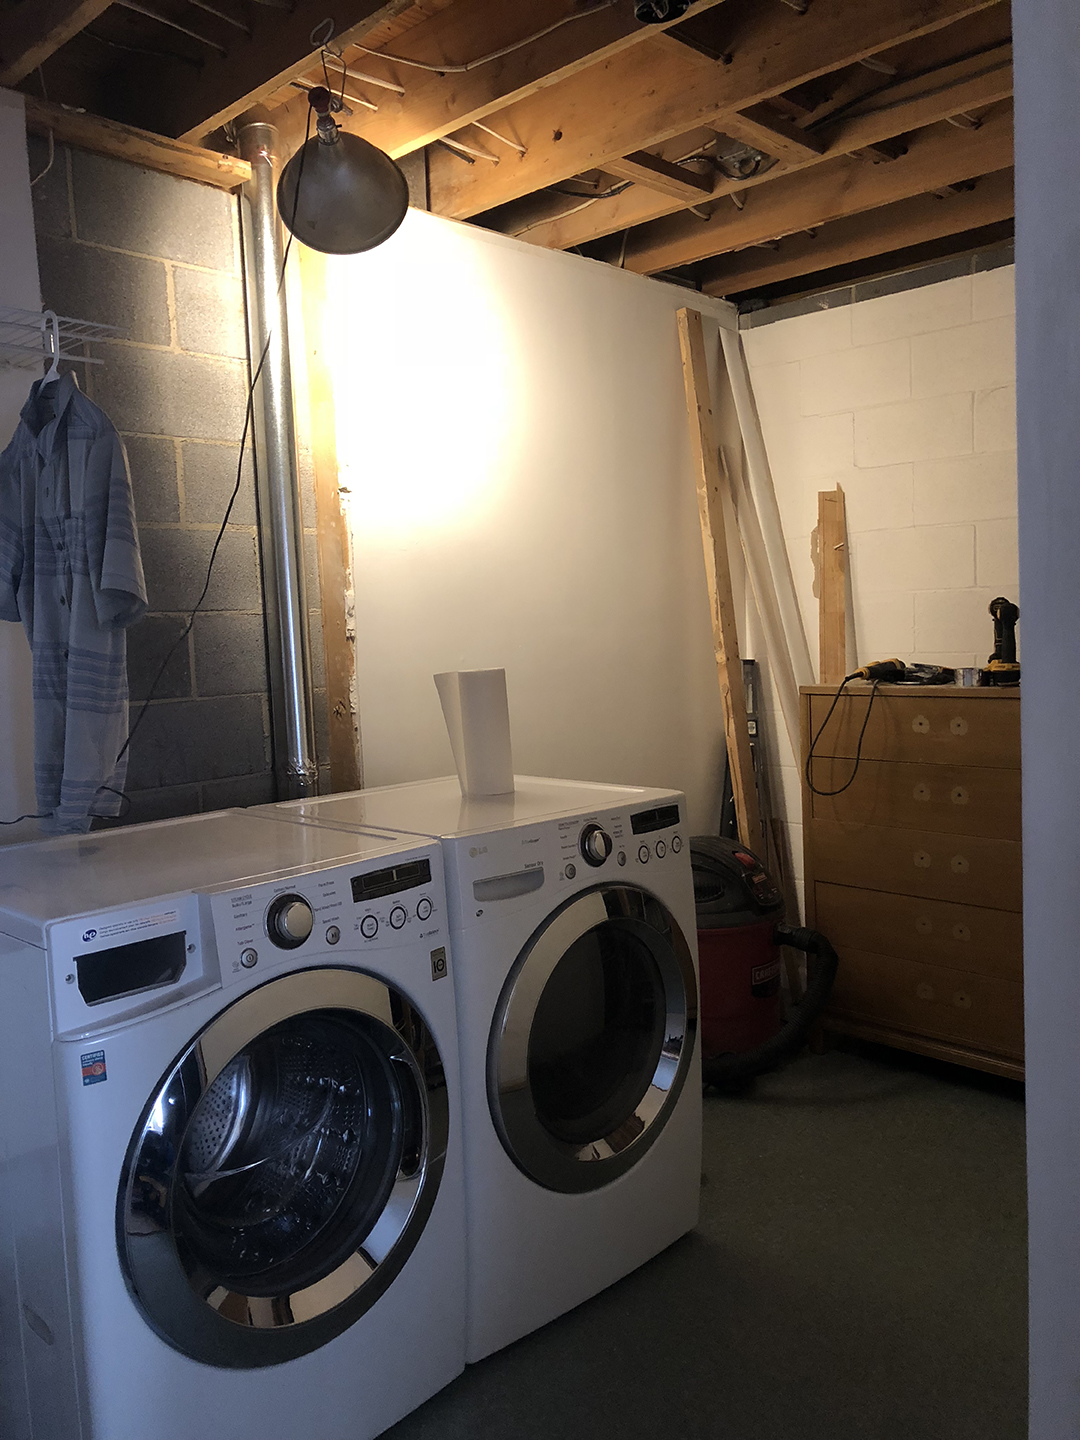
BEFORE
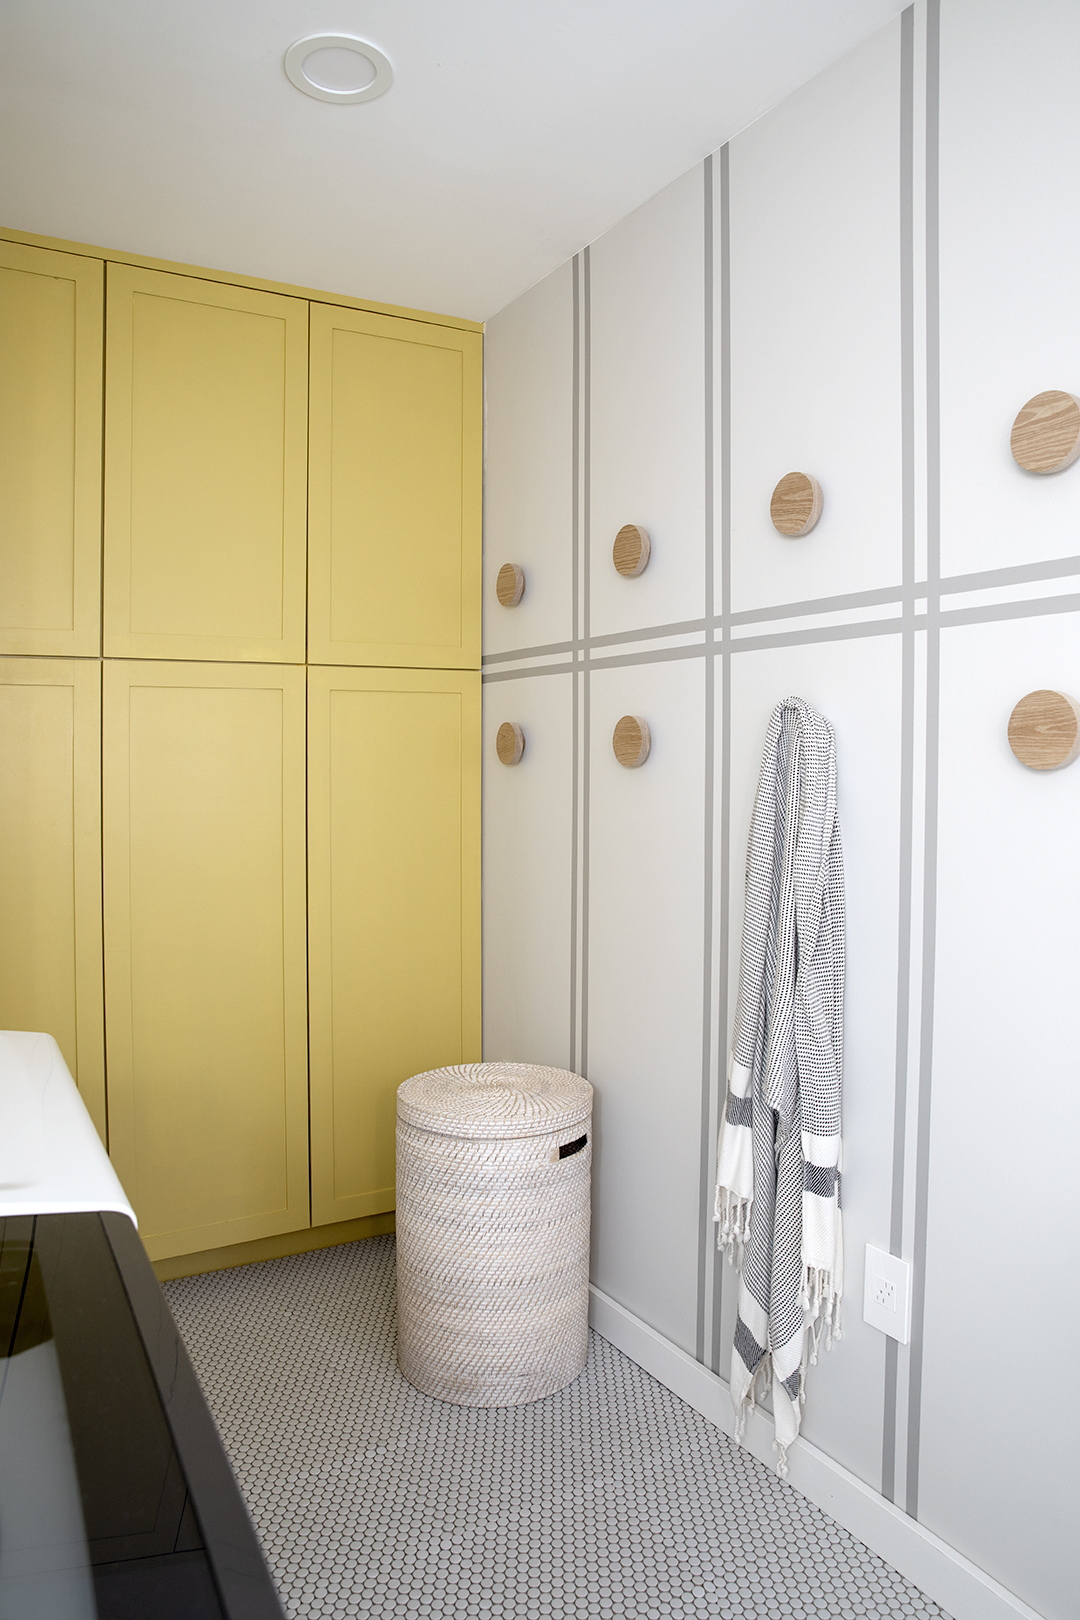
Wow! This room has come a LONG way!
Want to make your own plaid inspired wall treatment? Read on to see how we did it!
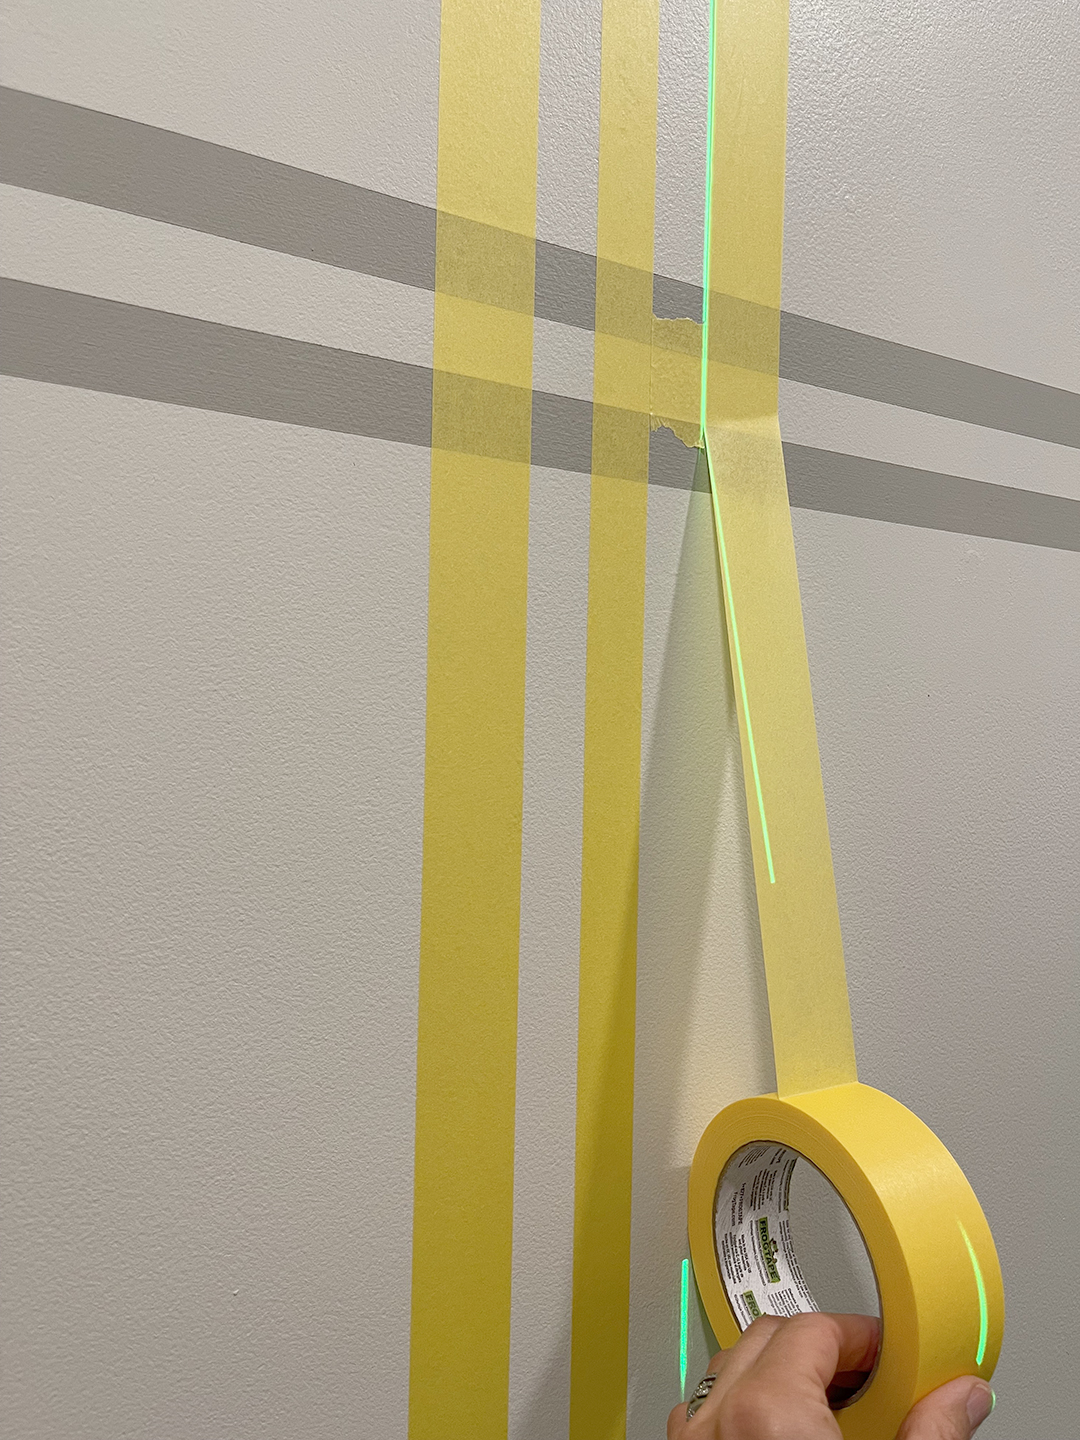
To get started, find the center of your wall. Use a laser level
Alternately, if you do not have a laser level, measure from the floor or ceiling every 18″ or so and place a piece of FrogTape .94″ to serve as a guide.
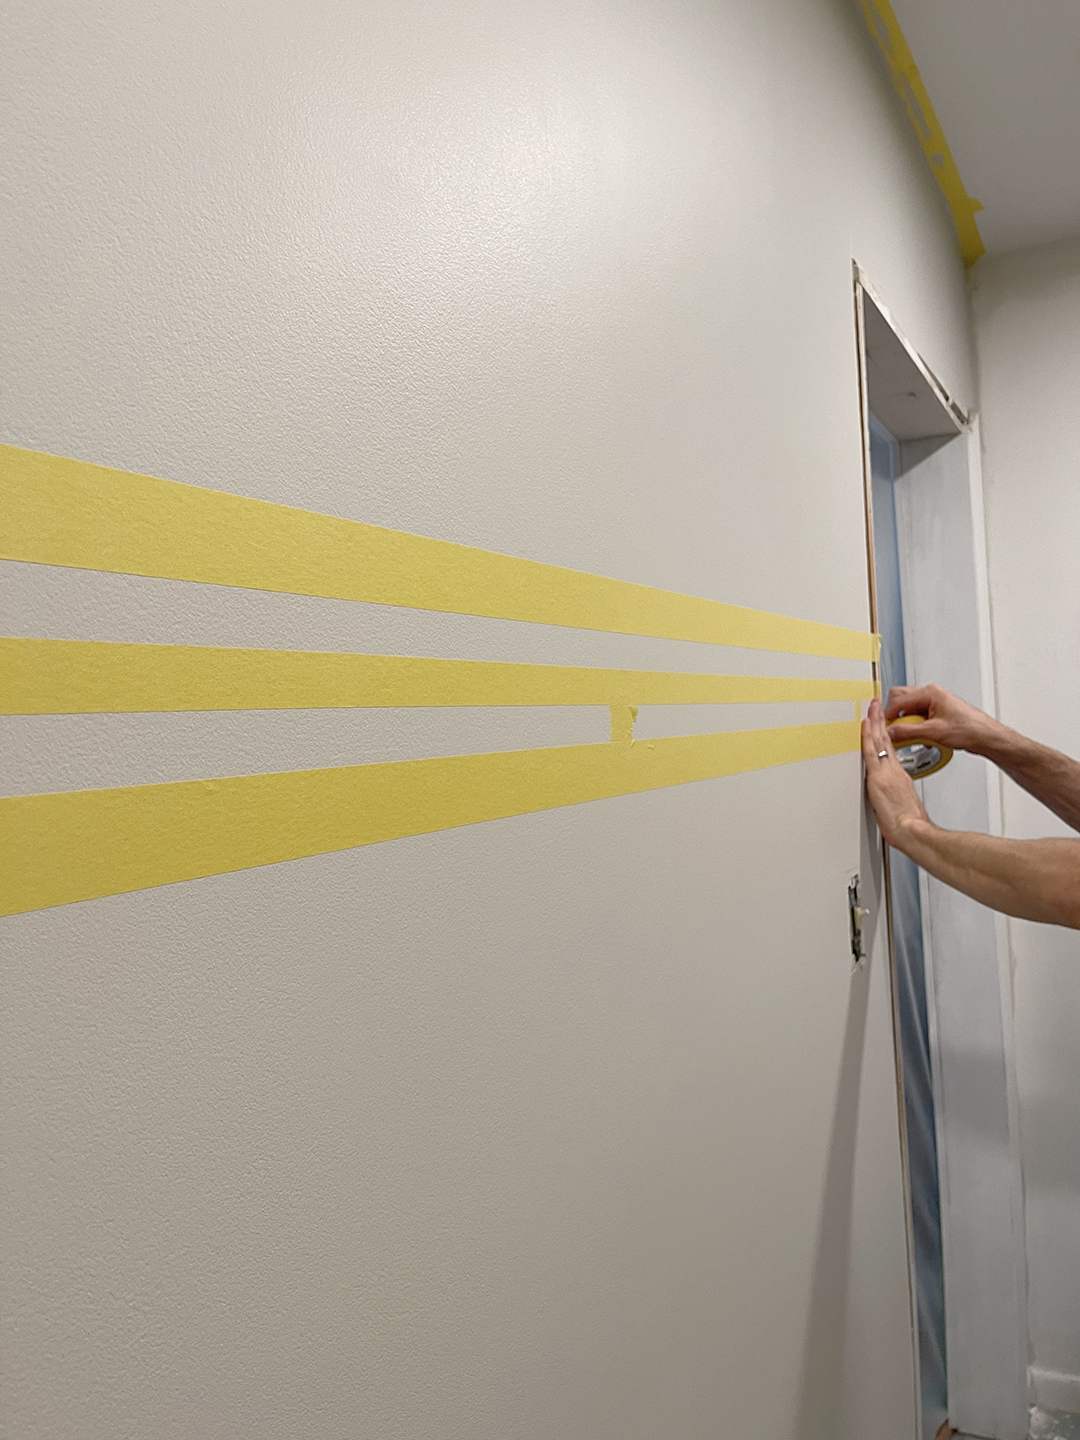
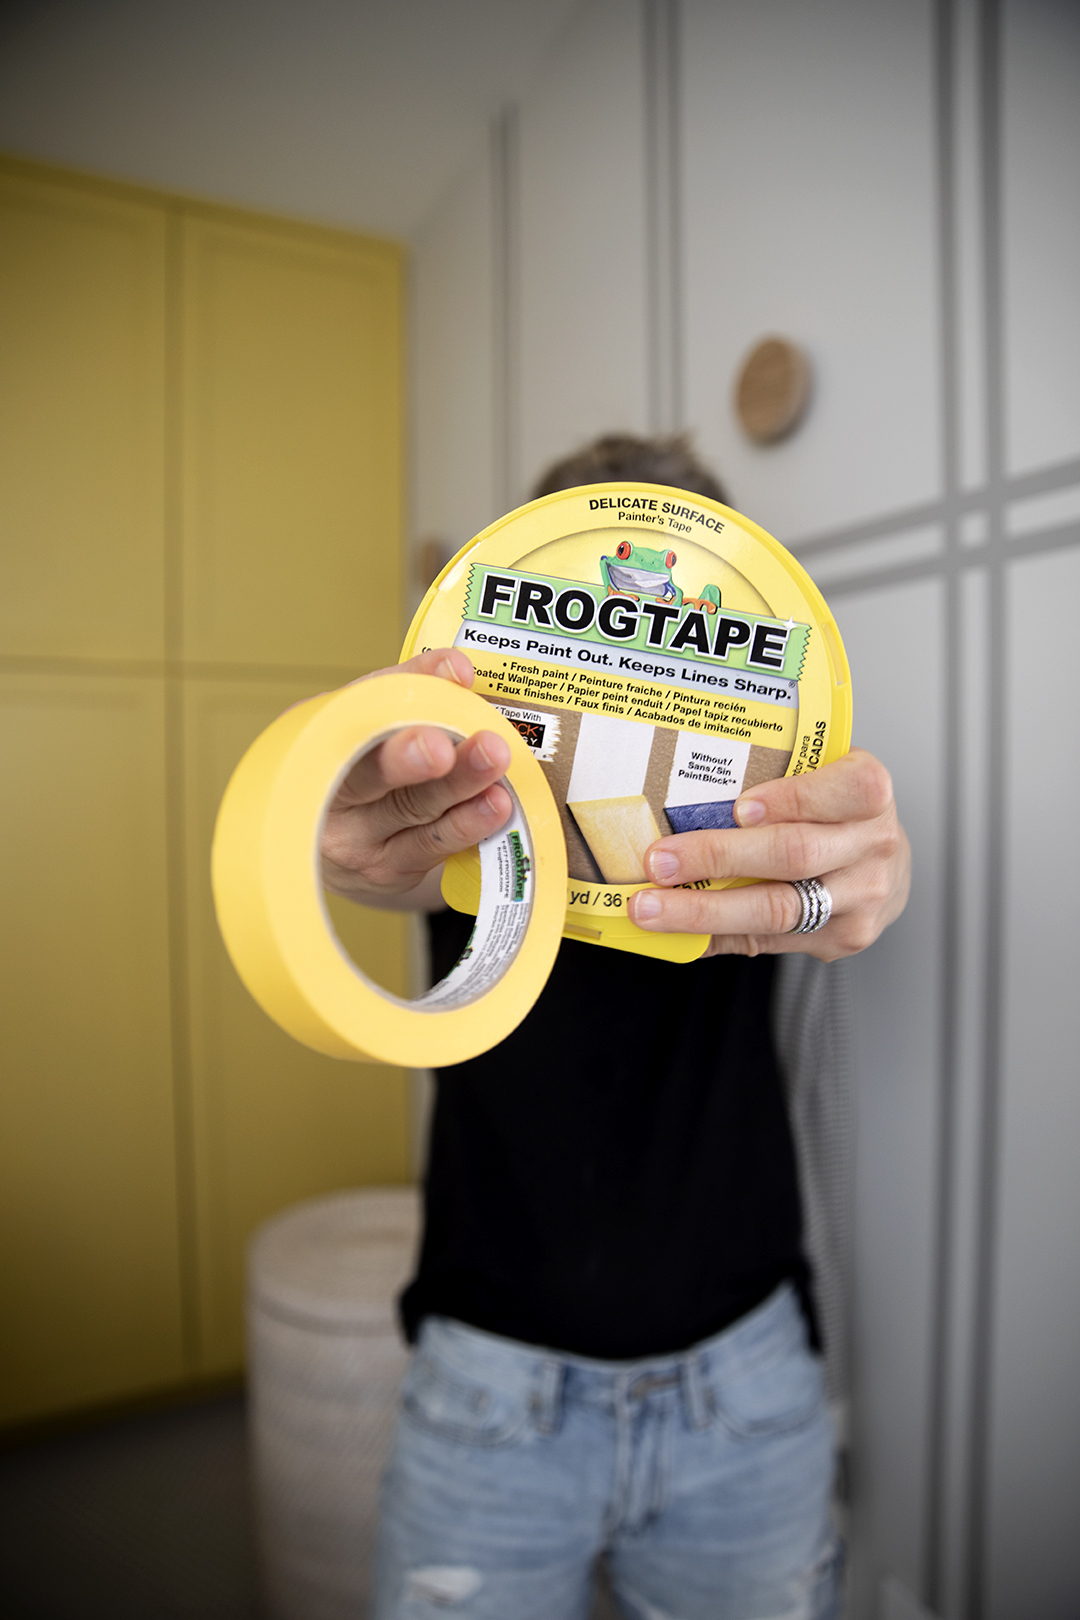
Apply FrogTape along laser line, pressing the edges firmly to seal the tape. We decided to use FrogTape Delicate Surface since this wall was freshly repaired and painted. The delicate surface tape works well on newer finishes and still seals tight!
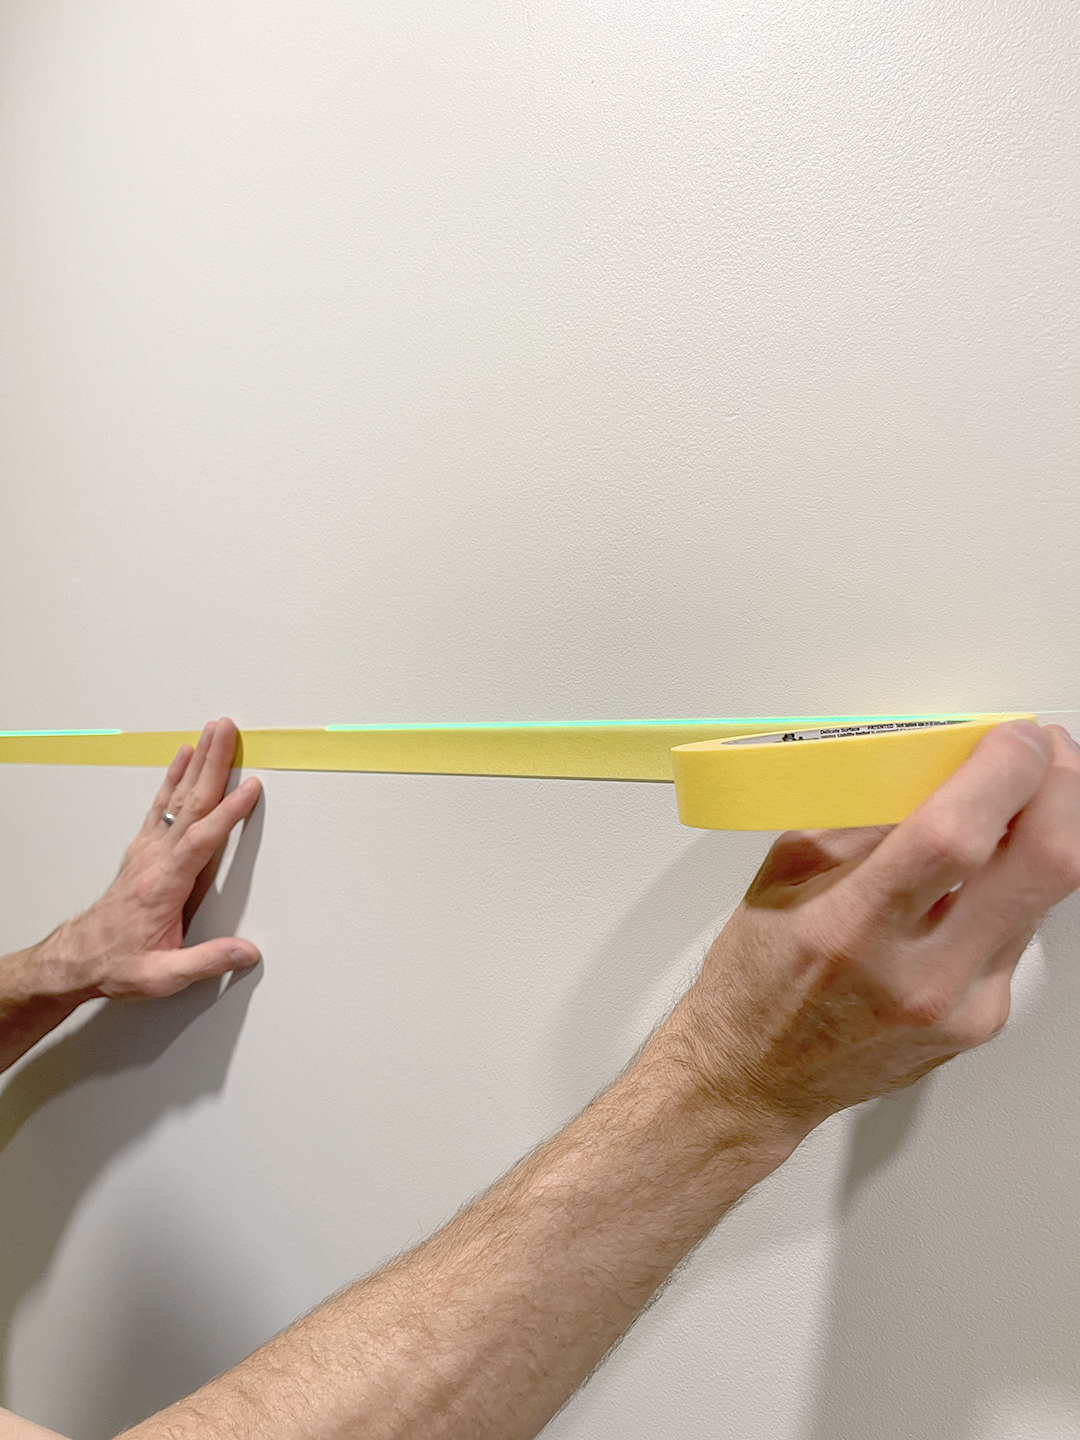
Next, above the tape, apply a piece of FrogTape .94″ as spacer, repeat about every 18″
Above the spacer, Apply FrogTape 1.88″, aligning with the spacers. Alternately, you can use FrogTape .94″, my preference is the 1.88″ so it gives you more cushion when applying the paint.

Repeat the above step on the bottom.
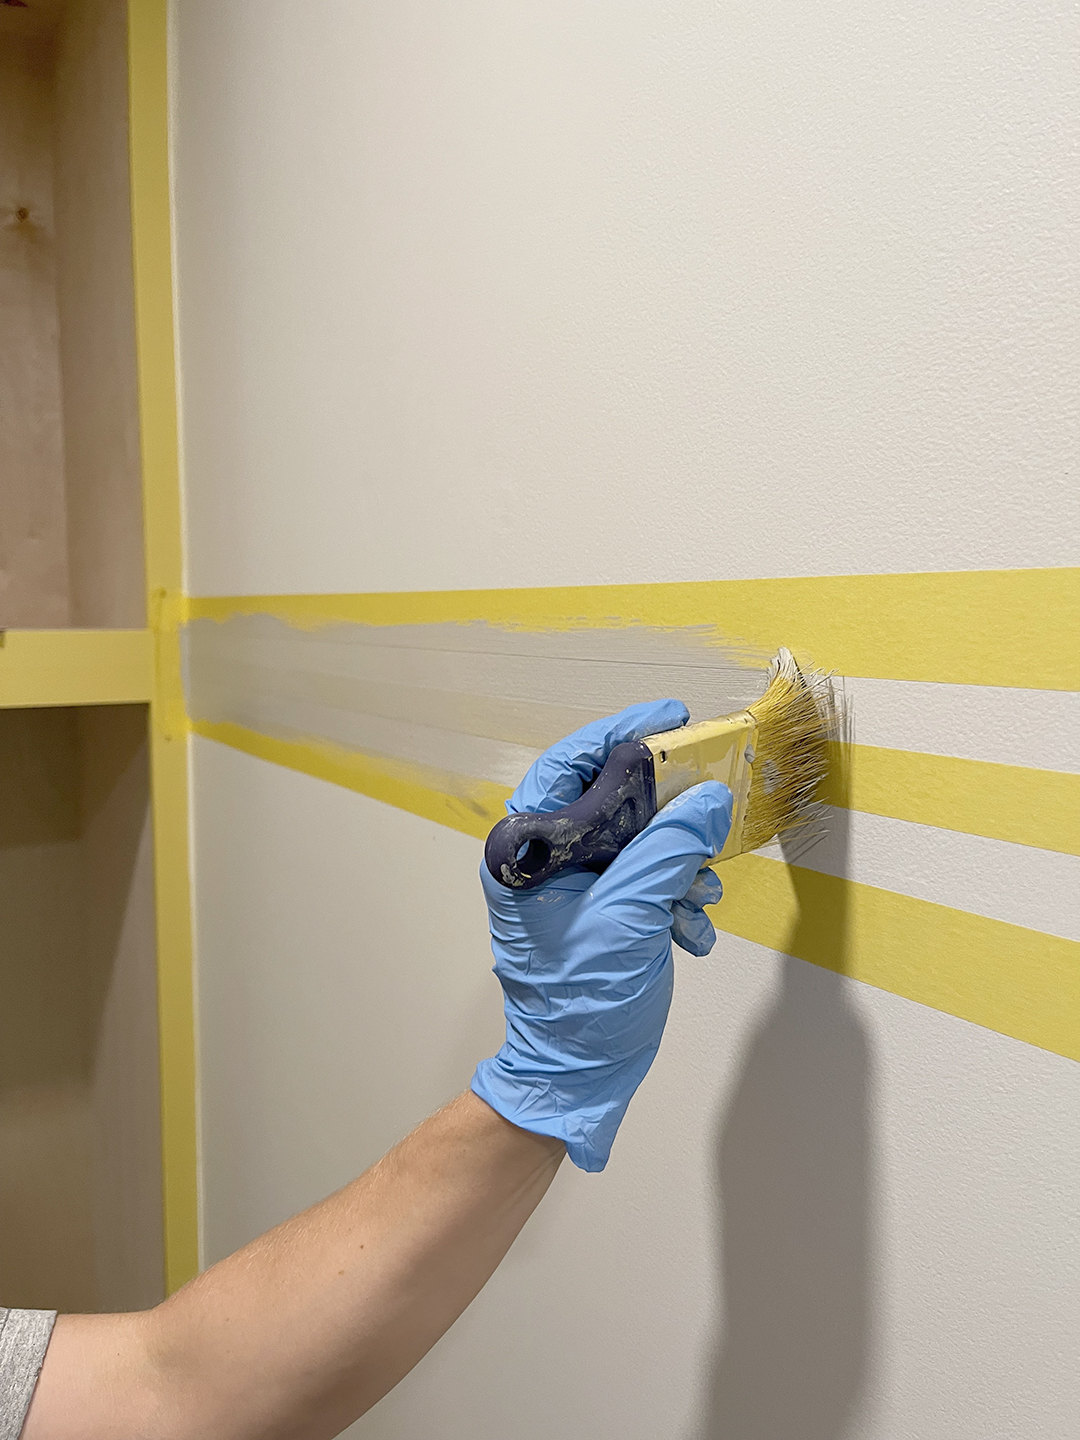
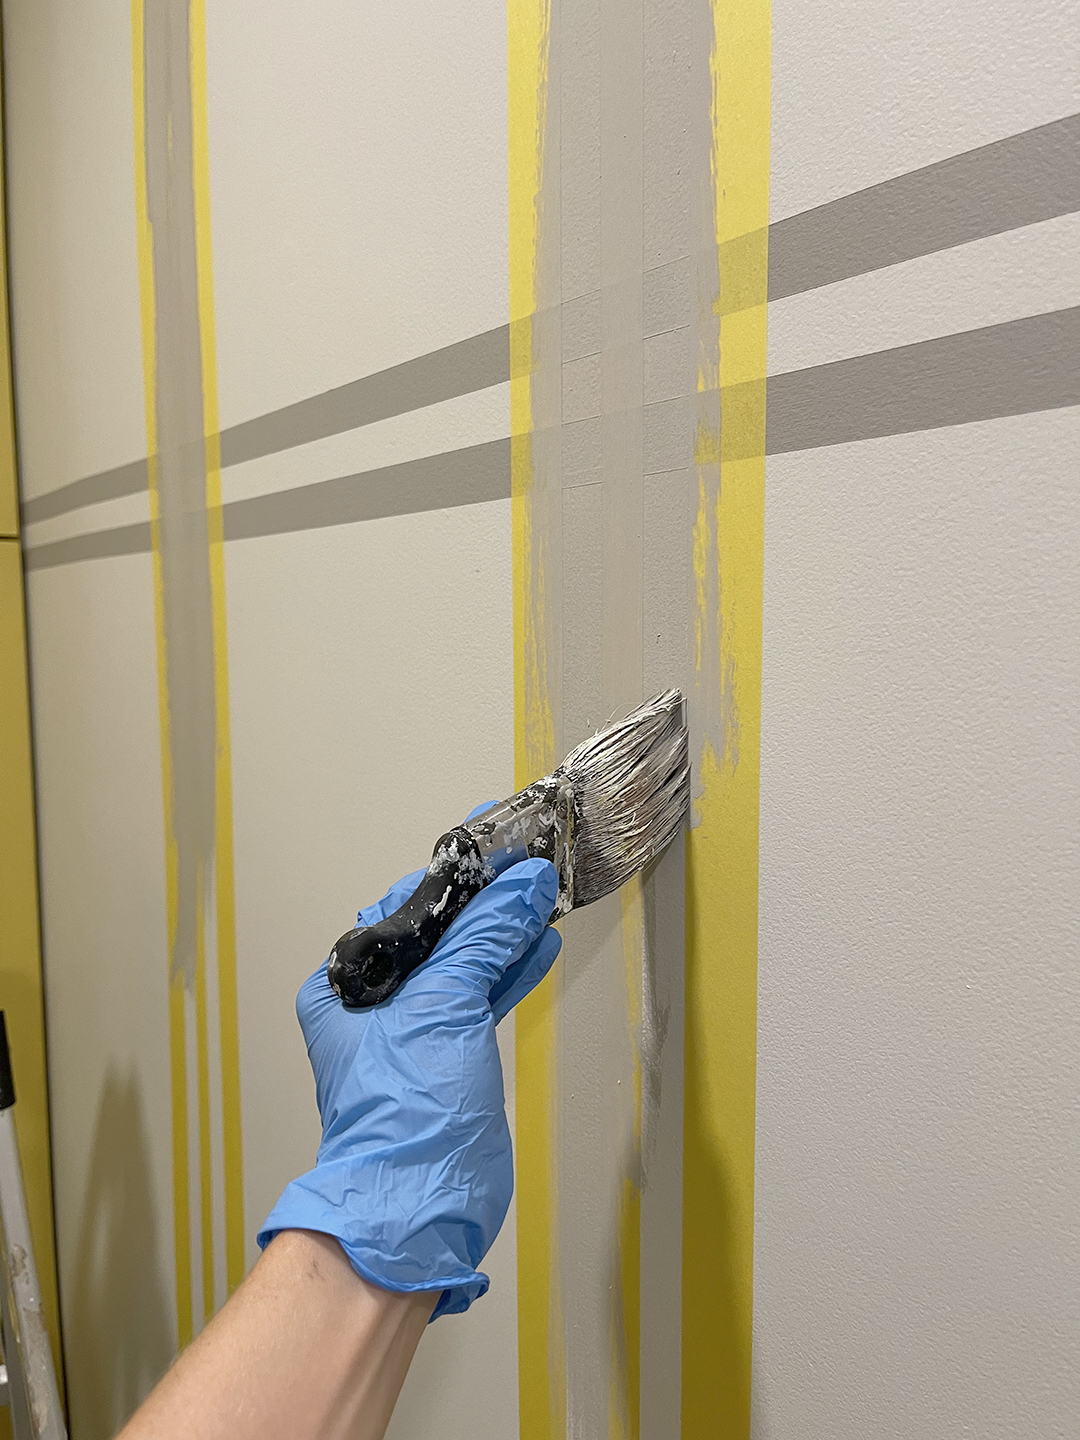
Apply two thin coats of paint (or as many coats as needed).
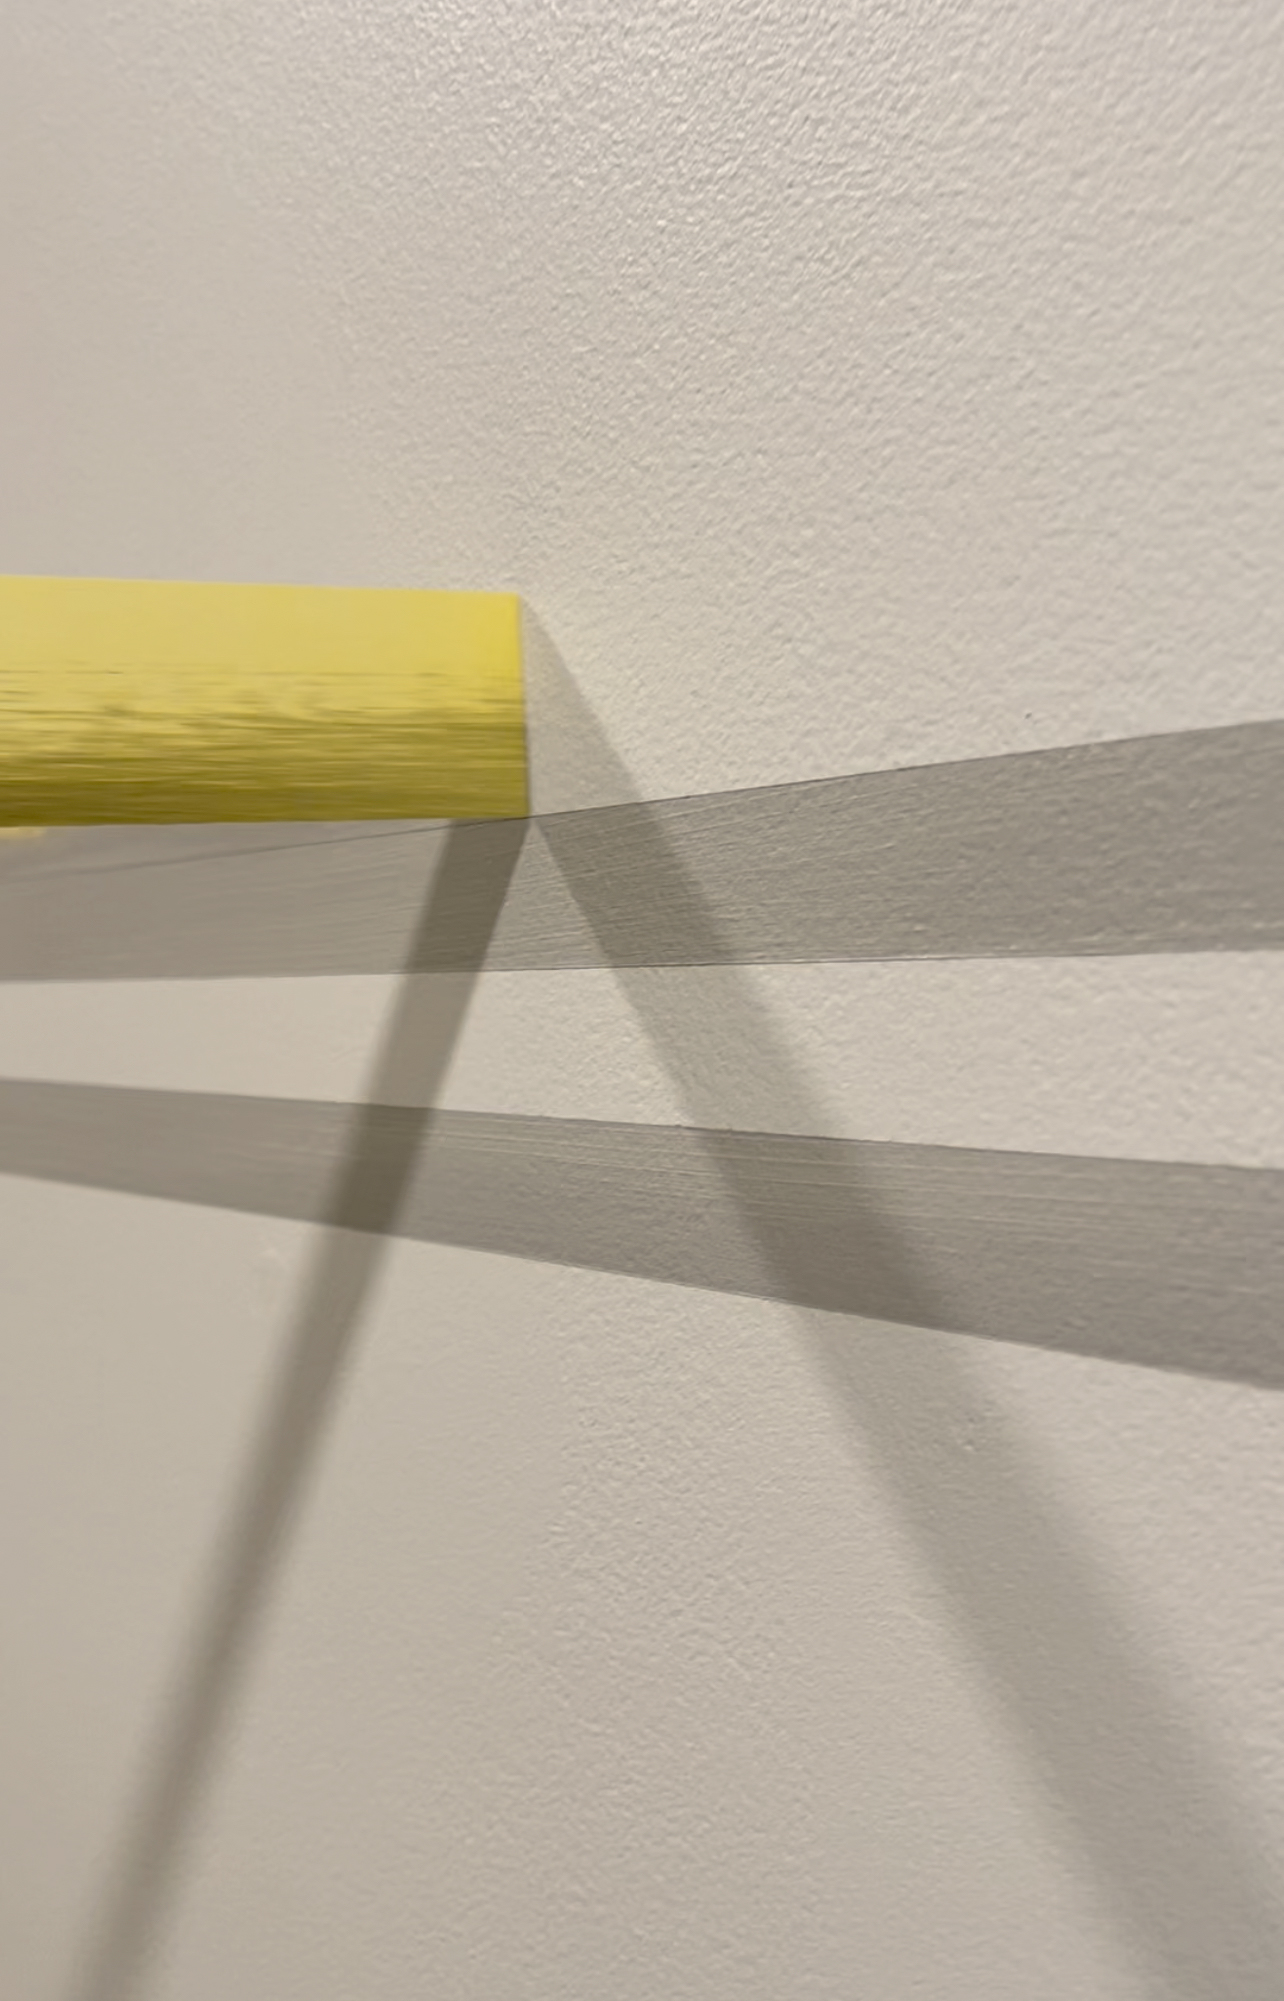
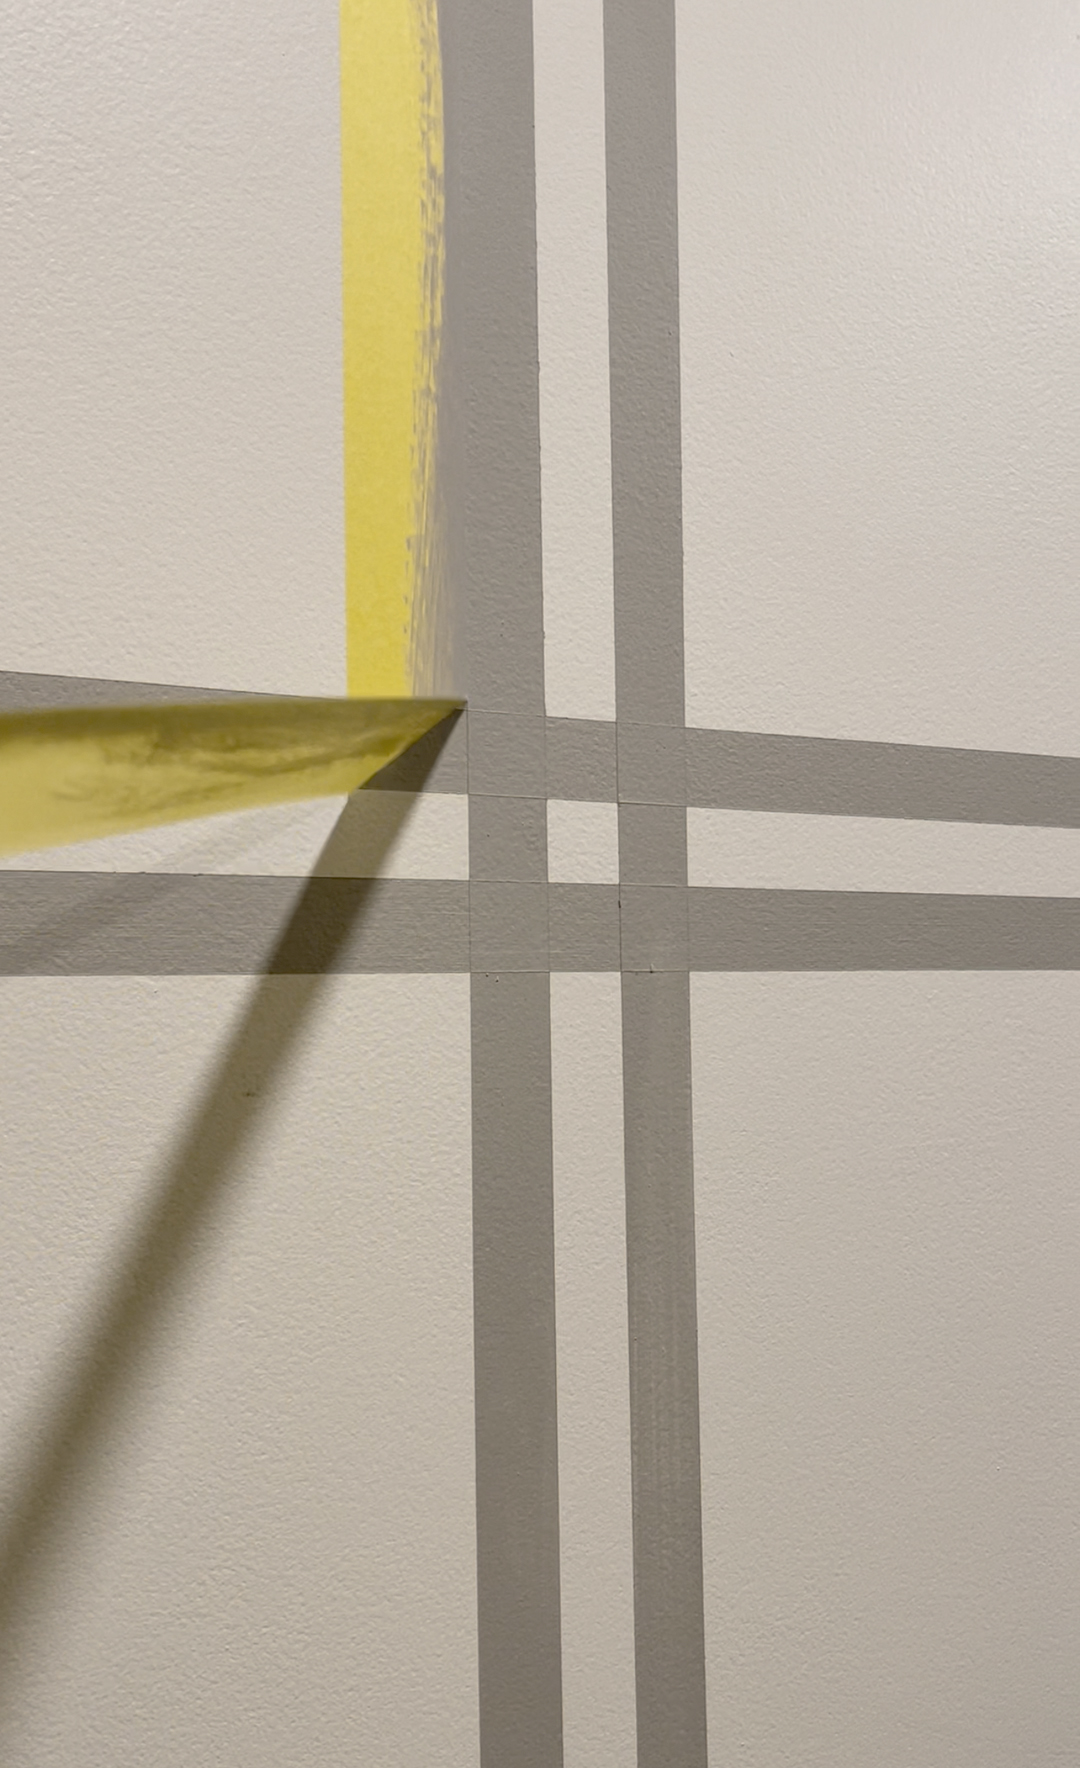
Once done painting the horizontal lines, remove the FrogTape while paint is still wet.
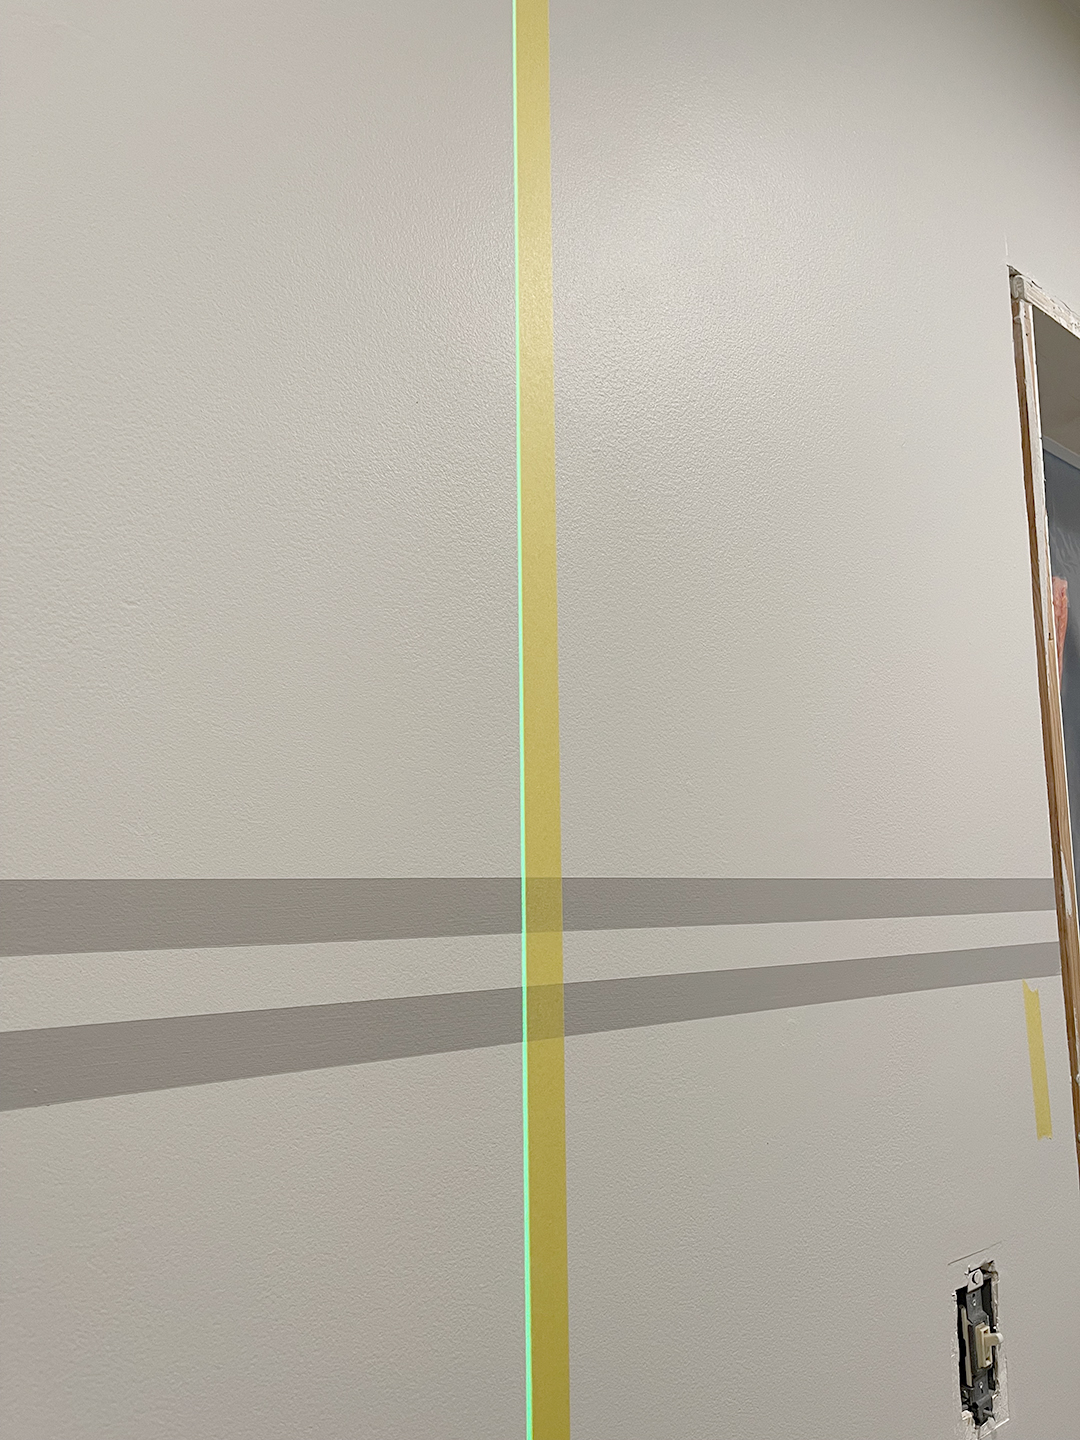
Once dry (we allowed ours to dry 24 hours), start applying the vertical lines.
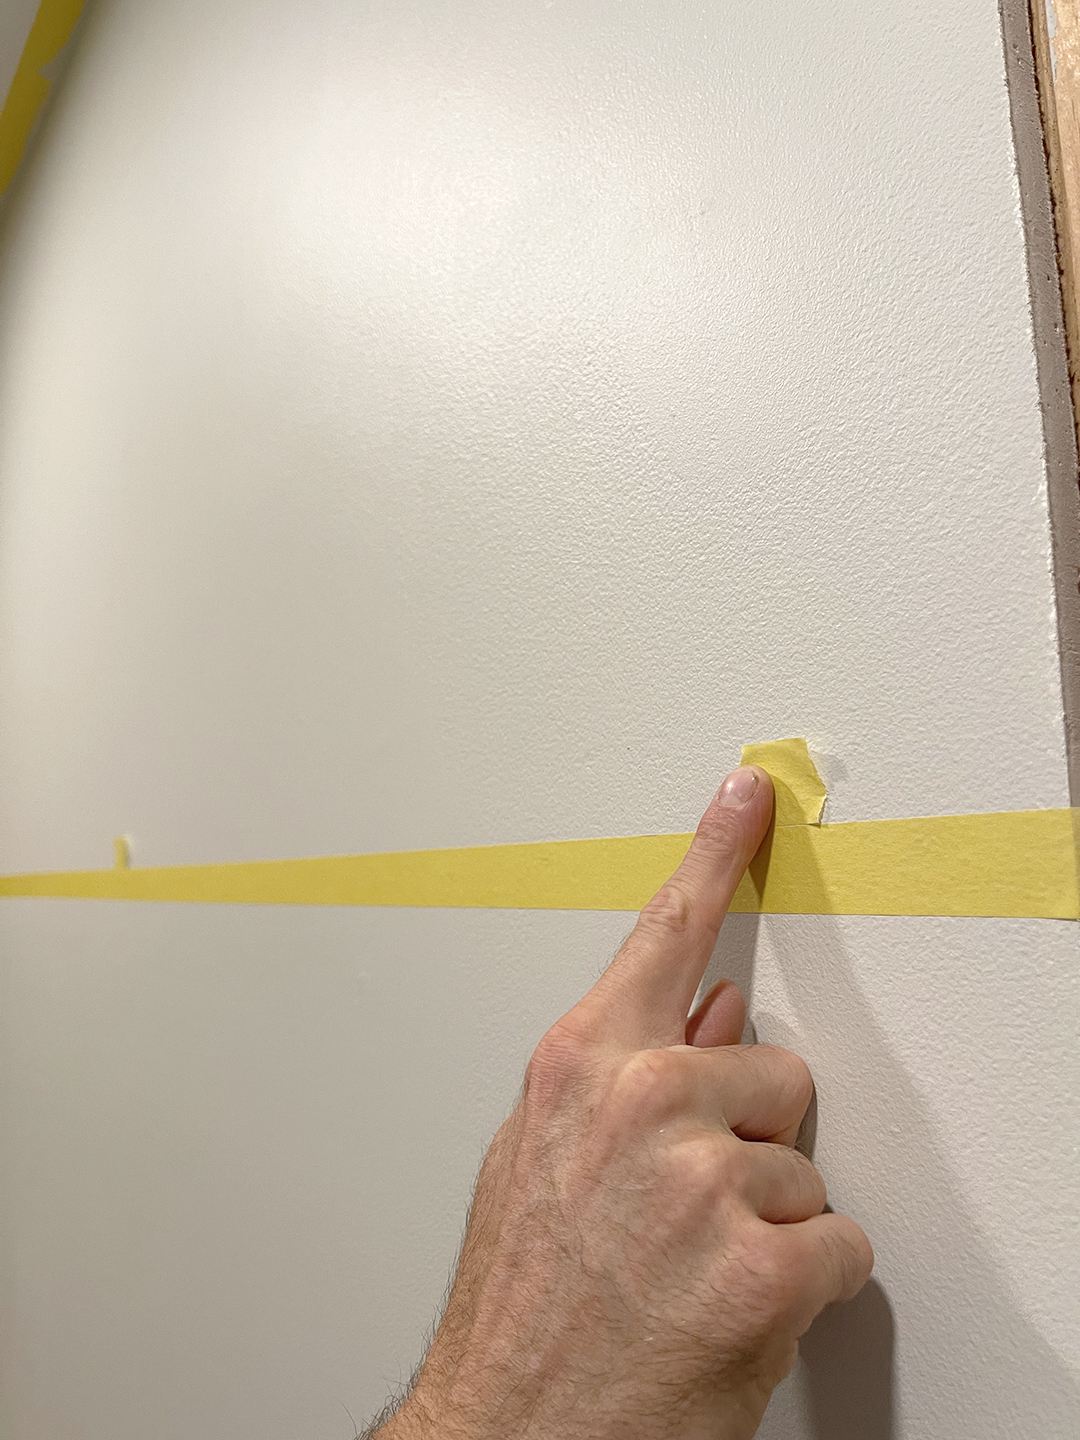
Divide your wall based on the number of sections and calculate where to put the vertical lines. We ended up with four 18″ sections for our layout so we marked the sections and then used the laser level with a 1/2″ offset to center the tape on the mark.
Repeat the steps for the laying out the outer horizontal lines, using spacers and FrogTape 1.88″ on the outside.
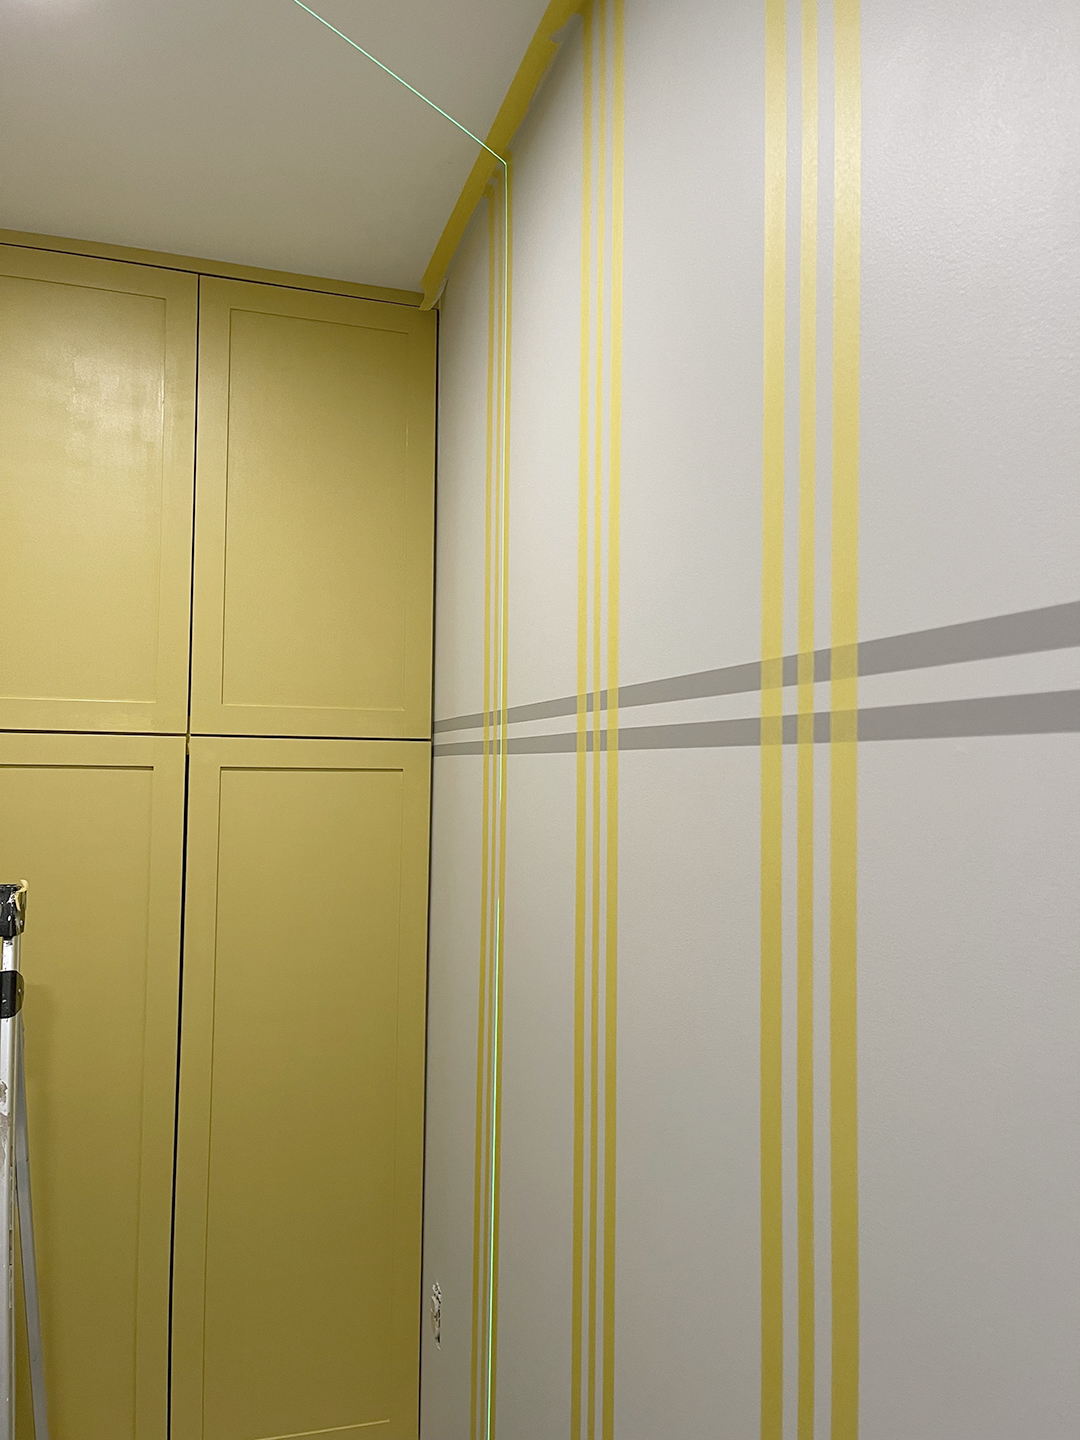
Once the FrogTape is laid out, paint two thin coats (or as many as needed for your finish).
Once paint coats are complete, remove all vertical lines of FrogTape while the paint is still wet.
That’s it! Install hooks, if desired. We made 4″ round hooks and installed them 6″ above and below the horizontal lines.
FrogTape did inadvertently inspire the cabinet color! Thinking back .. using it for previous projects, I remembered how much I love yellow. While I was painting the cabinets, I realized how close the color was to the tape! I decided to break free of my neutral paint colors and try something bright. I love the change and this small room is the perfect place to make a statement!
BEFORE
AFTER

BEFORE
AFTER
Phase 1 complete! Next, install the flooring (it is currently sitting on top), build and install shelves above washer dryer, backsplash behind washer/dryer and sink, and custom build sink.
SOURCES
cabinet color | wall color (sw repose gray lightened 50%) | wall stripe sw dorian gray | floor tile | wall hooks (new 4″ size, message me) | laundry basket (home goods, a few years ago) | turkish towel
Thanks so much to FrogTape for sponsoring this post, as always, I only share products and companies that I love and have had a good experience with!
Leave a Reply