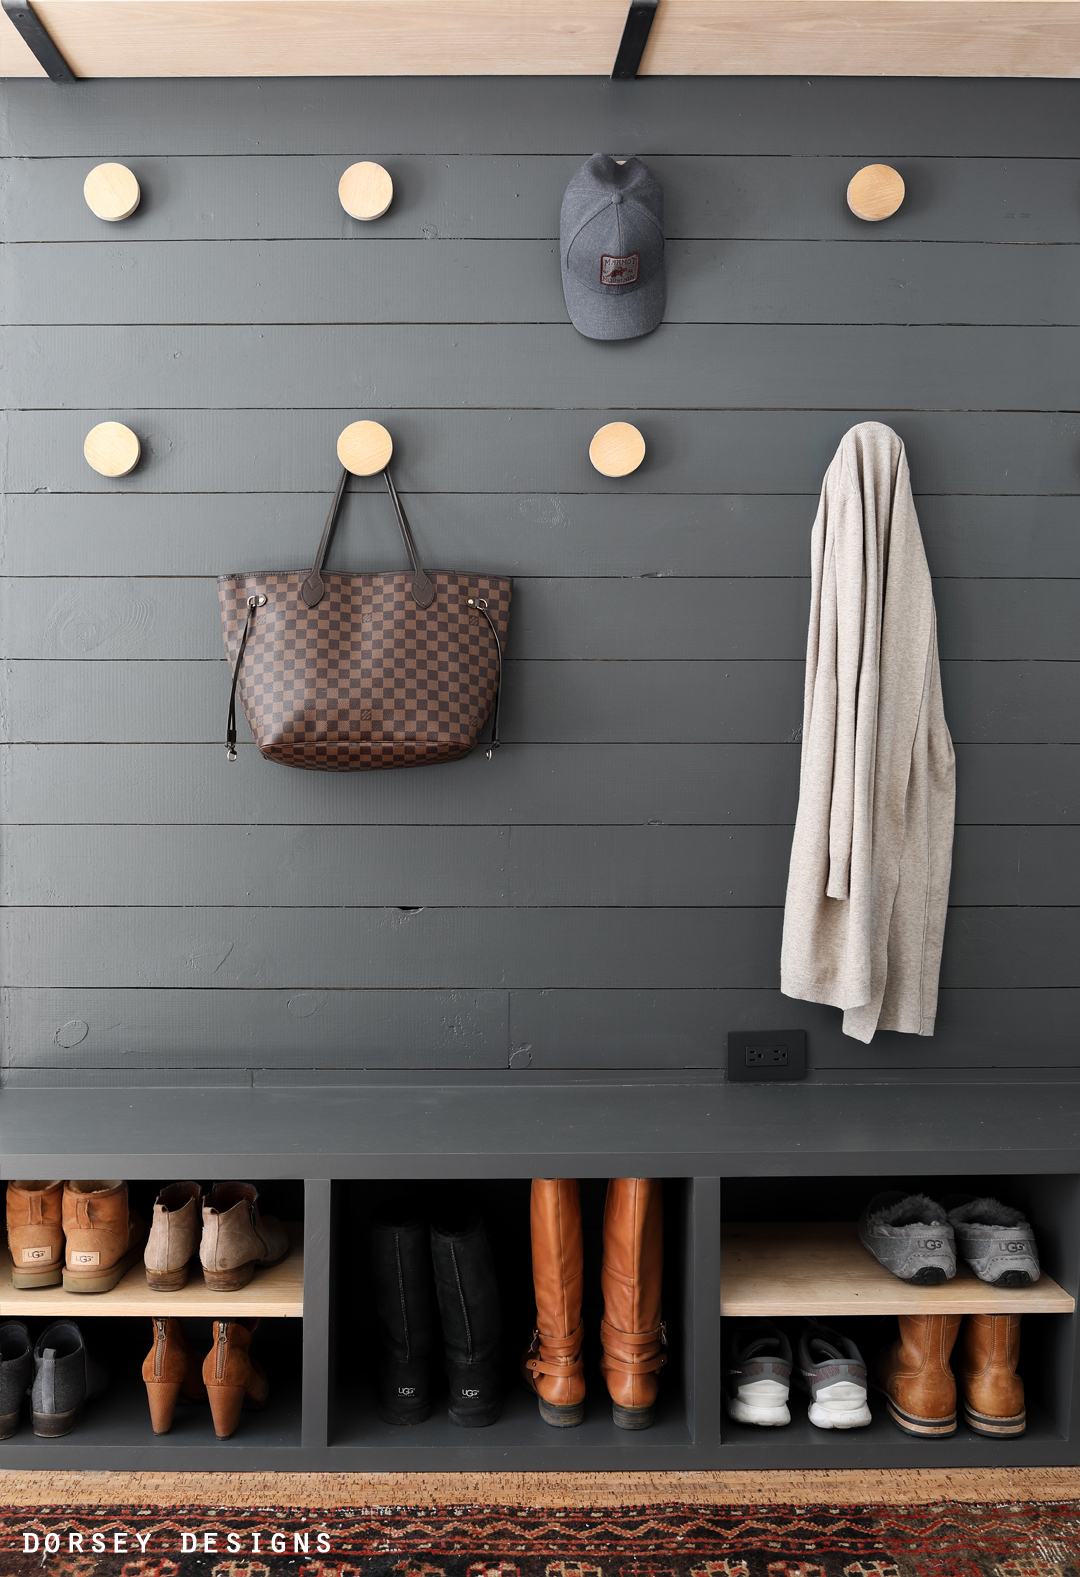
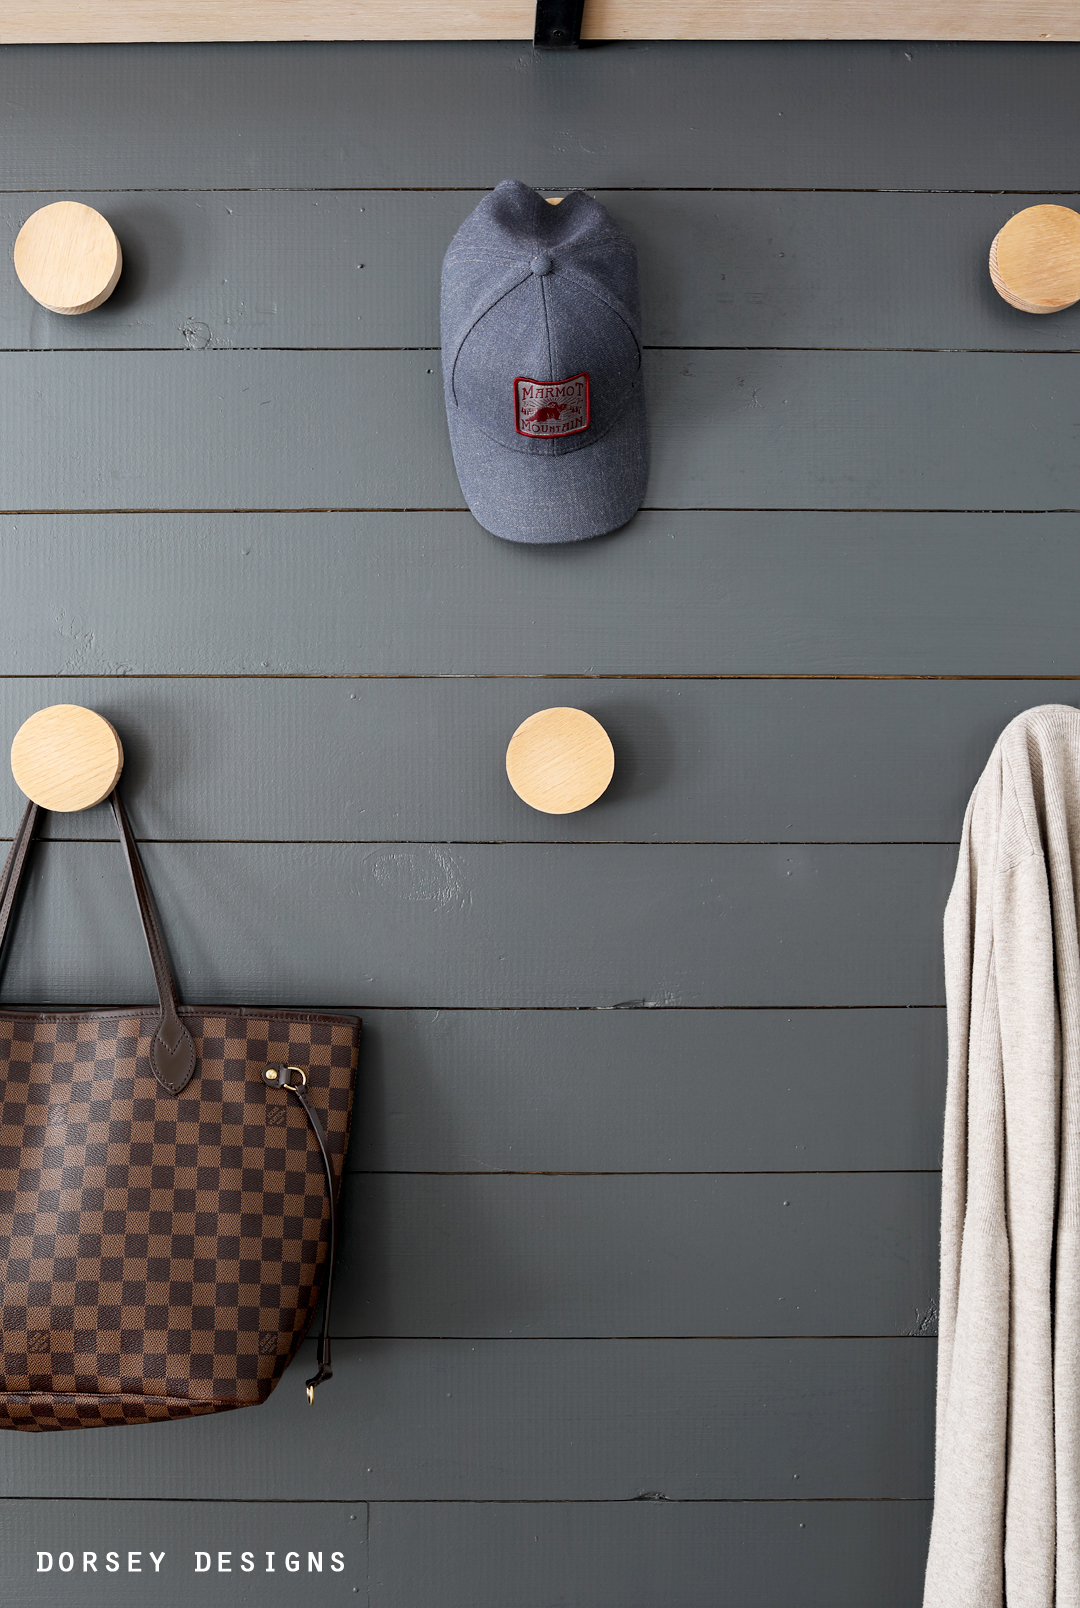
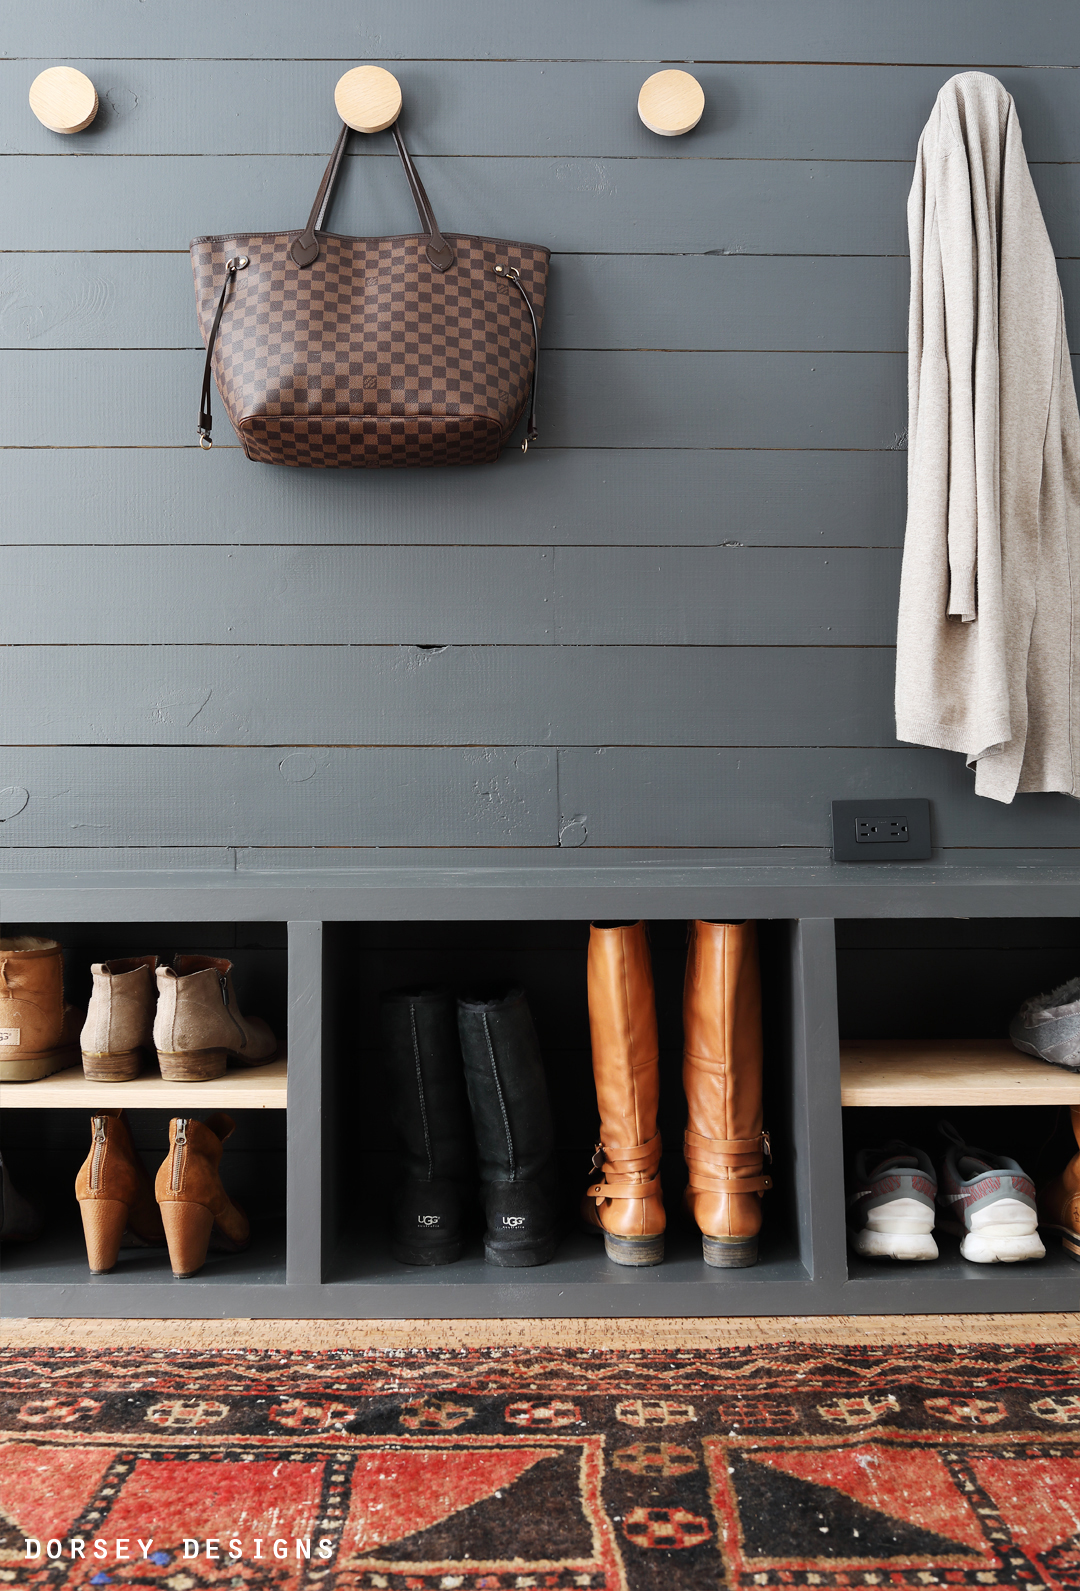
You guys! I’m so excited to share our new and improved entry off of the garage! We recently added hooks, a bench with space for shoes and a shelf above! I’m obsessed with this functional storage that works so well for our family! Our main living level entrance is a flight of stairs up, so we mostly come in through the garage. Since we’ve lived here, we’ve used a chest to hold our coats and shoes .. it wasn’t pretty .. this is SO much better! We’ve been using it for a few weeks now and so far, so good – still organized! I only removed a few coats for photos so you could get a better sense of the hooks.
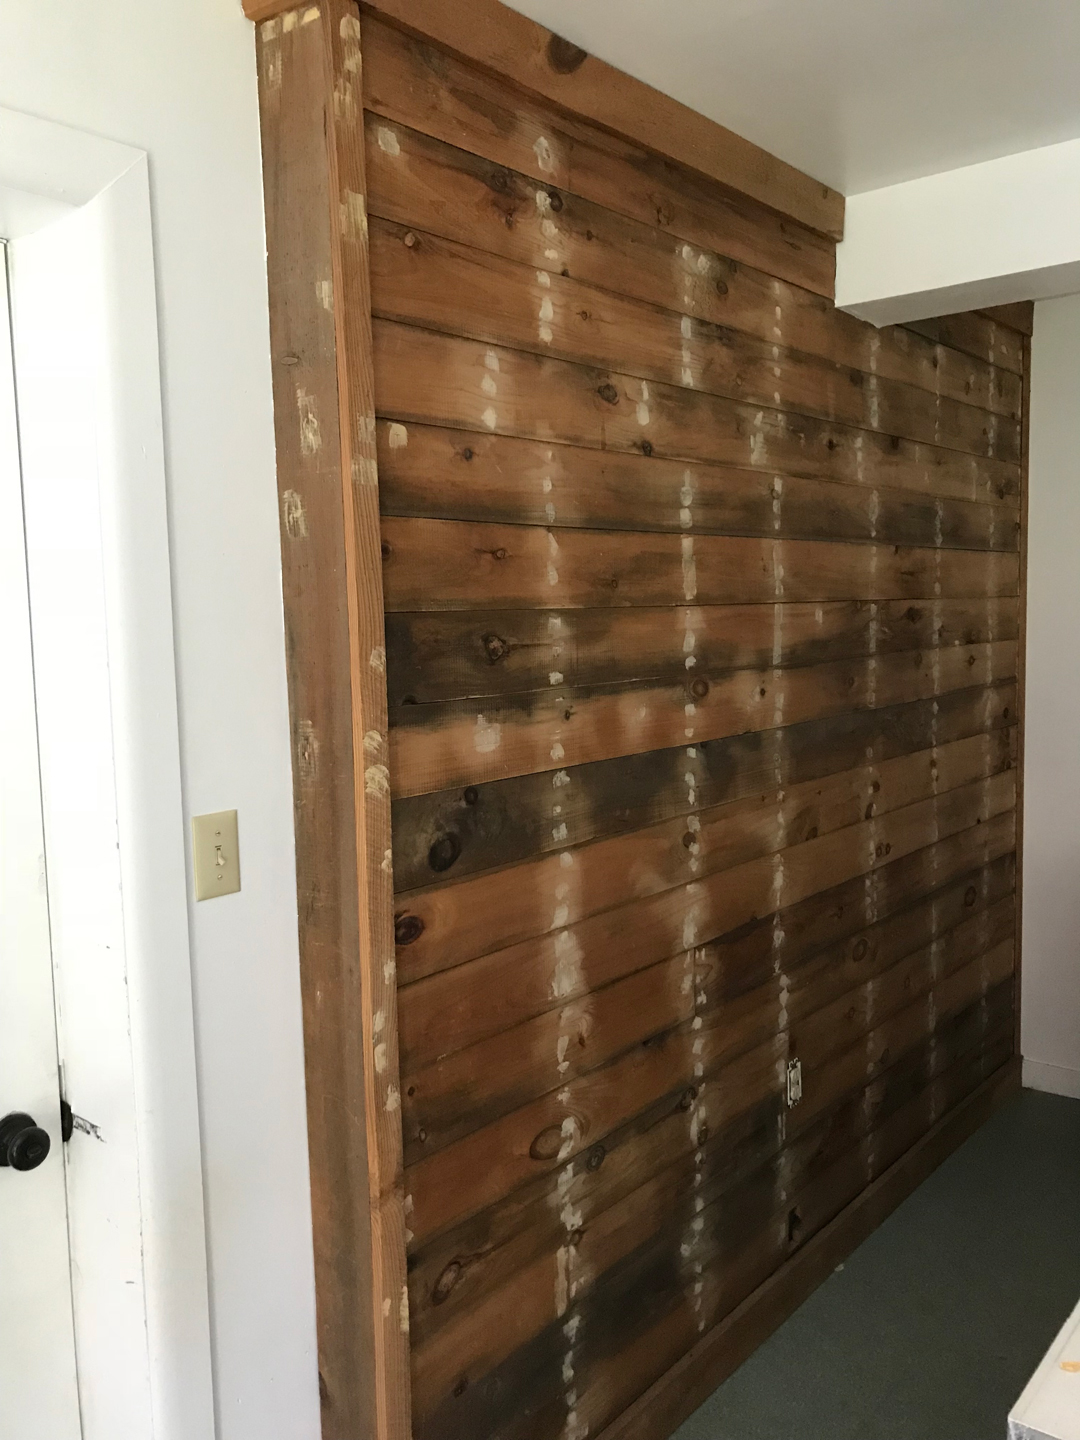
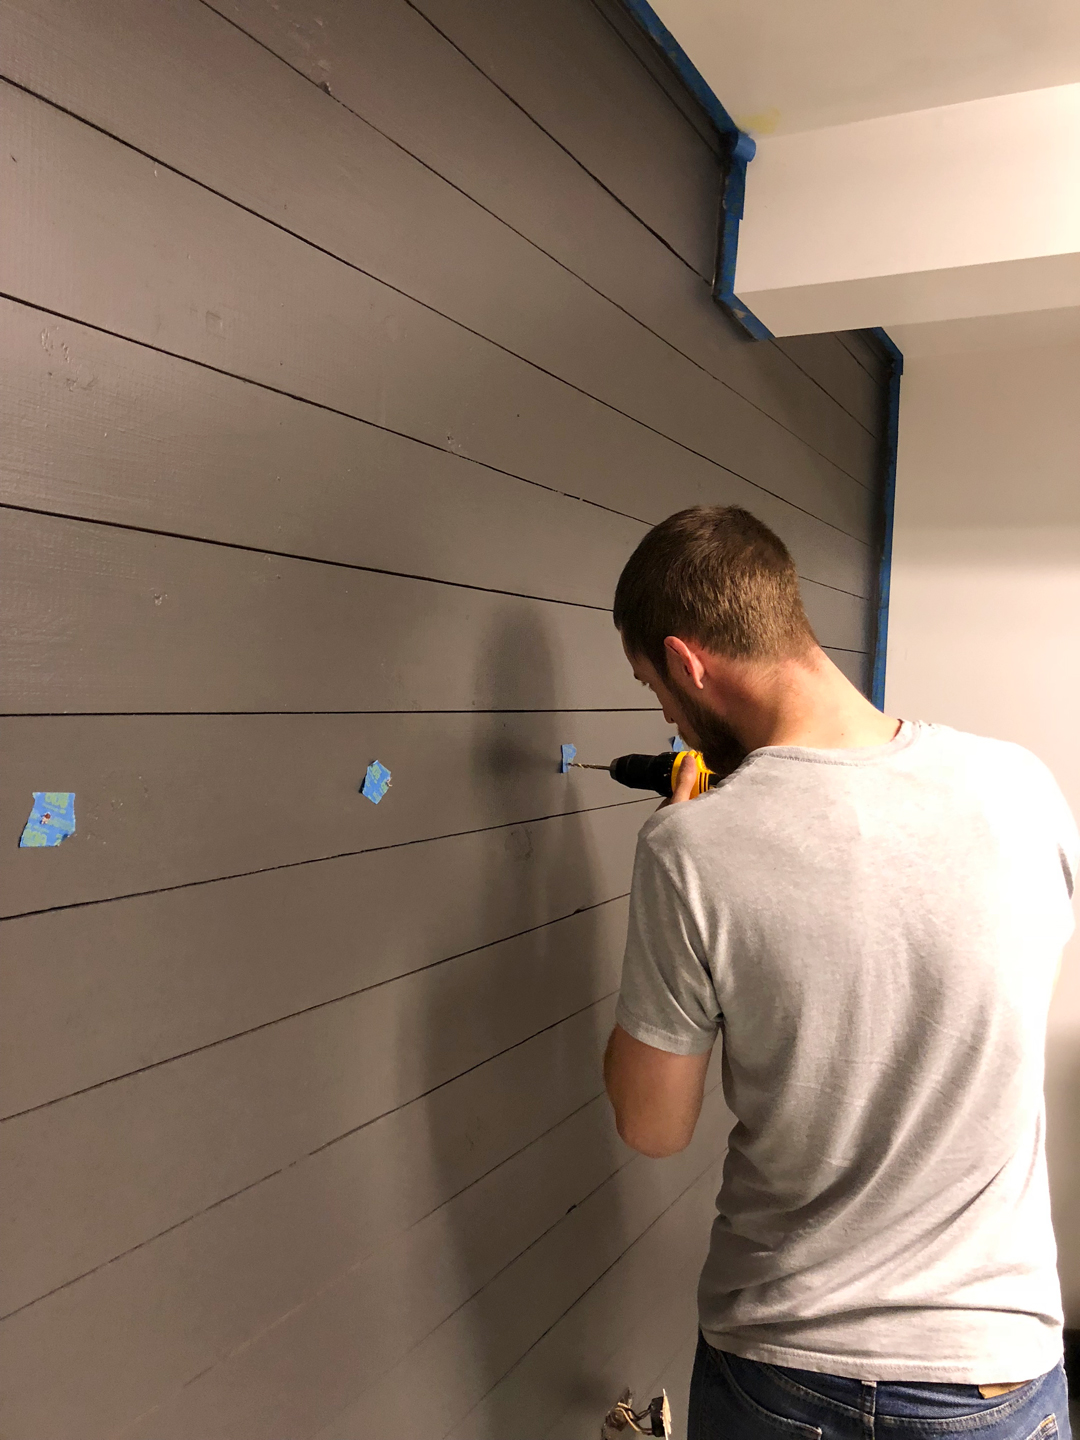
We started with a pine wall (original to the house). This was the perfect starting place – we replace some of the outer trim, it was installed poorly and was bulky. Over the summer, I primed the wall white – this is the space where we photographed all of the process photos for my book (coming out June 2019!) and I wanted the space to be brighter. Since this wood is rough cut, the paint stuck in some of the cracks and looked messy. We used a multi cutting tool (our’s here) to open up the lines a little.
Our fall One Room Challenge guided the finish inspiration here, since this is the other side of that space. We painted it the same color as that built in – BM Kendall Charcoal (made darker), exact color formula 792 – 3x (Gallon) – Y3 2x 6.5000, S1 8x 11.5000 W1 0x 0.0000 R3 0x 13.5000 (Base 3) (mixed at Benjamin Moore, Advance Satin).
We made the hooks from Oak (available to purchase HERE) To install them, we placed tape approximately where they go, measured the height from the bottom and then from the sides creating an x so we’d know where to pre drill the holes.
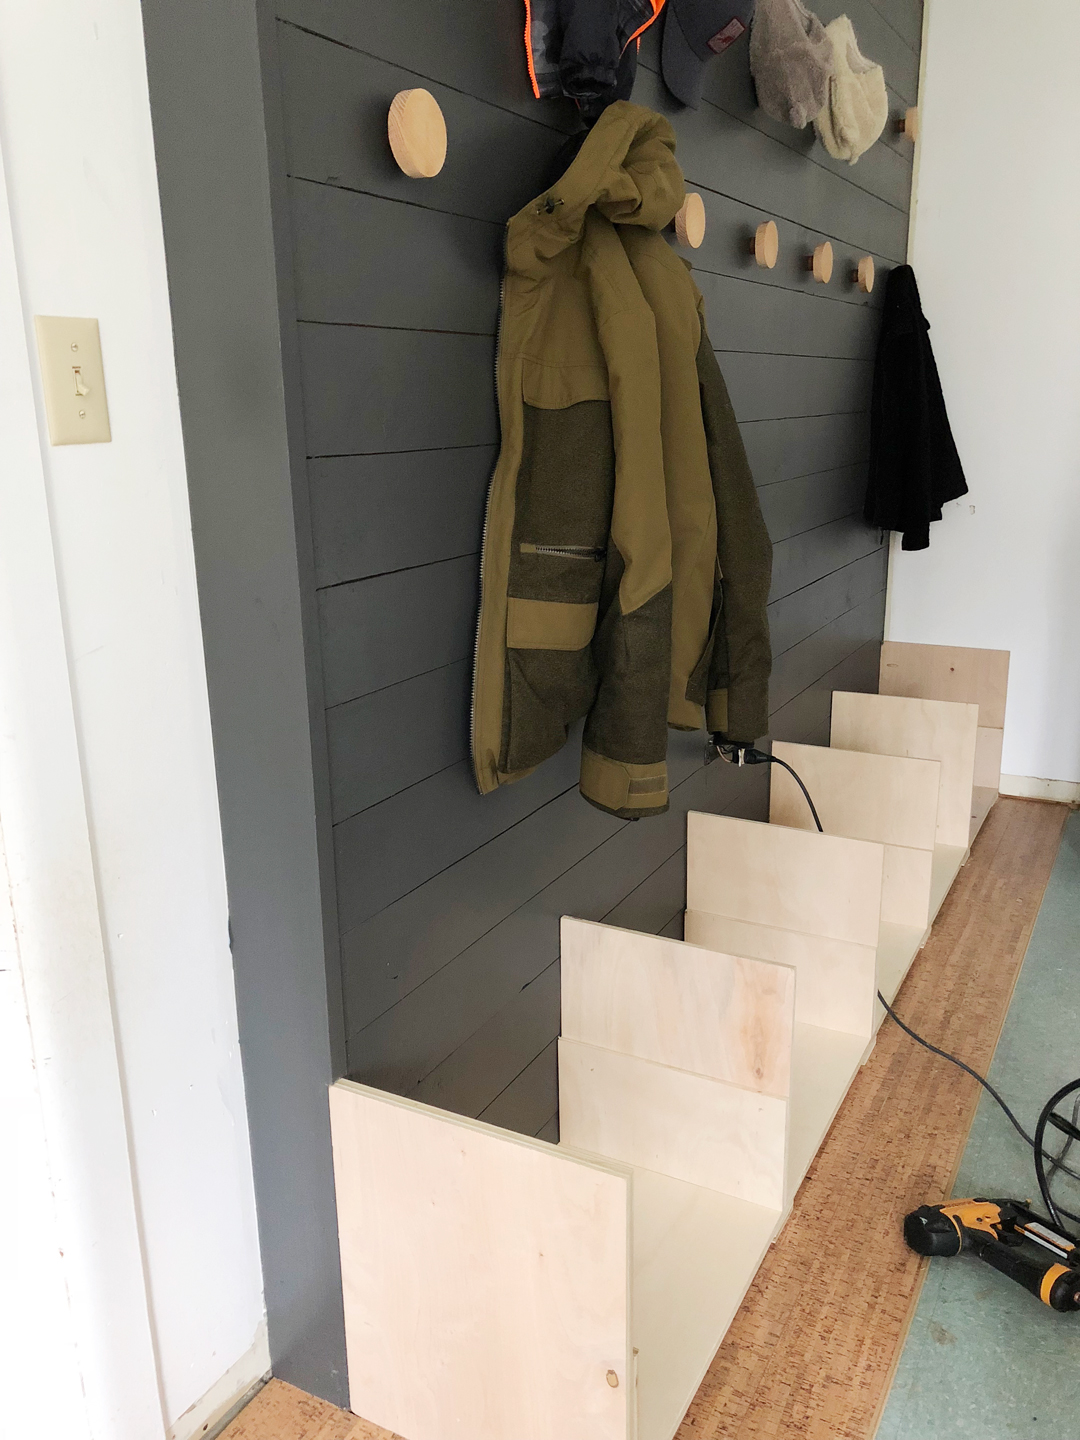
David came up with the construction method for the bench and shelves – it’s the same premise as our loft built in (still need to share that!). We used 3/4″ and 1/2″birch plywood to construct the boxes. To accommodate the shelves, the center vertical sections are made of three 1/2″ sections of plywood and the outer ends and top and bottom are two 3/4″ sections. The inner boards are cut to create a groove for the shelves to sit.
We started by cutting a 15″ strip of 3/4″ plywood for the bottom and then measured to create five even sections. David cut small 3/4″ sections to go under the six vertical sections so the bottom would be 1-1/2″ tall overall. We then attached one of the outer 3/4″ boards and the 1/2″ verticals at each of the marked locations. Next we attached the lower portions that were cut to center the shelves with wood glue and brad nails.
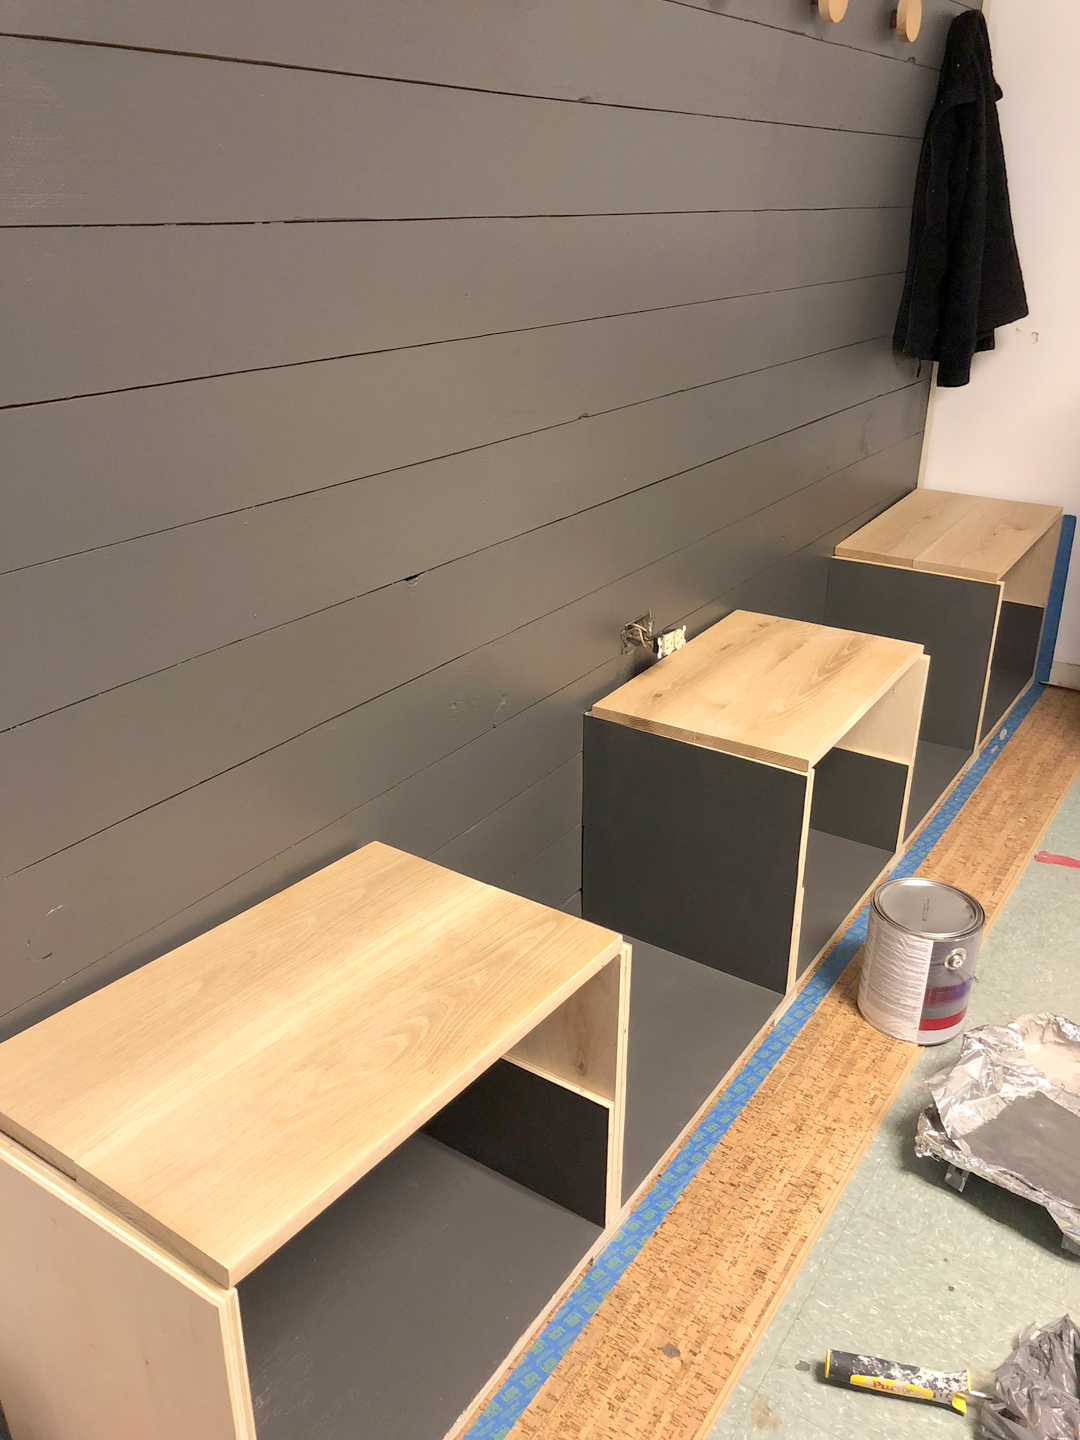
Because of the tight quarters, we painted at each step. This is totally optional, I just hate painting inside boxes 🙂 While I painted, David joined the oak boards and then cut them to fit on the top of the lower section. (In photo above, the shelves are sitting on top, but we moved them to sit on top of the1/2″ plywood (where it is painted))
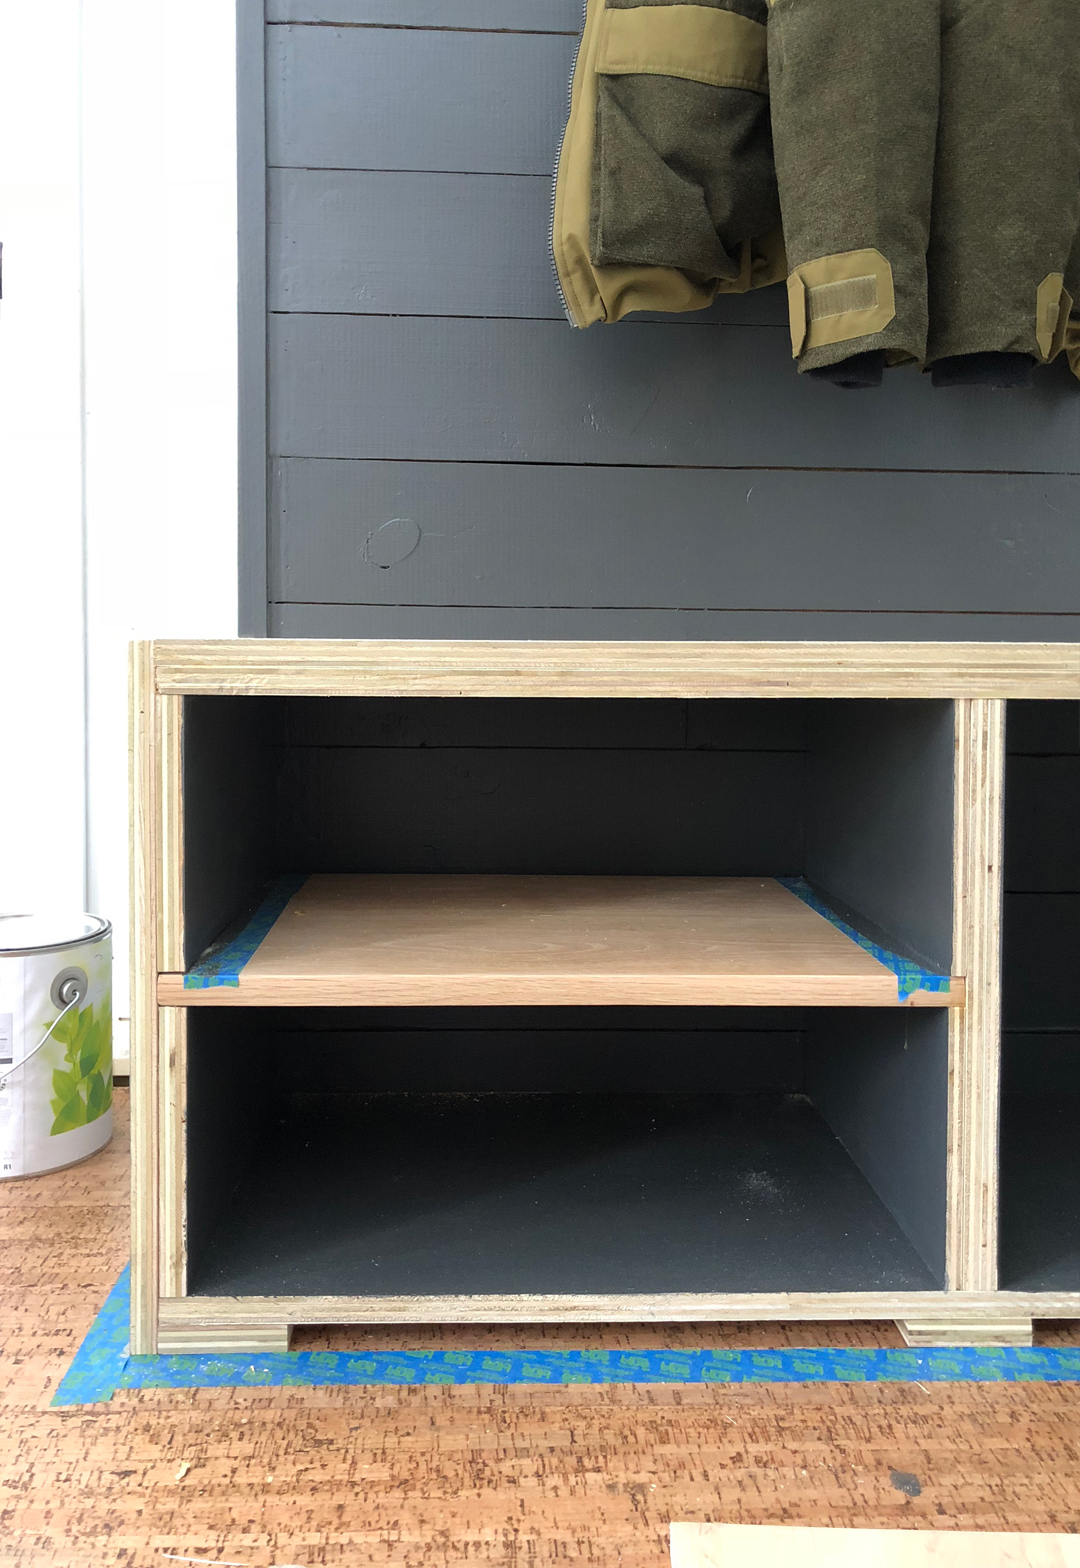
Once the shelves were installed, the top section of the verticals was glues and nailed and then we attached two layers of 3/4″ plywood for the top. Once complete, all sides are 1-1/2″ thick an have a seamless look on the inside.
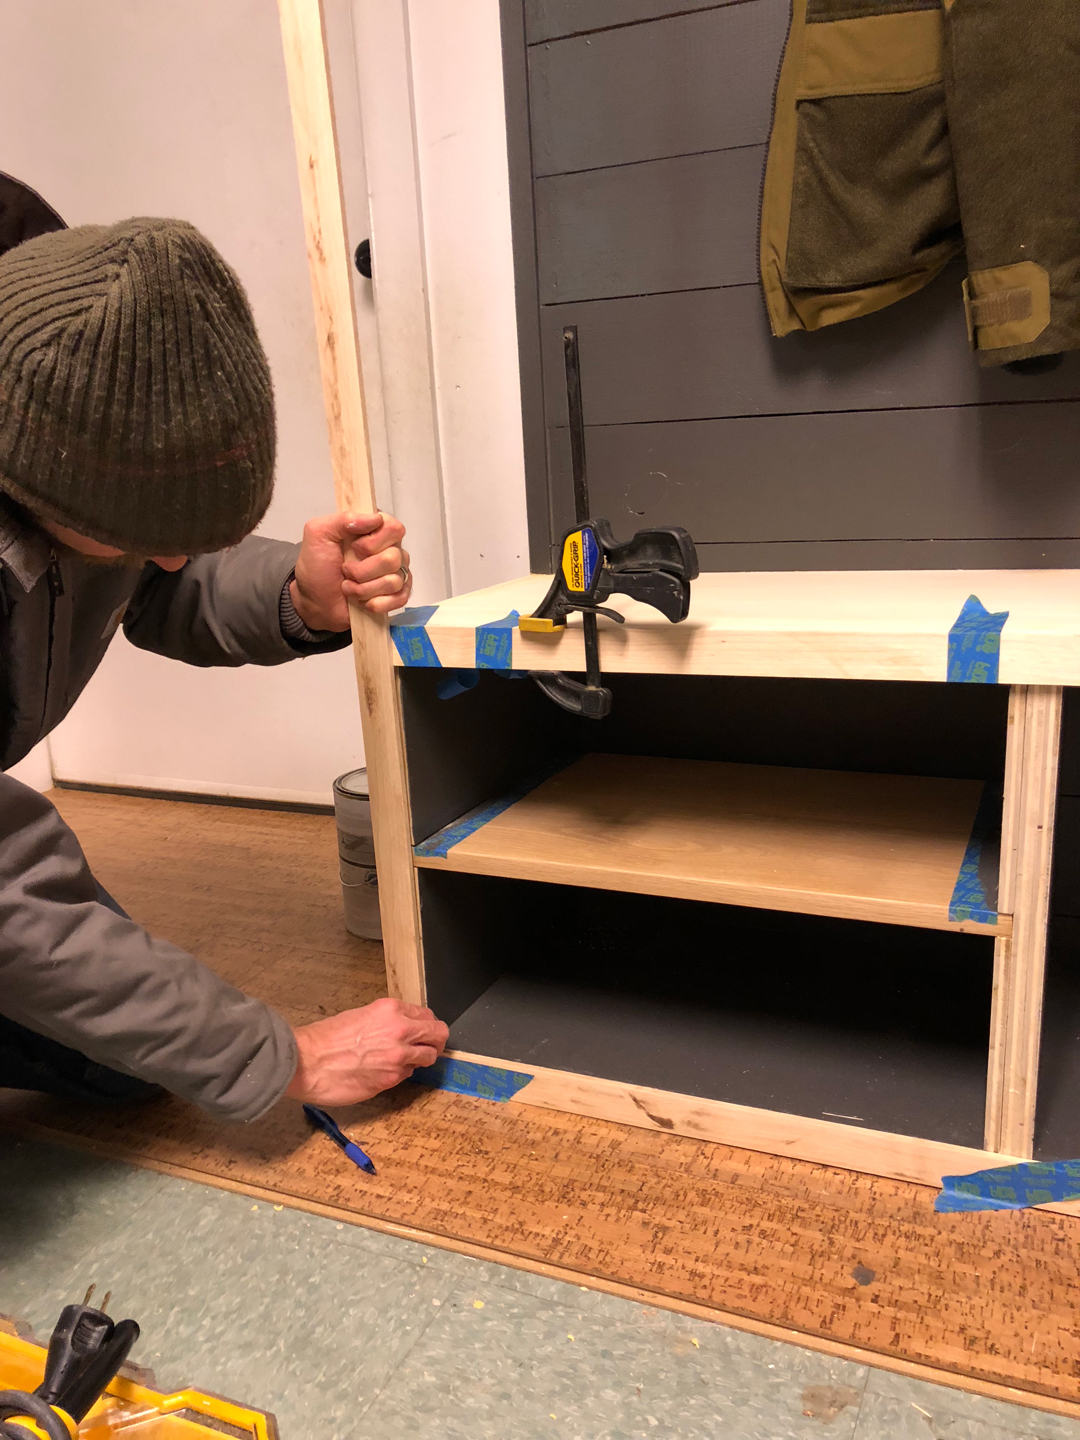
To prepare the front, we added 1/4″ x 1-1/2″ facers that were ripped from maple. These were glued in place and then we used wood filler to fill any minor gaps that showed. Once complete, we finished painting. Make sure to cover the floor (or keep a wet cloth nearby to wipe any drips)
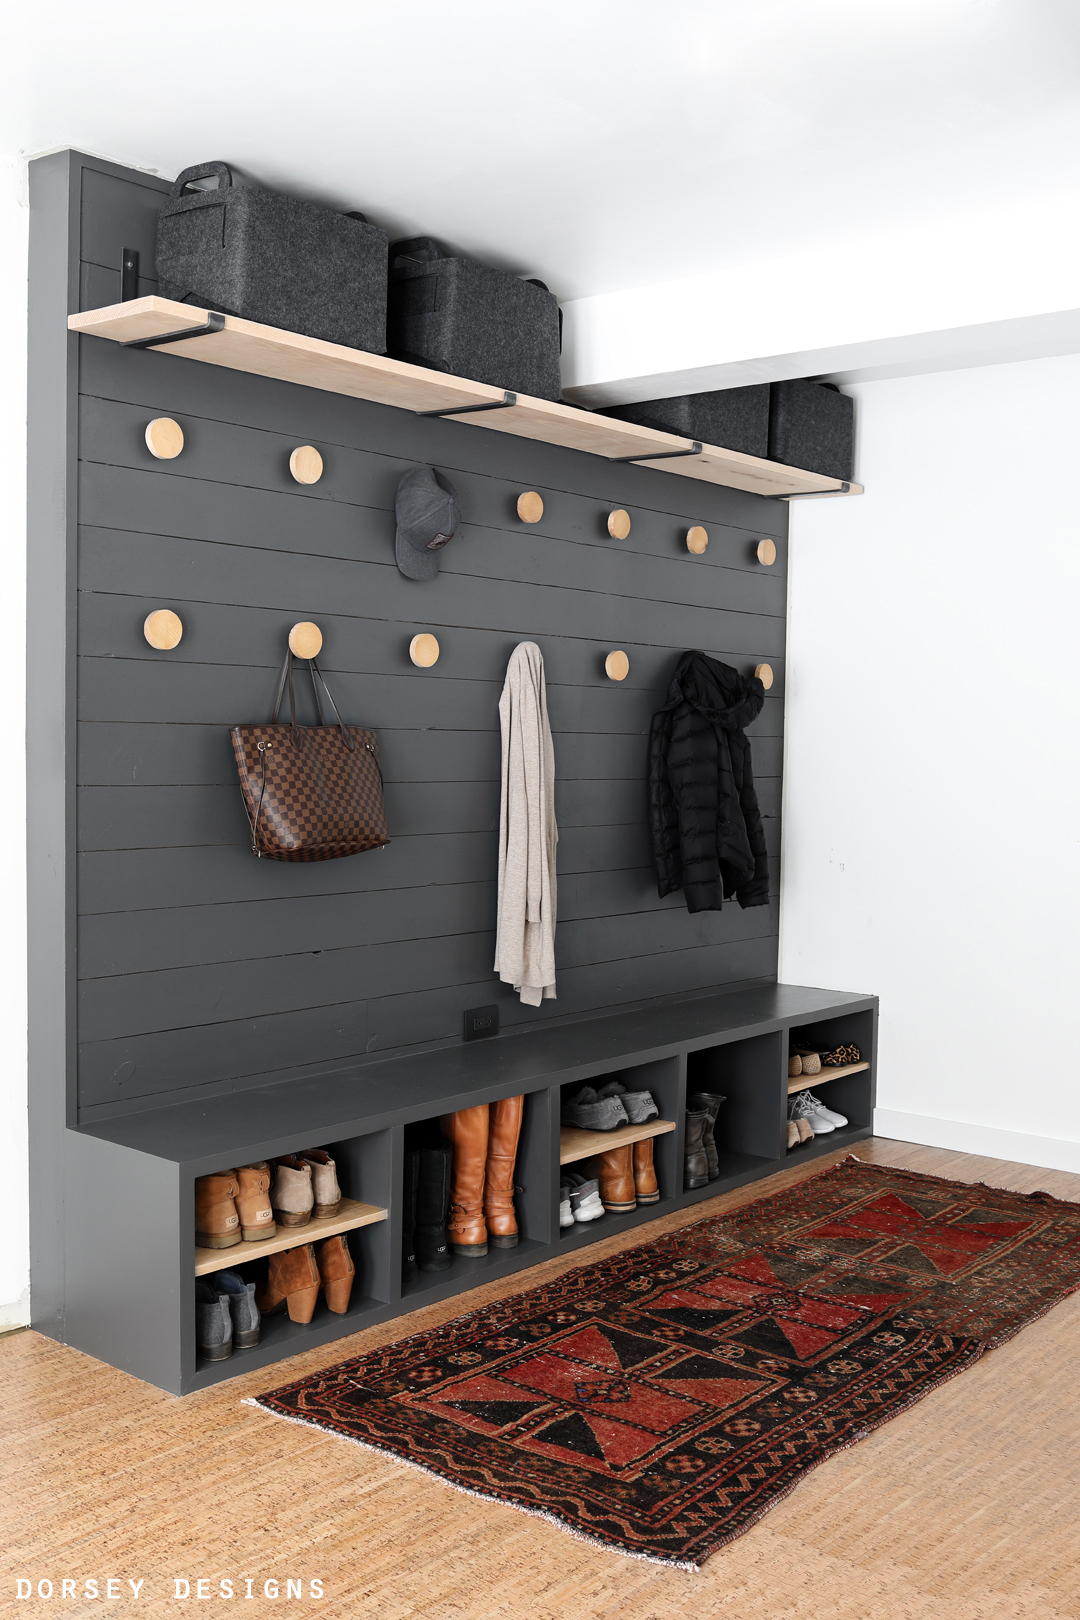
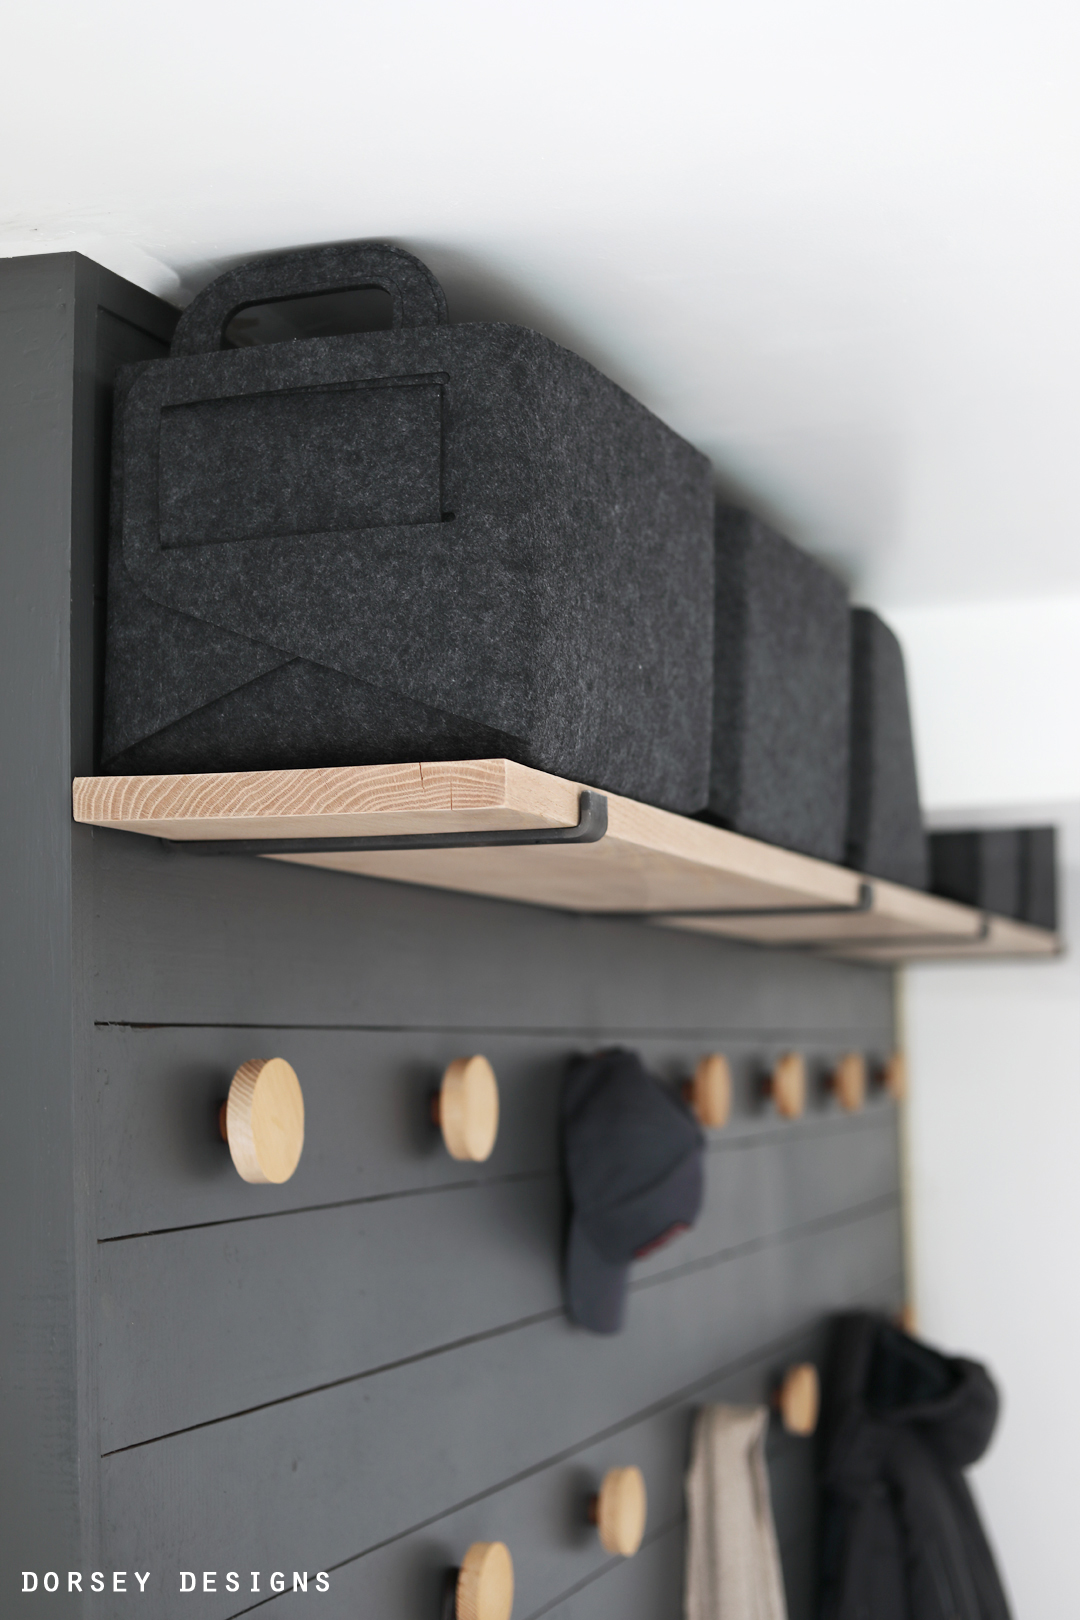
Hooks (custom made by David) available to purchase HERE
I’m crazy about the added function to our space! We still need to finish the floor (we want to replace our wood stove on the other side, so we’re waiting on that), paint the rest of the room, finish trim and add finishing touches, but we’re getting there! I’d love to add an adjustable work table in front that can function for projects, computer work (excited to see that come together!) See the other side of this space here and the other side of the basement here
Sources
paint // BM Kendall Charcoal (made darker), exact color formula (Quart) Y3 0x 17.6250, S1 2x 2.8750, W1 0x 0.0000, R3 0x 3.3750 (mixed at Benjamin Moore) // shelf brackets // black outlet // round hooks, we made them, available to purchase HERE or message me directly to purchase here // felt baskets // cork flooring // rug vintage – etsy shop is here
I love what you did here. So stylish and functional. I would definitely be interested in buying those hooks! They’re fantastic!
Thank you so much! David just ordered a jig so we are going to start selling soon!
This looks so great! I love the color and I’m envious of how handy you & your hubby are.
How do you manage your projects with your little one?
Thank you! It is definitely slower, but at night and we have help from the Grandparents 🙂
Love how the mudroom turned out to be! You and your husband did an amazing job here. Slightly darker colors make a great contrast against the white walls. Also, it’s amazing how you’ve made the perfect balance between stylish and functional.
Thank you Katarina! I’ve been loving adding darker contrasts to our white spaces! 🙂
Looks great-I love the hooks. Okay this is just an opinion but I think I would like them stained the color of the boots…a warm maple. Just thinking out loud…they will patina over time. Thanks for showing how he constructed it-it looks wonderful and is so functional.
Thanks Christine 🙂
This looks amazing! I was wondering where you got the wall brackets for the top shelf?
Thank you! Link to sources at the end of the post 🙂
what are the dimensions? total length, width and height of the bench part? I love this design! I have a 70 inch wall that I want to do this with. thank you!
110″ w x 18″ h
Thank you! Be sure to let me know if you do it!
Great design, both visually and construction!
Thank you James!
I just stumbled up on this on Pinterest– I love it! Are you selling the hooks?
Hi! Thank you so much! I plan to sell them soon!
I would love to buy some of the hooks. Are yuh selling them yet? Also how did you attach them?
Yes! We actually just started selling them https://www.etsy.com/listing/767073275/oak-round-hook