• Home
  • About
  • Services
  • Shop
    • Bloglovin
    • Email
    • Facebook
    • Instagram
    • Pinterest
    • Twitter

Dorsey Designs

DIY and Interiors by Sarah + David

  • Home Tour
  • DIY TUTORIALS
  • friday favorites
  • design + build
  • art

get the latest straight to your inbox

Nailhead Metallic Linen Headboard | Tutorial

Thanks so much for your sweet comments on my post yesterday! Your support means so so much!

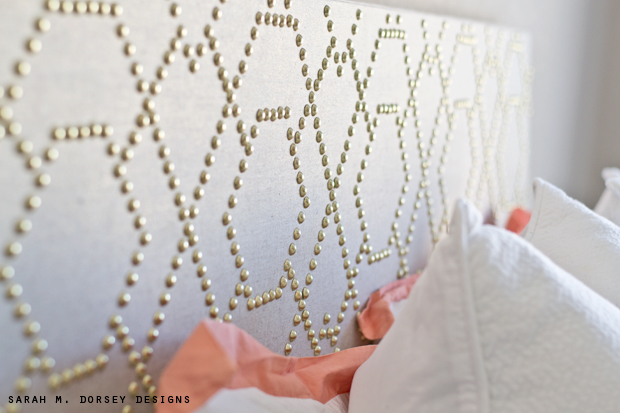
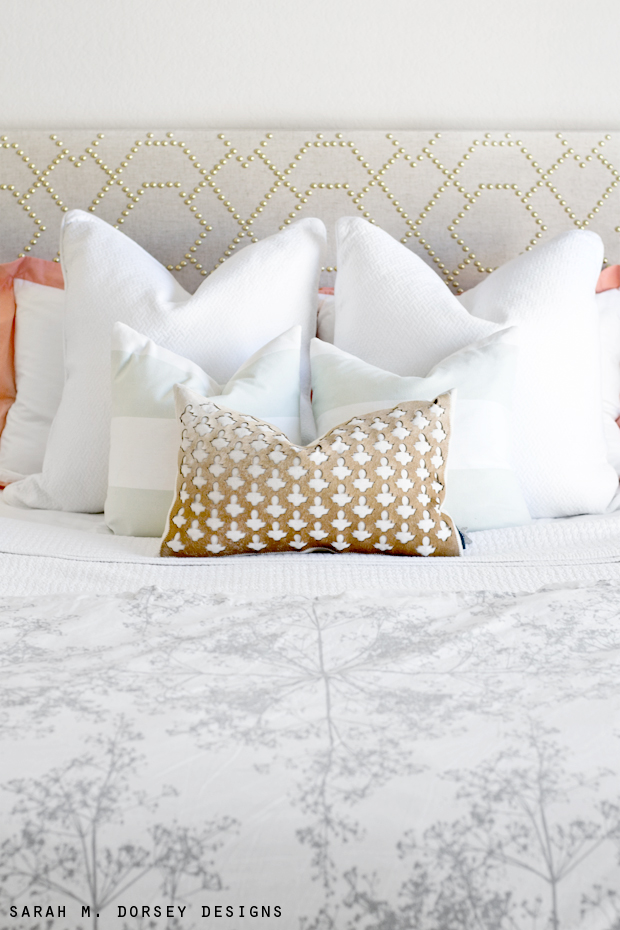
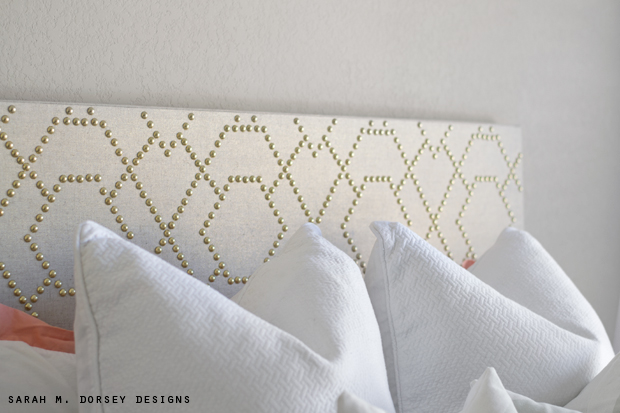
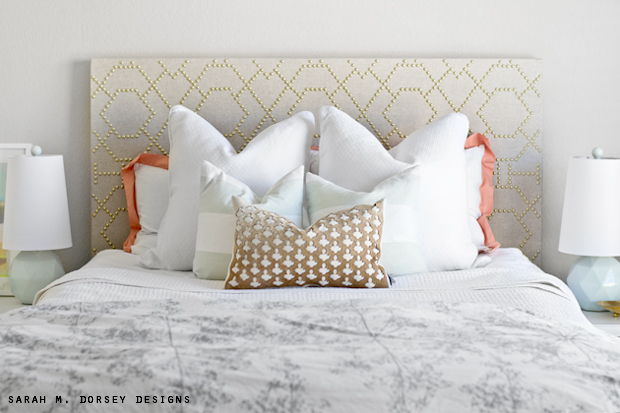
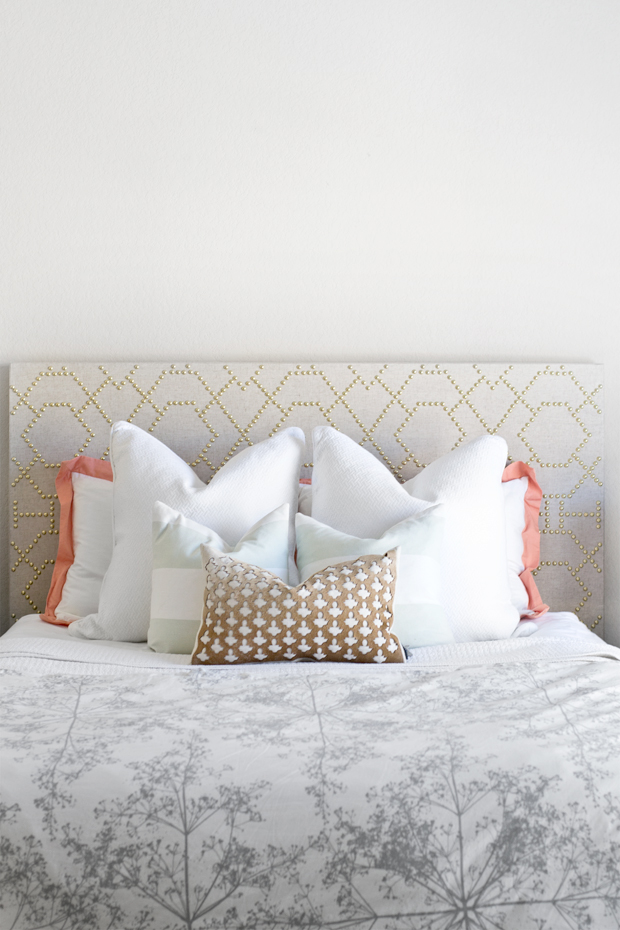
Today, I’m sharing our most recent headboard – a nailhead and metallic linen square headboard.

Nailhead can seem intimidating, but since working on several projects with nailhead (including this massive nailhead feature wall) we’ve found a few tips that make it go faster! 

Here’s how we did it!

First, we used (for a queen bed)

Plywood (1/2″ cut to 60″ x 36″)
2x2s for the frame (qty 4)
Metallic linen look table cloth (found at Marshalls) (I think it was around 76″ x100″, if you’re buying yards, you need about 2)
Nailhead (UPS is the only shipping option listed online at DIY Upholstery, if you call, you can get USPS shipping which is about half the cost)
Cardboard upholstery strip
Upholstery stapler

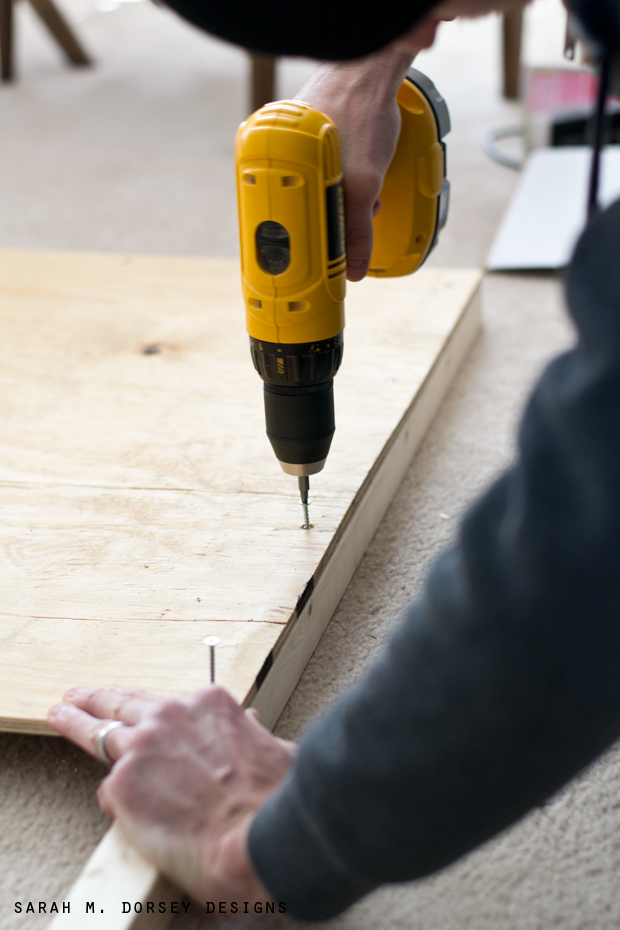
First, we simply framed the back with 2x2s by creating a box on the outside of the backside of the plywood (legs extend from the top of the plywood to the floor. The total height of our headboard was 55″

We secured the plywood to the 2x2s by screwing from the top.

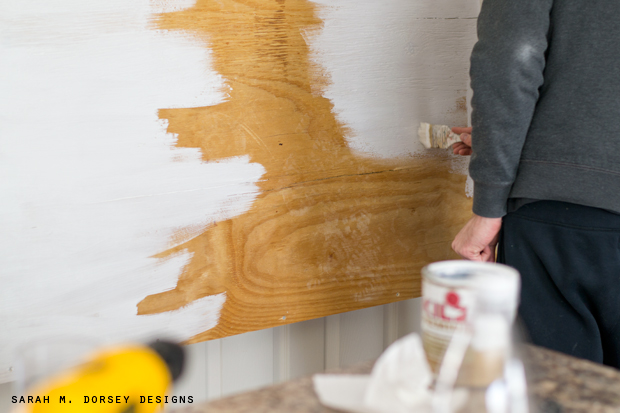
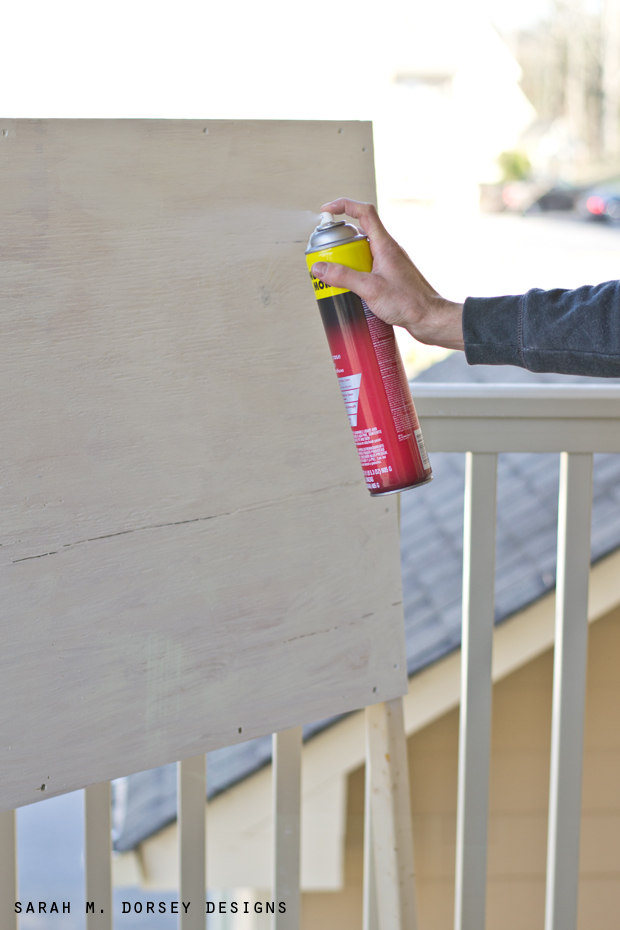
Since our fabric was semi transparent, we primed the plywood so you couldn’t see any knots through the fabric.

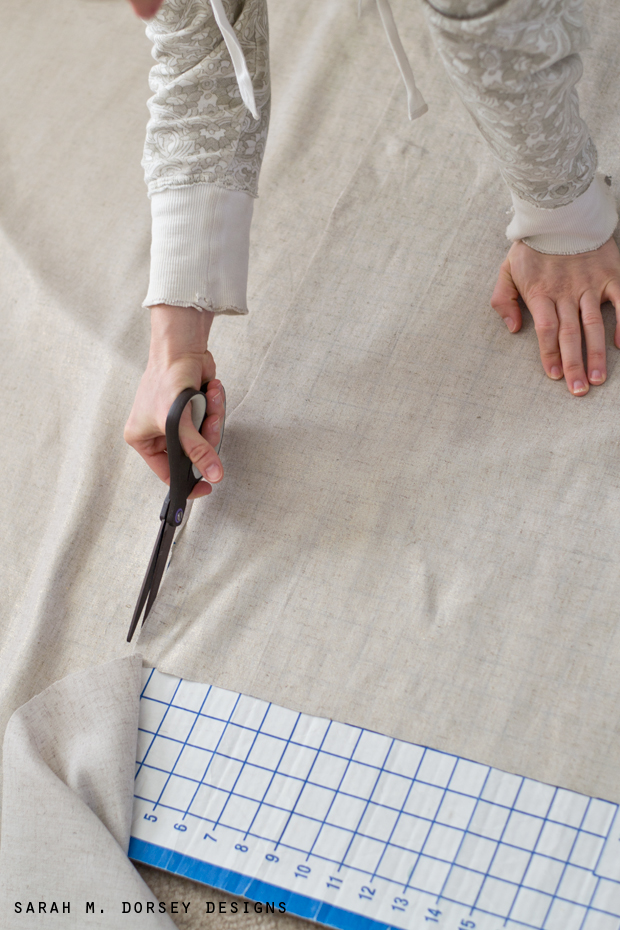
We ironed and cut the fabric to size – enough so it could wrap around the sides.

Outside, we applied spray adhesive to the front of the plywood. Make sure to cover up anything that you don’t want the adhesive on since it gets everywhere!

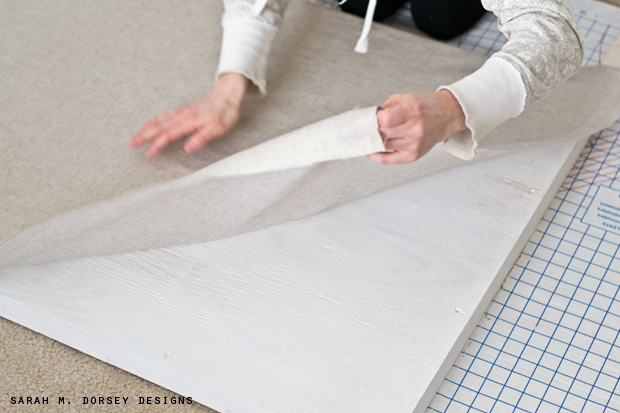
Then, we centered the fabric and applied it to the plywood, smoothing it. We lifted the fabric up and re smoothed as we went. Having two people for this step really helped!

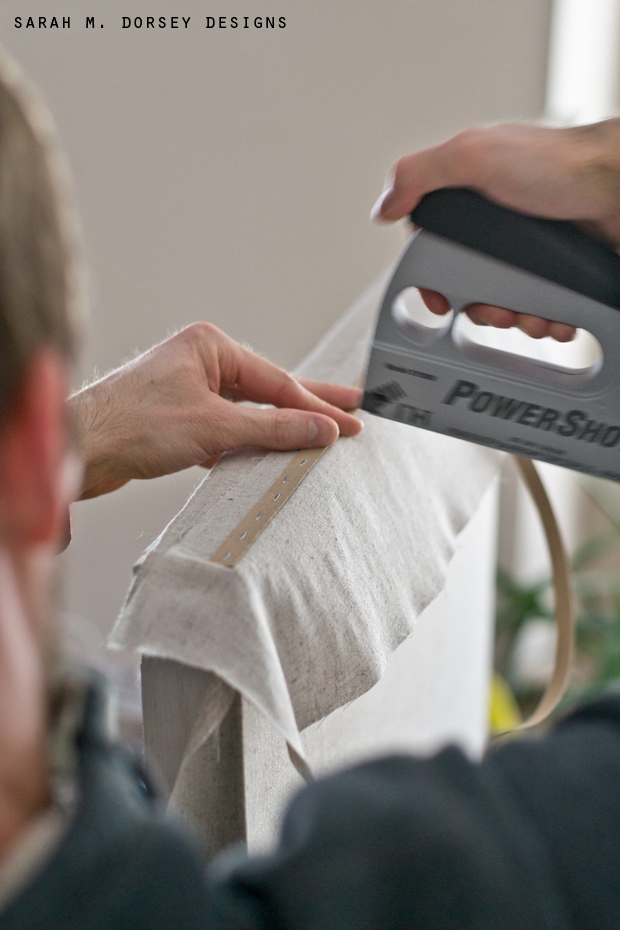
You could just staple the fabric on the back, but for a more finished look we used a cardboard upholstery strip and an extra strip of fabric, stapled along the edge and then folded it over and stapled on the back.

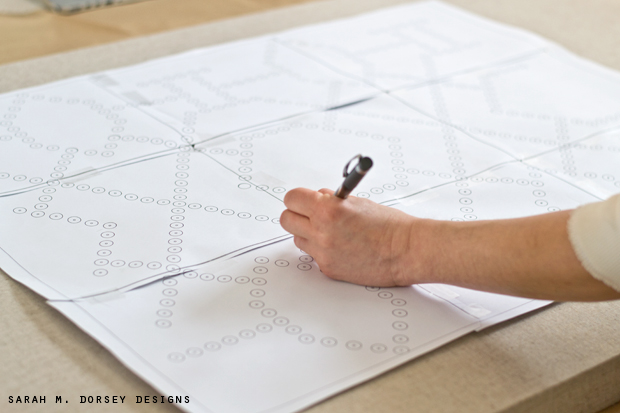
Next, the pattern. We did a couple of versions and then landed on this fretwork inspired design. You can download our design HERE (it’s a 10 page PDF, 1st page is the entire design, remaining 9 pages are the design, arranged top to bottom, left to right) Carefully tape them together. 

First, we poked holes through the center of each circle (we use an awl – used to mark metal) off of the headboard. Next, we centered and leveled the pattern – we took a lot of time ensuring it was even so the pattern would stay consistent. Then, we taped it to the headboard and marked each hole with a pen.

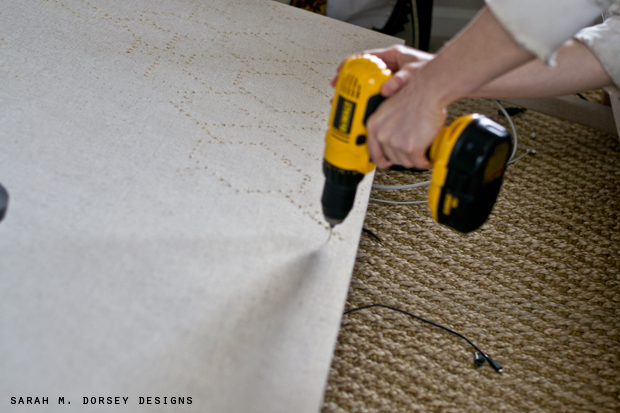
So here’s the trick to make the nailhead super easy and fast. With a small drill bit (compare to the end of the nailhead and test on scrap wood first – you want the nailhead to sit in the hole, but it should be snug) Drill each previously marked hole a small amount – you want the nailhead to go in about half way. Again testing on a piece of scrap would is recommended till you get the hang of how deep to go.

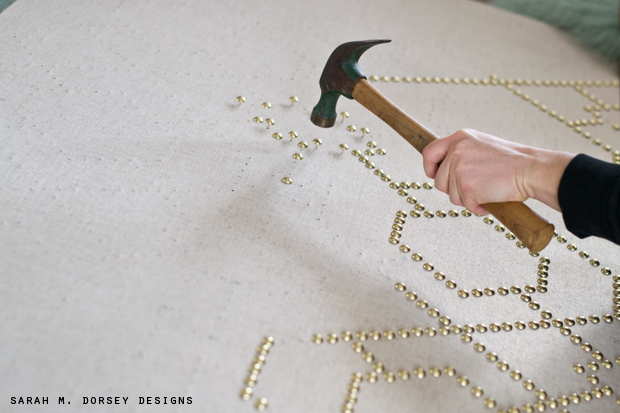
It’s an extra step, but trust me, it makes applying the nailhead SO much faster! Not shown in the image, but we covered the tip of the hammer with leather (for durability) and then painters tape to secure the leather in place – this protects the smooth surface of the nailhead. We replaced the leather and painters tape combo a few times throughout. They also make hammers specifically for applying nailhead, but this was a great substitute since we didn’t have one.

We like to insert a few at a time (spaced at least one apart – otherwise they are too close and go in properly) and hammered a few at a time. This is so much easier than picking up hammer up and down every time you insert a nailhead.

I made a quick video to show how fast it is!

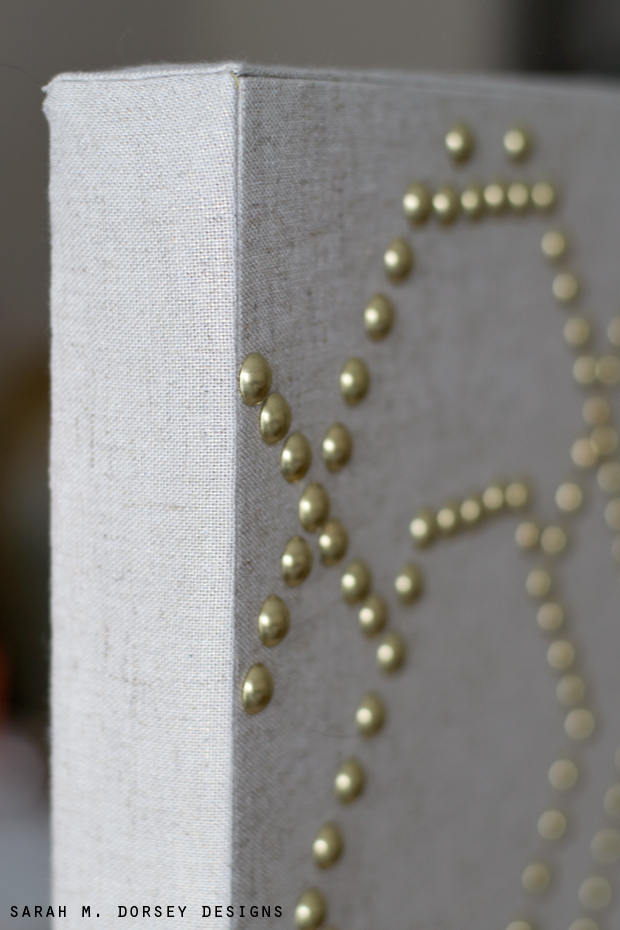
Note: A few of the nails went in crooked, so we used those to go in sideways in the few spots where the screws were underneath the placement of the nailhead on the edge of the plywood.

Depending how the light hits it – the fabric shows a subtle metallic glow.

I’m obsessed with the pattern!
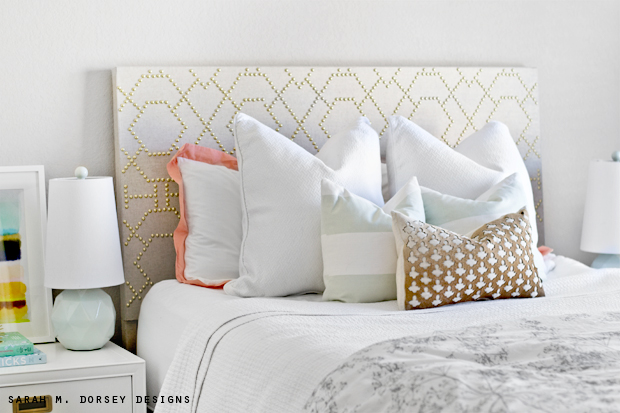
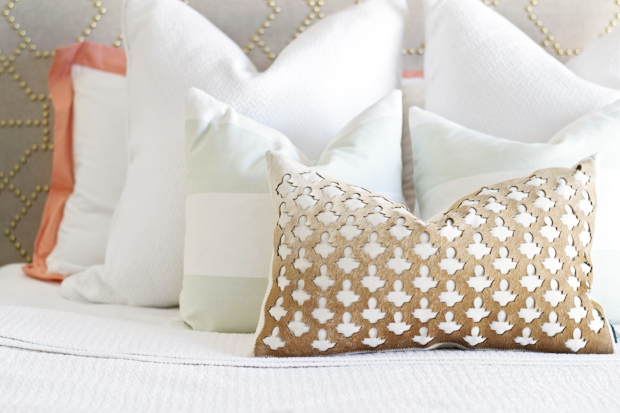
The lumbar pillow is a hair on hide from Marshalls (Tahari) I love the cut out and subtle natural ombre. 
So if you’ve been wanting to tackle a nailhead project, don’t be scared! It really is easier than it looks – dare I say, kinda fun!? 
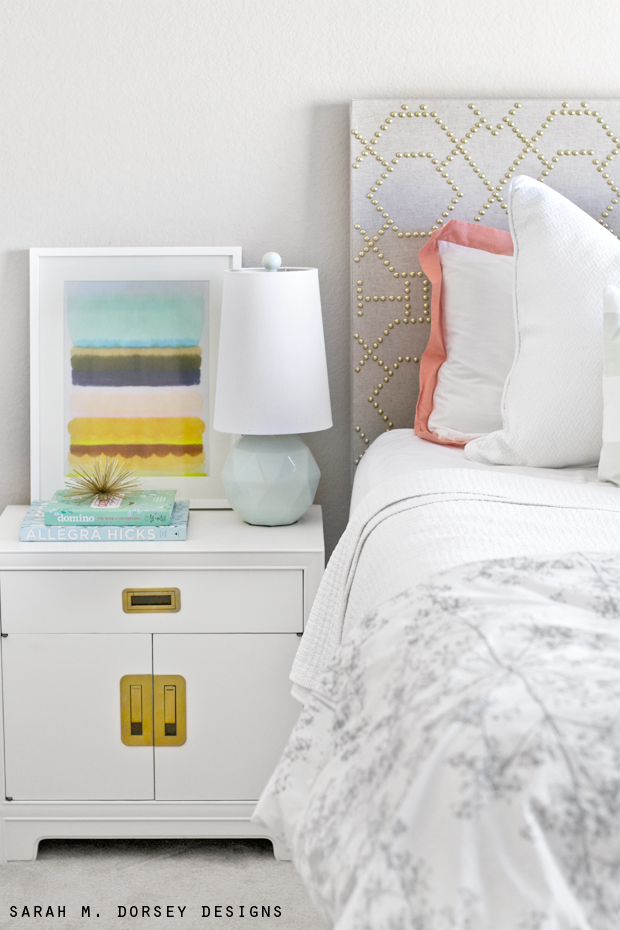
Coral shams Crane & Canopy // Stripe pillows Nate Berkus // lumbar pillow is from Marshalls // Duvet is Marimekko for Crate and Barrel a few years ago // Print is from Artfully Walls, Twos Company urchin found at the thrift store!! // lamps are from Ross. 

Bedroom// design + build// DIY TUTORIALS// furniture// Uncategorized// Uncategorized38 Comments

Subscribe

get the latest straight to your inbox

« Nailhead + Linen Headboard Sneak Peek + BHG 2015 Blogger Awards
Friday Five | 02.20.15 »

Comments

  1. Amanda says

    February 17, 2015 at 7:51 pm

    (Oops hit publish accidentally:) )
    As can always be expected from your projects, this is stunning. I can't believe the quality of your projects! And I love your new trick of using the upholstery strip, that is so clever to add a professional quality. Love!!!

    Reply
    • Sarah says

      February 18, 2015 at 1:35 pm

      Thanks so much Amanda! 🙂

      Reply
  2. Leslie B. says

    February 17, 2015 at 8:34 pm

    Very nice! I want to do something similar on a dresser. Thinking about a project involving the Rast dresser…

    Reply
    • Sarah says

      February 18, 2015 at 1:36 pm

      This would look great on a fast dresser!

      Reply
  3. Bharati S says

    February 17, 2015 at 9:06 pm

    Wove!! Headboard looks amazing!! piece of art

    Reply
    • Sarah says

      February 18, 2015 at 1:36 pm

      Thank you!! 🙂

      Reply
  4. Cassie @ Primitive & Proper says

    February 17, 2015 at 9:07 pm

    WOW! you make it look easy! it is STUNNING!!!!!! no wonder you were excited about it!

    Reply
    • Sarah says

      February 18, 2015 at 1:36 pm

      Thanks Cassie! 🙂

      Reply
  5. Shavonda Gardner says

    February 17, 2015 at 9:25 pm

    Ummmm yeah. Another knockout headboard lady. Just amazing:)

    Reply
    • Sarah says

      February 18, 2015 at 1:36 pm

      Thanks Shavonda! 🙂

      Reply
  6. Gilly Morrison says

    February 17, 2015 at 9:46 pm

    Sarah…..you just amaze me! I absolutely adore this, the best DIY headboard I have seen! You nailed it (pun intended!)

    Reply
    • Sarah says

      February 18, 2015 at 1:36 pm

      Thanks Gilly! 🙂

      Reply
  7. tansha says

    February 17, 2015 at 9:56 pm

    Wow! Great! it looks amazing!

    Reply
    • Sarah says

      February 18, 2015 at 1:37 pm

      Thanks Tansha! 🙂

      Reply
  8. Jennifer @ Dimples and Tangles says

    February 17, 2015 at 9:59 pm

    Wow, is this fabulous! Love the pre-drilling tip. I did that on a few projects and it definitely helps so much!

    Reply
    • Sarah says

      February 18, 2015 at 1:37 pm

      Pre-drilling saves SO much time!! Thanks Jennifer!

      Reply
  9. Brittany says

    February 17, 2015 at 10:45 pm

    Flawless as always. Makes me delirious and jealous;)

    Reply
    • Sarah says

      February 18, 2015 at 1:37 pm

      Thanks Brittany!! 🙂

      Reply
  10. Sandra Pace says

    February 18, 2015 at 12:46 am

    Damn your good! That is just gorgeous!

    Reply
    • Sarah says

      February 18, 2015 at 1:37 pm

      Thanks Sandra!! 🙂

      Reply
  11. Heather Freeman says

    February 18, 2015 at 4:55 am

    I mean, really? This is just great. Stunning but elegant. Love the cowhide pillow a little too much.

    Reply
    • Sarah says

      February 18, 2015 at 1:38 pm

      Thanks Heather!! 🙂

      Reply
  12. marty (A Stroll Thru Life) says

    February 18, 2015 at 12:49 pm

    Gorgeous, what a great design and the nail heads are wonderful.

    Reply
    • Sarah says

      February 18, 2015 at 1:38 pm

      Thanks Marty!! 🙂

      Reply
  13. Julia Konya says

    February 18, 2015 at 2:04 pm

    Looks so gorgeous!

    Reply
  14. For My Love Of says

    February 18, 2015 at 3:30 pm

    I wish you had your own decor line so I could just buy this! SO SO fabulous!

    Reply
  15. Brynne Delerson says

    February 18, 2015 at 4:28 pm

    You are an absolute genius!!! I love this so much! It's incredible!

    Reply
  16. luckyporcupineco.com says

    February 18, 2015 at 6:47 pm

    Sarah, you just changed my life! I did a project a few months back using nailhead trim and it was NOT pleasant in the slightest. I swore I would never touch nailhead trim again. After seeing this tutorial you have restored my faith. 😉 thanks so much for sharing!

    Reply
  17. Jennifer@The Chronicles of Home says

    February 18, 2015 at 8:53 pm

    This looks so cool, Sarah! Love that hair on hide pillow too, so interesting.

    Reply
  18. Gwen, The Makerista says

    February 18, 2015 at 11:49 pm

    Your creativity and ingenuity continues to amaze me!

    Reply
  19. Jennifer Jones says

    February 19, 2015 at 12:13 am

    Phenomenal as always DIY superstar! It looks so high end chic! Love it!

    Reply
  20. jana bek design says

    February 19, 2015 at 9:55 pm

    You are such a DIY rockstar! Love it! XX jana

    Reply
  21. Patricia says

    February 22, 2015 at 6:06 pm

    Wow, such a great job Sarah! Looks so well executed and expensive!

    Reply
  22. Mekenzie @ interiorsbykenz.com says

    February 23, 2015 at 12:50 am

    That is really pretty. What a creative idea! My brain is going on full speed now thinking of all the pattern possibilities you could do with this.

    Reply
  23. Bethany DeVore says

    February 24, 2015 at 11:56 am

    You guys are amazing! I'm not sure I have the patience for that many nailheads, but your tips are great!

    Reply
  24. Pblair says

    March 30, 2015 at 4:54 pm

    could you tell me what size nail head you used

    Reply
    • Sarah says

      March 31, 2015 at 1:01 am

      There's a link under the second photo. Thanks!

      Reply
  25. lily mills says

    May 22, 2015 at 4:40 am

    How long did this take to complete?

    Reply

Leave a Reply Cancel reply

Your email address will not be published. Required fields are marked *

Contact Me

sarahmdorseydesigns{@}gmail{.}com

Stay Updated!

Get all the latest goods straight to your inbox!

This error message is only visible to WordPress admins

Error: No connected account.

Please go to the Instagram Feed settings page to connect an account.

Must Reads

Custom Peg Board + DIY Circle Art | FrogTape

Custom Peg Board + DIY Circle Art | FrogTape

Main Level Refresh with The Home Depot

Main Level Refresh with The Home Depot

Sponsor

2016 Daily Simplified Planner

Popular Projects

It’s beginning to look like a headboard | and the winner is …

It’s beginning to look like a headboard | and the winner is …

June 8, 2012 By Sarah 3 Comments

TV Wall Trellis Stencil Progress

TV Wall Trellis Stencil Progress

April 2, 2012 By Sarah Leave a Comment

How to lenghten your cafe rod for $1

How to lenghten your cafe rod for $1

March 20, 2012 By Sarah 2 Comments

Headboard Cost Breakdown

Headboard Cost Breakdown

June 13, 2012 By Sarah 6 Comments

Large Black and White Abstract Art for the Office

Large Black and White Abstract Art for the Office

August 5, 2013 By Sarah 30 Comments

  • DIY TUTORIALS
    • design + build
    • furniture redo
    • diy in 1 hour or less
  • free printable
  • friday favorites

Disclosure

Occasionally, affiliate links are used when they are available. I do earn a small commission when items are purchased using those links. As always, I only link to things that I truly love. I also link to items that I love when an affiliate link is not available. Thanks so much!

  • Home
  • About
  • Services
  • Shop

Copyright © 2025 Dorsey Designs

MENU
  • Home
  • About
  • Services
  • Shop