Happy Friday friends! If you’re stopping by from The Shabby Creek Cottage, welcome! I’m so glad that you’re here!
I was recently given the opportunity to try Krylon Looking Glass Mirror-Like spray paint and today I’m sharing my project. I’ve been wanting to try it for a while, so I was super excited to see the result!
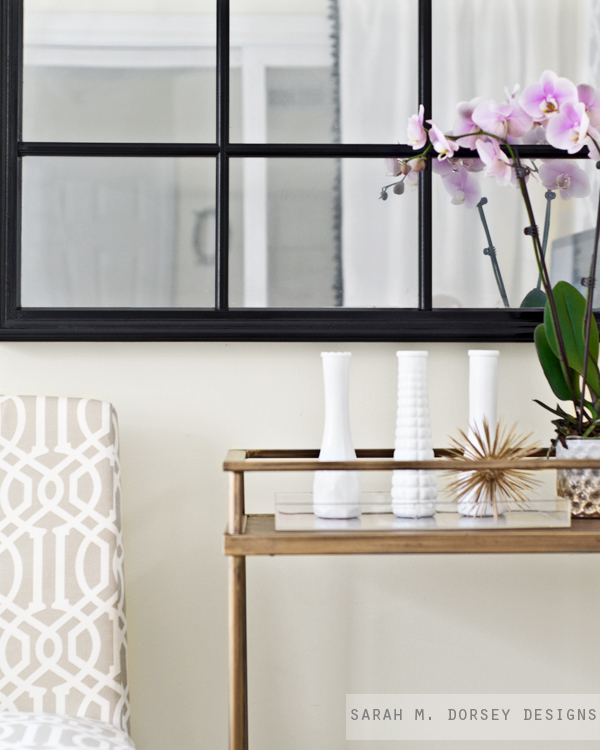
Inspired by Pottery Barn’s Eagan multi-panel mirror, we created our own, simplified version. Instead of inserting individual mirrored panels we used the existing mullions on the window and the Looking Glass spray paint for a mirrored effect.

Here’s how we did it!
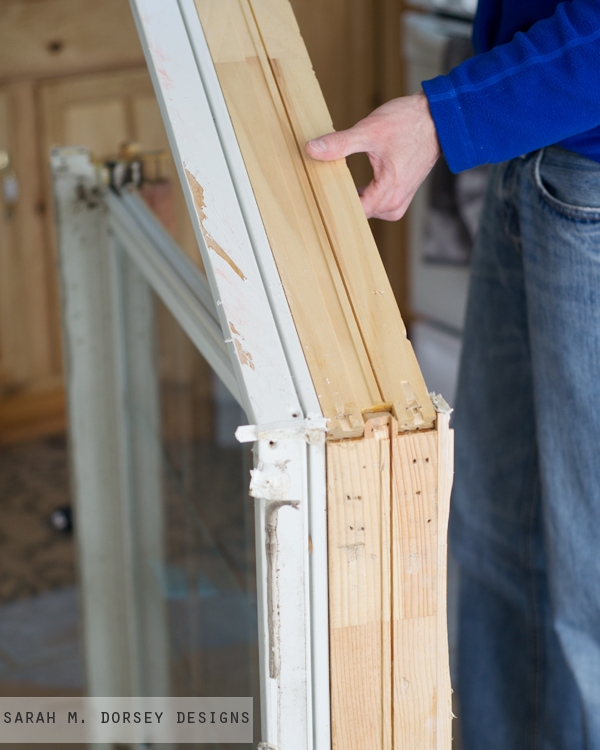
First, we carefully removed the exterior frame. Since our window was double paned, we also removed one of the panes. This would eliminate weird reflections from the side and make it look like a real mirror.
Once the exterior frame was removed, we sanded the inner frame.
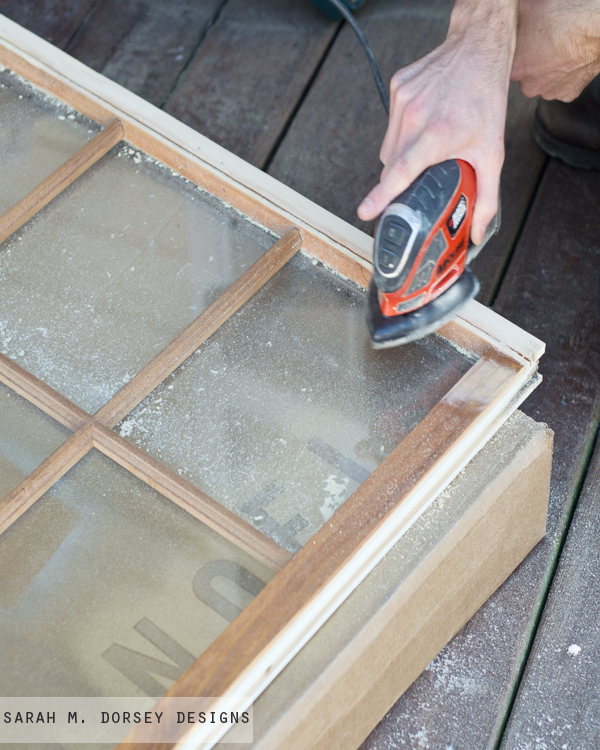
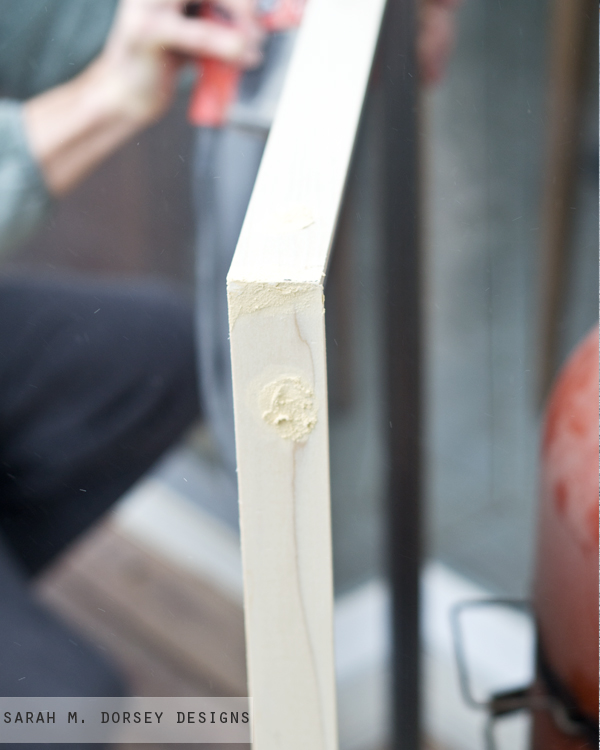
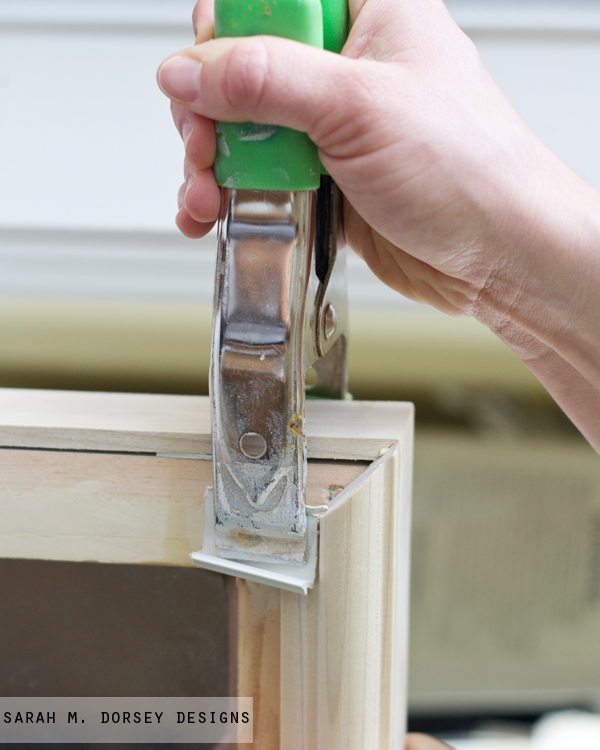
Then, we worked on the new exterior frame. Since the frame was uneven on the edge, we added a 1″ x 1/4″ poplar strip – mitered at the corner. We used screws and then wood filler to even out the imperfections. Once dry, we sanded.
Next, we added a 1 – 1/4″ piece of poplar trim to the front to give it a more finished look. I love how it seamlessly blends into the frame!
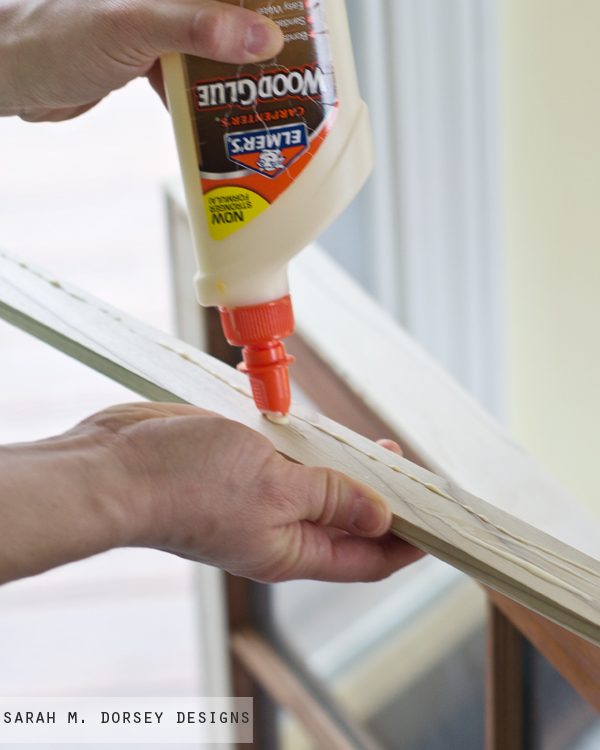
We used wood glue and clamped it around the outside of the frame. A scrap piece of plastic (or cardboard, etc.) in between the trim and clamp helps prevent the wood from denting.
After the frame was done, we were ready to paint!
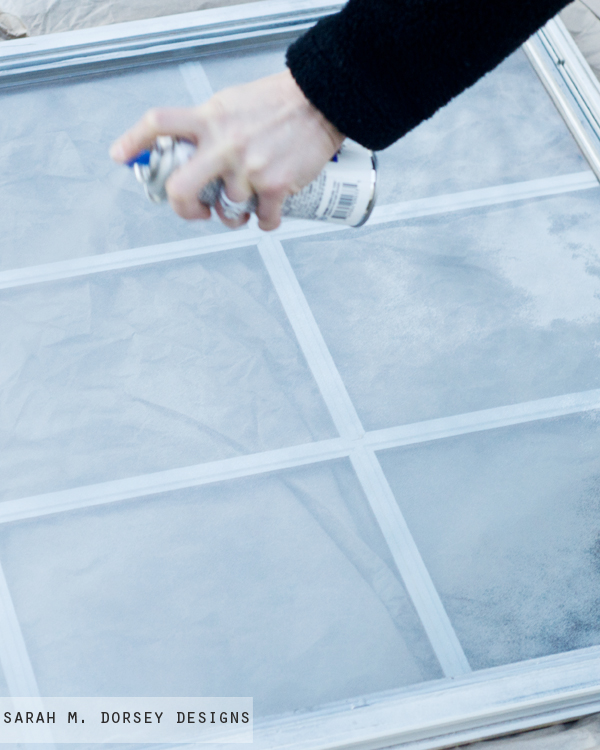
Following the instructions, the Looking Glass spray paint is applied to the back side of the glass, so we flipped the window over and gave it a good scrub. We finished with a paper towel and window cleaner to make sure it was dirt and oil free.

We sprayed 4 light coats (1 can), allowing it to dry a few minutes in between. When wet, it looks a little uneven, once it evens out, it’s dry and ready for another coat.
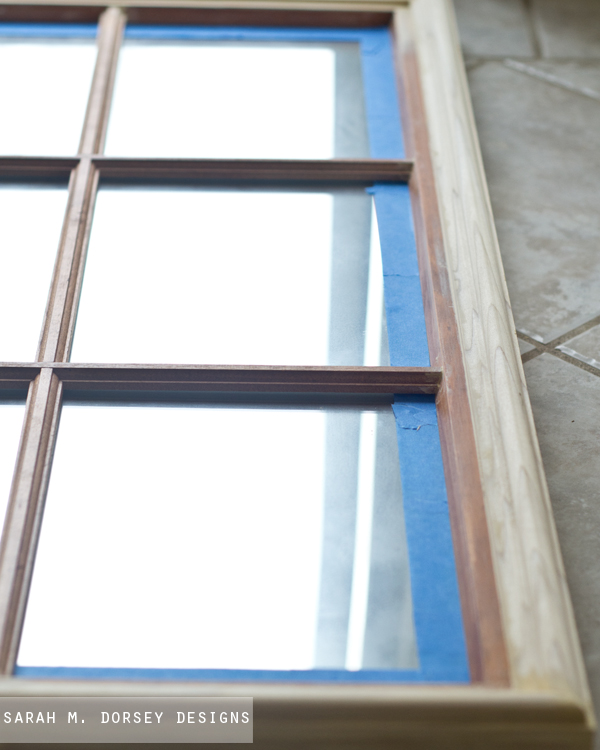
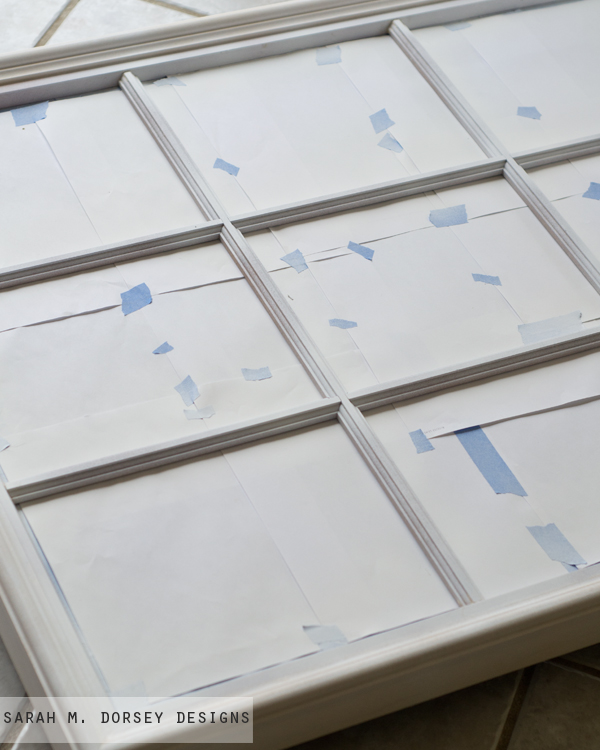
Then we painted the frame. We applied painter’s tape to the edge and tapped sheets of paper together and slide underneath the mullions.
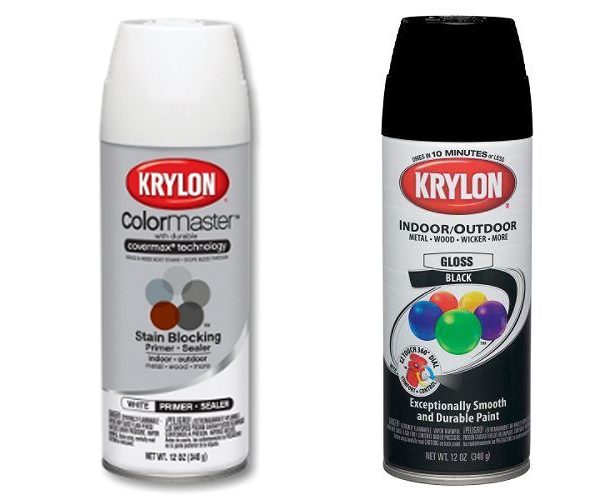
We finished it off with a glossy black, and that was it!
I’m crazy about the finished result!
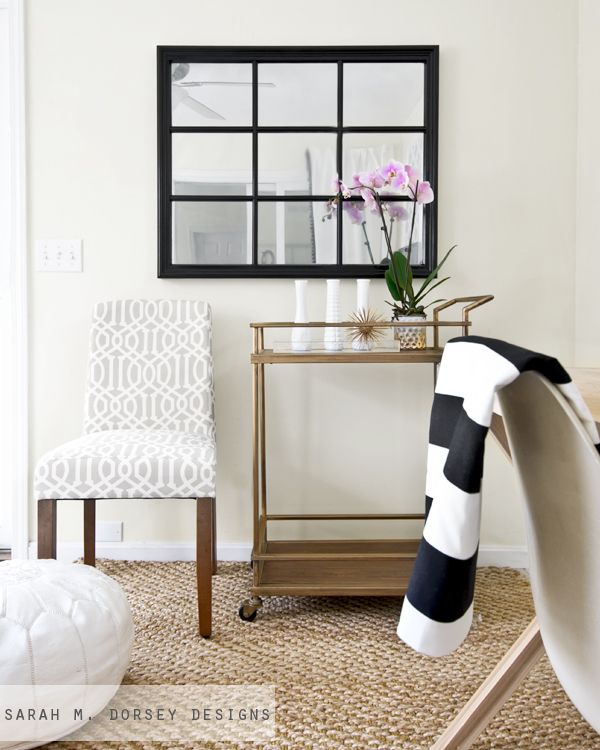
Love how the frame seamlessly blends into the existing window.
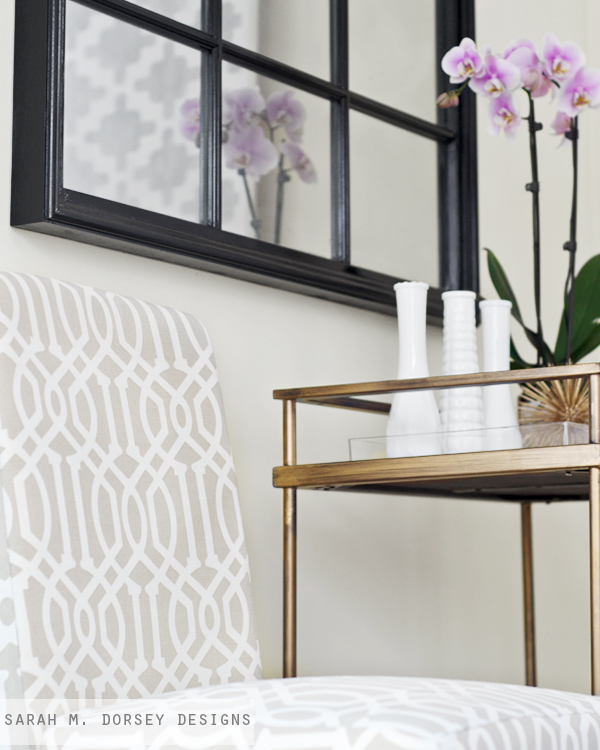
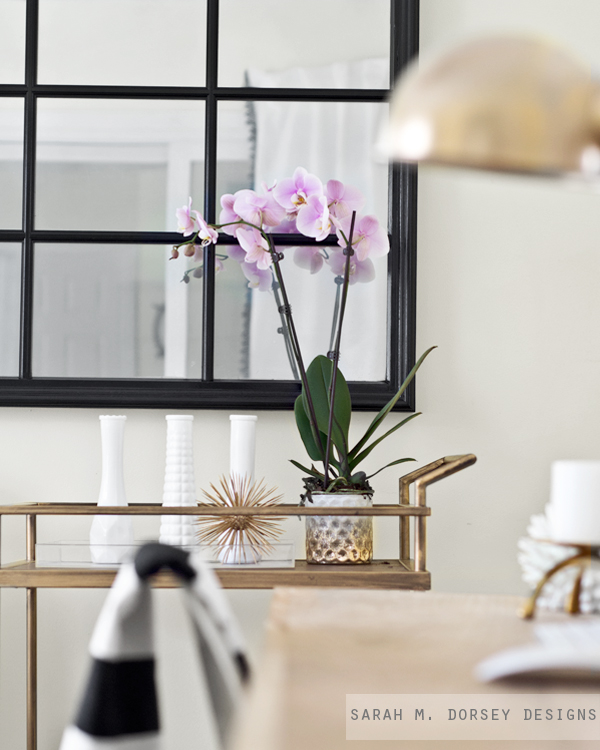
The Looking Glass spray paint has a beautiful reflective quality – it’s hard to believe that it came out of a spray can.

I LOVE the new addition to my office!! Can’t wait to finish up the rest of my space!
p.s. since this is one of the first looks of my office, it’s a “4 seasons” sunroom, so there is an exterior sliding door between this room and the rest of the house (just in case you were confused about the reflection 🙂
Make sure to stop by Desiree’s – The 36th Avenue to see her awesome project using Krylon Looking Glass spray paint – you won’t want to miss it!!
** I was provided Krylon Looking Glass spray paint, as always, all opinions are completely my own 🙂
Sarah, I LOVE this! I've been wanting to DIY something like this for ages. I'll have to keep my eye out for an old window 🙂
Great tutorial and it looks great!
it looks awesome! i have used this paint on some frames with glass and love how it looks!
I've had looking glass in my paint closet for almost a year and have never used it! This is a great idea. My friend just bought the bar cart too and wants me to replace it with glass. Maybe I could use the looking glass spray for that 😉
Thanks for the idea! Looks awesome!
This is beautiful…I love how the black really makes it pop! 🙂
Absolutely LOVE this project Sarah! You are always so creative. I love the texture the glass gave the mirror. So trying this myself! 🙂
LOVE! I've seen the looking glass spray used a lot for "faux" mercury glass, but using it for its intended purpose is gorgeous. Like you said – I can't believe that came out of a can of spray paint!
Fan-Freakin-tastic
yo, you and your incredible projects! I seriously need to recreate this, it turned out absolutely perfect!
It looks so beautiful Sarah! I love the way it turned out!
wow…that's amazing! so much time and effort and detail…such a gorgeous result.
That's pretty amazing!
Such a beautiful project. I'm hoping to try it soon, but all the windows are getting pretty expensive where we live…everyone is figuring out that you can use them to make incredible projects!
Just found your site & glad I did. What an amazing project! I didn't know about this kind of paint & I love it. Now, can't wait to try it, thanks.
WOW! This looks stunning! I love so many of your projects. Your blog and all the wonderful things you make was what pushed me into (finally) taking an interior deisgn class. Its online and only 3 months, but its a great start. I just wanted to let you know how much you inspire me. Thank you for that.
I love the way the mirror window turned out I have no window in my bathroom & this would be perfect for my bathroom Thanks for the tutorial
Wow, the finished product looks really good! I am remodeling my bathroom and new mirrors would really improve the look of it! How easy of a job is this?
Holly James | http://www.misterwindowanddoor.com/
Hi Holly! It was pretty easy, a little time consuming, but could be easily done in a weekend. The reflection in the mirror isn't clear, so better as an accent verse a mirror you'd be using everyday to get ready.
I love the look of your mirror window I don't have a window in my bathroom & this would be a perfect idea for my bathroom thanks for your post
This is stunning…I love in what way the black actually styles it modern!
Thank you so much!!