• Home
  • About
  • Services
  • Shop
    • Bloglovin
    • Email
    • Facebook
    • Instagram
    • Pinterest
    • Twitter

Dorsey Designs

DIY and Interiors by Sarah + David

  • Home Tour
  • DIY TUTORIALS
  • friday favorites
  • design + build
  • art

get the latest straight to your inbox

Designer Inspired Pillow Shams | Stenciled Ikea Pillow Shams for only $3 each!

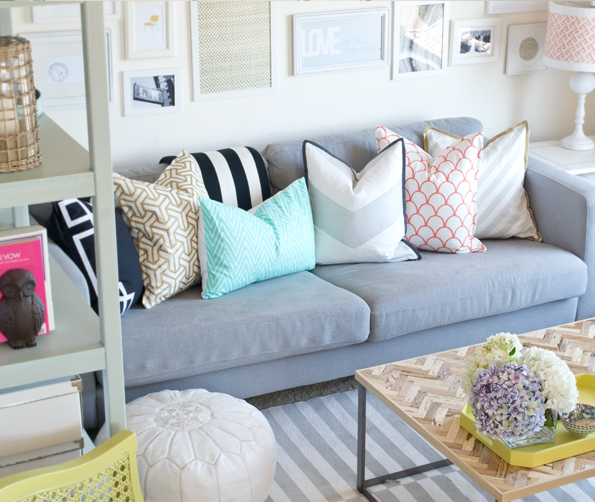
Hi! I hope that you had a great weekend!! Today I’m sharing a few super affordable pillow shams – I made them before we moved, so photos are taken from our CA home – if you are wondering if we have a gallery wall/shelving/rug etc. Not yet, but hopefully soon!

In case you missed the tutorial on Infarrantly Creative, read on to see how I made them!

I love this because you can simplify it to be finished in about an hour or you can spend a little more time to have a completely custom look! Want to know the best part? It only cost about $3-5 per pillow sham!

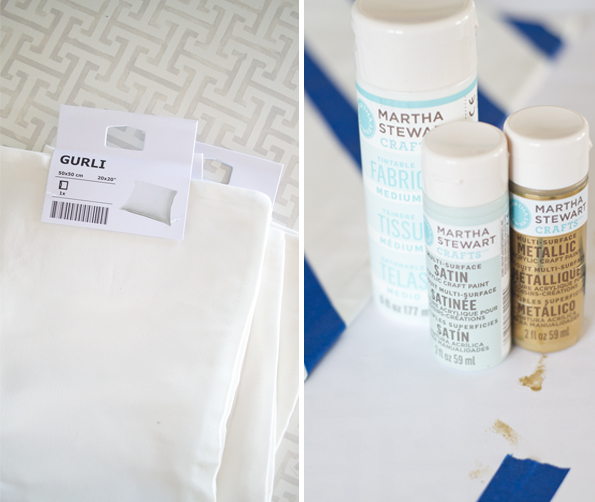
I started with $3 white pillow shams from Ikea. Then I picked up some fabric paint and fabric medium from Michaels. I decided to purchase the colors that I didn’t have and also use leftover latex paint with fabric medium so that it would be washable after heat setting.
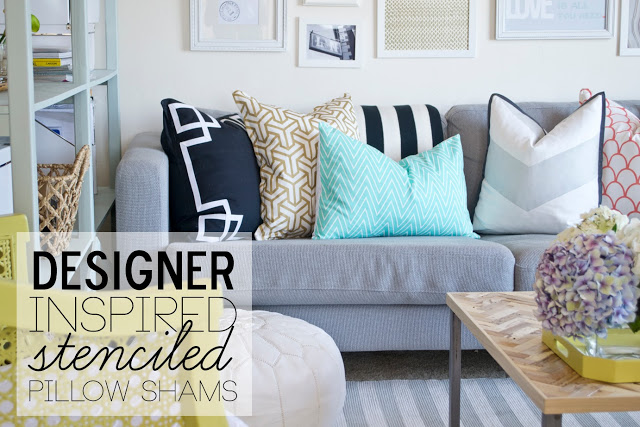
For my inspiration, I turned to my Pinterest boards (always a great way to see trends in what you like!) and picked the a few designs that I loved from Caitlin Wilson Textiles and Sarah Swanson’s home. 
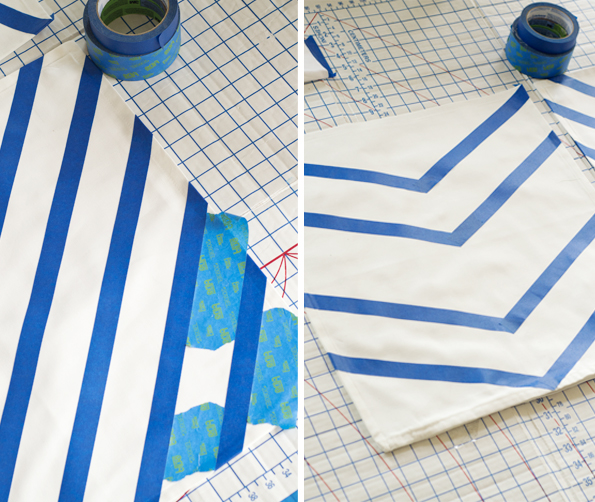
I started with two striped designs. It really doesn’t get easier that this! For the diagonal stripes, I didn’t even have to measure! 🙂 I simply determined the width between stripes and offset it with two pieces of tape to keep the line straight and then laid the next piece of tape. For the wide chevron, I did measure, but still super simple! 
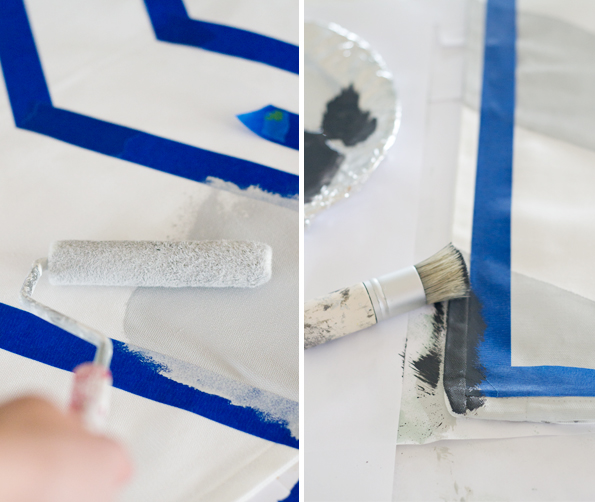
The most important thing is to press the tape down firmly so that the paint doesn’t seep underneath the lines. Then I mixed up my paint, dipped my roller in, rolled off the excess (also important to get clean lines) and rolled away from the painter’s tape to avoid build up around the tape. 
After that dried, I created an inexpensive trim by taping off the edge and brushed on a contrasting color. 
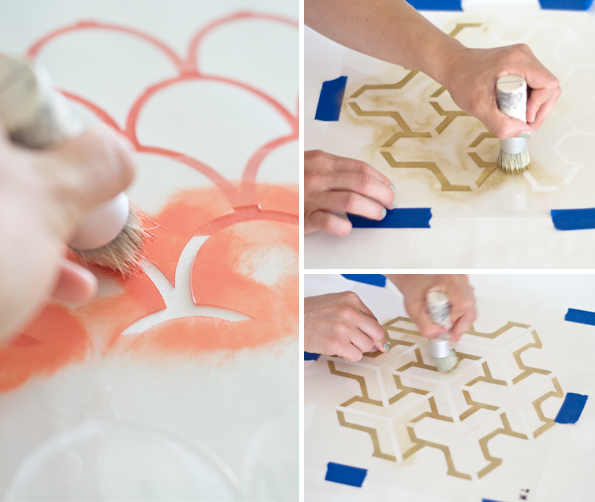
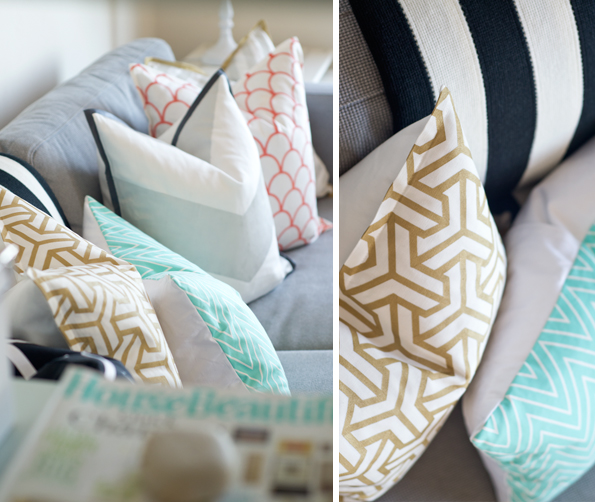
Now for my favorite part! I decided to create my own stencils based on Caitlin Wilson’s Hong Kong and Scallop fabrics. Download my silhoutte files for free Hong Kong inspired HERE and HERE (2 part stencil) Scalloped HERE. I drew the patterns in Adobe Illustrator and cut the stencil on my Silhouette Cameo. You could also pick up a few stencils at your local craft store for a simpler method. 
I’ve been making stencils for about a year and have learned that not everything can be easily translated into a stencil. To get the thin gold lines instead of a gold fill on the Hong Kong inspired stencil, I created a two part stencil, the first to capture the outer edge of the cube, and the second to finish the inside. A little extra effort, but I was able to achieve the exact look I was going for, so definitely worth it! 
If you’ve never stenciled before, here are a few tips. 1. Lay and tape paper over your table, tape the sham down, center the stencil and use painters tape to secure your stencil in several places to avoid it moving 2. dip your brush in paint and wipe off excess on a paper towel before starting, you want a small amount of paint on the brush to avoid it going underneath the stencil. 3. Hold the stencil down with your other hand as you go to prevent it from coming up 4. Carefully line up the next row so that the pattern stays consistent. 
Allow the paint to dry completely and heat set with a white cloth between the pillow and iron on a low setting. 
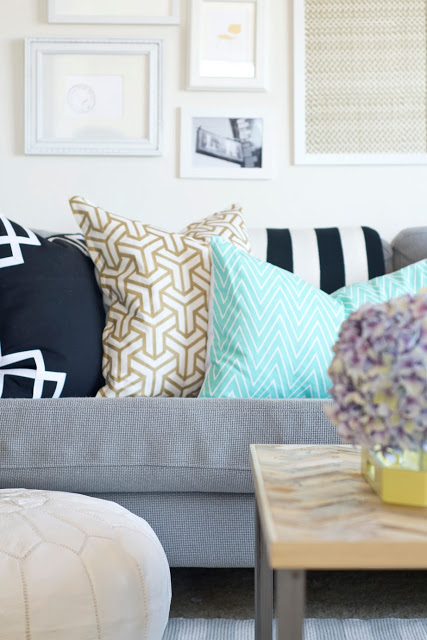
I decided to mix the painted shams with my DIY greek key sham and a pillow made out of the left over fabric from my Mid Century Modern refurbished chairs, Caitlin Wilson’s tall mint chevron. 
I didn’t paint the backs, but that would be a great way to add a contrasting color or pattern to have a reversible sham! 
I’m loving our new pillow shams! Most of all, I LOVE the price! 
Here’s the breakdown:
Ikea Gurli Sham $3, qty 4 $12
Paint and Fabric Medium $6 (with coupon at Michaels) 
Total: $18 
I had the fabric for the mint chevron pillow left over and the Greek key sham was a previous DIY, but this project could be easily done for under $30 depending on your fabric selections! 
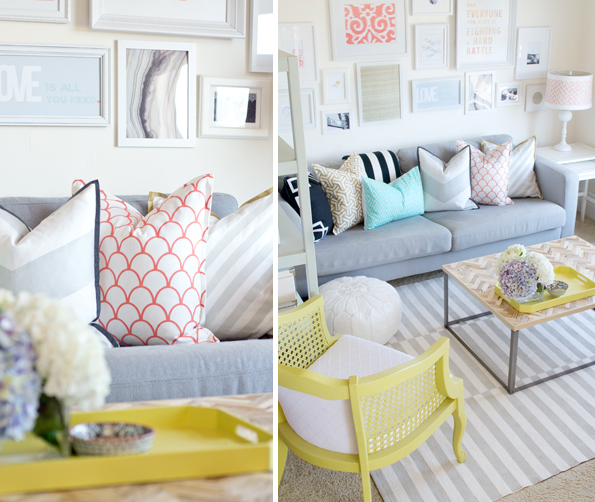
Other DIY projects in the room, chartreuse caning chair, herringbone driftwood coffee table, painted offset striped rug, custom shelving for $35, nesting tables with a greek key top, milk glass lamp with stenciled shade. 

DIY TUTORIALS// Pillows// Uncategorized// Uncategorized18 Comments

Subscribe

get the latest straight to your inbox

« Final CA Home Tour
Layered Headboard for only $20 | Contributing Article at Houzz »

Comments

  1. Amanda @ Our Humble Abode says

    November 4, 2013 at 7:24 pm

    The contrasting edge seals the deal. Looks so clean and offsets the design perfectly. Adding it to my to do list. 🙂

    Reply
  2. Sandy says

    November 4, 2013 at 11:04 pm

    Gorgeous pillow covers! You are sooo talented.

    Reply
  3. Julia Konya says

    November 5, 2013 at 12:11 am

    Gorgeous! You are the master of stencils. I really want to try some DIY silhouette stencils too.

    Reply
  4. Craftivity Designs says

    November 5, 2013 at 12:19 am

    Hey Sarah! Do you use IKEA inserts or do you buy other inserts? If so which IKEA insert do you buy? Your pillows always look the right combo of fullness and comfort.
    – Lora @ Craftivity Designs

    Reply
    • Sarah says

      November 5, 2013 at 1:10 pm

      Hi Lora! The pillow shams are from Ikea, here is the link http://www.ikea.com/us/en/catalog/products/50251717/#/30245299

      I like my pillow shams to be about an inch smaller than the pillow insert, it helps them to look more full.

      Reply
  5. Crystal says

    November 5, 2013 at 3:00 am

    Beautiful job on these pillows.

    Reply
  6. Sarah says

    November 5, 2013 at 6:56 am

    So gorgeous. I want.

    I bought some IKEA pillow covers months ago, and have been wanting to paint on them but haven't painted on fabric before. Do you have a certain brand of fabric medium that you like?

    Reply
    • Sarah says

      November 5, 2013 at 1:41 pm

      Hi Sarah! I've only tried martha stewart from Michaels, so I don't have anything to compare it to, but I've been happy with it 🙂

      Reply
    • Sarah says

      November 5, 2013 at 2:16 pm

      Great to know, thanks!

      Reply
  7. Amy Kelly says

    November 5, 2013 at 2:52 pm

    Holy wow. When I saw the title of the post "stenciled pillow shams" and the first photo, I had no idea which of the pillows had been stenciled. They look FABULOUS! I cannot believe how designer they look for that price tag. LOVE!

    Reply
  8. Emily @ DavenportDIY says

    November 5, 2013 at 2:59 pm

    These are gorgeous- I can't believe that you painted them. They look so crisp and not like paint at all. Nice job!

    Reply
  9. Kim says

    November 5, 2013 at 8:53 pm

    These came out fantastic. Would you be willing to share the studio file for the items you cut with your Silhouette?

    Reply
    • Sarah says

      November 5, 2013 at 9:22 pm

      Hi Kim! I just uploaded my silhouette files. They are next to the stenciling process image. Hope this helps 🙂

      Reply
  10. Neely says

    November 5, 2013 at 9:00 pm

    Those pillows look awesome! I've been looking for some ideas for inexpensive pillows for my sofa, and that's a great idea! Do you know if Michaels sells a scallop stencil or know where I can get one? Unfortunately, I don't have Illustrator.

    Reply
  11. House Envy says

    November 5, 2013 at 11:20 pm

    These look awesome! Love the stencil designs you made! So creative and such a great price for designer looking fabric!

    Laura

    Reply
  12. Bethany DeVore says

    November 6, 2013 at 11:36 am

    You seriously amaze me! Those pillows are fantastic. I'm especially loving the gold/geometric one. I may try making my own stencil with my silhouette too. Thanks for the inspiration!

    Reply
  13. Haley Crawford says

    March 14, 2014 at 12:47 am

    What material did you use to make your stencils with on the Silhouette?

    Reply
  14. ic12345 says

    September 6, 2014 at 7:59 pm

    Great job! I dont have a silhouette machine and im not too excited about cutting the stencil out manually…would you be interested in selling a couple stencils?

    Reply

Leave a Reply Cancel reply

Your email address will not be published. Required fields are marked *

Contact Me

sarahmdorseydesigns{@}gmail{.}com

Stay Updated!

Get all the latest goods straight to your inbox!

This error message is only visible to WordPress admins

Error: No connected account.

Please go to the Instagram Feed settings page to connect an account.

Must Reads

Custom Peg Board + DIY Circle Art | FrogTape

Custom Peg Board + DIY Circle Art | FrogTape

Main Level Refresh with The Home Depot

Main Level Refresh with The Home Depot

Sponsor

2016 Daily Simplified Planner

Popular Projects

Lucite Framed Scarf DIY

Lucite Framed Scarf DIY

March 23, 2016 By Sarah 5 Comments

Dining Room Update | Chippendale Chairs + Renter Friendly Accent Wall

Dining Room Update | Chippendale Chairs + Renter Friendly Accent Wall

March 12, 2015 By Sarah 16 Comments

art above the headboard finished!

art above the headboard finished!

May 15, 2012 By Sarah 27 Comments

TV Stand with Pivoting Door to Hide Electronics

TV Stand with Pivoting Door to Hide Electronics

July 27, 2012 By Sarah 11 Comments

MBR Headboard Update

MBR Headboard Update

April 10, 2012 By Sarah 2 Comments

  • DIY TUTORIALS
    • design + build
    • furniture redo
    • diy in 1 hour or less
  • free printable
  • friday favorites

Disclosure

Occasionally, affiliate links are used when they are available. I do earn a small commission when items are purchased using those links. As always, I only link to things that I truly love. I also link to items that I love when an affiliate link is not available. Thanks so much!

  • Home
  • About
  • Services
  • Shop

Copyright © 2025 Dorsey Designs

MENU
  • Home
  • About
  • Services
  • Shop