• Home
  • About
  • Services
  • Shop
    • Bloglovin
    • Email
    • Facebook
    • Instagram
    • Pinterest
    • Twitter

Dorsey Designs

DIY and Interiors by Sarah + David

  • Home Tour
  • DIY TUTORIALS
  • friday favorites
  • design + build
  • art

get the latest straight to your inbox

Striped Etched Glass Canisters | Tutorial

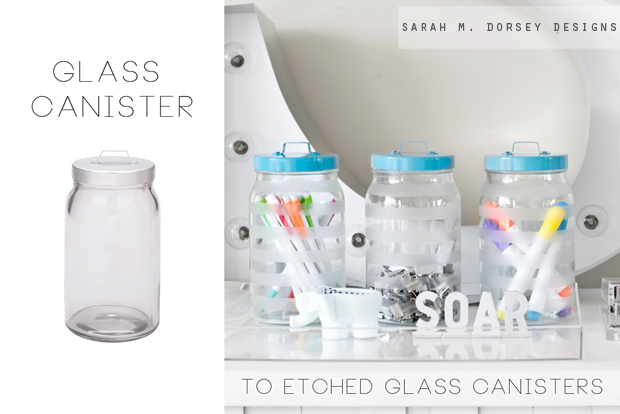
If you saw my large cork board tutorial at Infarrantly Creative last week, you may have noticed a few etched glass canisters, today, I’m going to share how to make them! 

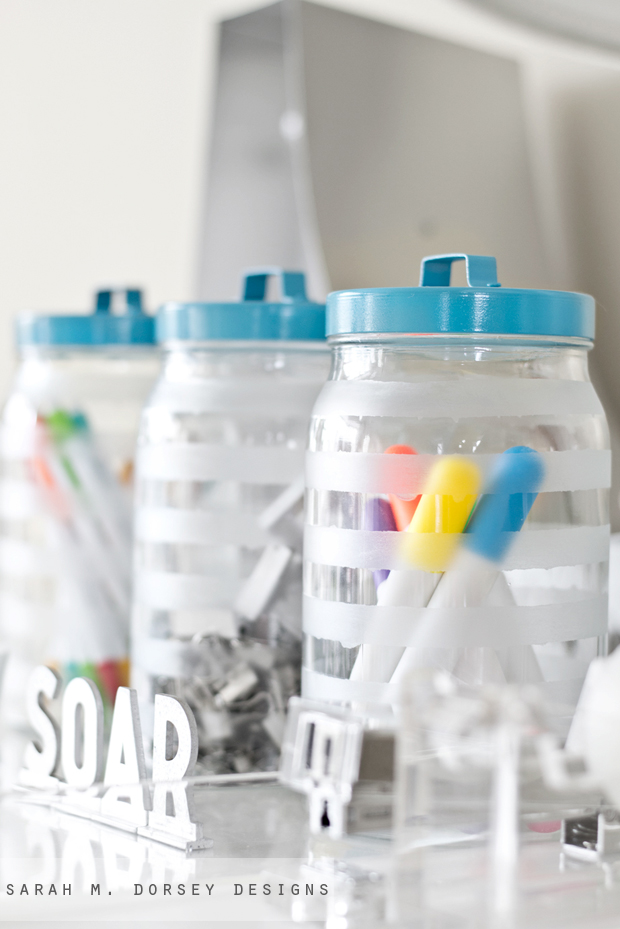
If you’re looking for a stylish way to keep your office accessories organized but within easy reach – these etched glass canisters might be the perfect solution! The etched glass partially obscures the view while adding a design element to the glass. In a few hours, with minimal effort, you can have your own customized glass canisters! These would be perfect organizing office odds and ends, bath products, craft supplies, etc. Today, I’m going to show you how to make your own with a simple stripe pattern and colorful lid. At just a few dollars each, these are super affordable! 


Materials:
Glass canisters (I used Ikea Burken)
Painters tape (I used 1 3/8″ cut into .5″ sections (two .5″ sections per piece)
Etching cream (I used less than 1/4 of the jar, so a smaller size would work too) 
Plastic scraper 
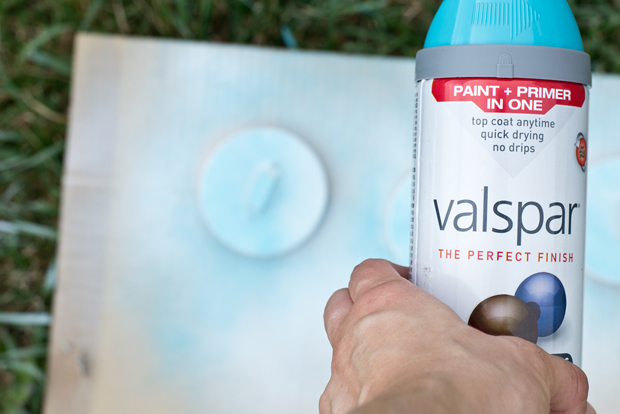
Spray paint (I used Valspar Exotic Sea, Gloss)
Gloves / Safety Googles when working with etching cream

1. First, prepare the painter’s tape by cutting it into .5″ sections.


2. After washing and drying your canister, apply a strip of painter’s tape at the bottom.


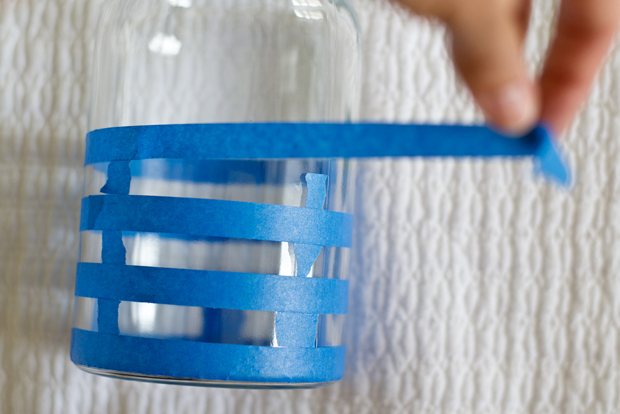
3. Apply small pieces of .5″ painter’s tape as a spacer.

4. Once all of the tape is laid out, remove the spacers.


5. Smooth the painter’s tape with a plastic scraper. It is important that the tape is securely bonded to the glass so the etching cream cannot seep underneath.

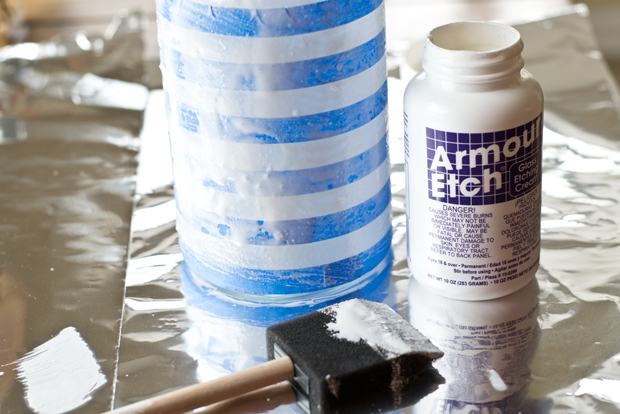
6. Apply the etching cream with a brush. Make sure that it is fairly thick and has even coverage – this prevents brush strokes. Let the etching cream sit following the manufacturer’s instructions. Be careful not to touch the etching cream with your skin, wear gloves if you’re going to come into contact.


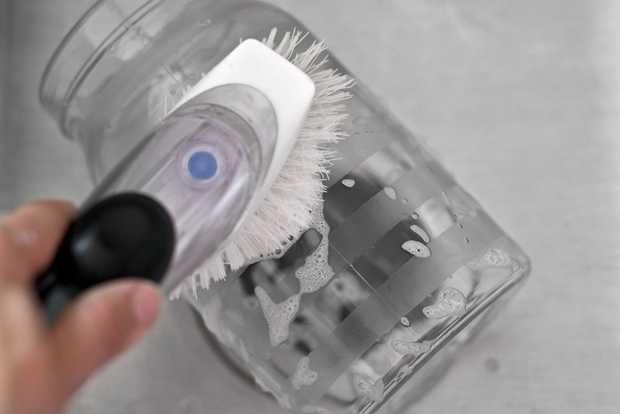
7. Once the etching cream has set (I let mine sit for about 45 minutes), wash off all excess with water. (Etching cream is safe on stainless sinks, but not all materials, if yours is different, research first)


8. Remove the painters tape and wash canister with soap, water and a utility brush. (Once the etching cream is removed, the finish is permanent and ready to use)


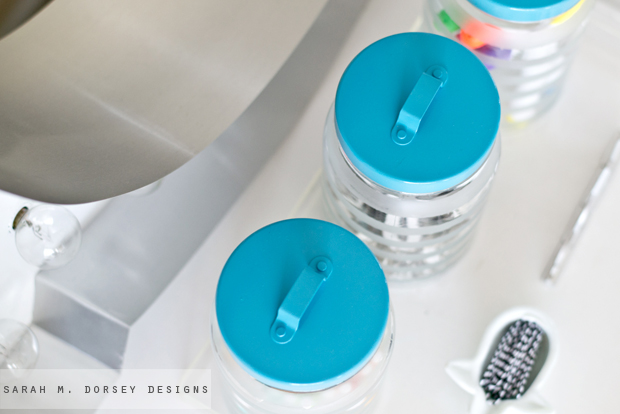
9. If desired, paint the lid with spray paint. 

Load up with your favorite office accessories and start organizing!

The Ikea Burken canisters have a small handle – making it easy to take the lid on and off.

This project can be easily customized with different tape patterns, addition of text, or lid color. So get creative and organize your clutter!
Also in the photo:
Large marquee letter here // credenza with overlays here // gold geometric lamps here 
—
I hope that you had a great weekend! Mine was spent grouting and finding thrifted/vintage treasures. It was Treasure Sale day at my Mom’s work, again she rocked the bidding! She had a little more competition, but she got the last bid in right as time was called (auction was silent bid style). We loaded up the truck and trailer with a mid century modern dining table/chairs, china cabinet, project sofa, and bar cart. It was a good weekend! Make sure to follow on Instagram to see our recent finds, projects, and Annabelle updates!

DIY TUTORIALS// Uncategorized// Uncategorized10 Comments

Subscribe

get the latest straight to your inbox

« Friday Five
Master Bath Plans + My Design Thought Process »

Comments

  1. Cassie @ Primitive & Proper says

    June 23, 2014 at 2:24 pm

    these are gorgeous!!!! i love the clean lines and i just said to sarah "only sarah dorsey can make jars look so pretty!"

    Reply
  2. Beth of designPOST Interiors says

    June 23, 2014 at 2:51 pm

    Ok now I can handle this kind of project!

    Reply
  3. Elizabeth @ The Little Black Door says

    June 23, 2014 at 4:05 pm

    I saw your great find yesterday on Instagram. Score!

    Reply
  4. Emily McCauley says

    June 23, 2014 at 4:47 pm

    I love these and have been wanting to use etching cream for a while, thanks for the inspiration!!

    Reply
  5. Katja | Shift Ctrl Art says

    June 23, 2014 at 5:05 pm

    This is so pretty. I recently used one of these in my kitchen and painted the lid too. I love the strong shape of this container!

    Reply
  6. Julia Konya says

    June 24, 2014 at 1:50 am

    This would be perfect for my daughter's hair clips. Looks so pretty

    Reply
  7. Carrie Waller says

    June 24, 2014 at 12:06 pm

    So cute, Sarah!! Seems a lot simpler than I thought. Can't wait to try it out =) Also, I'm so jealous of your new MCM goodies!!

    Reply
  8. Gwen, The Makerista says

    June 24, 2014 at 2:02 pm

    Love these!

    Reply
  9. Lily L-M says

    June 24, 2014 at 3:00 pm

    Just discovered your blog and is this a great way to start! Love this DIY!

    x Lily
    http://whilemyboyfriendsaway.blogspot.com/

    Reply
  10. Auralee says

    June 25, 2014 at 5:19 pm

    Looks very pretty!

    Reply

Leave a Reply Cancel reply

Your email address will not be published. Required fields are marked *

Contact Me

sarahmdorseydesigns{@}gmail{.}com

Stay Updated!

Get all the latest goods straight to your inbox!

This error message is only visible to WordPress admins

Error: No connected account.

Please go to the Instagram Feed settings page to connect an account.

Must Reads

Custom Peg Board + DIY Circle Art | FrogTape

Custom Peg Board + DIY Circle Art | FrogTape

Main Level Refresh with The Home Depot

Main Level Refresh with The Home Depot

Sponsor

2016 Daily Simplified Planner

Popular Projects

diy painted morrocan rug finished!!

diy painted morrocan rug finished!!

May 24, 2012 By Sarah 44 Comments

Ikat Chevron Office Chair ReUpholstery

Ikat Chevron Office Chair ReUpholstery

February 11, 2014 By Sarah 26 Comments

Guest Bedroom Headboard Progress

Guest Bedroom Headboard Progress

June 7, 2012 By Sarah 2 Comments

Battle Me Vs. Airbrush

Battle Me Vs. Airbrush

April 27, 2012 By Sarah 2 Comments

Weekend Find: Cane Chair

Weekend Find: Cane Chair

August 20, 2012 By Sarah 9 Comments

  • DIY TUTORIALS
    • design + build
    • furniture redo
    • diy in 1 hour or less
  • free printable
  • friday favorites

Disclosure

Occasionally, affiliate links are used when they are available. I do earn a small commission when items are purchased using those links. As always, I only link to things that I truly love. I also link to items that I love when an affiliate link is not available. Thanks so much!

  • Home
  • About
  • Services
  • Shop

Copyright © 2025 Dorsey Designs

MENU
  • Home
  • About
  • Services
  • Shop