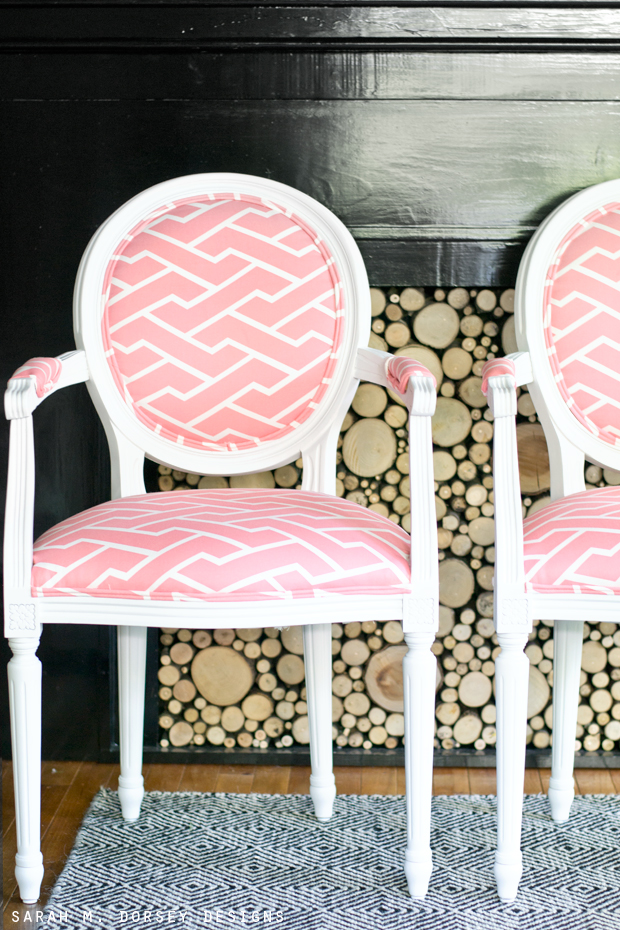
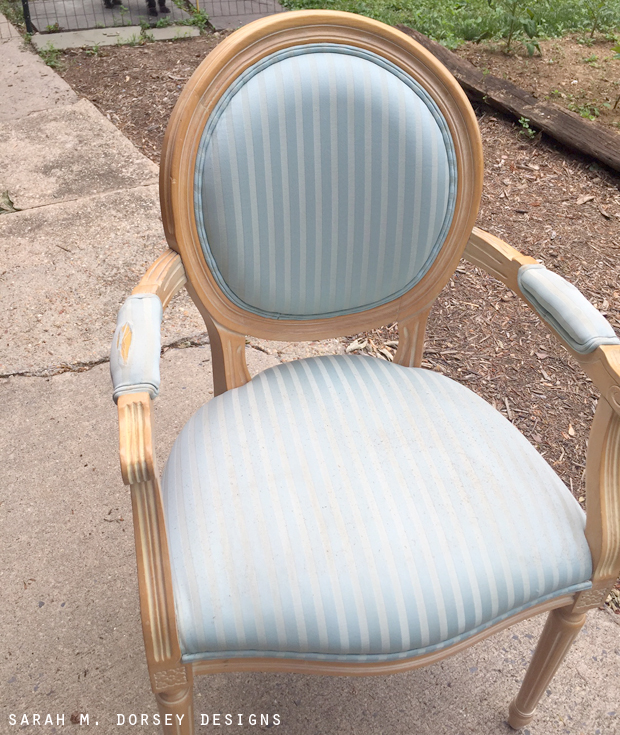
Over the weekend, I finished a pair of Louis chairs! Our home is currently a mess – getting ready for paint (see the before here). So, I photographed them in front of our faux fireplace, but they will most likely end up in my office, the guest bedroom or dining room!
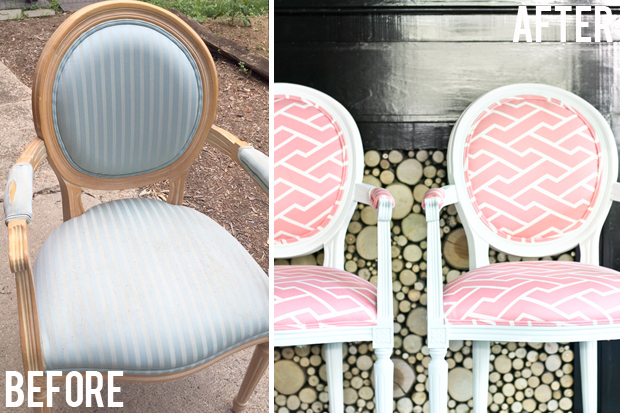
After finding Kayla Taylor on Instagram and seeing her chairs, I knew that I had to have them! So, as soon as I found my own Louis chairs, I knew exactly how I wanted to refurbish them! By the way, if you’re not following Kayla, make sure to do so – tons of inspiration!
I won’t be sharing a full tutorial on how to reupholster a Louis chair, but here are my general tips and must haves. If you have any specific questions, feel free to leave in the comments 🙂
Louis chairs are probably one of the easiest things to reupholster (and get a great result!) You simply pull it apart and put it back together how you took it apart. The only tricky part is the area around the legs on the seat (I followed the Y release cut instruction (for the back legs) in Spruce Upholstery book)
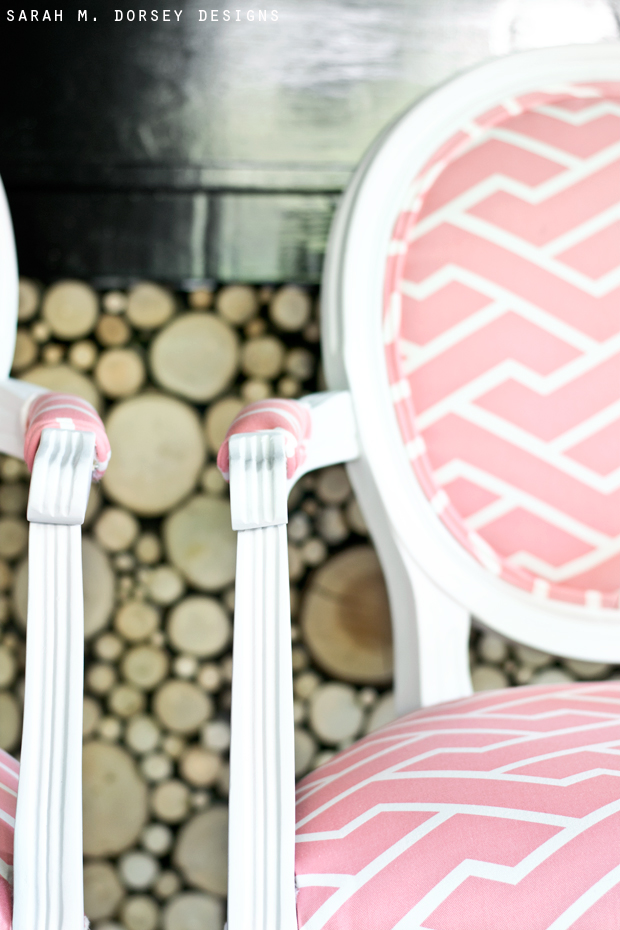
For a how to, I recommend Jenny’s tutorial series and Spruce Upholstery book. I didn’t follow either exactly, but it’s a great place to get started! Like I said above, it’s fairly easy. Just staple close to the edge (typically working evenly on all sides) and pull tight. Cut the excess fabric with an xacto knife and cover staples with double cord welting (if you sew, it’s pretty easy!) or, I’ve heard that it’s pretty affordable to get done at a local seamstress!
Stripping fabric:
– Take photos as you take it apart so you remember how things go back.
– Here are the tools that I like to use when stripping the old upholstery.
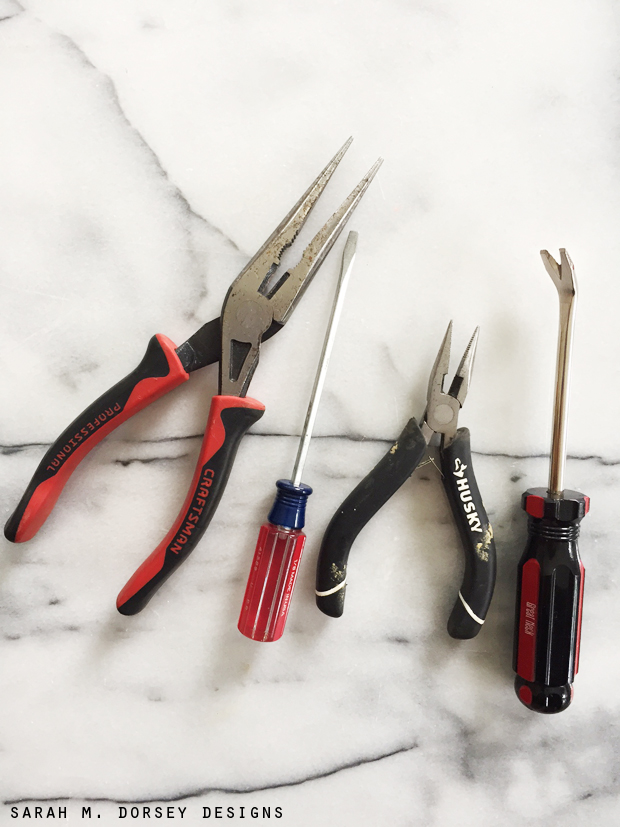
Needle nose pliers, small thin tip screw driver (makes it easier to get under tight staples), small needle nose pliers, and tack puller. You should also wear gloves and safety googles to protect your hands and eyes.
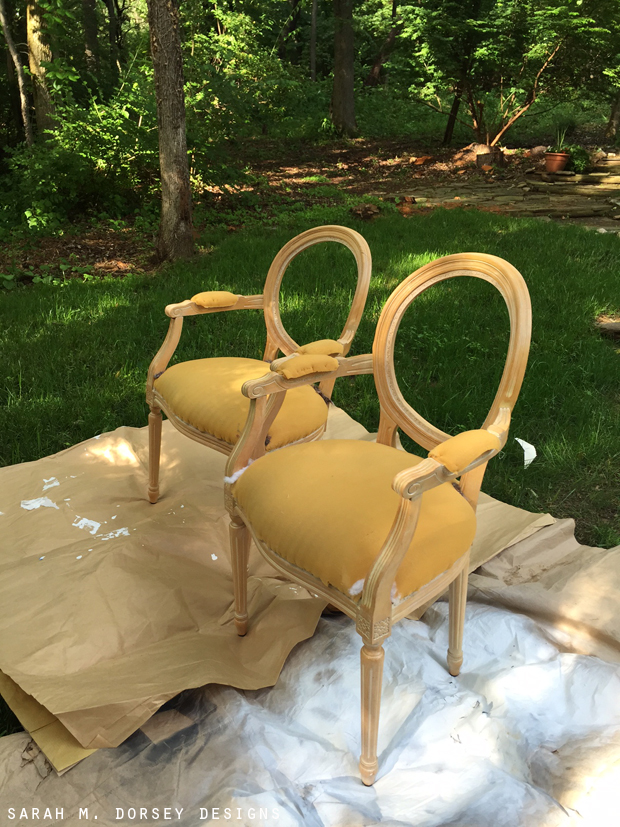
Sanding and painting:
After sanding with foam block and removing the dust with a cloth, I sprayed Kilz Primer and Rustoleum Satin enamel. Satin (versus gloss) is the perfect hide to conceal any imperfections! I decided to leave the foam since it wasn’t very old, and I wanted to save a step, but sometimes replacing the foam is essential.
Upholstering:
– When applying the new fabric. Staple on all four sides and work out to the edge (leave the corners last). Apply a few sub staples (at an angle so they are easier to pull if needed) to get started, hammer in place when finished, or pull and re staple.
– Buying this stapler and air compressor was life changing. If you upholster a good bit, it’s definitely a good investment!
– Applying a row of staples, without any gaps is important to avoiding gapping fabric.
– Pull fabric with palms verse fingers to get a smooth finish. Cut the fabric so you have plenty to pull, this also helps give a smooth, professional finish.
– Use a fabric that is easy to upholster with. So far, my favorite has been Caitlin Wilson’s cotton canvas. It’s easy to grab when you’re pulling, smooths well, and has a great weight. Generally, thicker fabrics are easier to work with than thin fabrics.
– I like to apply the double cord welting with a fast grab fabric glue – I like Fabri Tac.
– You will need about one yard of fabric per chair. I purchased two yards and had a little left over. I cut at a bias (diagonal) across the entire 2 yards for the double cord welting.
One more before:
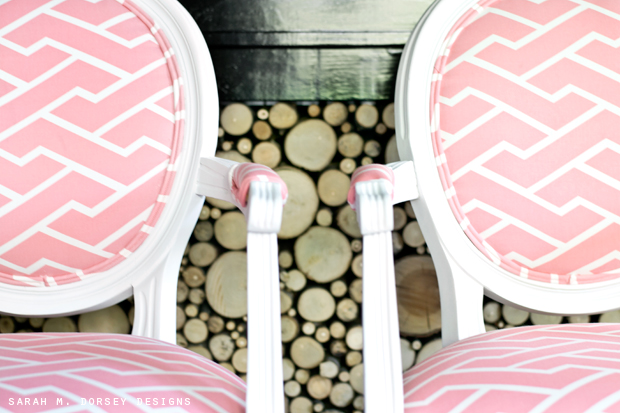
and after!
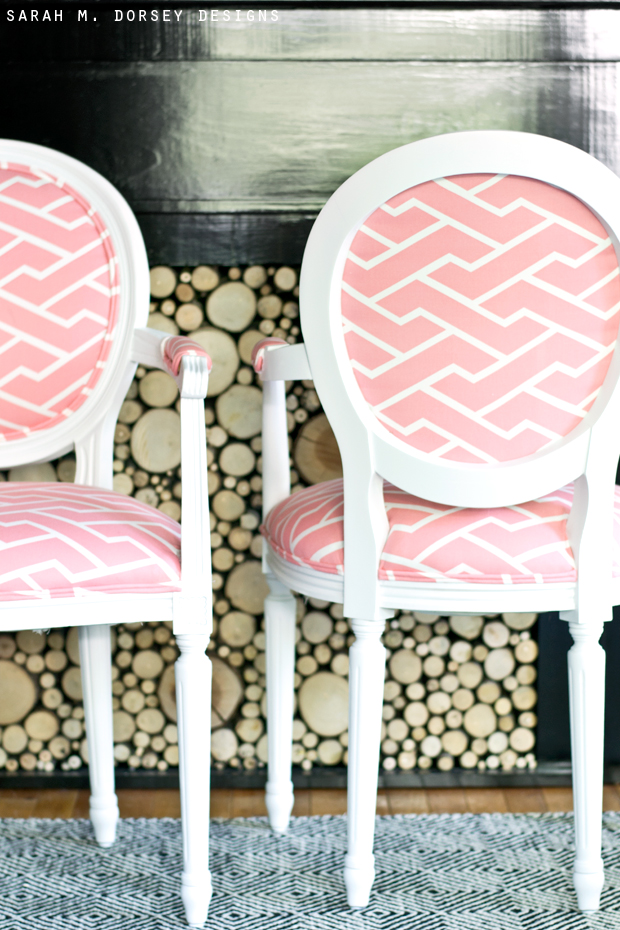
I can’t wait to get these in their permanent place!
We have lots of furniture waiting for a makeover – once we get the paint done and refinish the floors we’ll start refinishing pieces and placing them (can’t wait to have our home a little more livable!)
Really lovely and such a fun colour (the fabric). Was there batting in the backrest? I didn't see that part in your post. I have similar chairs that have existing caning, but I'd like to replace it with fabric, I'm just not sure what to put in between the back and front layers.
Love that you painted them white and such fun fabric!!
So gorgeous. I love love love the fabric
Now you have me obsessed with Louis chairs! I am on the hunt now on Maryland's Craig's List 🙂
So so pretty! Love the fabric choice 🙂 xo
So pretty! I love the fabric you chose!