Hey! I hope you had a good weekend! Today, I’m finally sharing the tutorial from our TN Rental.

We’ve made a lot of headboards – this was definitely the most difficult, so I wouldn’t recommend trying this as your first (this simple one would be a perfect first headboard!)
If you’ve had some upholstery experience, some patience and time (and love the curved arms with tufting) you’ll love this tutorial!
These measurements are for a queen bed.
You will need:
Plywood sheet (around 3/8″ thick) 4×8 sheet cut to 5’6″ W (4′ height is good)
2×8 (cut to 5′ H)
2×4 (8′ qty 3)
Screws
Chip board
Drill
Fabric (I believe I had around 4 – 6 yards)
2″ thick foam (or two 1″ thick glued together)
Batting (full size bed is enough)
Scissors
Marker
Upholstery needle (qty 2)
Upholstery thread
Tape
Upholstery strip
Button kits (56 buttons)
Tools:
Chop saw
Upholstery gun and compressor (for this size project, I definitely recommend this over a standard stapler)
First, the frame will need to be constructed (very similar to this headboard, if you’d like to see more photos). The plywood is 4′ x 5’6″ (it needs to be larger than the mattress – since the arms are curved)
Reinforce the plywood by attaching the 2×4 along the perimeter (on the back) – Attach the side arms by screwing into the 2×4 frame. Our headboard is 60″ tall – so the arms (2×8) were cut to that length.
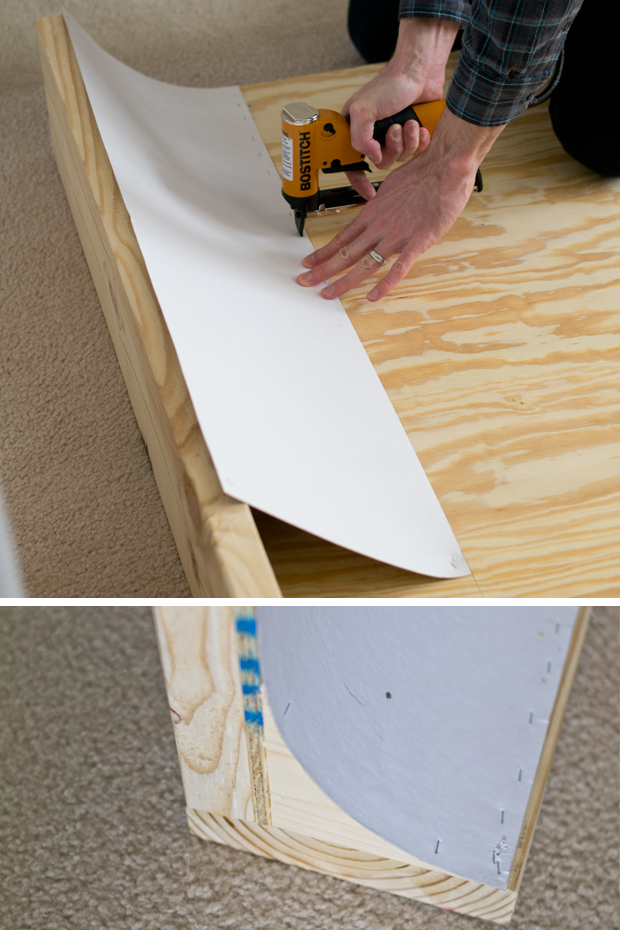
Next, attach the chip board to the arm and back to make a curve – determine the curve, measure and mark the distance on the plywood. To help reinforce it, we added a scrap wood block (cut to shape with jigsaw) on the top and bottom.

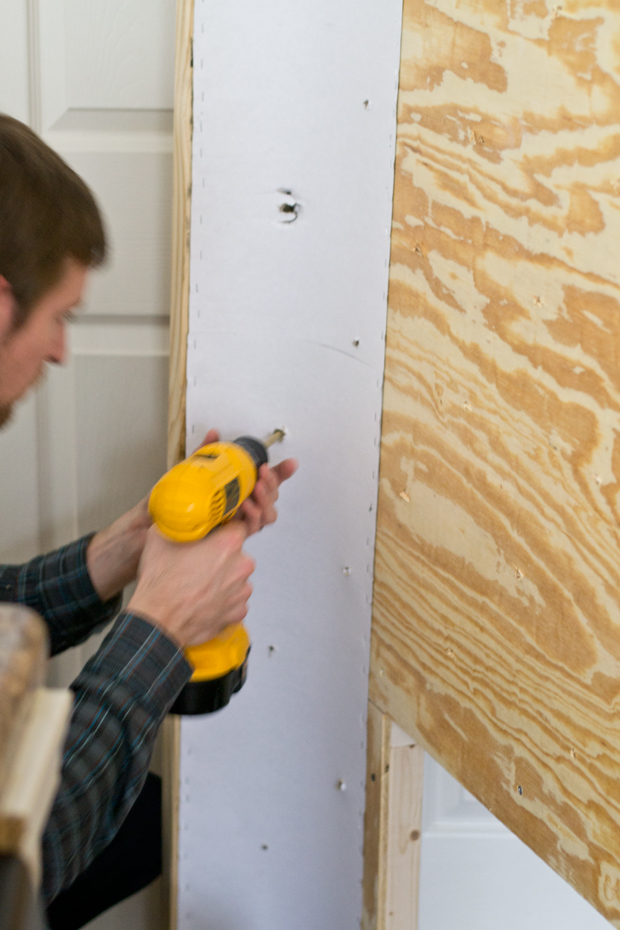
Measure and mark the hole placement – drill with a 3/8″ bit.
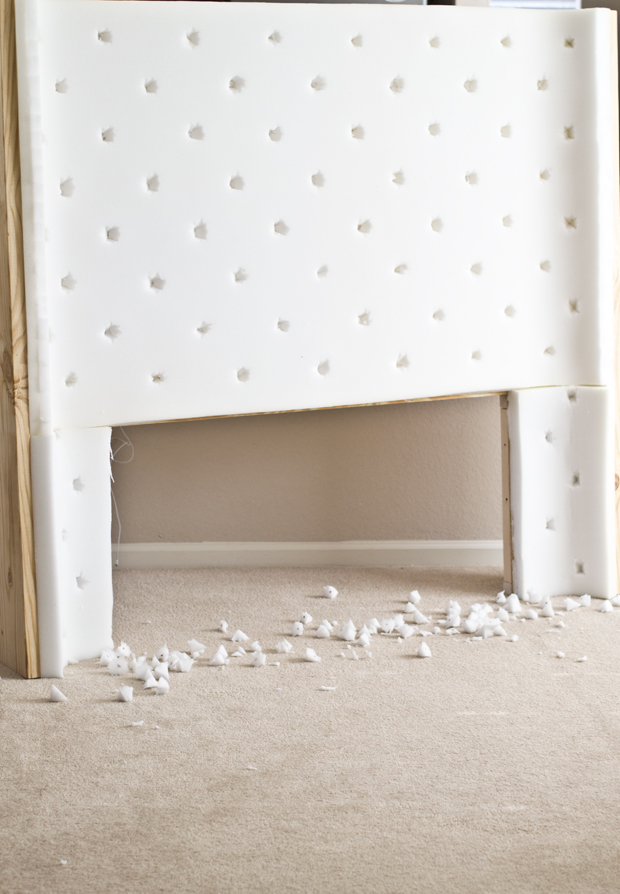
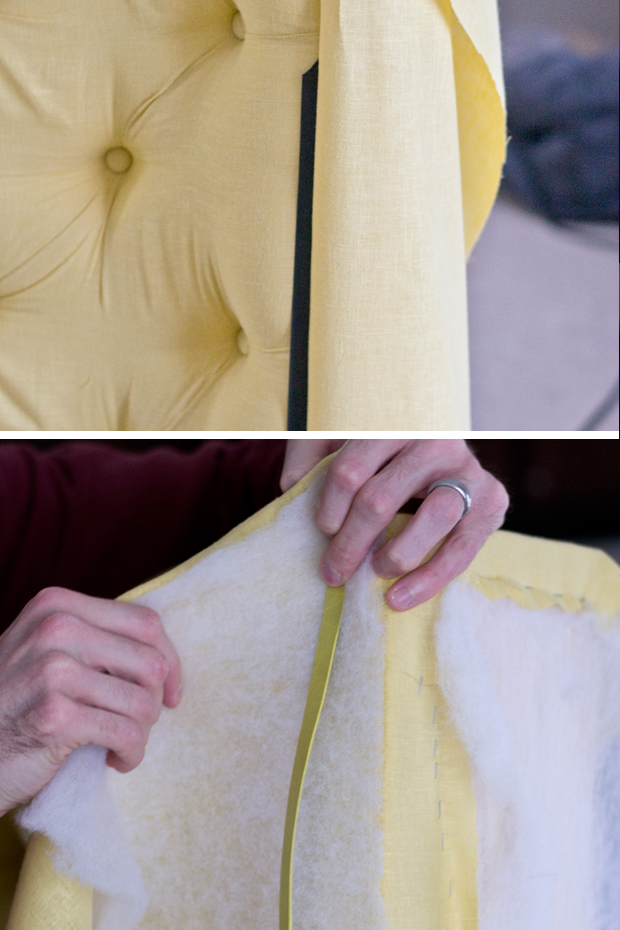
Place foam on top (legs too) – glue in place with spray adhesive. Cut any excess off – make sure to leave a little extra so it goes over the edge (the front of the arm) when crushed – this will give a softer, fuller look. We used two 1″ pieces from Hobby Lobby.

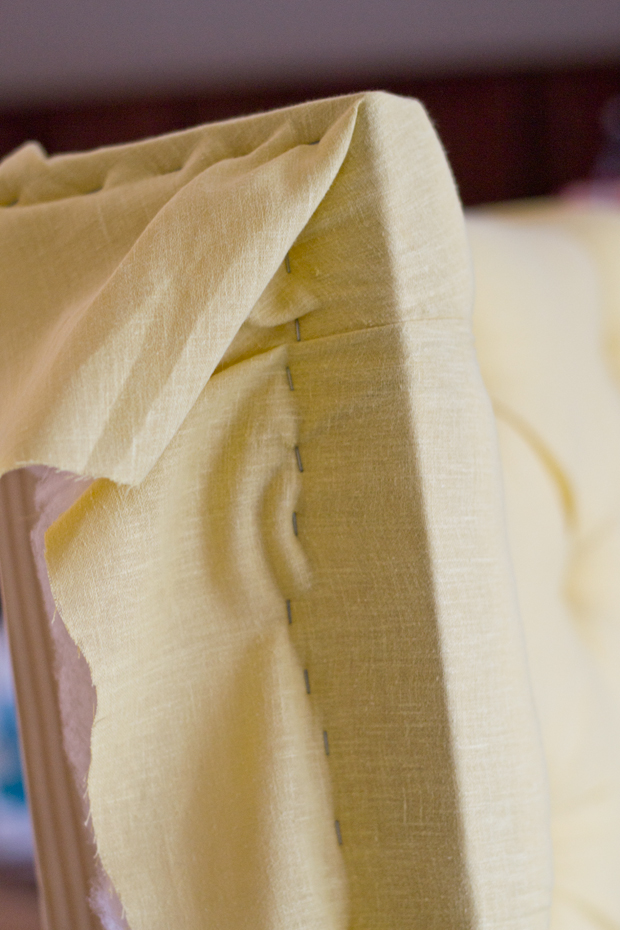
On the back – poke through with something sharp (like a knitting needle). If you have two people, it’s helpful to mark the hole with a sharpie from the front.
At an angle, cut the holes with a pair of scissors (it doesn’t have to be perfect) This will make it easier when tufting and give a deep tufted look.
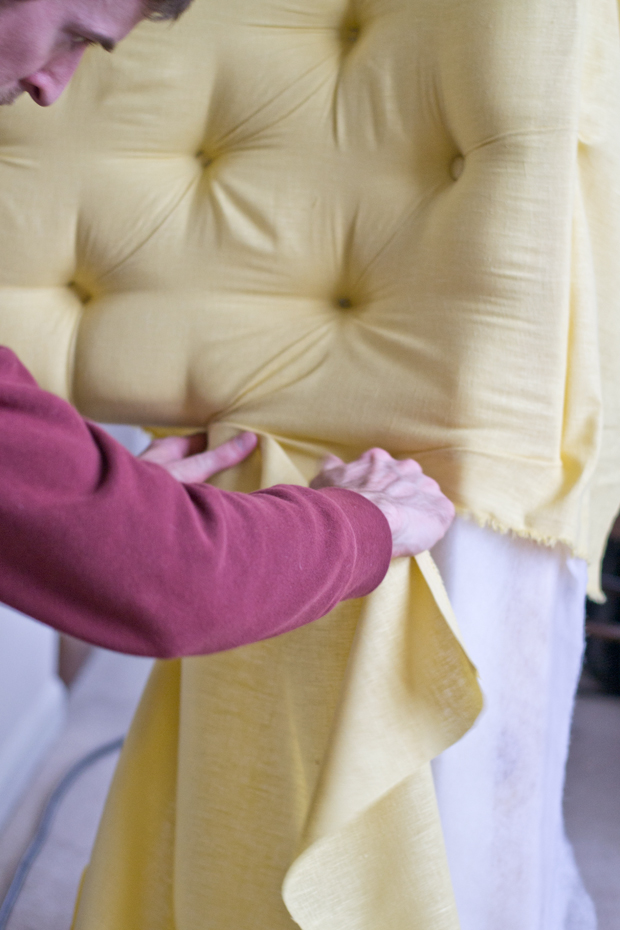
Next, run the fabric width across the headboard – you will have enough for the main headboard (not the legs – these will be covered later) Since the fabric is railroaded, you need a solid or a pattern that looks good sideways.
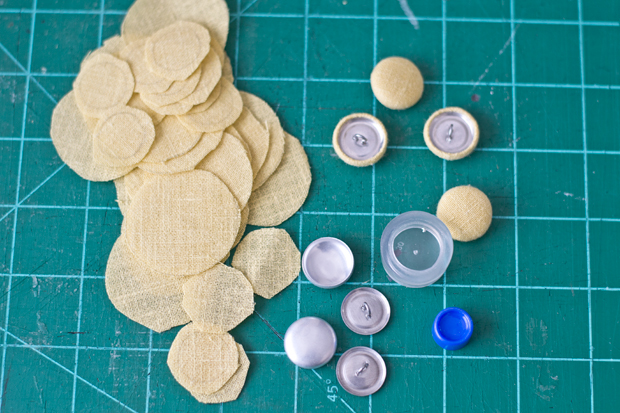
Before tufting, create the buttons – using a button kit – with thin fabric, use two layers to cover the button, the layer underneath should be a little smaller (OR spray paint the metal button to match the fabric, so the silver won’t show through.) Tip: before closing the button, apply a little Gorilla glue to make it extra durable.
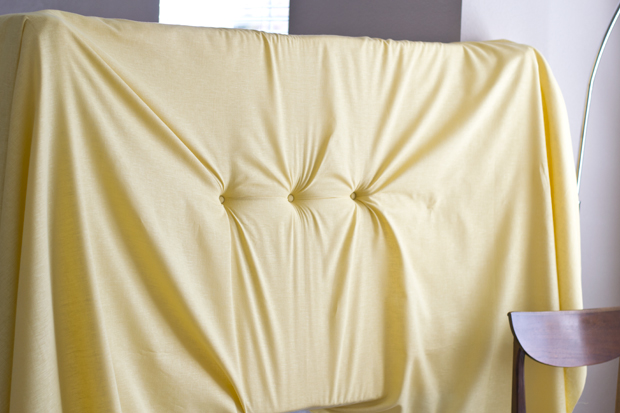
Starting on the middle button – prepare the fabric by folding where you want the fabric to fall for the deep tuft.
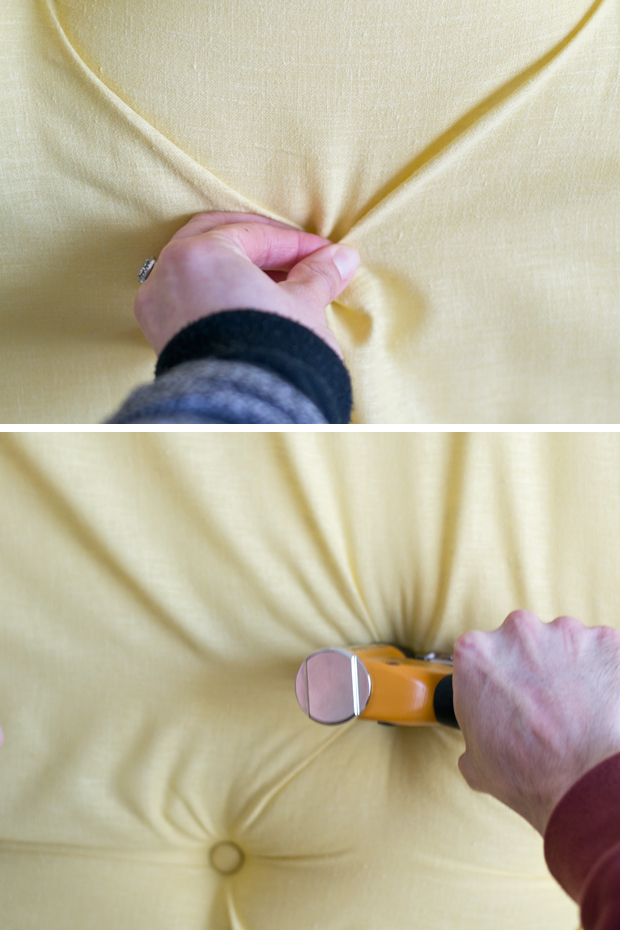
Since there is so much tension on the button – we found it helpful to staple around the hole first to help hold the fabric.
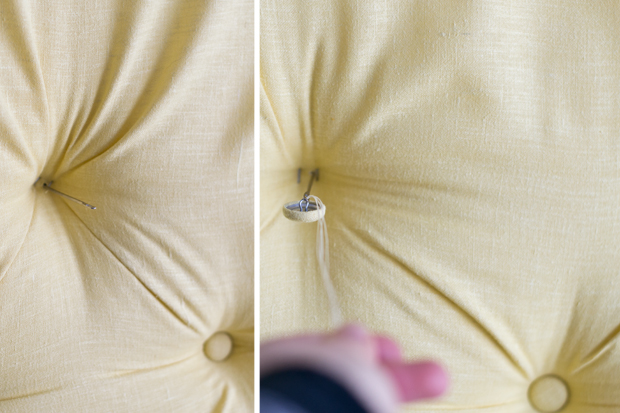
To start the tufting, we pushed an upholstery needle from the back – this helped us find the hole from the front (not necessary, but we found it helped speed things up) From the front, we threaded the button through two pieces of upholstery thread, then threaded on a upholstery needle (having two speeds it up!) I pushed from the front and David stapled 4 times on the back.
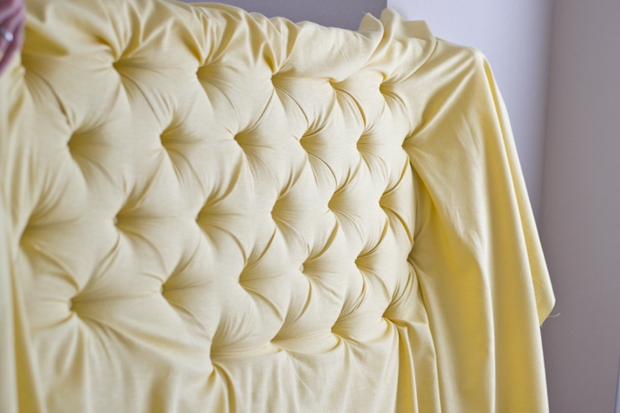
To cover the legs – we added another panel of fabric, folding it with the tufts helped hide it (though the mattress does that, so it doesn’t have to be perfect)
Staple on the back and you’re done!
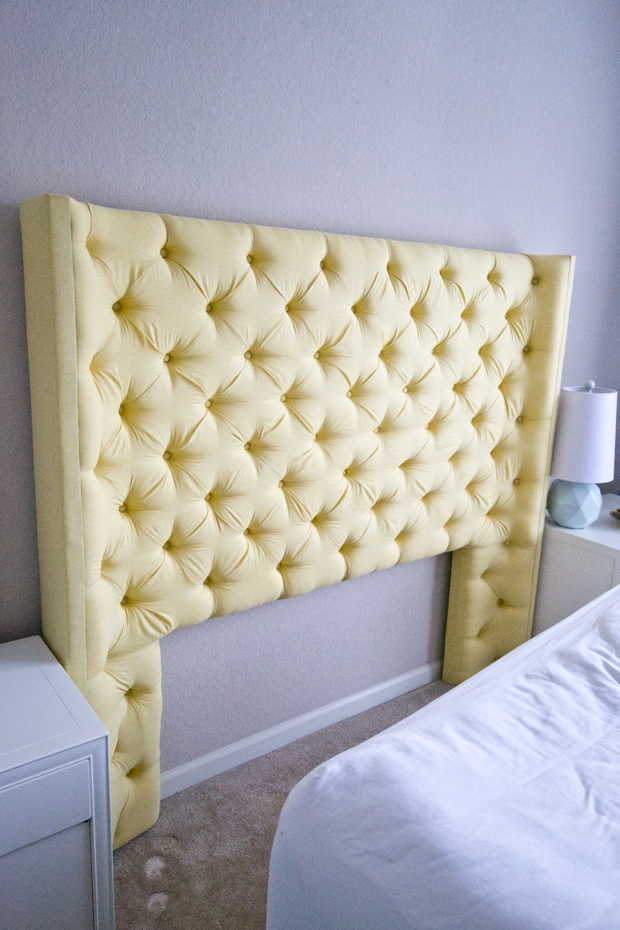
This project definitely wasn’t the easiest, but I LOVE how it turned out! I’d recommend breaking it up over a few weekends.


This is in our current MD bedroom – still love it! We made this headboard last year, so I may have missed some details, if you have any questions, let me know and I’ll try to answer them.
Thanks for stopping by today 🙂 I’ll be back later this week!
it's so beautiful! love the shape and am always impressed by your skills.
I've made my own tufted headboard before (the simple kind, not one with arms) which follows a very similar process you just outlined here. Only I made mine using pegboard instead of plywood! Immediate gridlines of holes to use! I just built a frame work out of 2x4s to staple the batting/fabric to. An extra bonus was the fact that it made the headboard very light and easy to transport as I moved multiple times.
I couldn't love this any more than I do already. It's so so stunning
It's gorgeous, Sarah! You guys always design and build the most amazing headboards. Love it!