This post has been sponsored by FrogTape
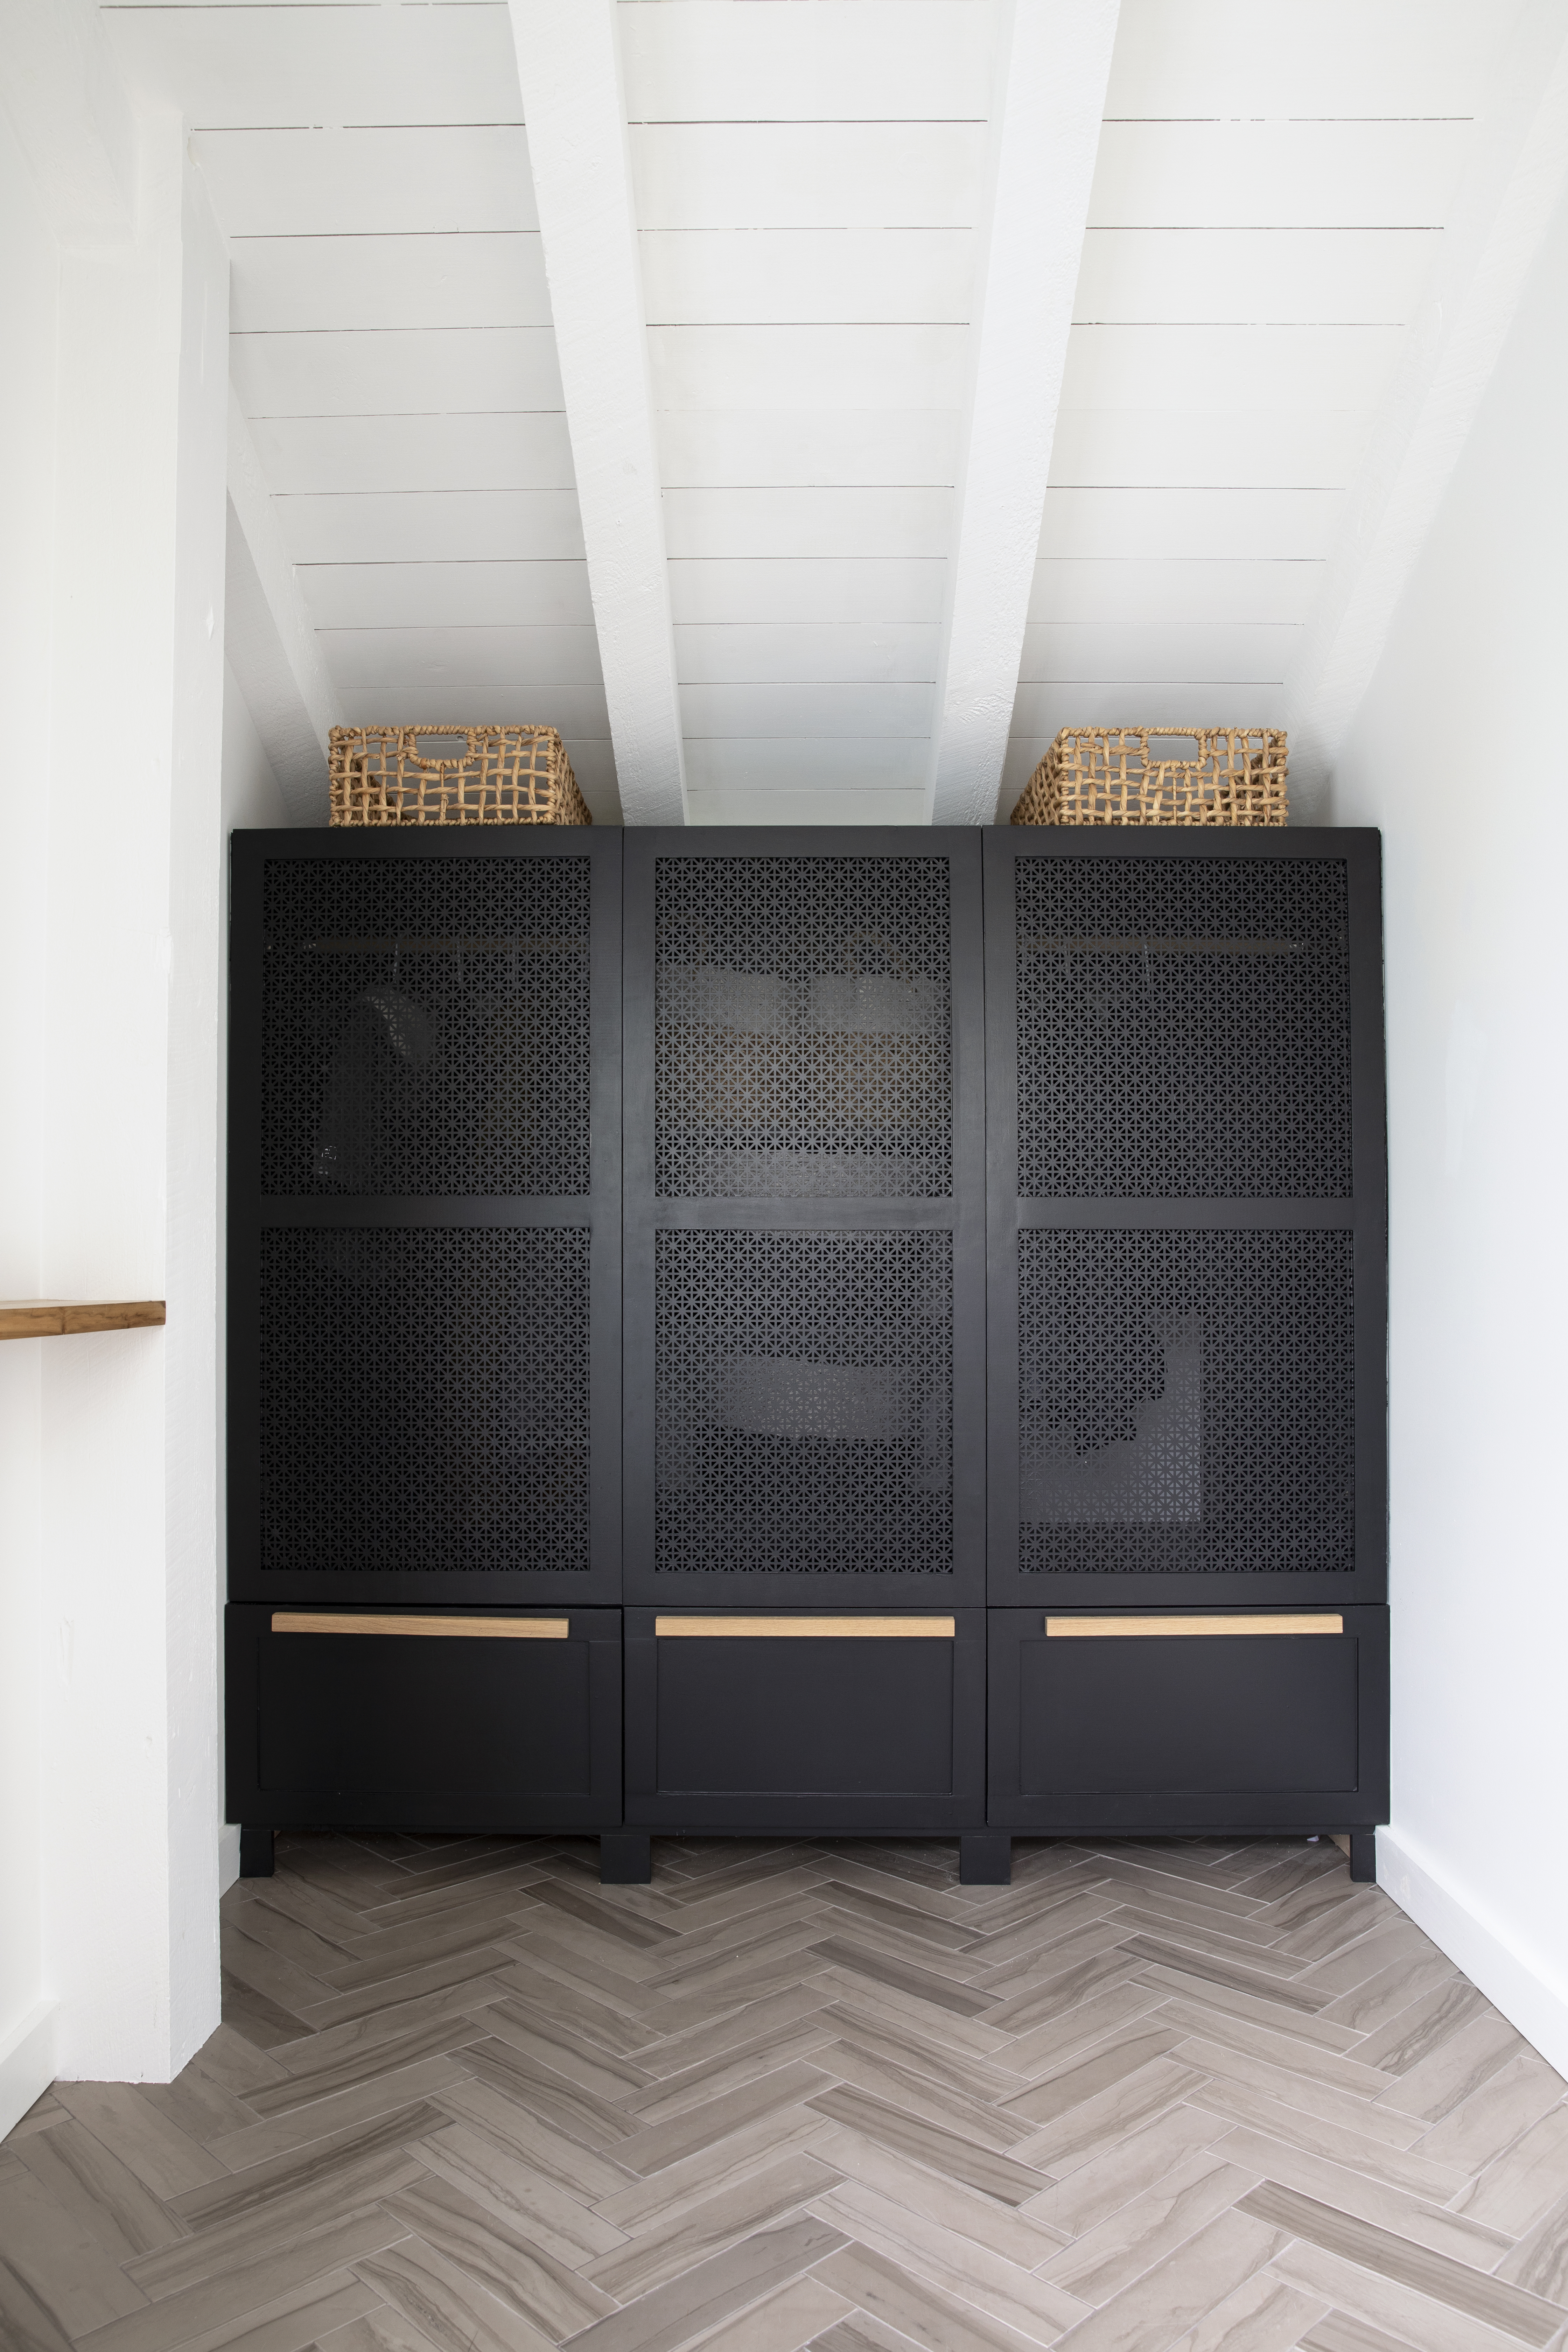
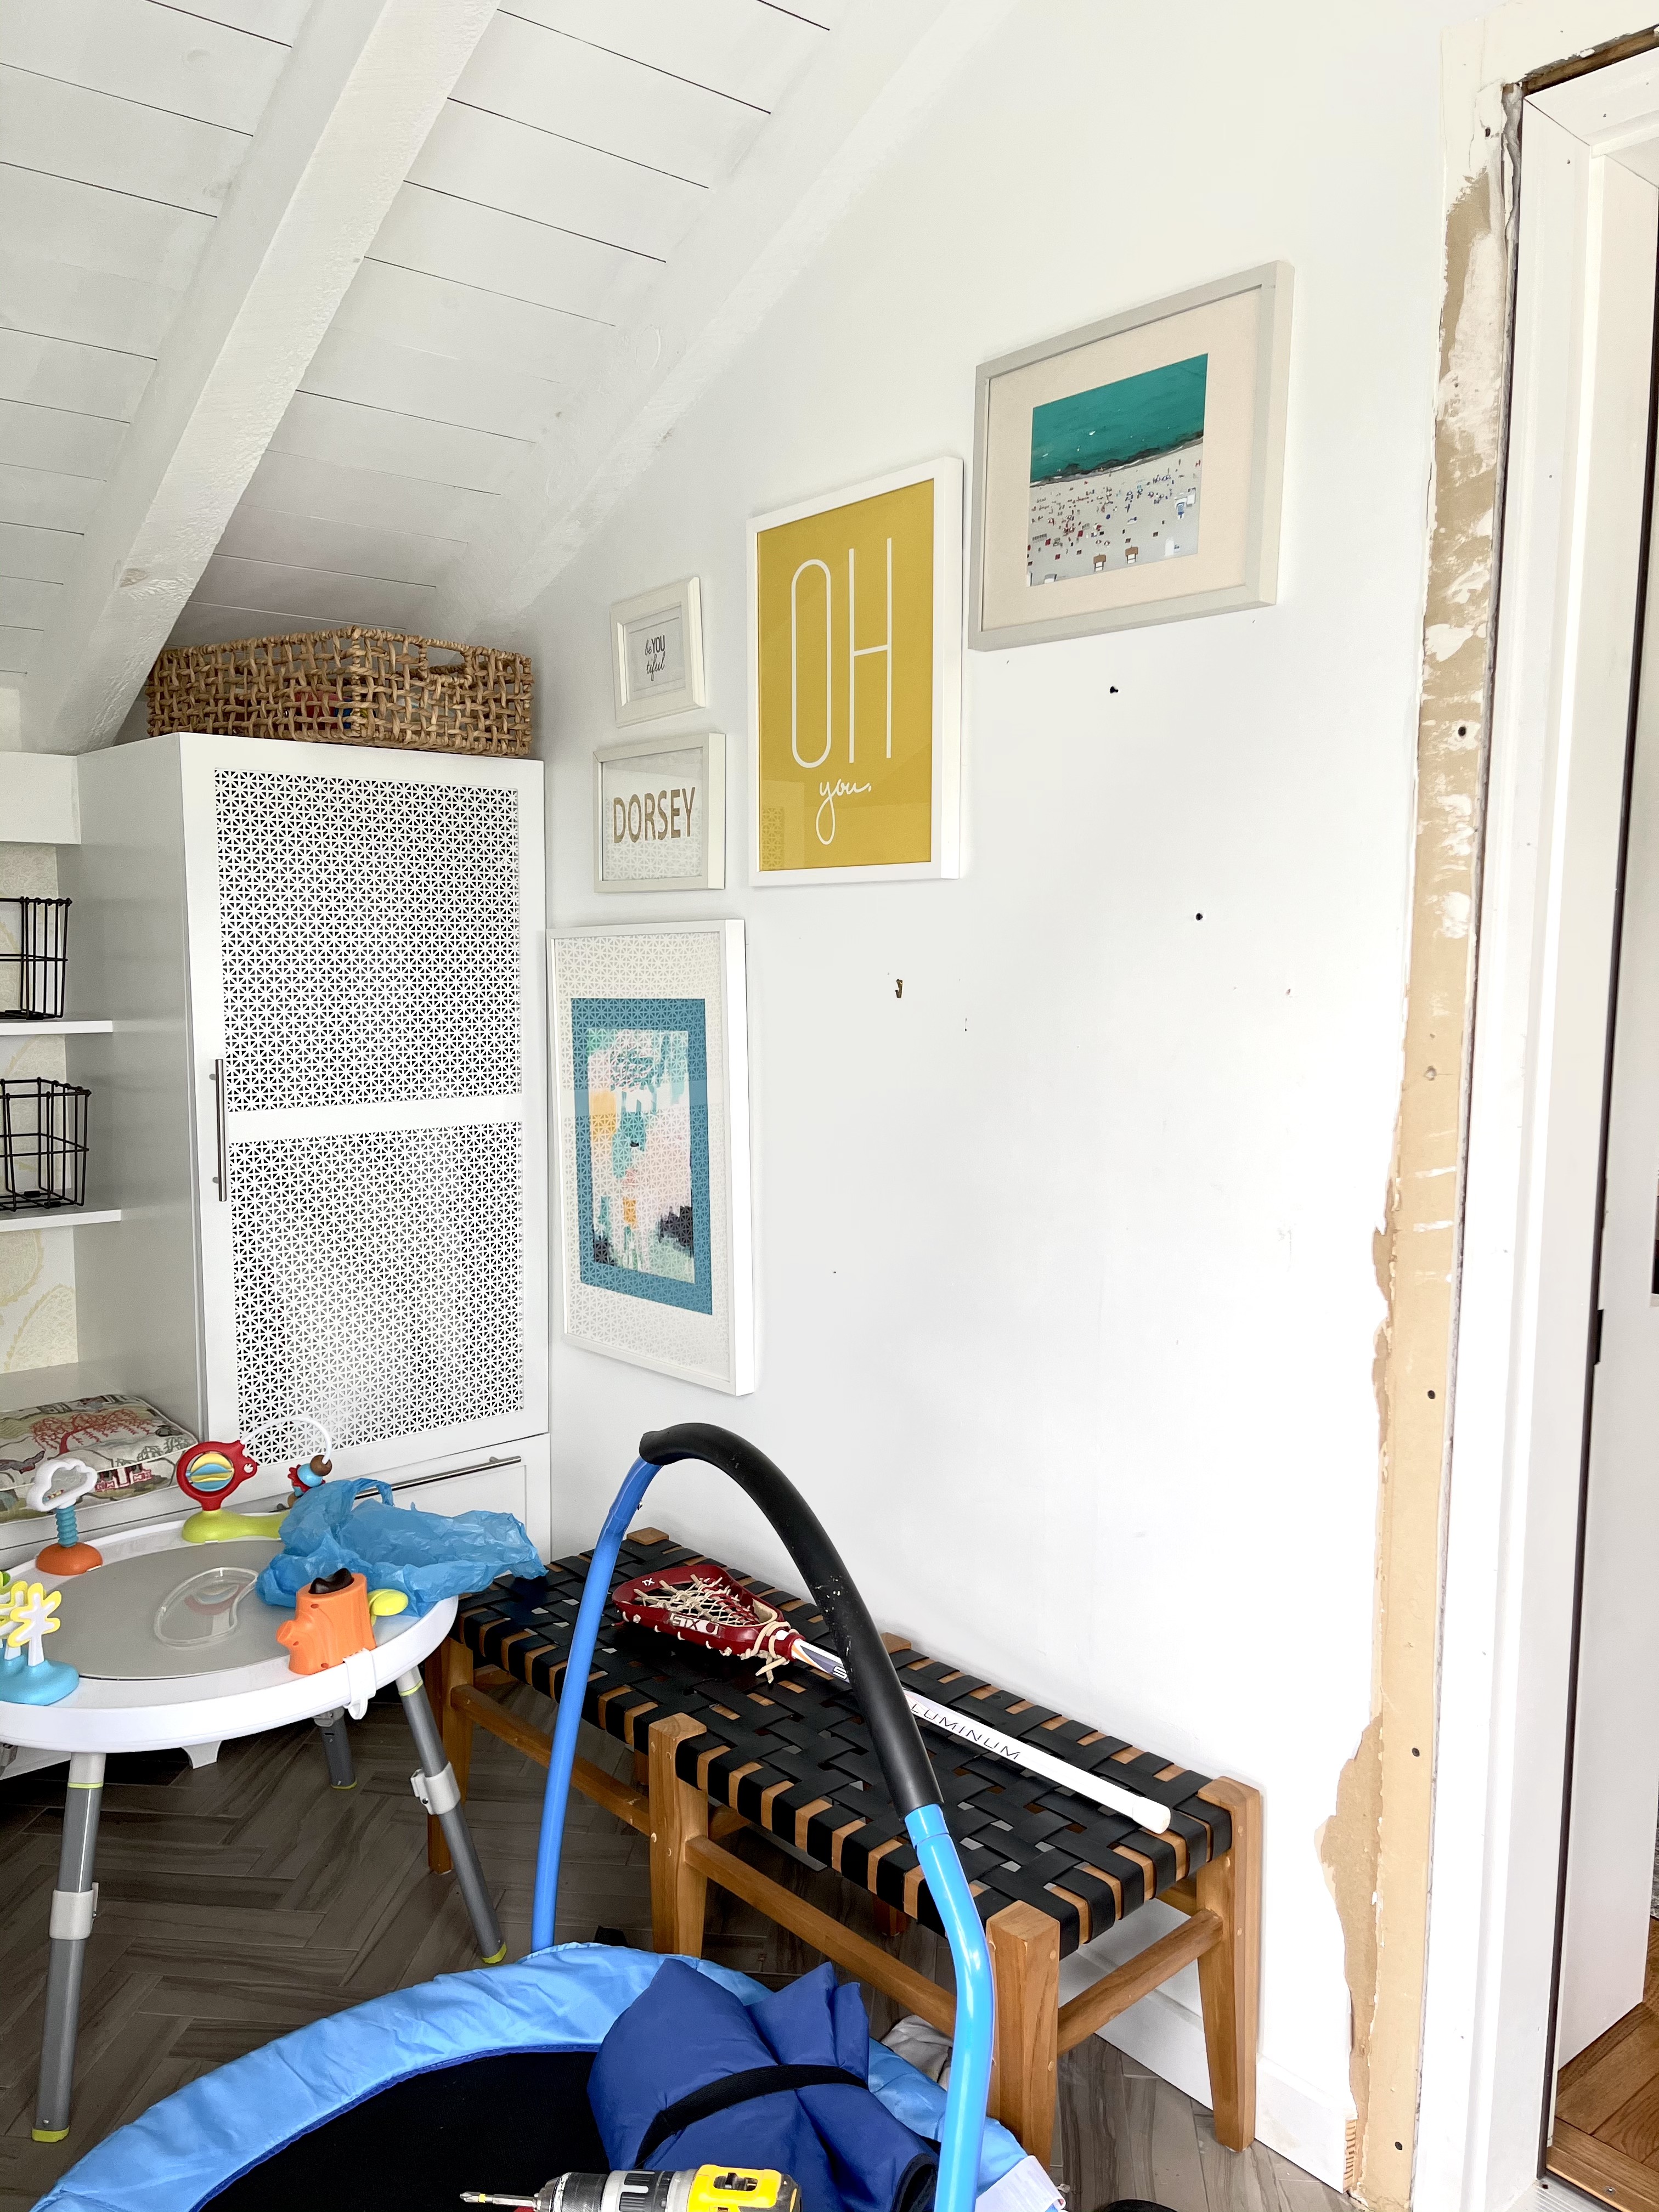
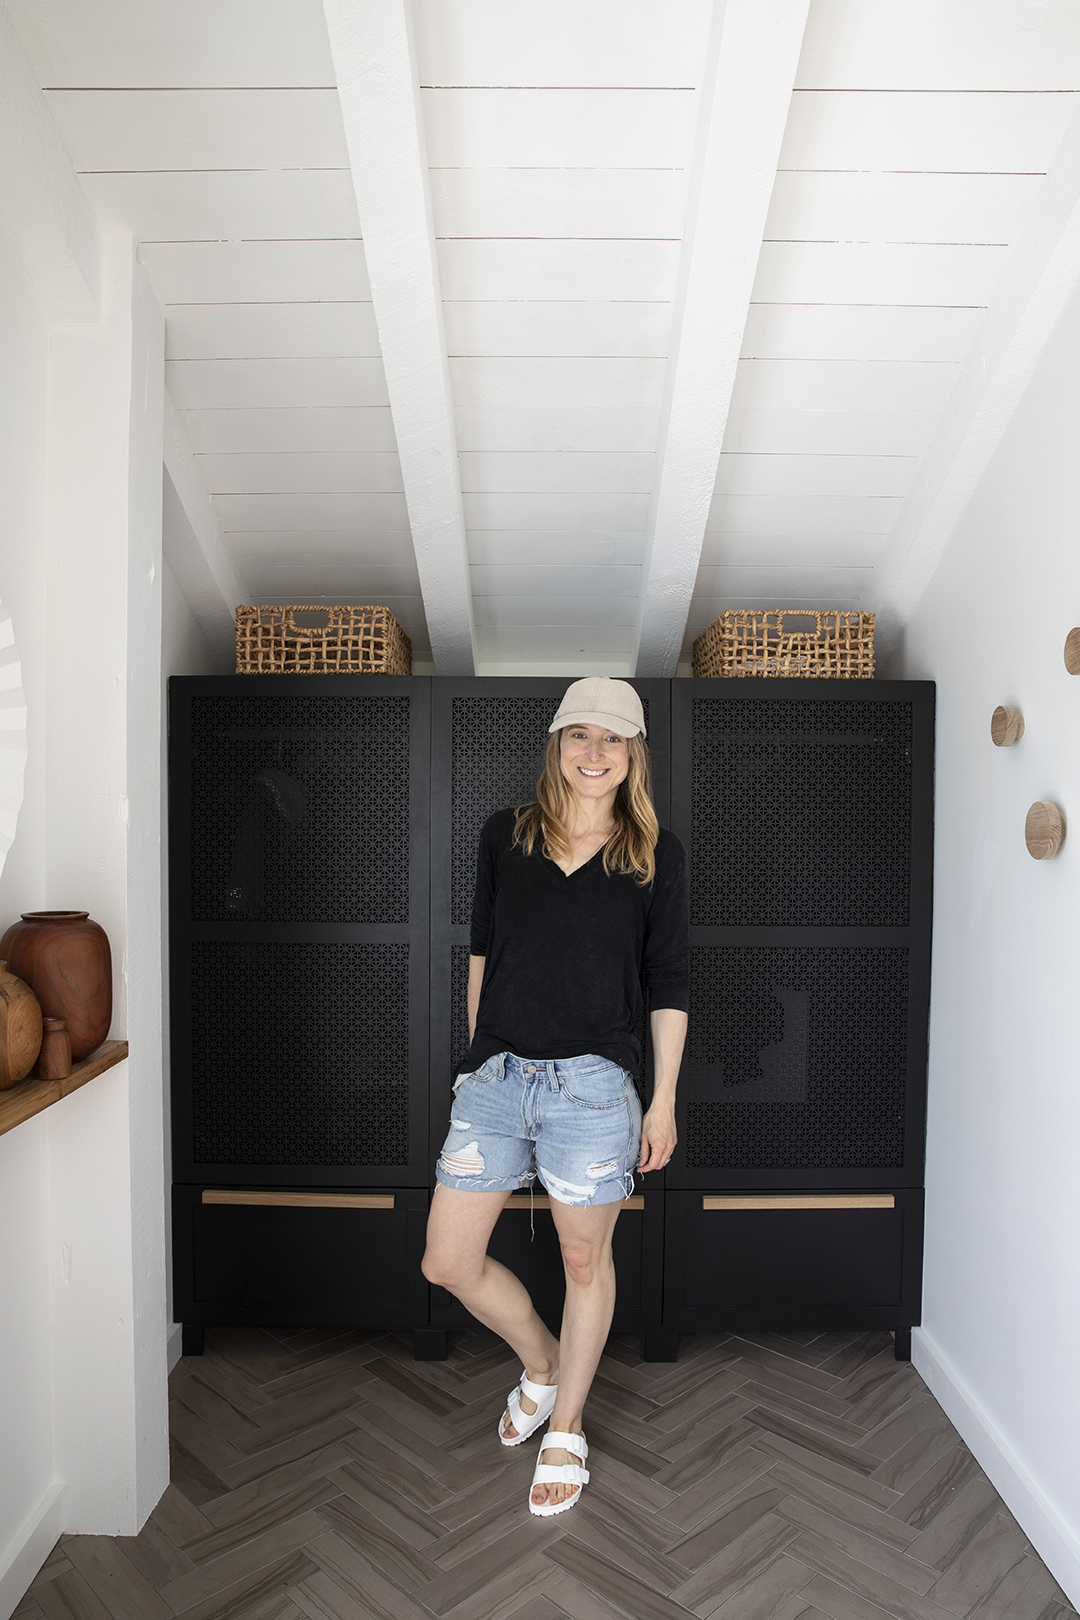
I’m SO excited to share our first project with FrogTape as the 2021 FrogTape DIY | Influencer! Adding a built in to our entryway was the very first project in our home. Now, several years (and two kids) later – my style has evolved and our needs have changed. Since we never really used the bench – closed storage with extra baskets was so much more functional for our family. We decided to modify it by closing in the center section, adding a top and door. Here’s how we did it!
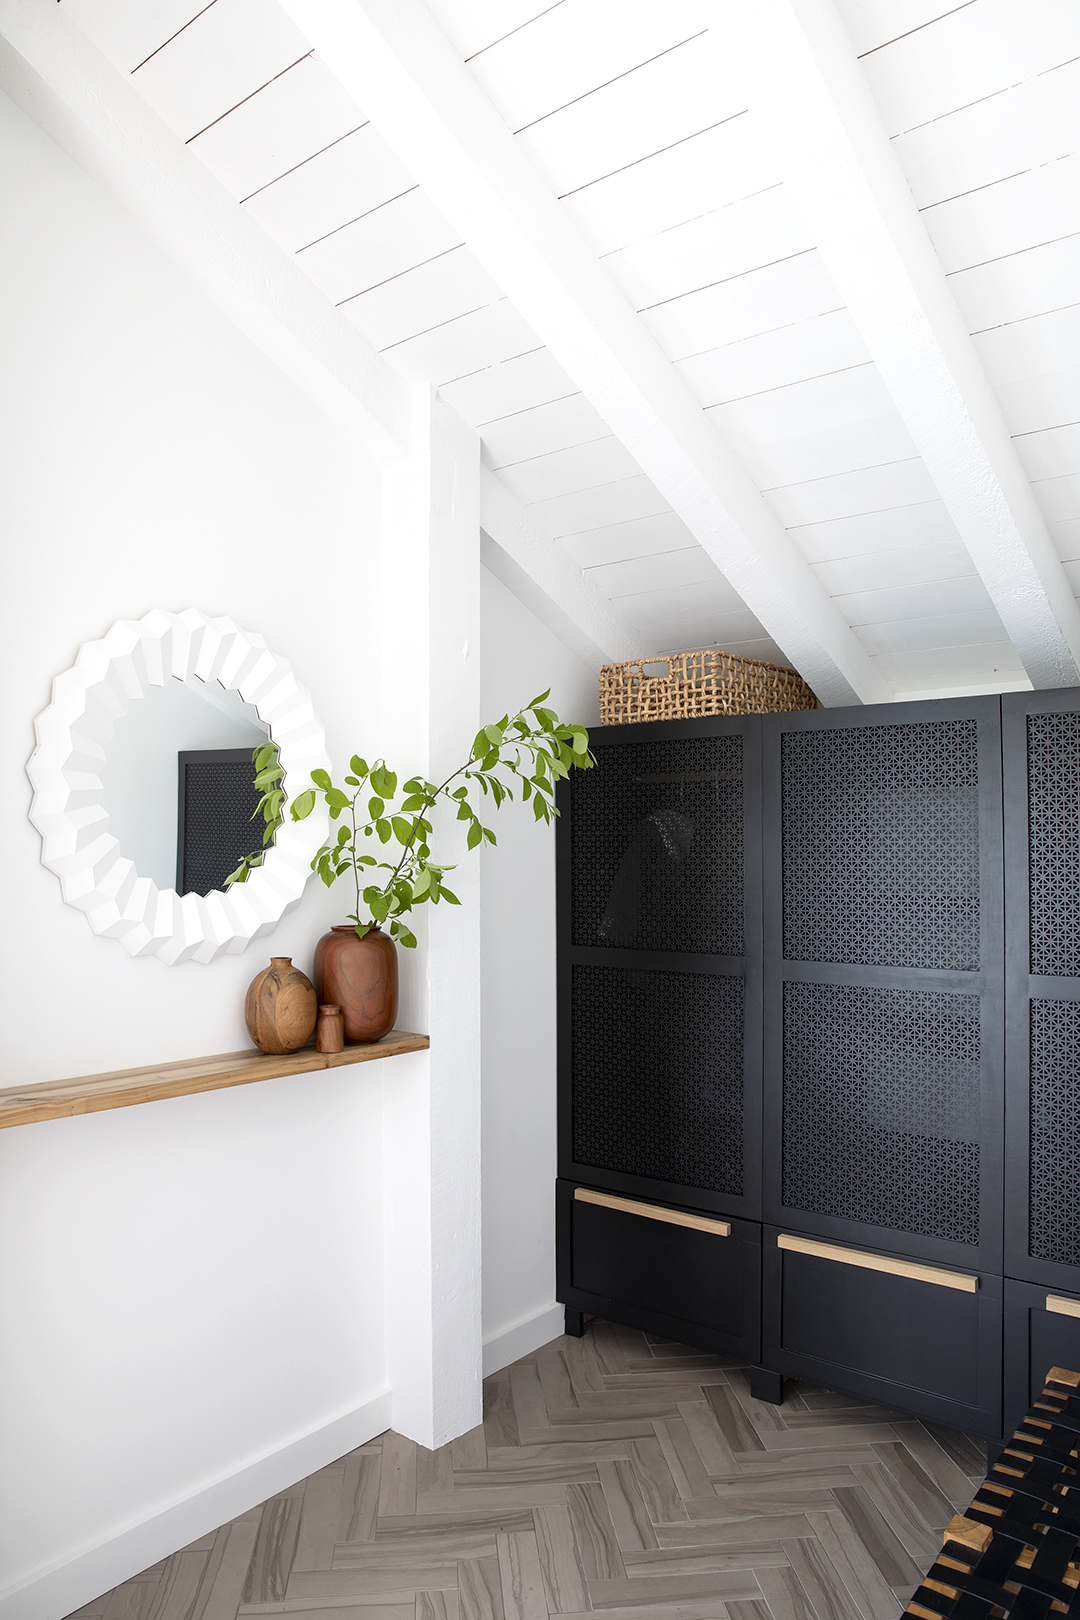
BEFORE
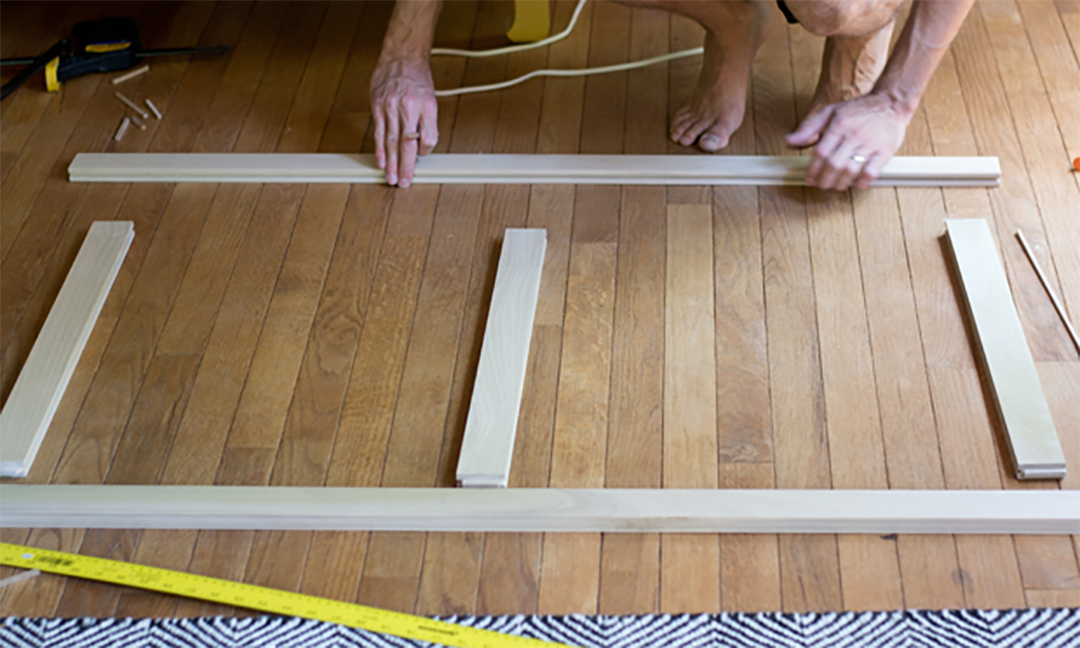
- To build the center door, we measured the opening and made a shaker frame out of poplar wood ripped to be 2” wide, with one 2” center brace in the middle.
- We routered the frame with a tongue and groove bit set for the frame construction and to insert the metal sheets.
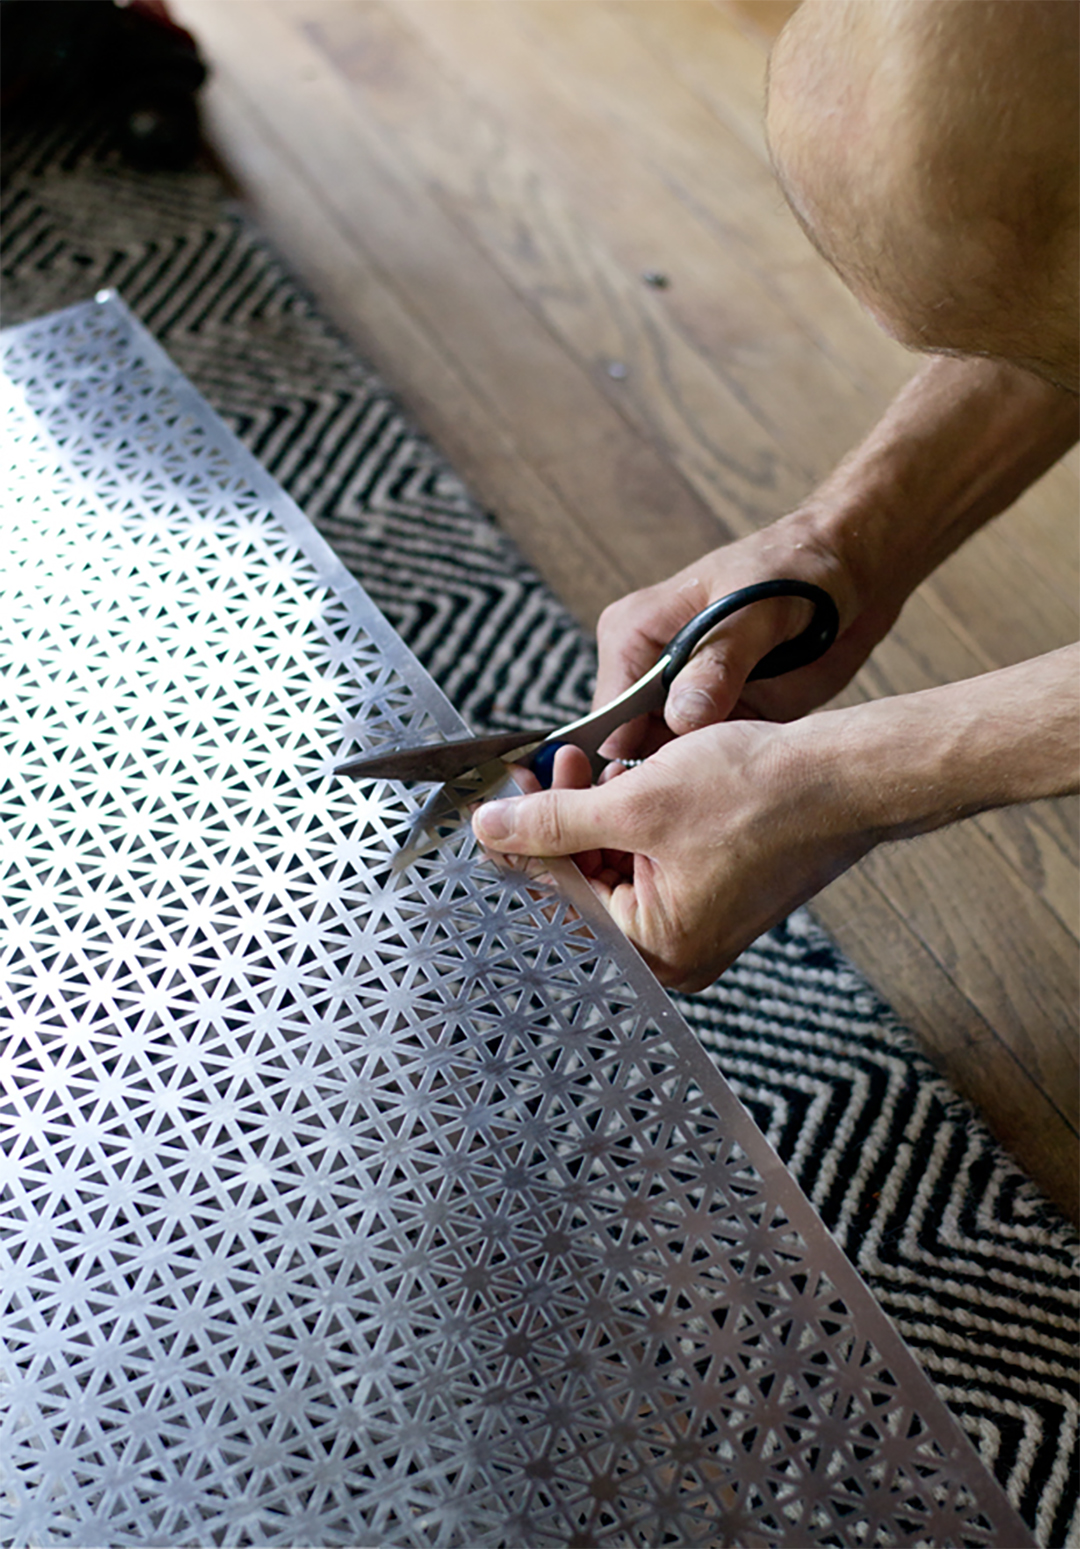
- We measured and cut the decorative metal sheet for each section.
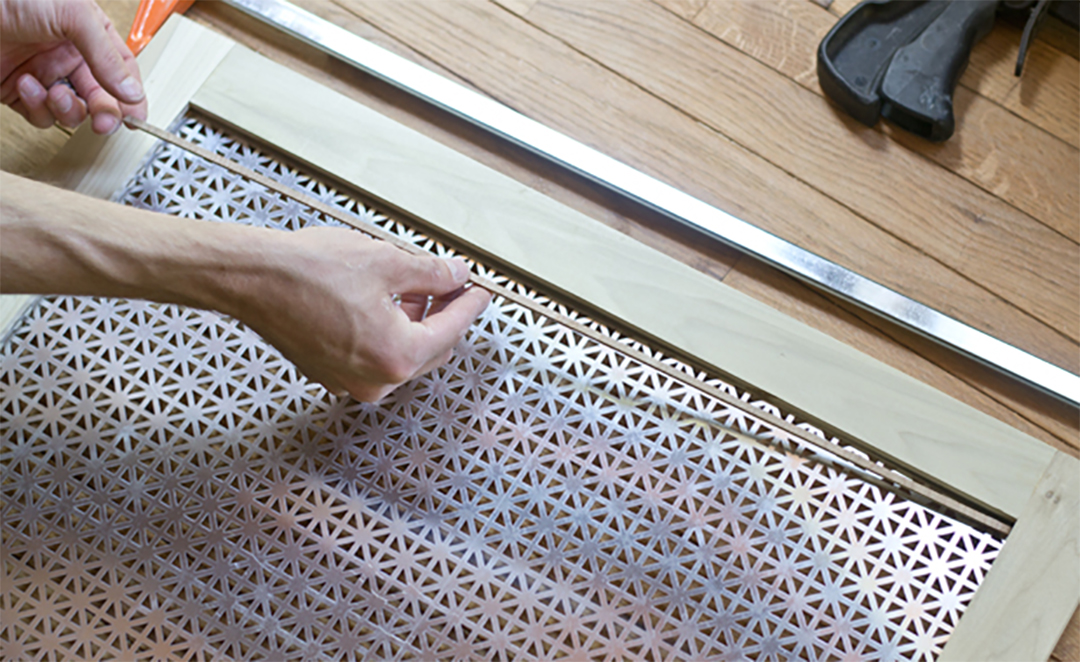
- The routered groove was ¼” wide, so we glued a 1/4” x 3/8” spacer in the groove behind the metal sheets to secure the panel and fill the groove.
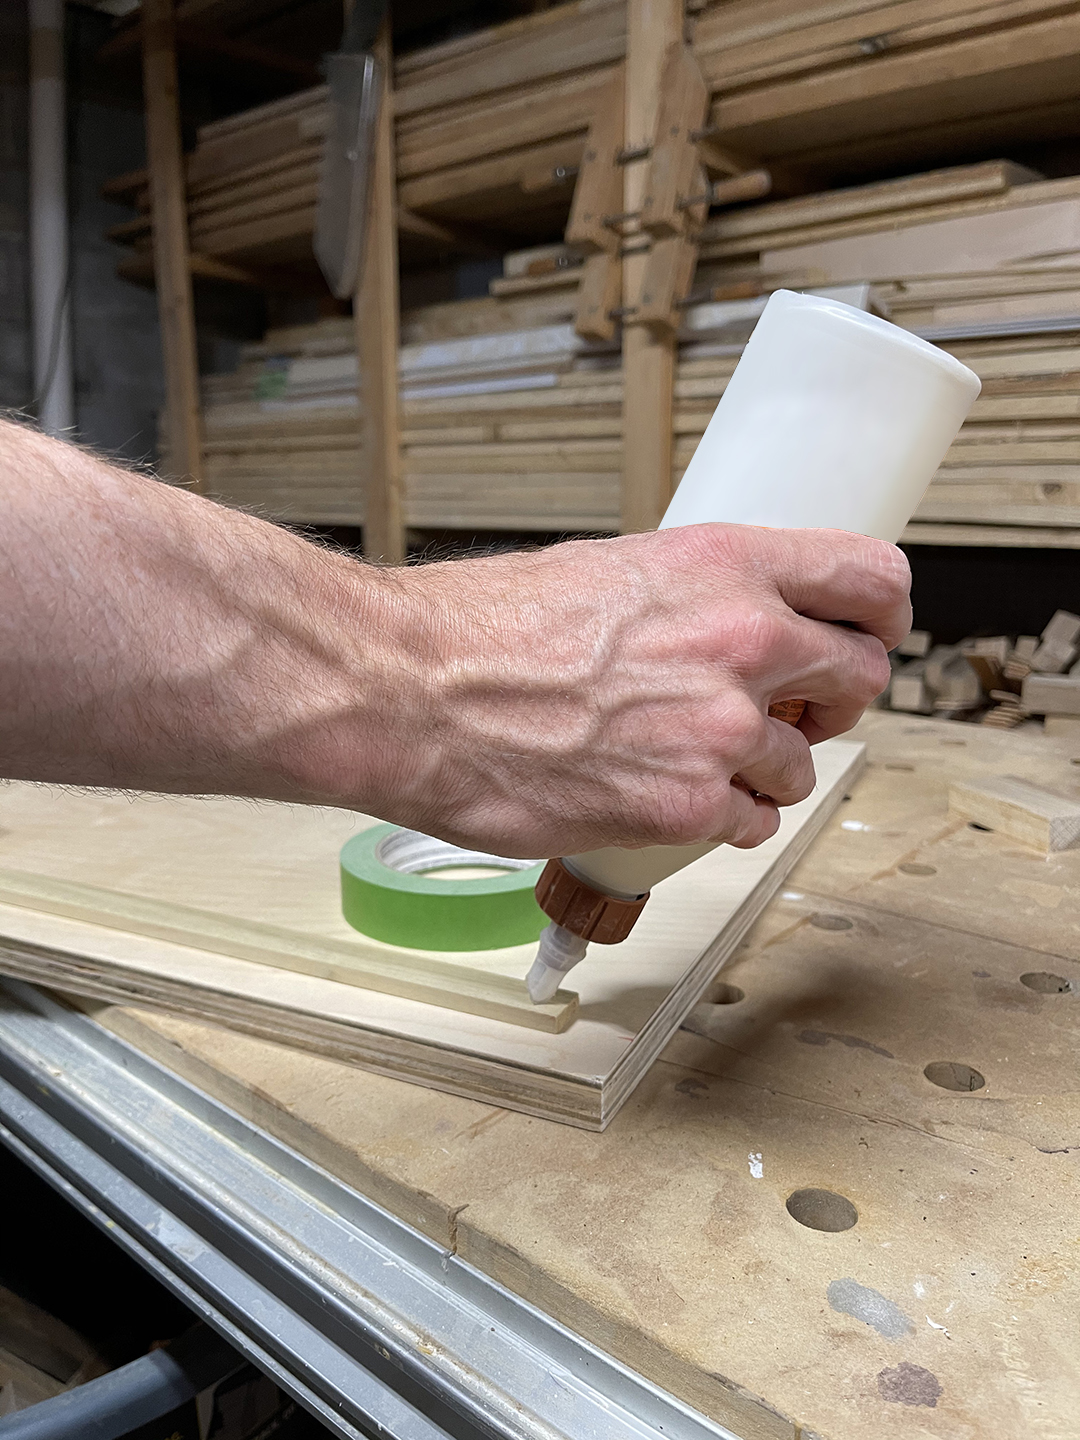
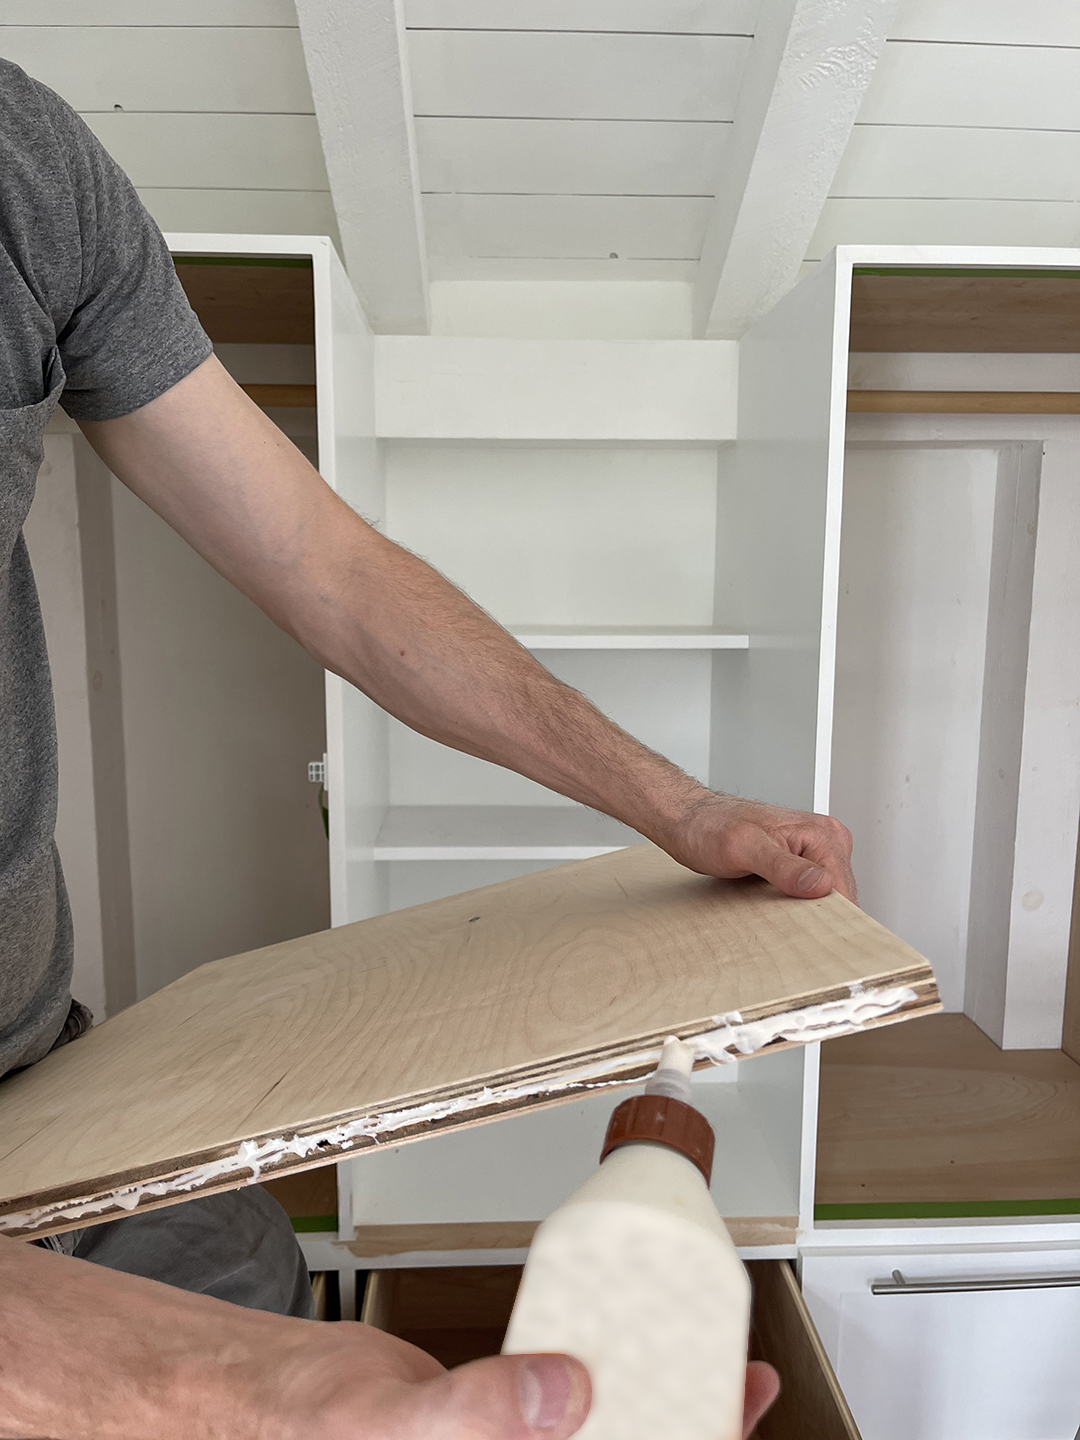
- Moving back to the built in, we measured the top opening and cut a piece of ¾” Birch plywood. To cover the cut edge of the plywood, we created a facer by ripping a 1/4” x 3/4” piece of poplar that is glued in place.
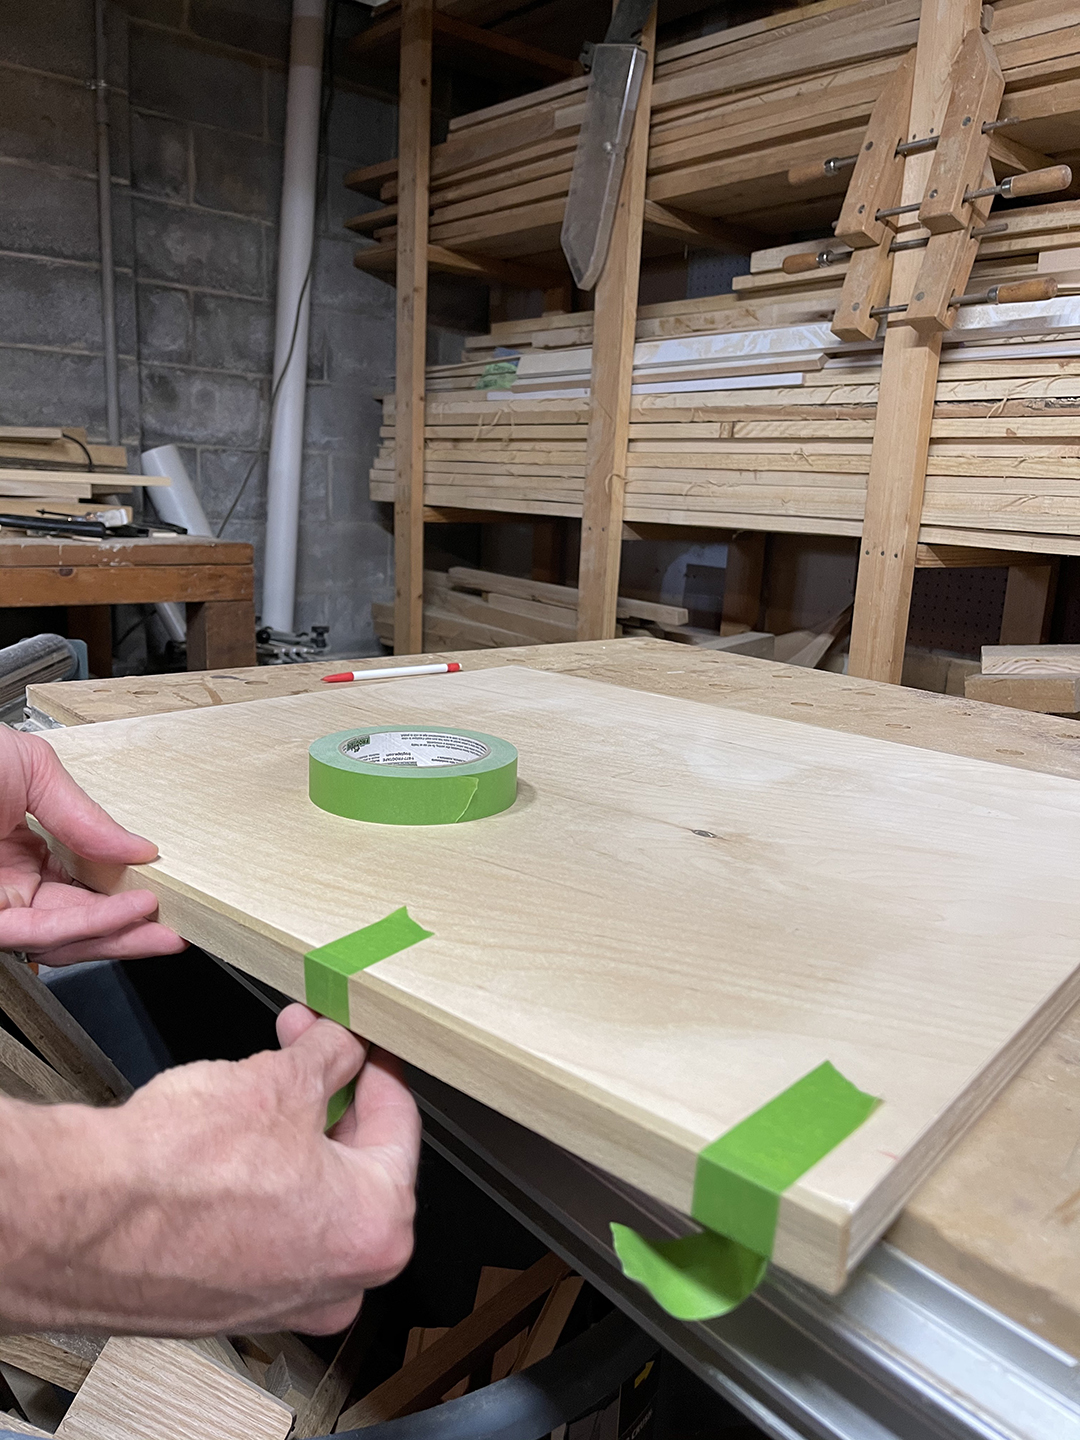
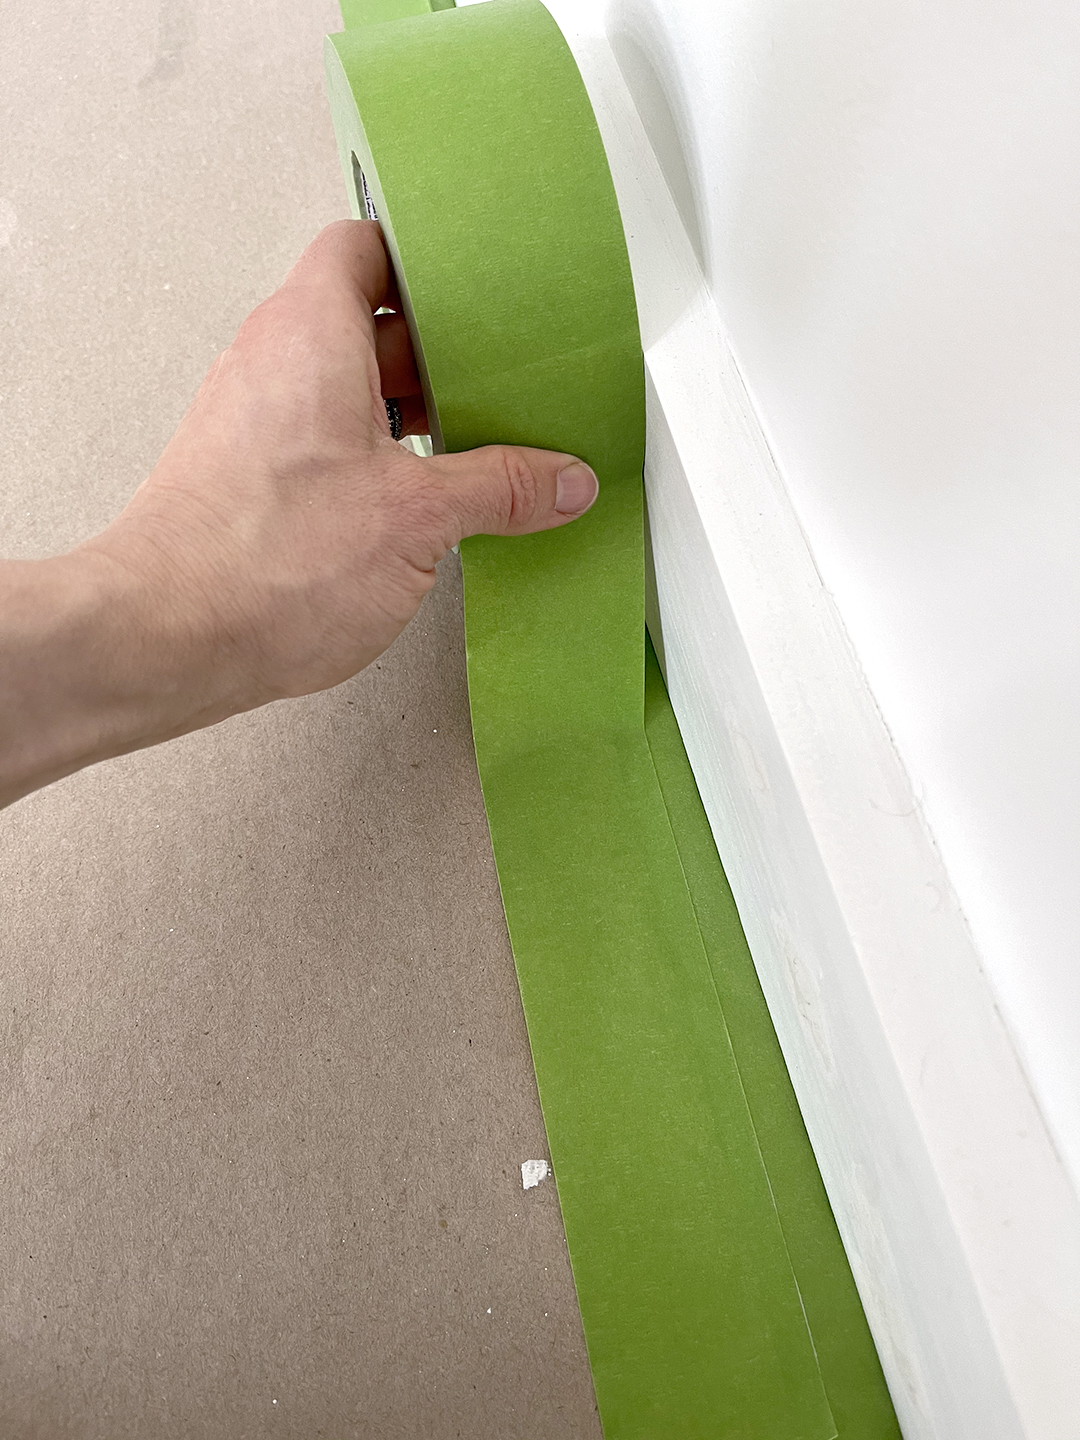
- To secure it, we used FrogTape to hold it in place while the glue dried.
- Preparing to secure it to the top of the built in, we drilled 4 pocket holes (2 on each side)
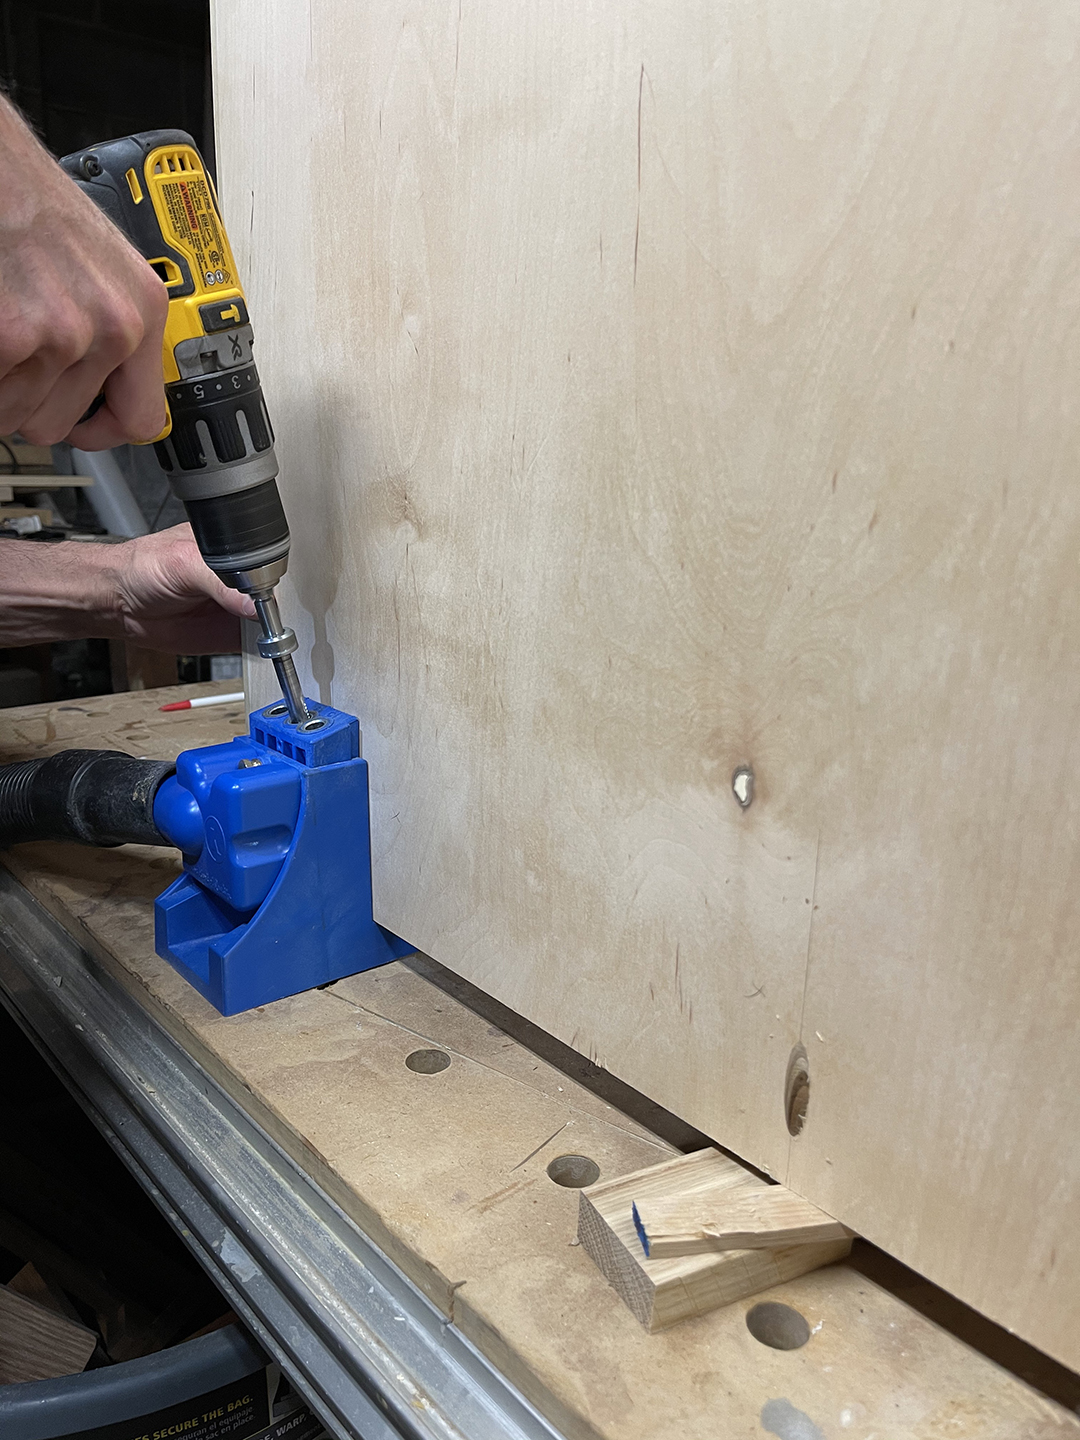
- We applied wood glue to all edges
- To secure the top to the built in, we used screws through the pocket holes.
- To prep for paint, we removed all existing hardware.
- After lightly sanding with 220 grit sandpaper and removing dust with a microfiber cloth, we applied FrogTape delicate around all edges to protect all surfaces we weren’t painting
CLICK TO VIEW VIDEO APPLYING FROGTAPE
- First, we applied primer
CLICK TO VIEW VIDEO APPLYING PRIMER
- Once dry, we applied the top coat, Tricorn Black.
CLICK TO VIEW VIDEO APPLYING TOPCOAT
- We applied three topcoats, once complete, we removed the Frogtape from the built in and paper and Frogtape Multi Surface on the floor.
CLICK TO VIEW VIDEO REMOVING FROGTAPE
CLICK TO VIEW VIDEO REMOVING PAPER
- Finally, we added new pulls and reattached the doors.
CLICK TO VIEW VIDEO ATTACHING HARDWARE
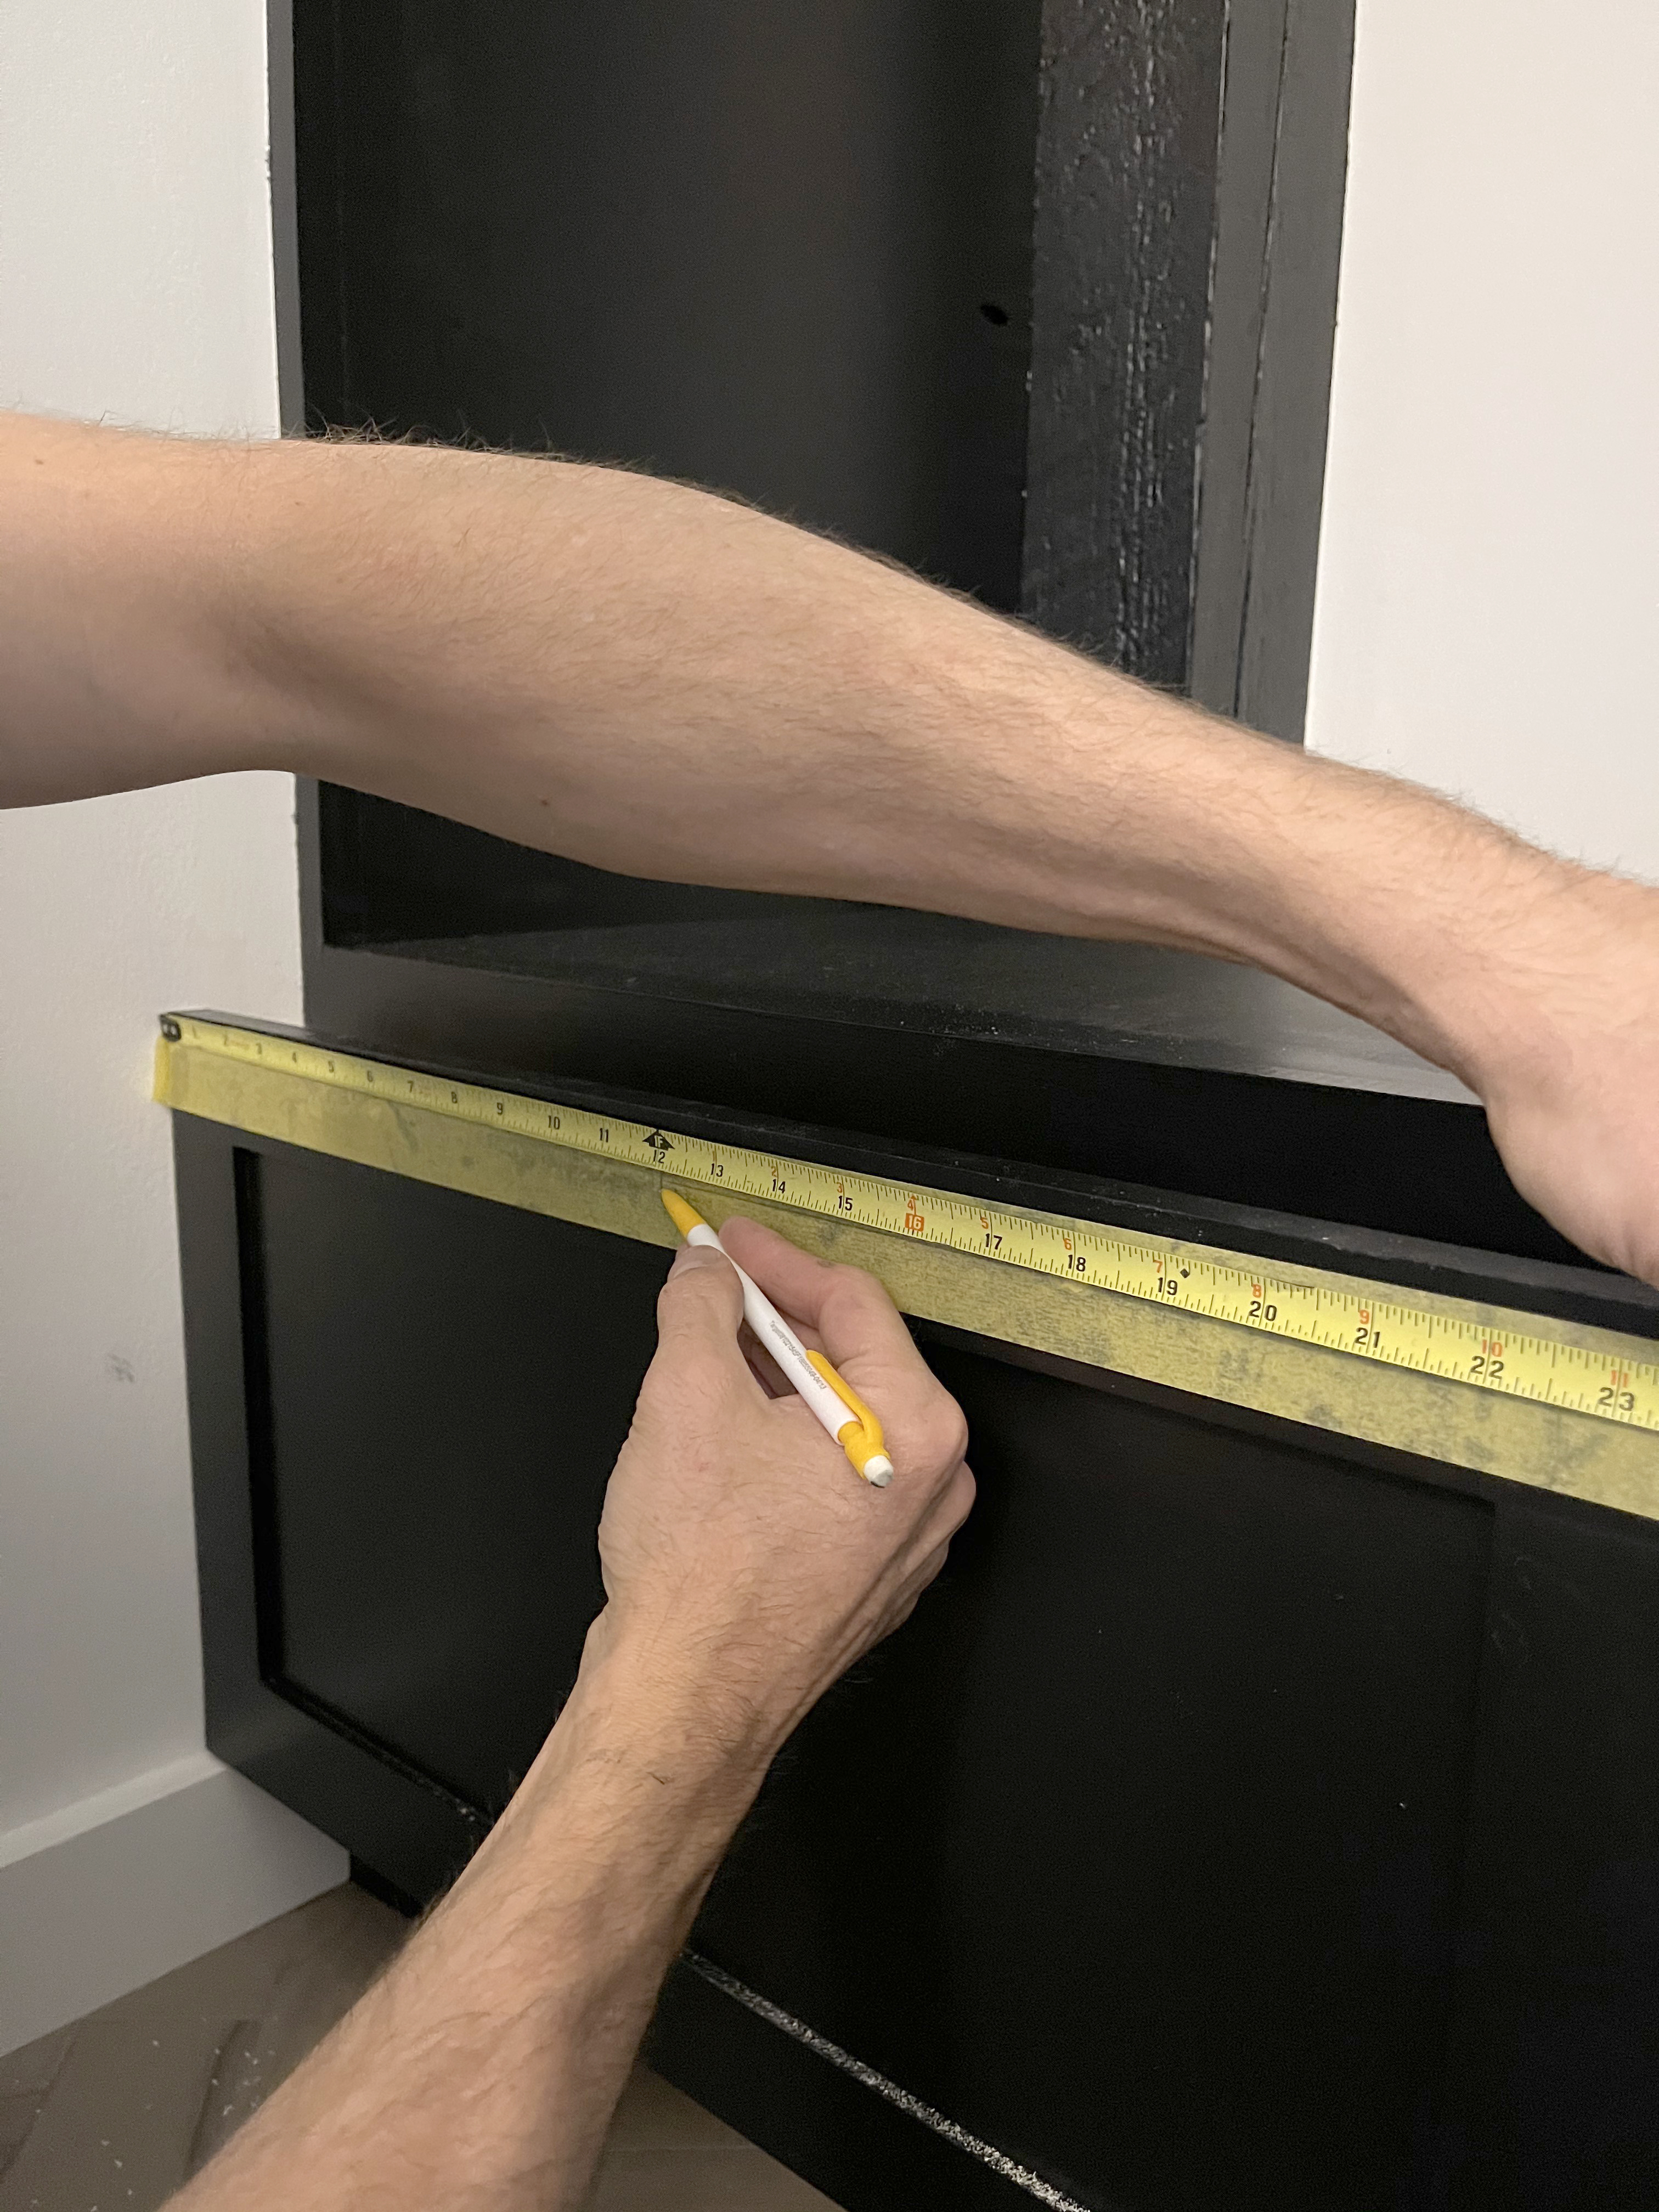
How to create a template with Frogtape to attach hardware to drawers.
- Apply Frogtape in approximate location of where holes will be drilled.

- Measure from the top of the drawer to the center of holes for hardware.
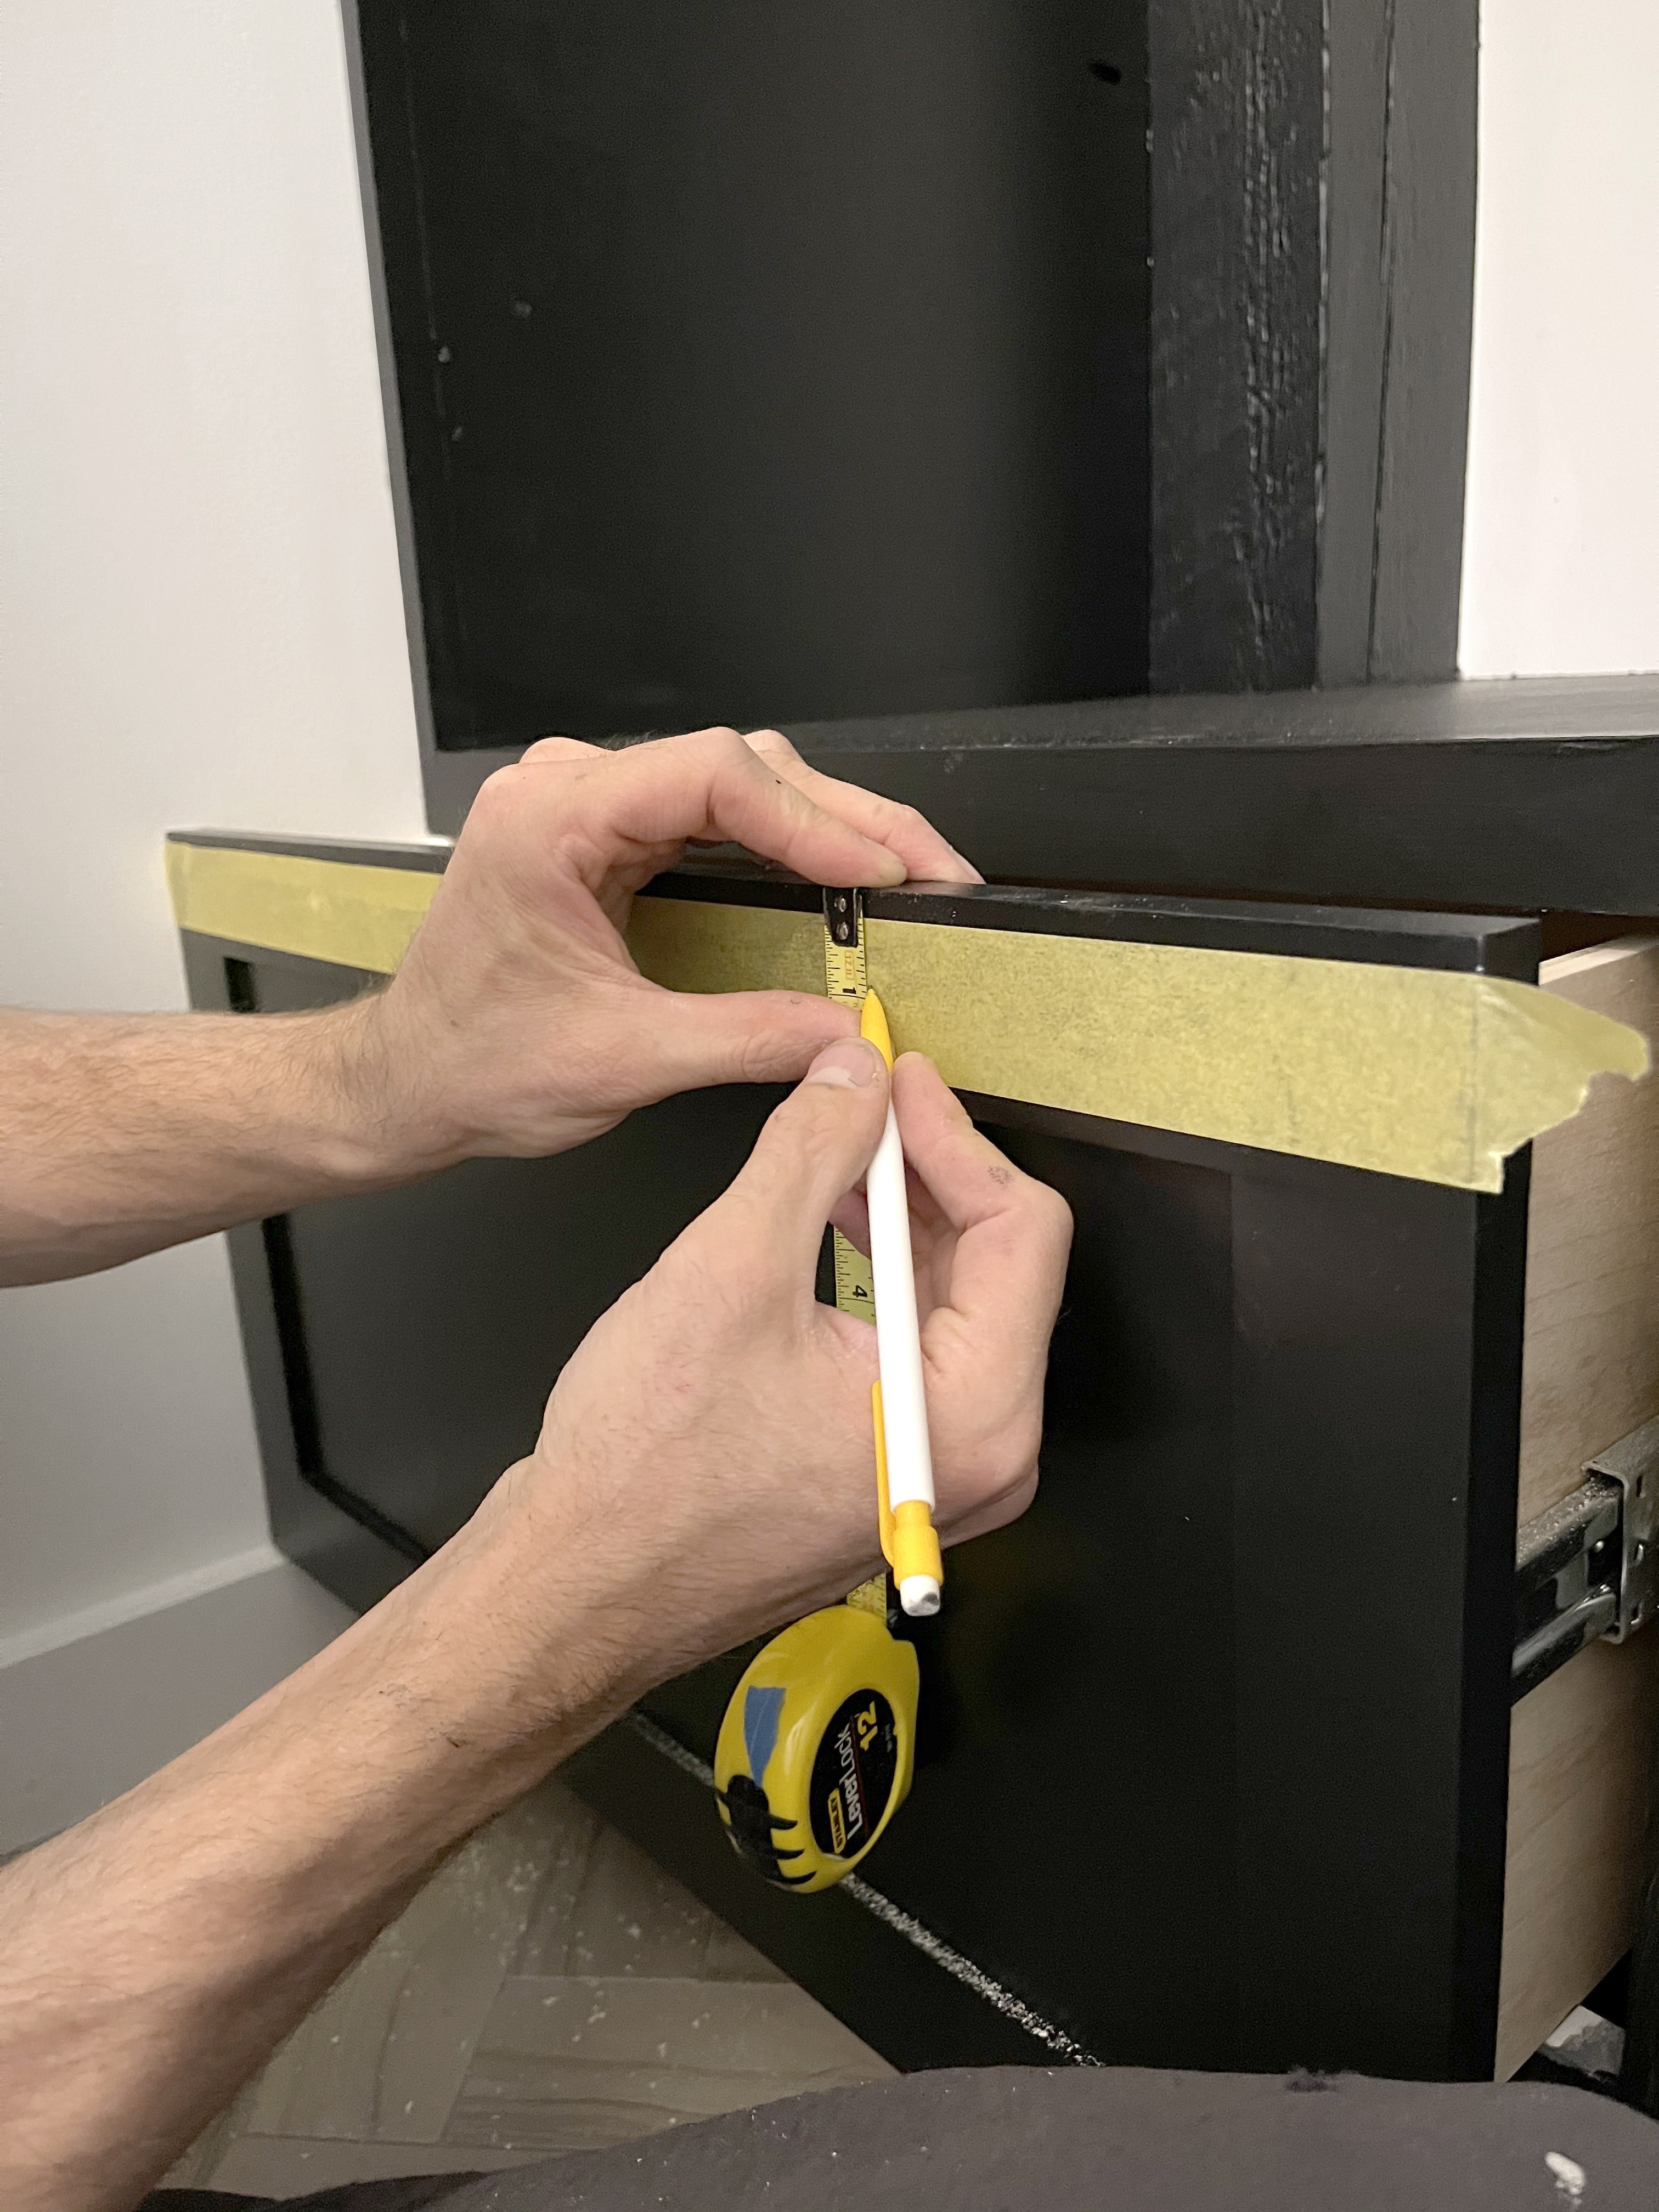
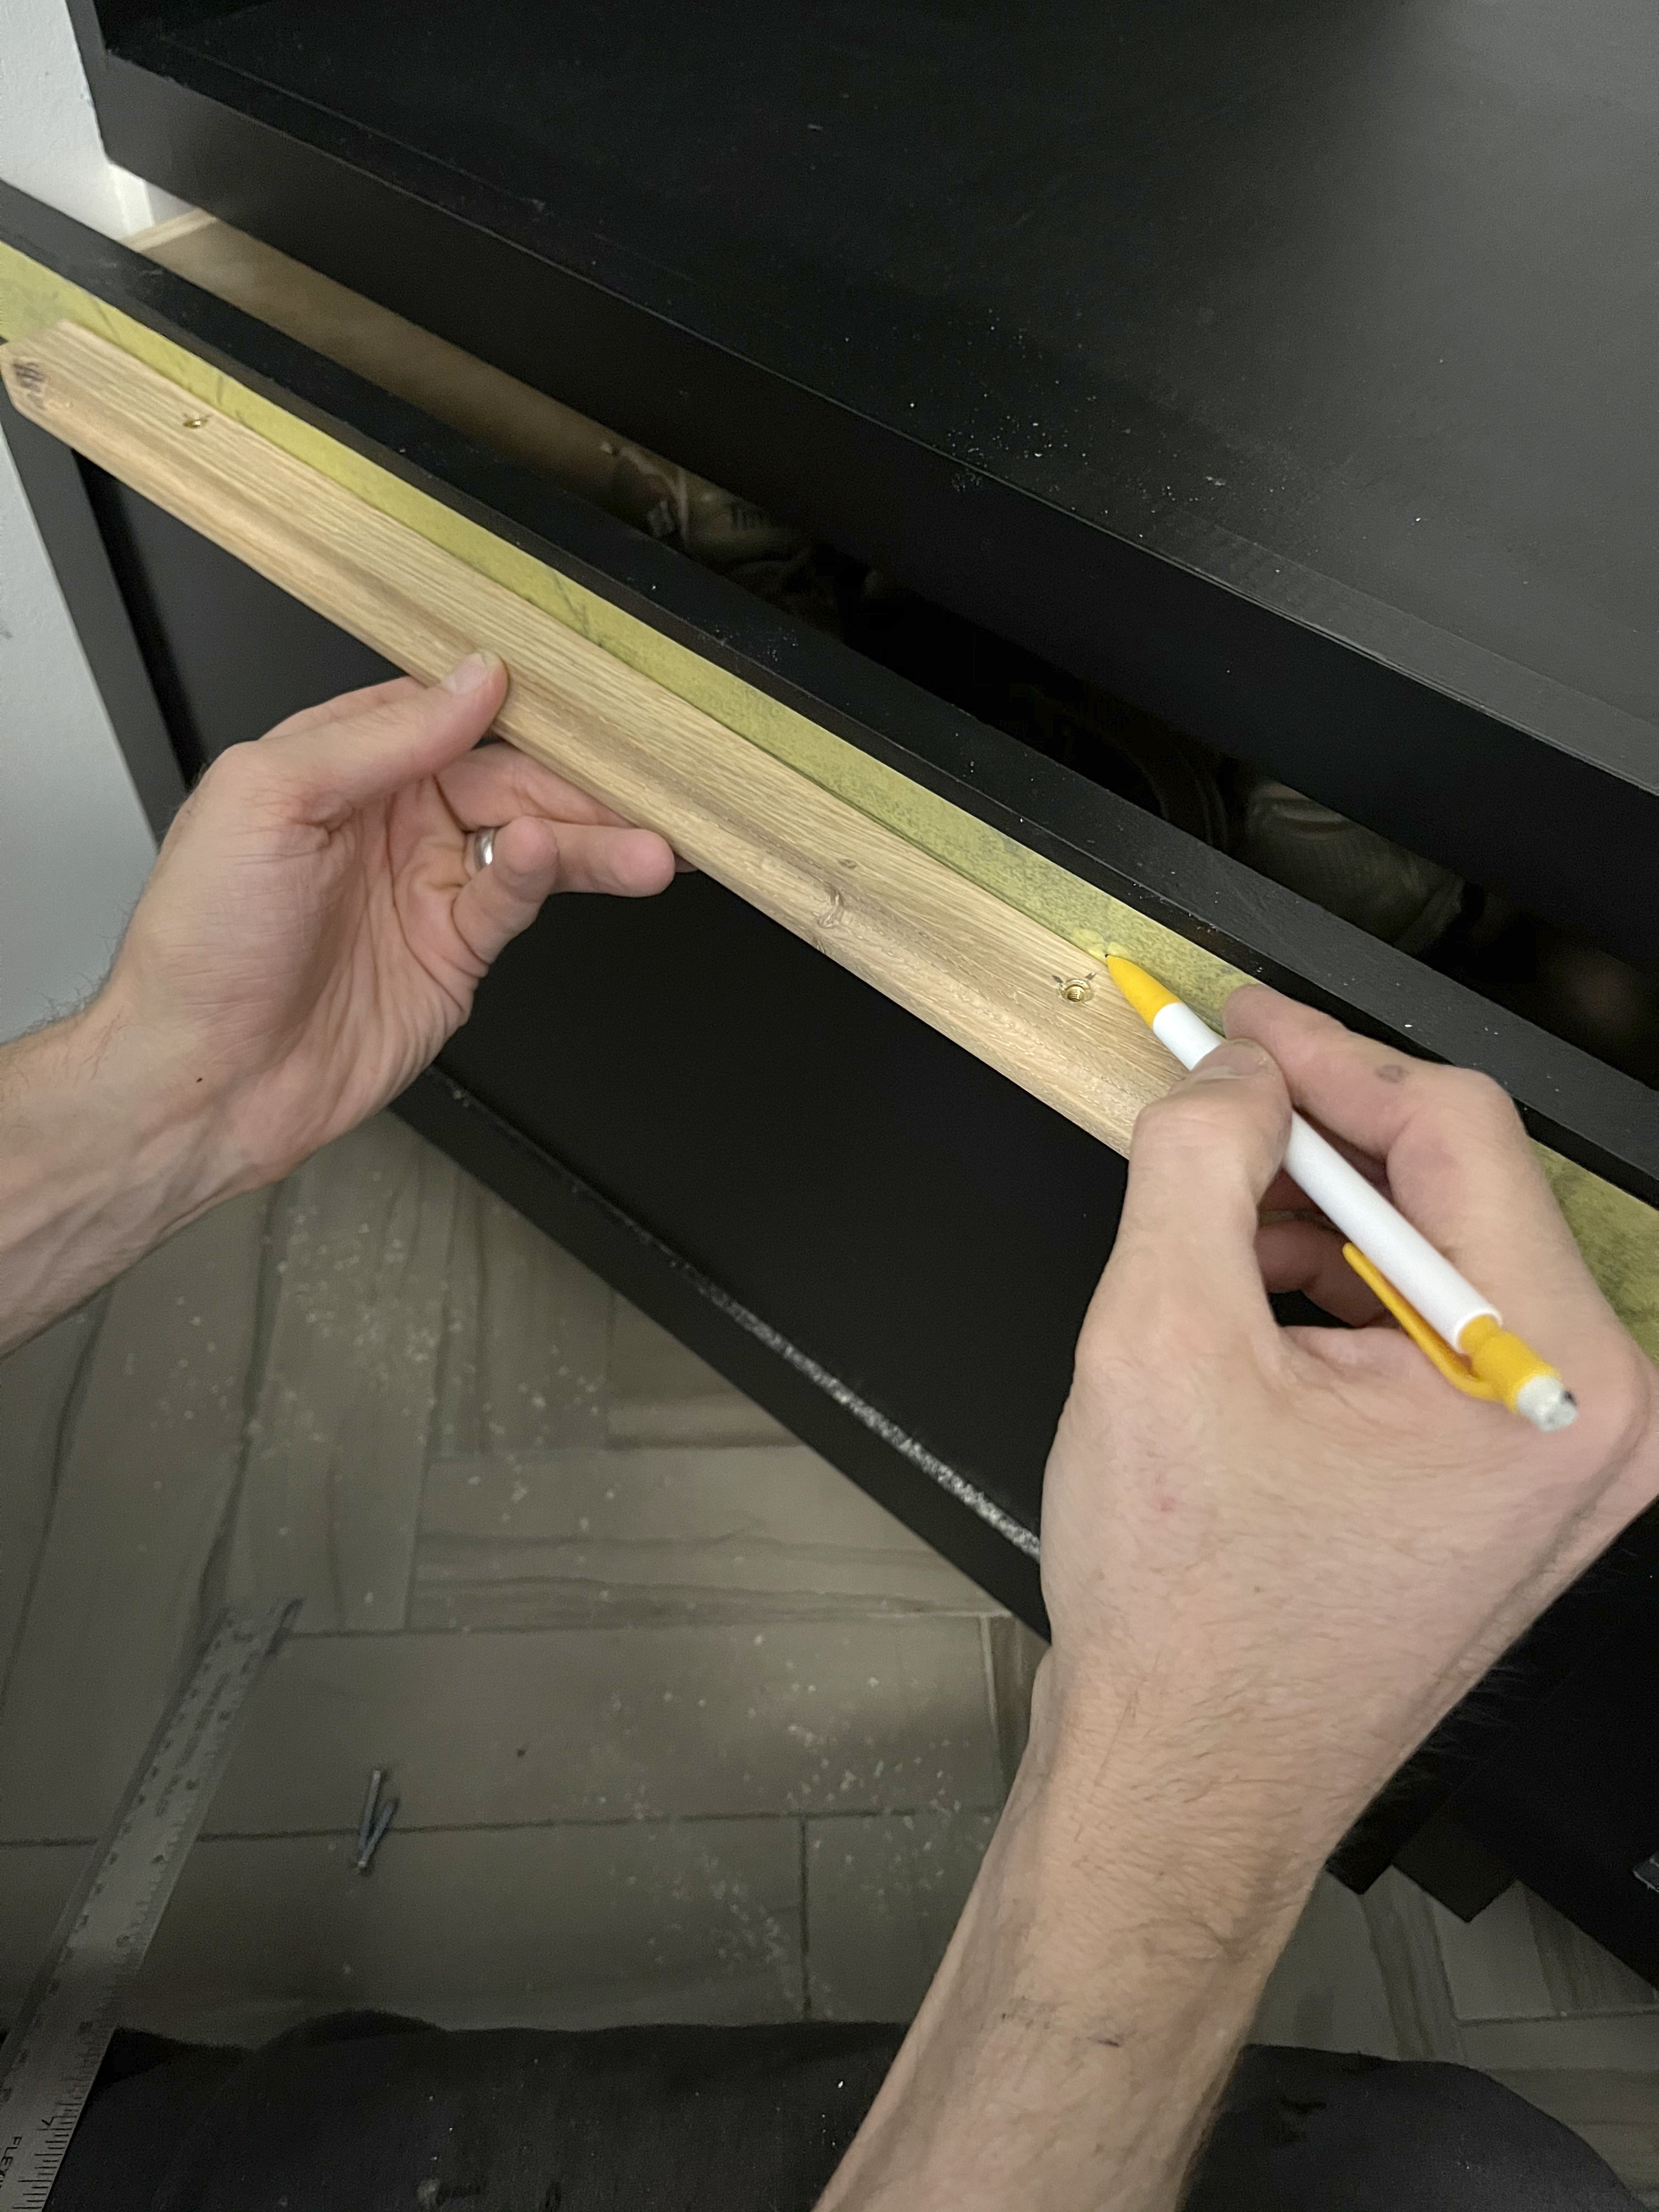
- Measure to the center of the drawer, make a mark on the Frogtape. Also, measure center on the back of the hardware and make a mark.
- Align the center mark on the Frogtape and center mark on the pull. On the line drew during second step, mark the screw inserts on the tape.
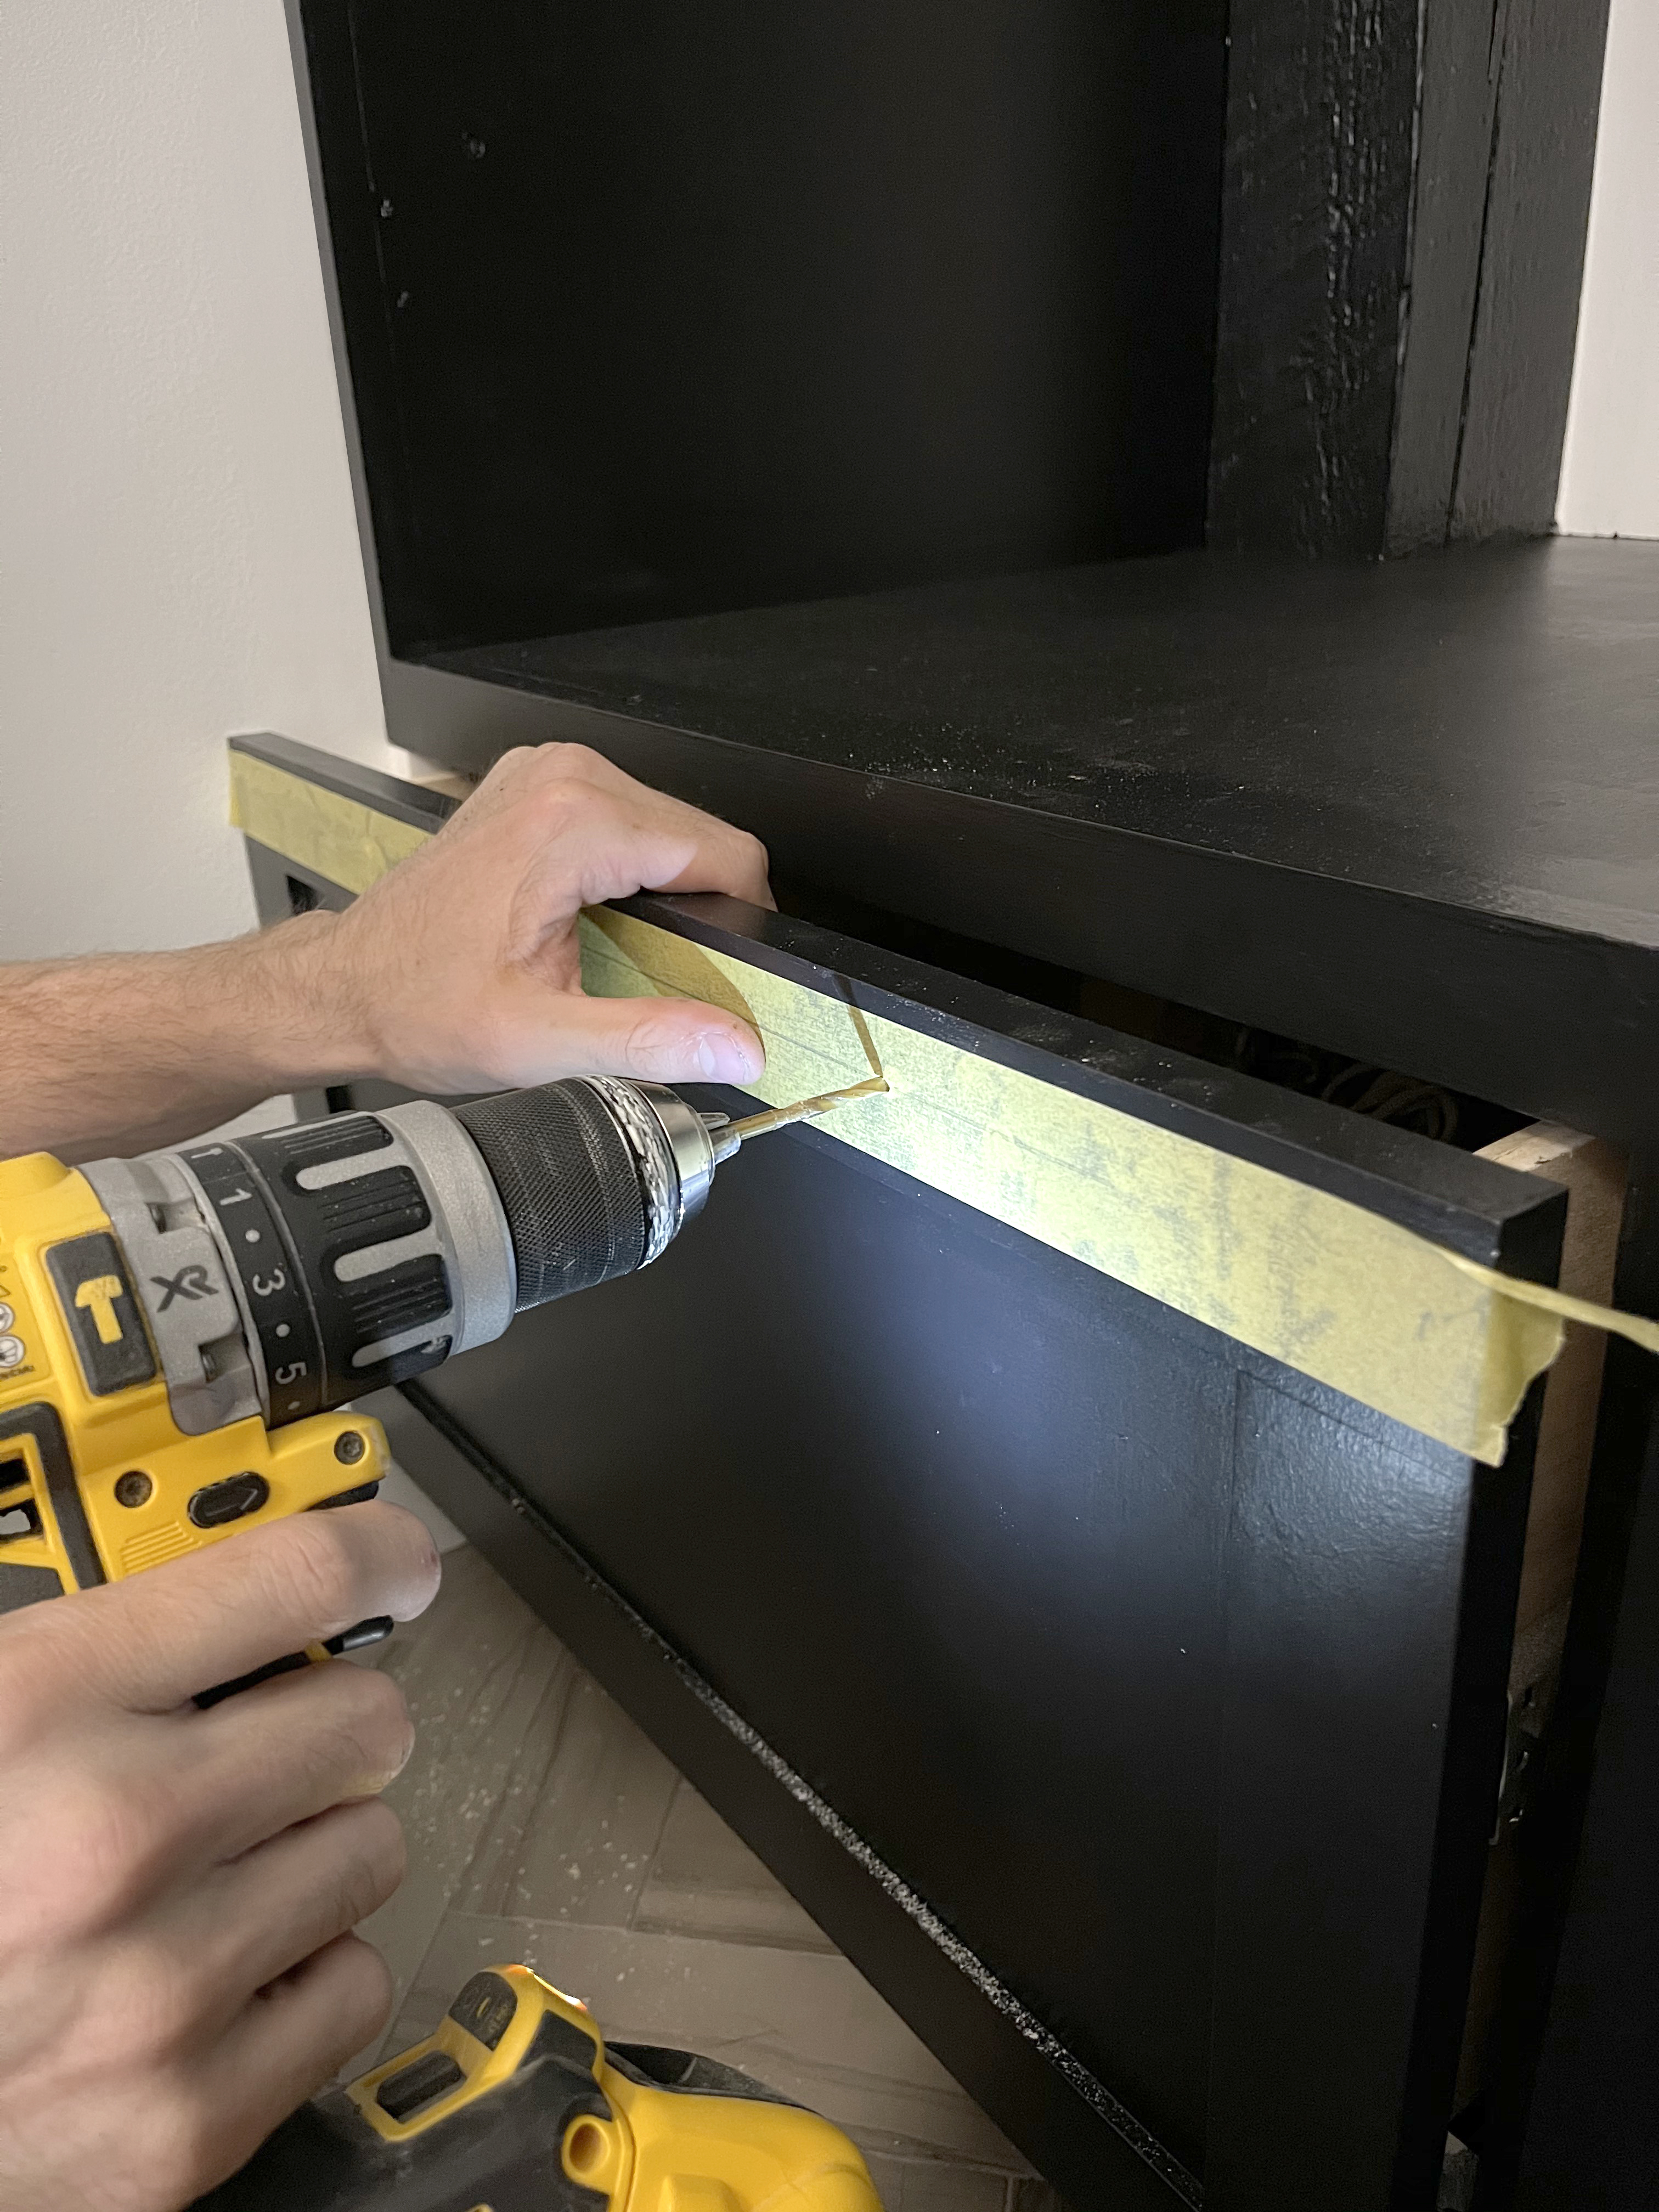
- Drill through mark made.
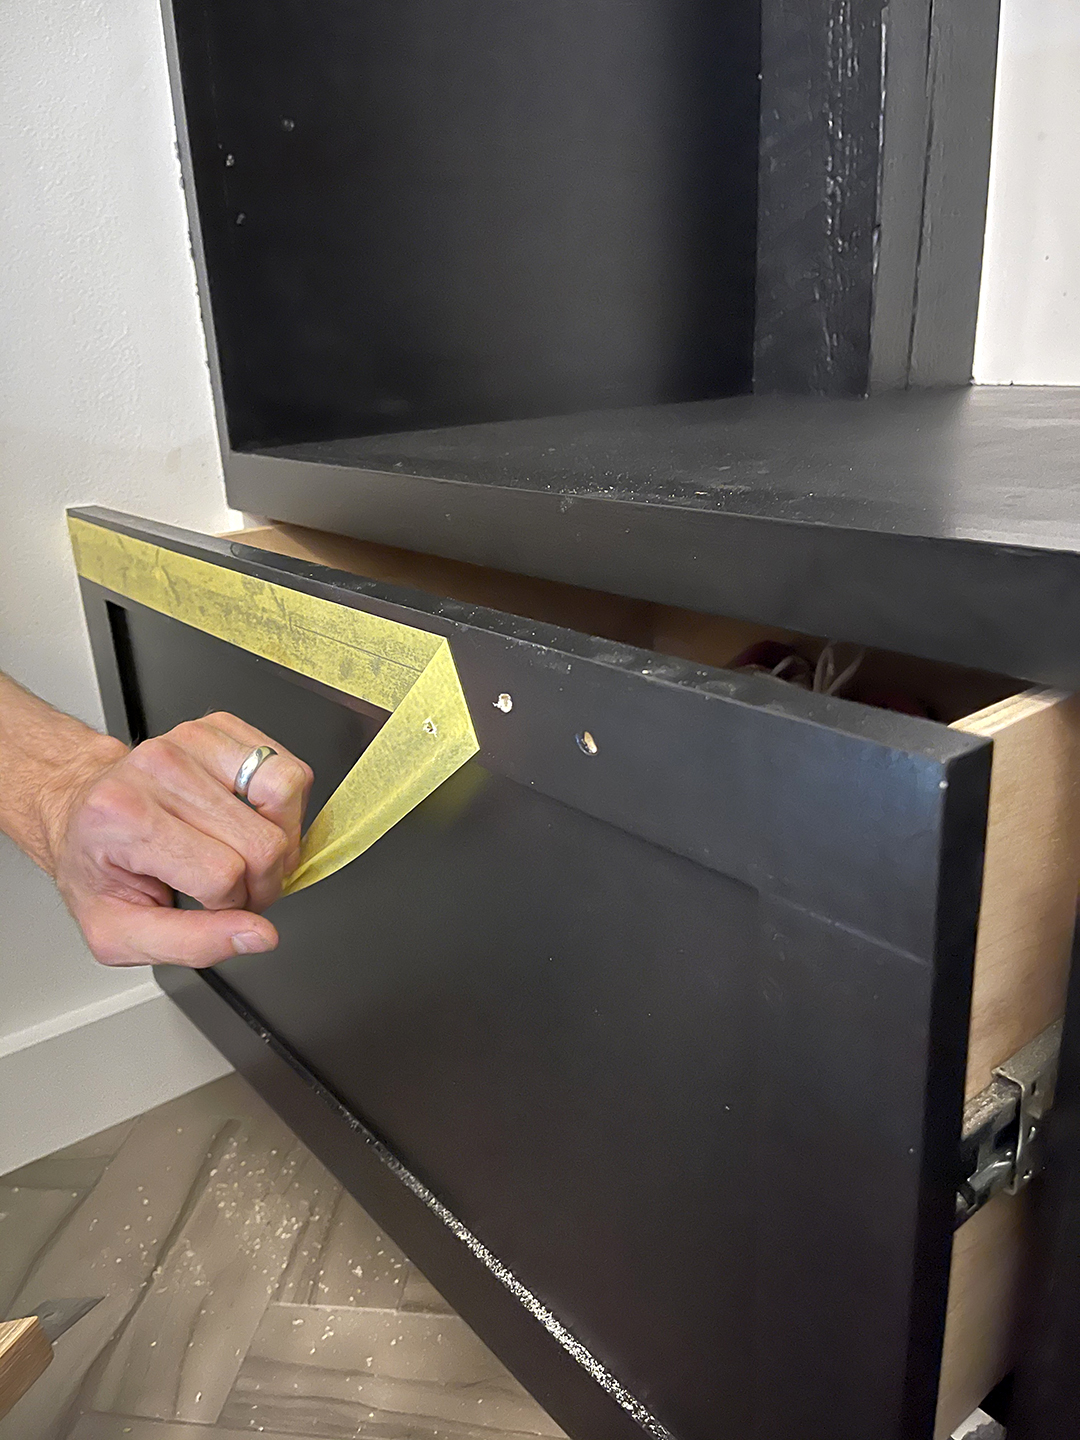
- Remove the Frogtape and attach the pull.
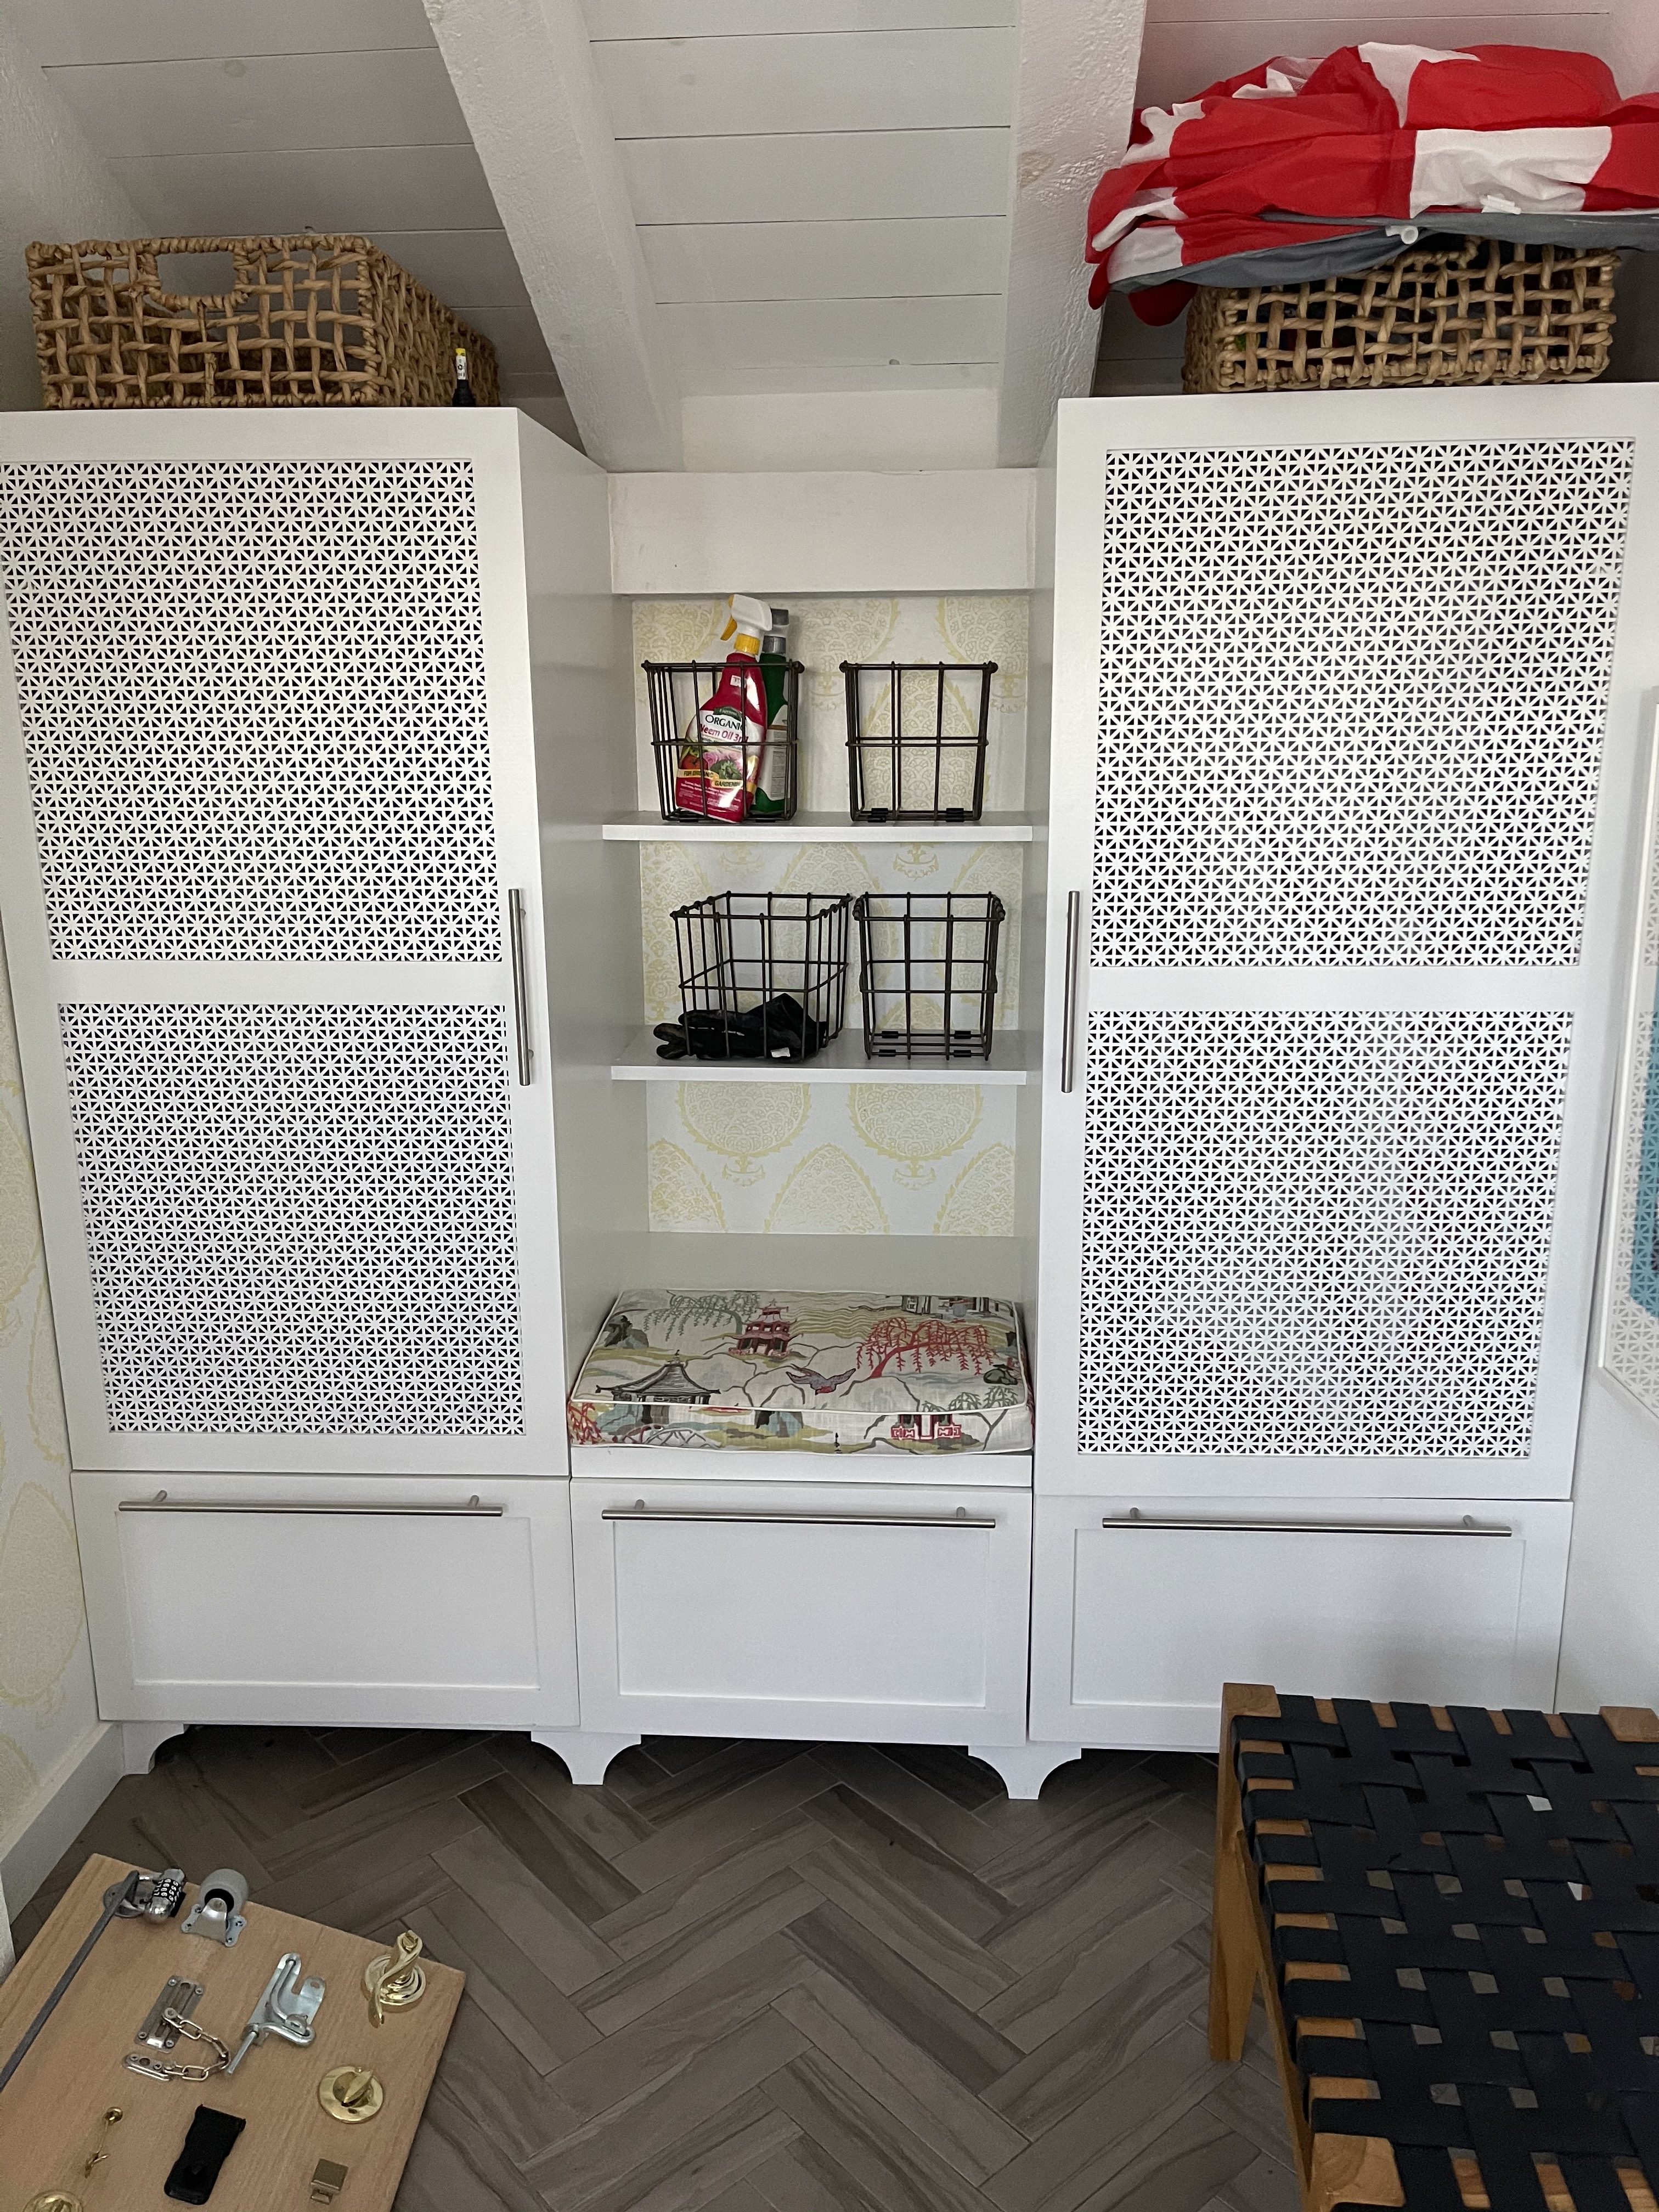
BEFORE
AFTER

Thanks for stopping by! I’m so excited to share more projects with FrogTape in the coming year, stay tuned!
Thank you to FrogTape for sponsoring this post! As always, I only share products and brands that I love and have had a good experience with!
This post is part of a series with FrogTape, see other posts here – Color Block Wall in Entry
WOW! this space looks incredible, as do you! Damn!
Thank you Cassie!!
Those rounds things on your wall for hanging!!! Wow, love them.
Thank you!