This post has been sponsored by FrogTape.
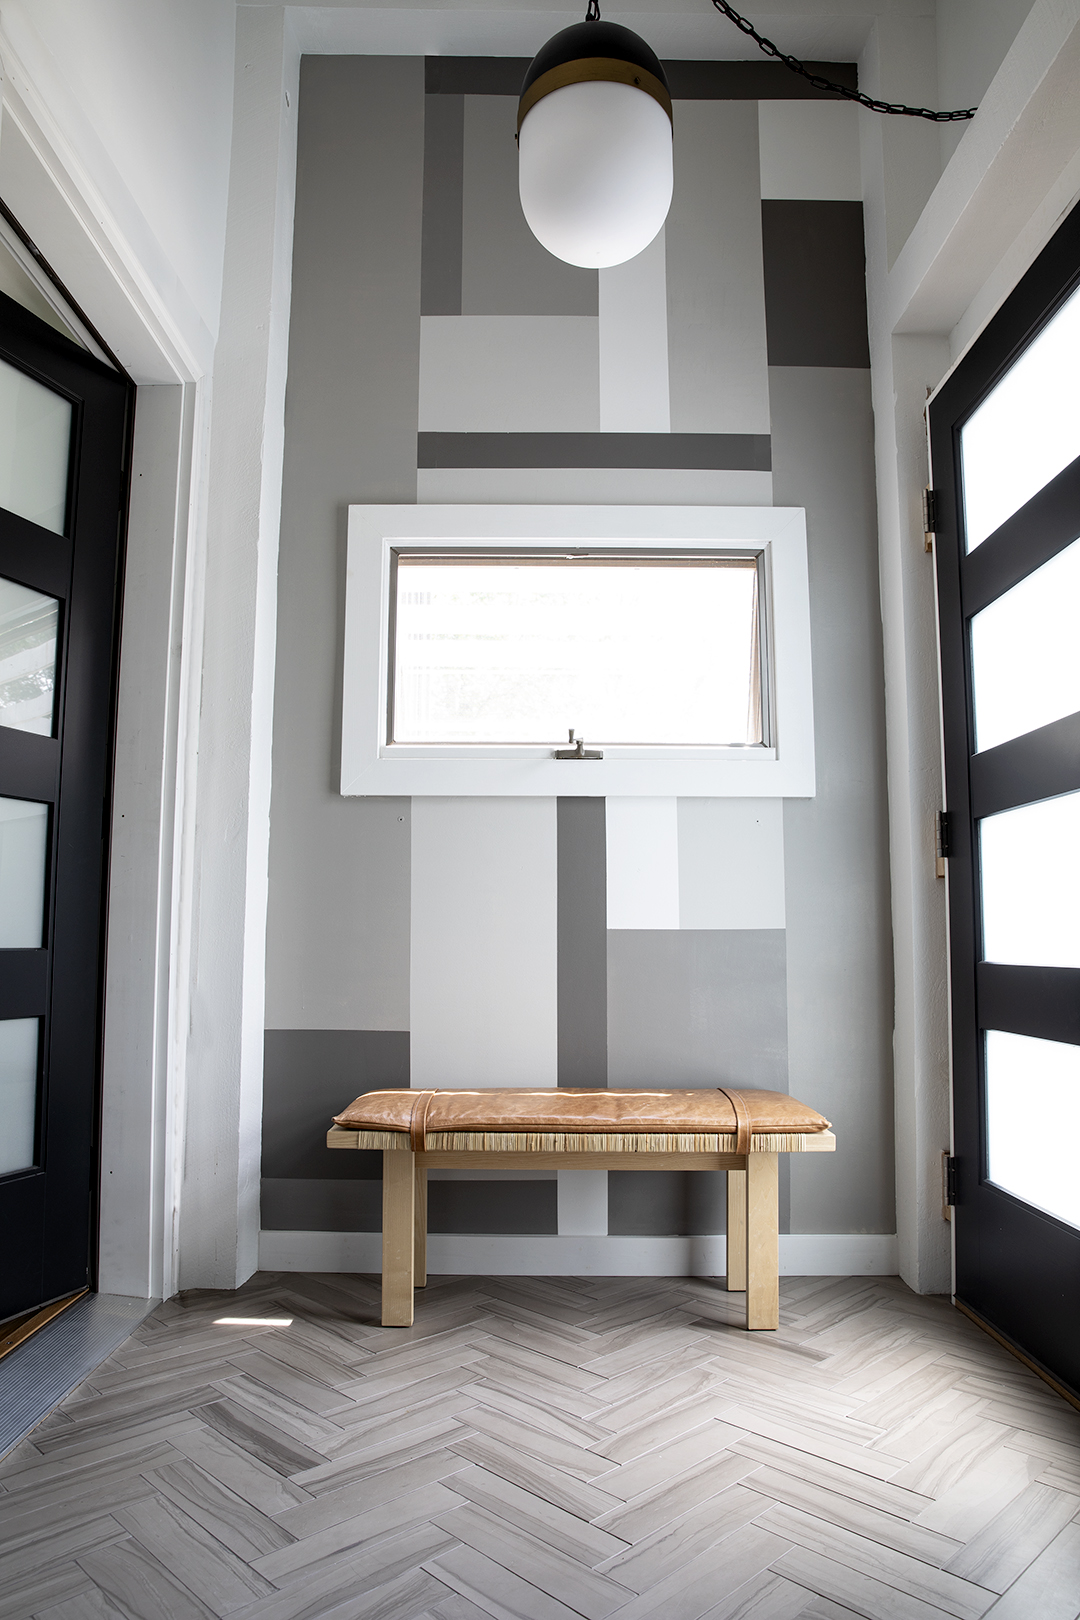
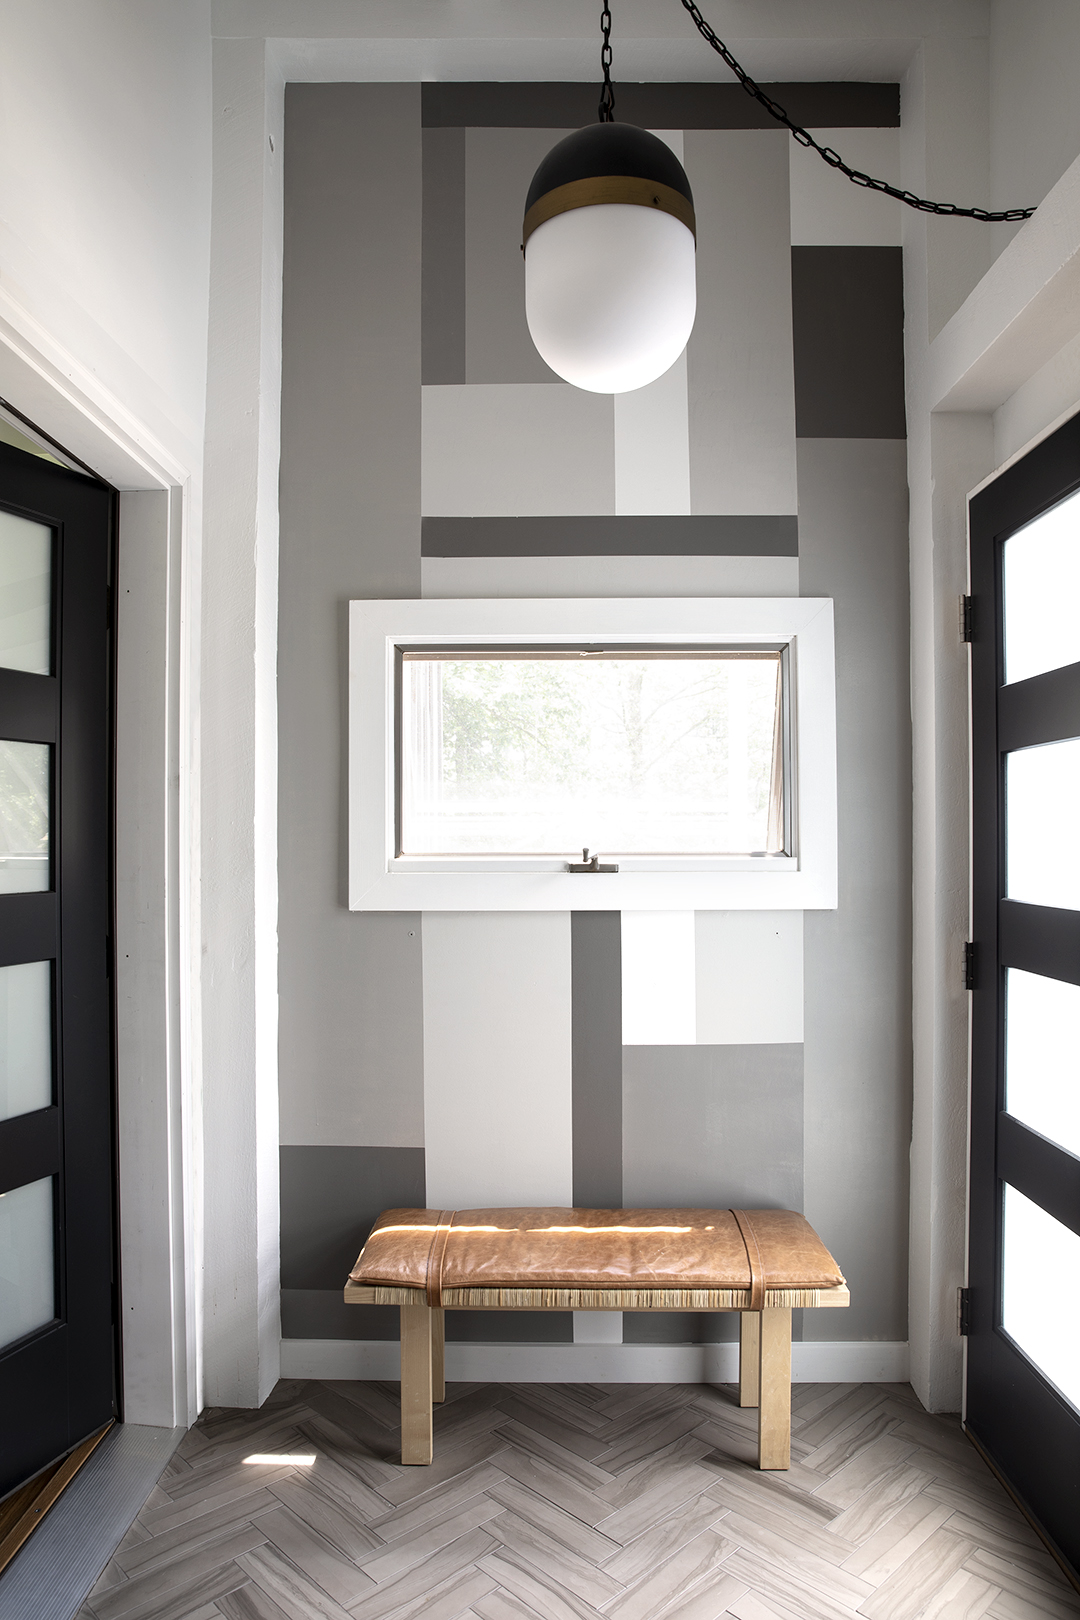
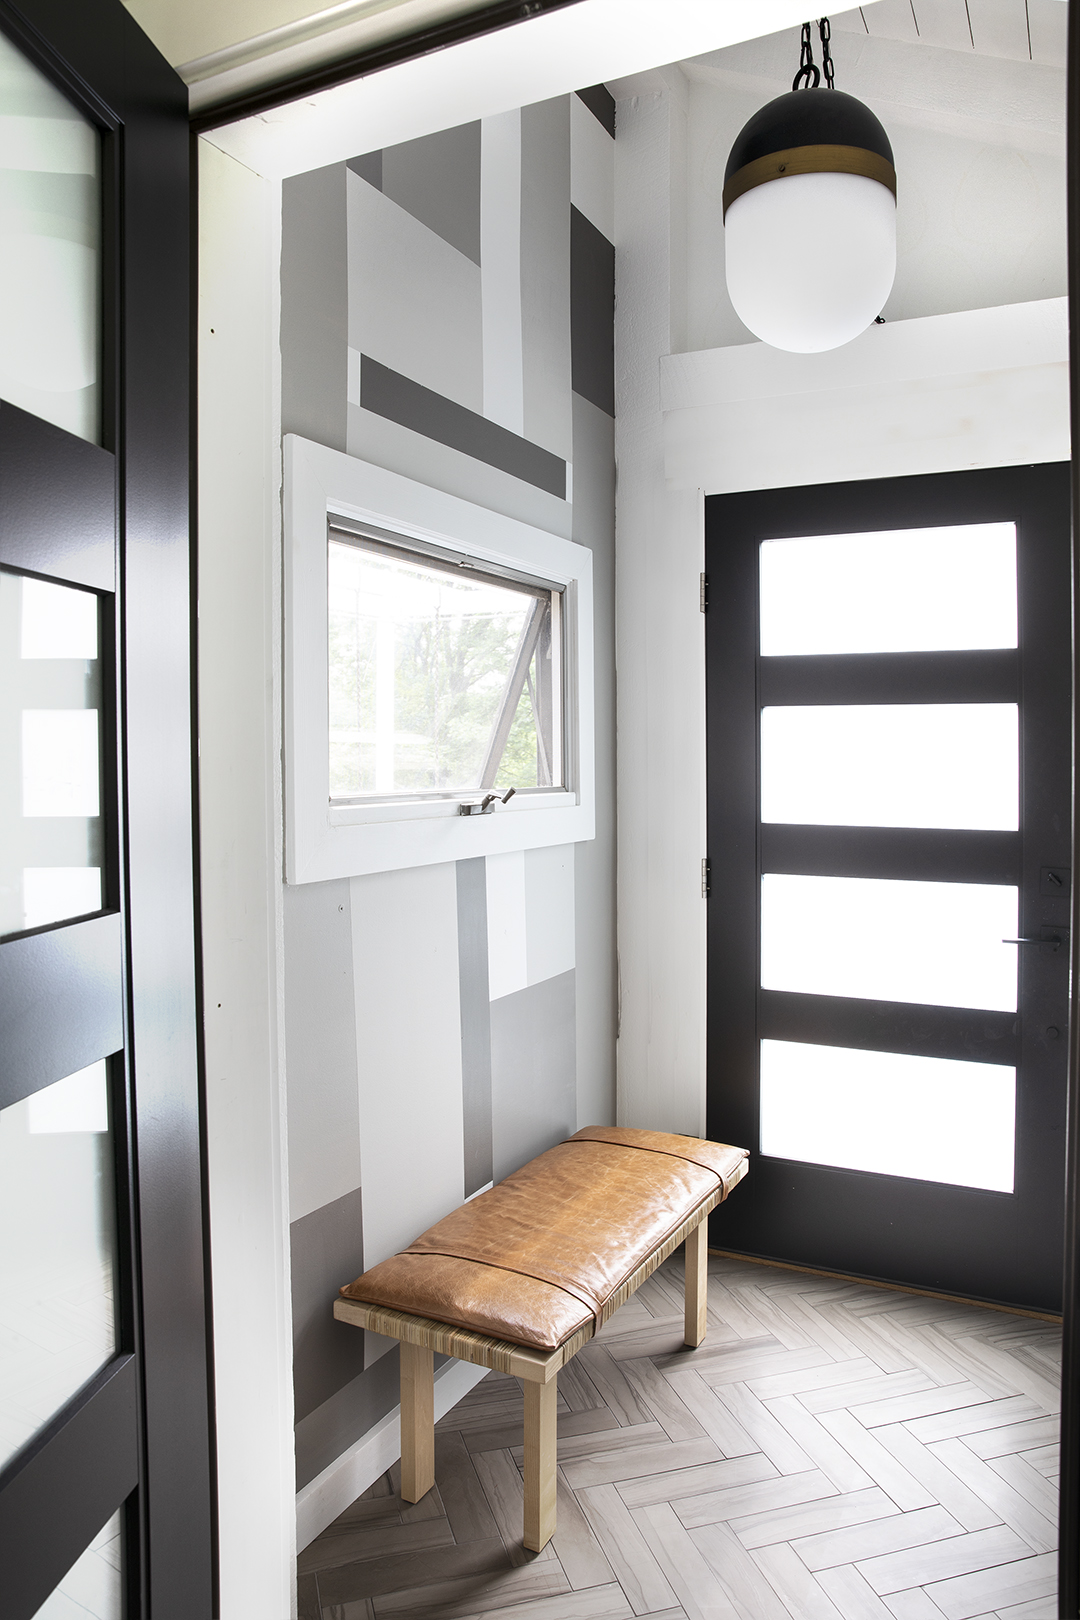
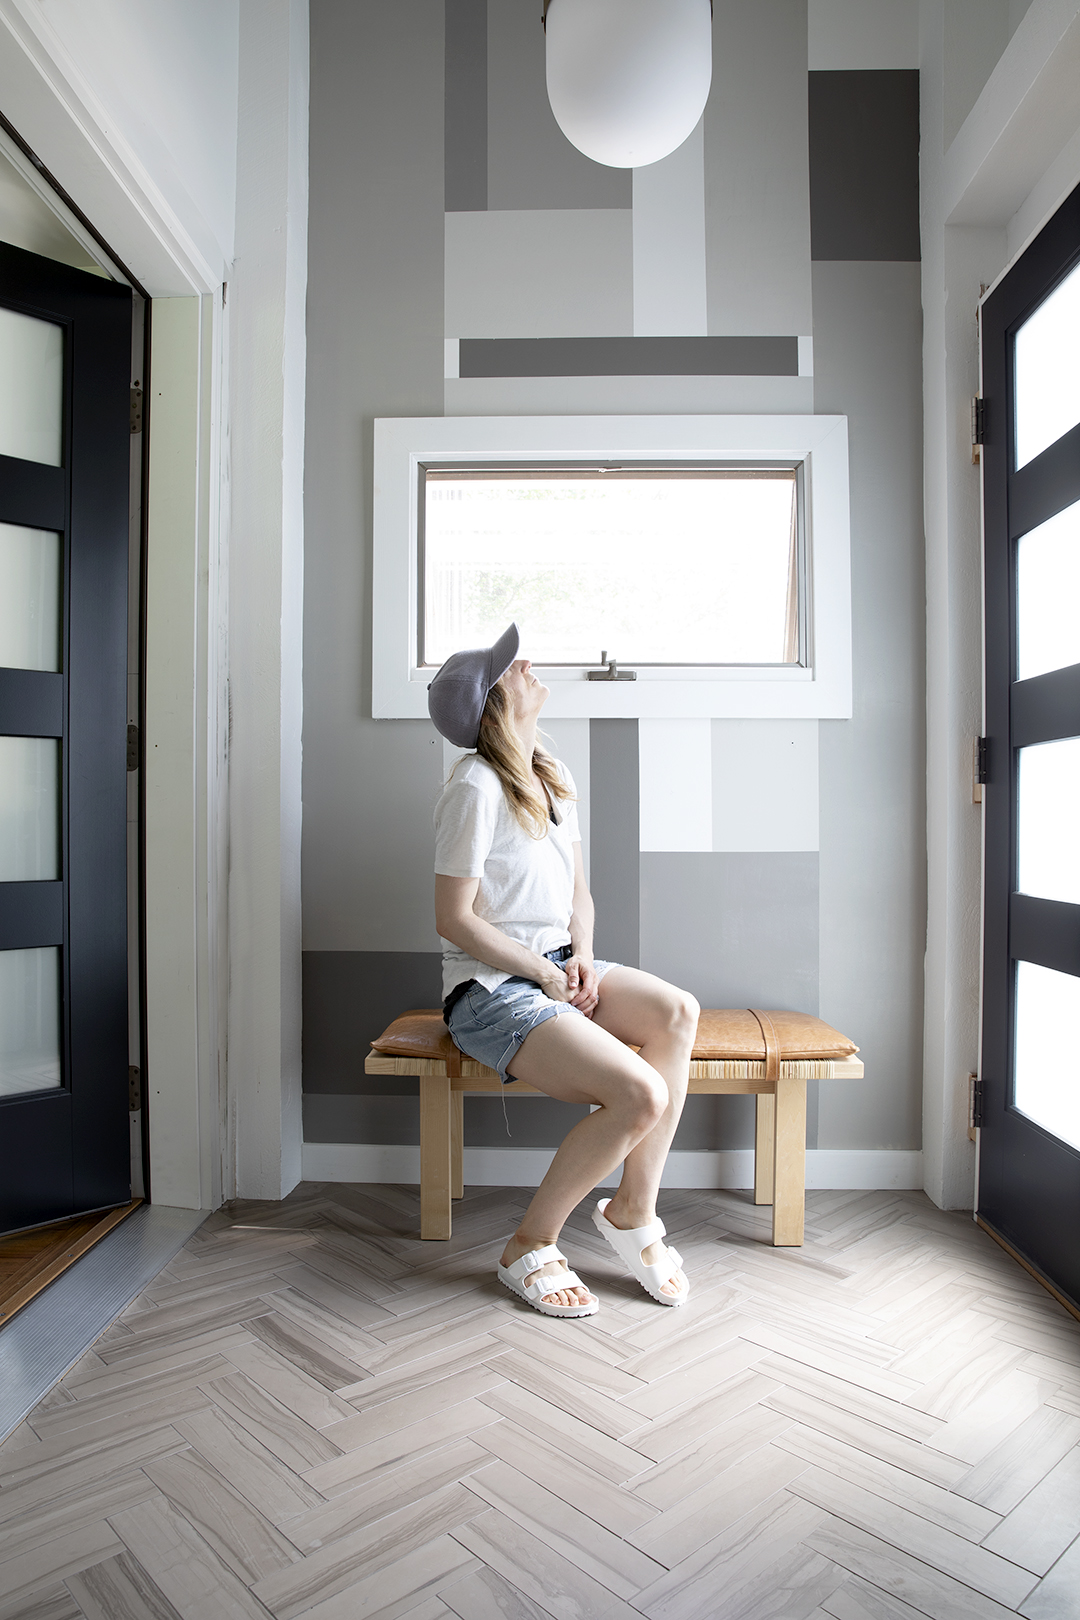
I’m SO excited to share another project in collaboration with FrogTape! We’re moving to the other side of our entry and adding a geometric color block wall. I love the hit of pattern and the contrast that it adds to this space. Read on to see how we pulled it together!
First, gather your supplies.
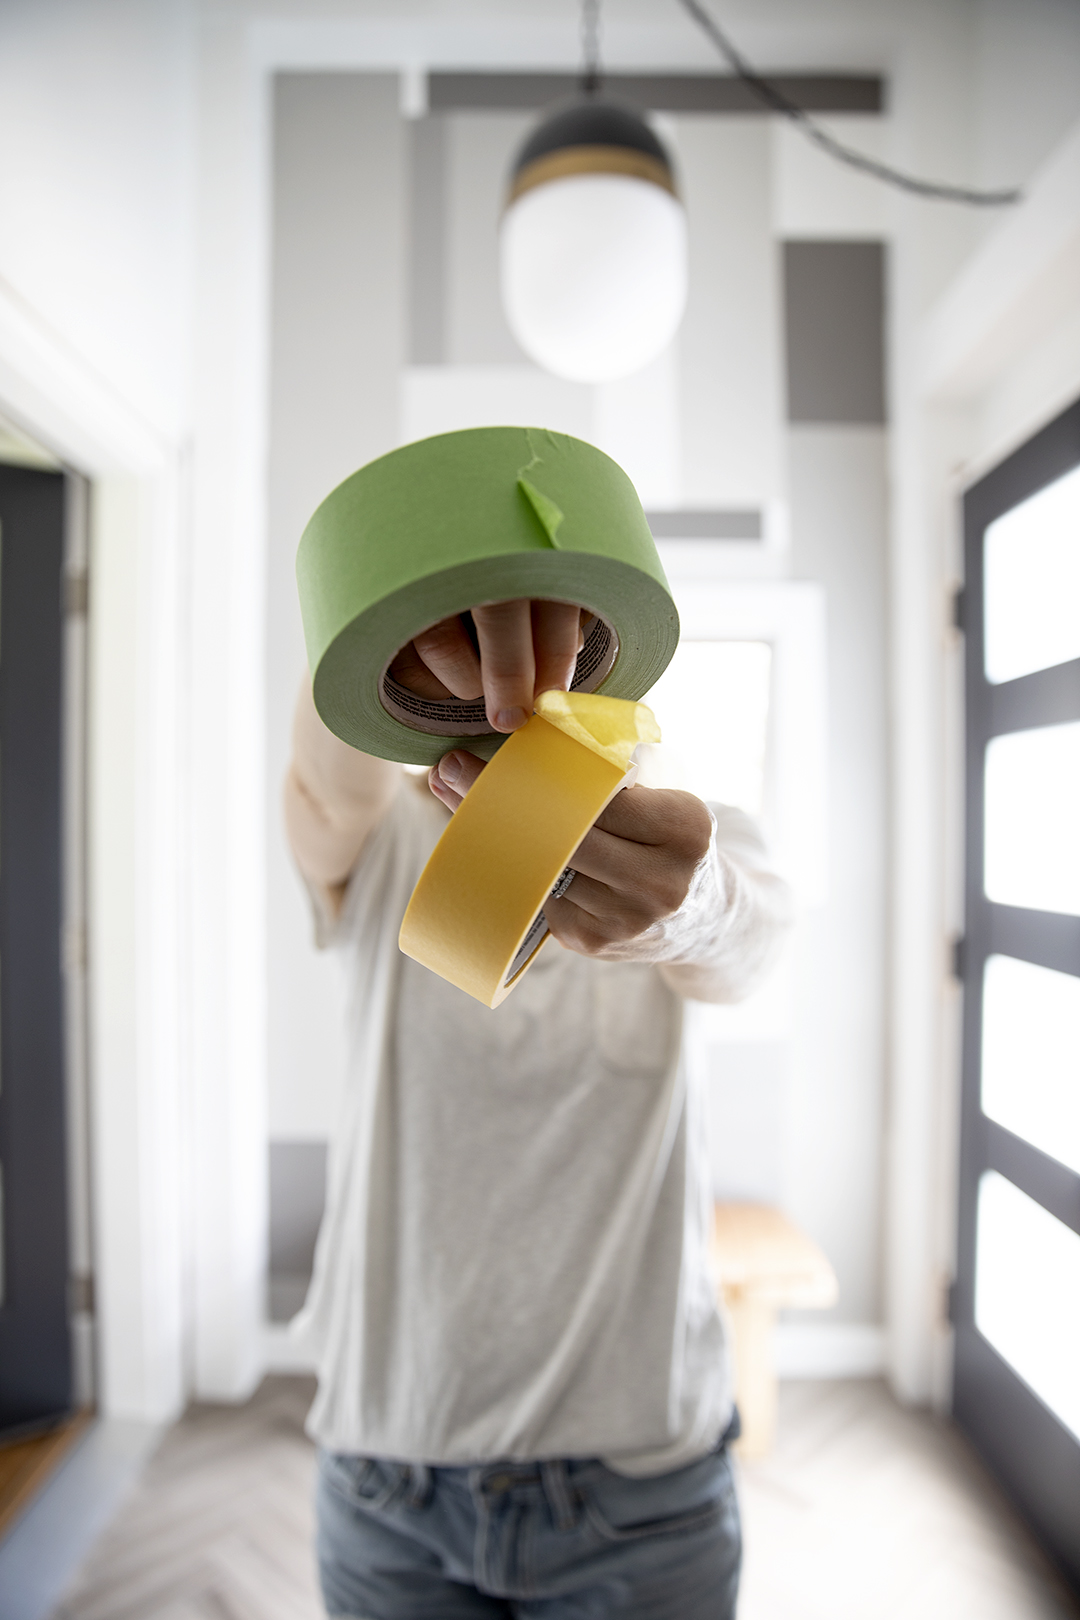
- FrogTape Multi Surface
- FrogTape Delicate
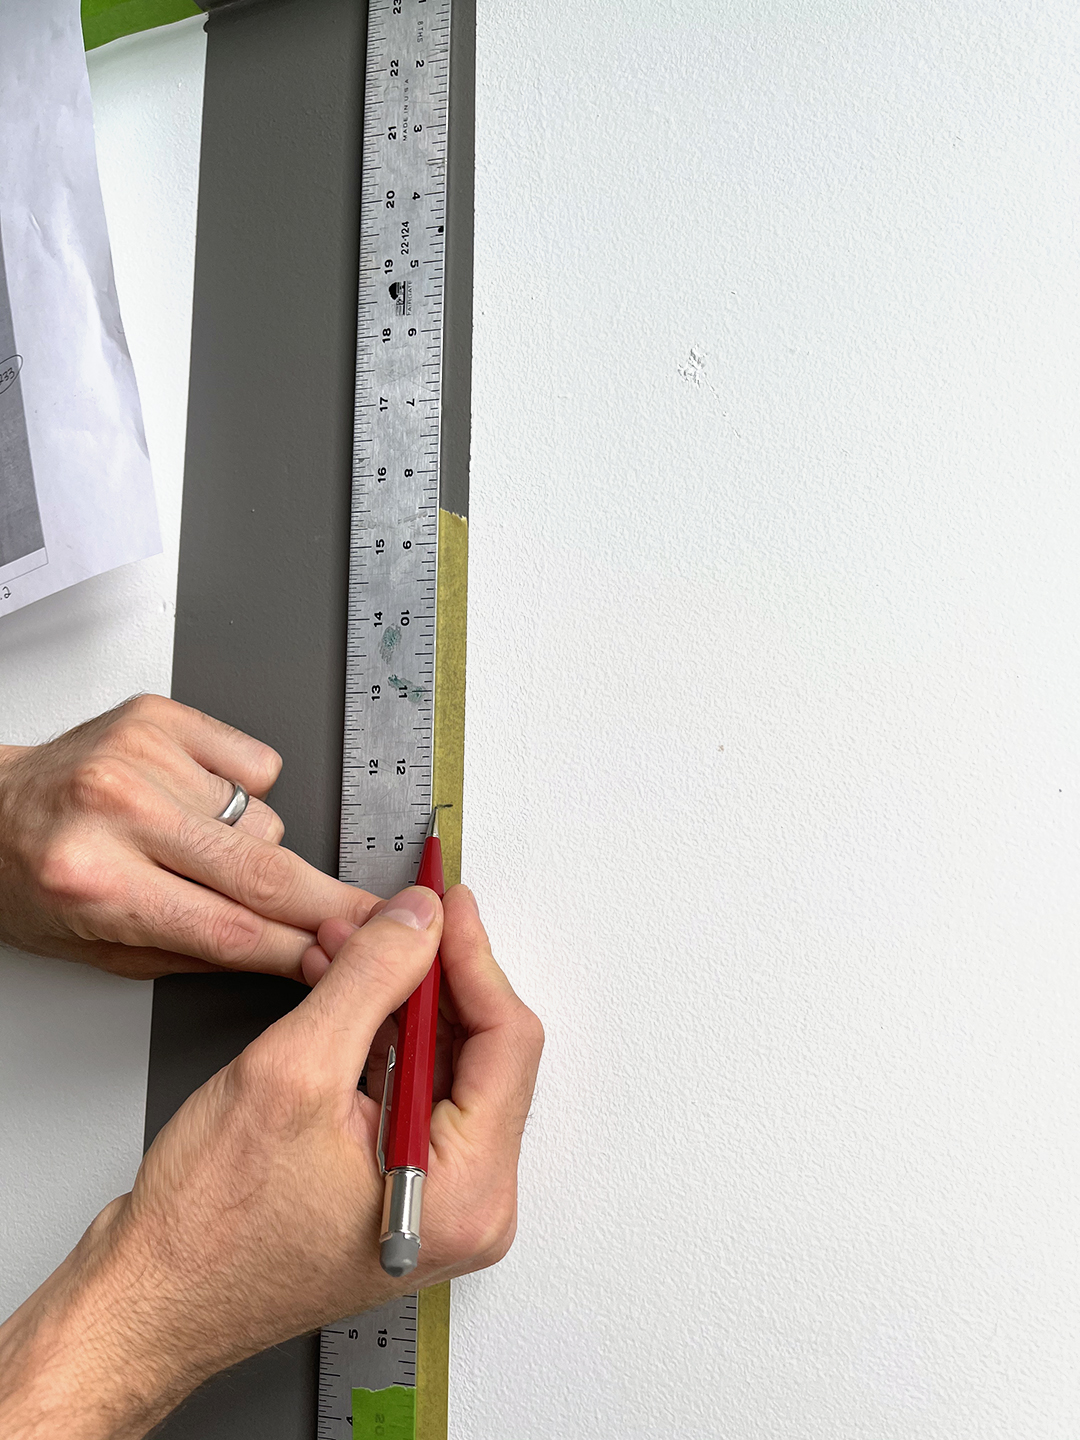
- 18” metal ruler
- Tape measure
- Laser level
- Level
- Pencil
- 4 colors of paint (I used Repose Gray, Dorian Gray, Dovetail, and Gauntlet Gray)
Let’s get started!
- Measure the desired wall for treatment with a tape measure and draw to scale in a program such as Adobe Illustrator, SketchUp or use graph paper if you don’t have access to a computer program.
- Begin to layout your color blocking pattern. Create a variety of shapes horizontal, vertical, small and large. Adjust shapes until pattern looks good. Optional: add colors to layout desired color placement.
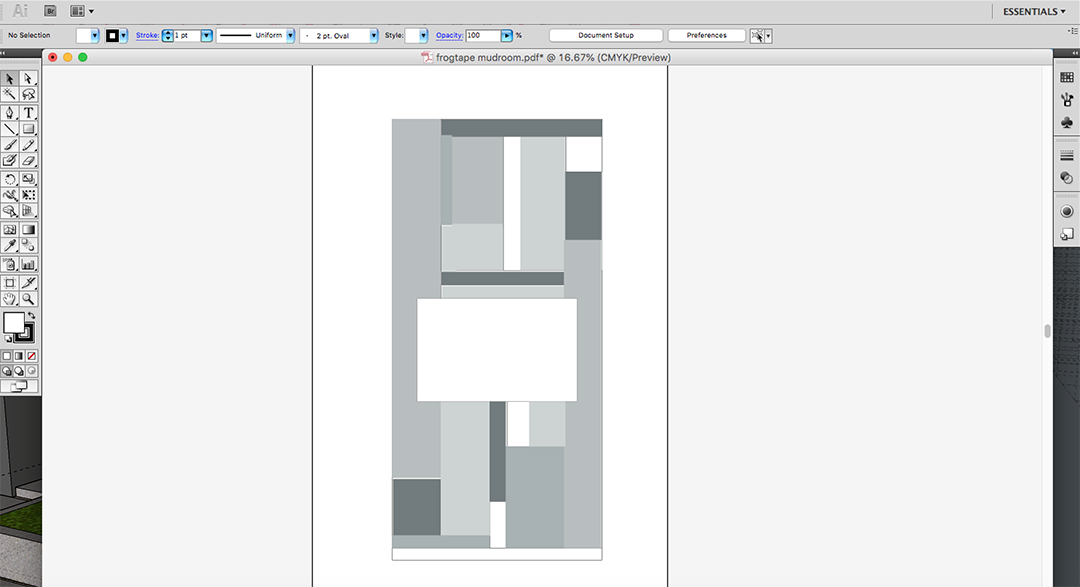
- Print layout on paper, or markup graph paper with measurements for each block and note the paint color. This will be a reference when laying out the pattern on the wall.
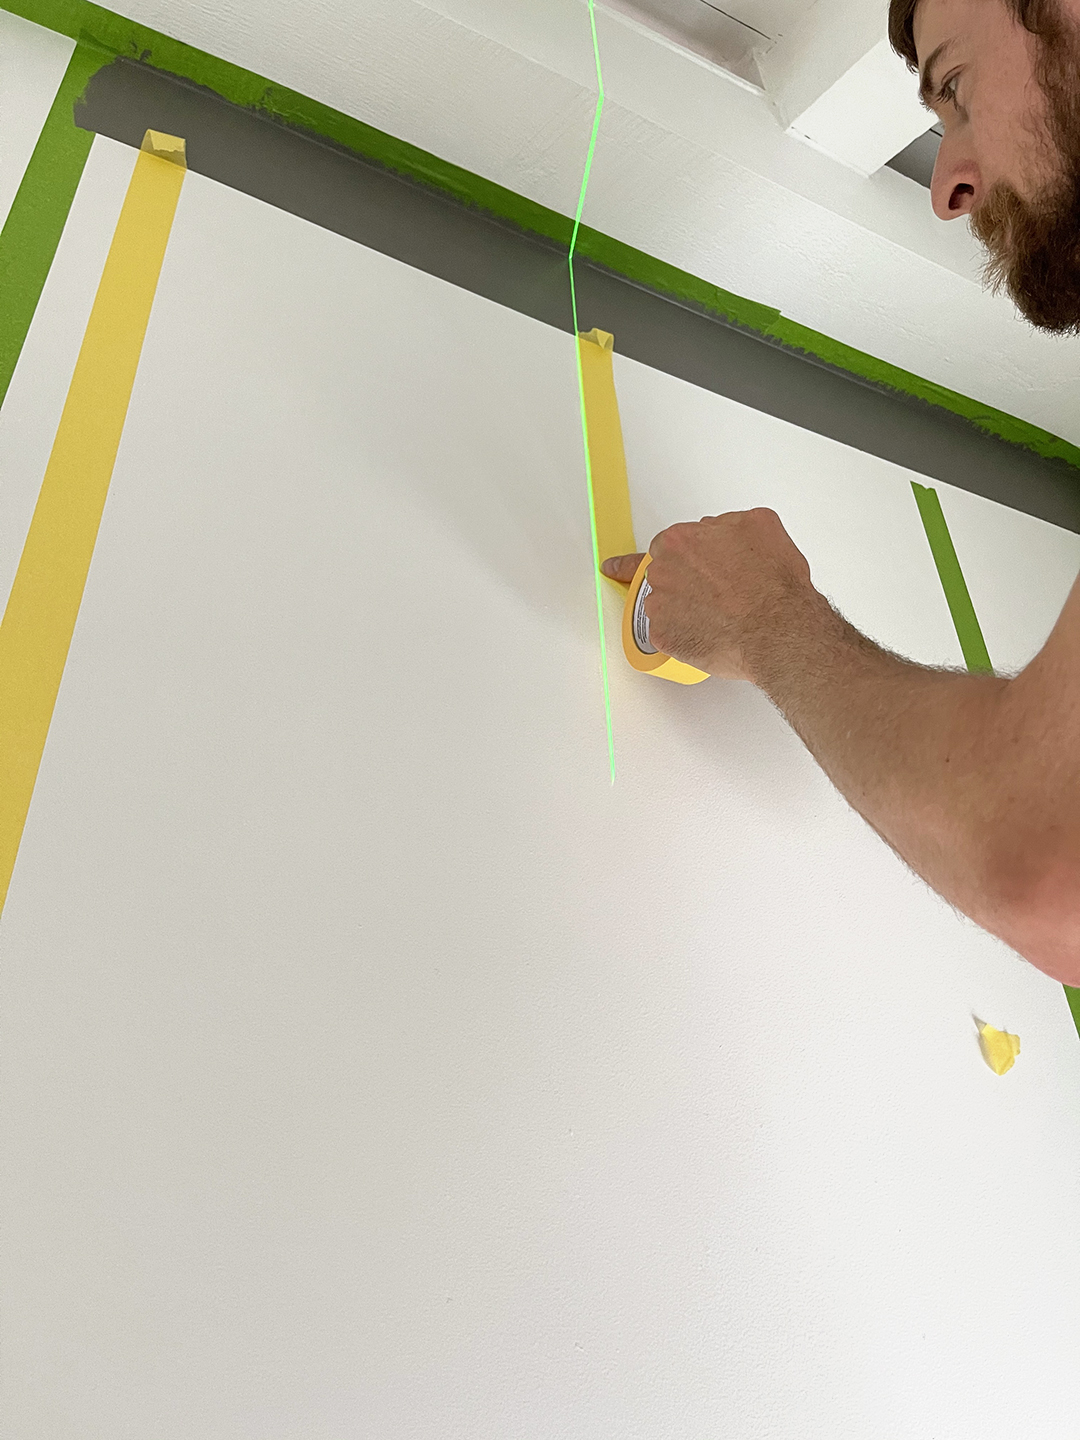
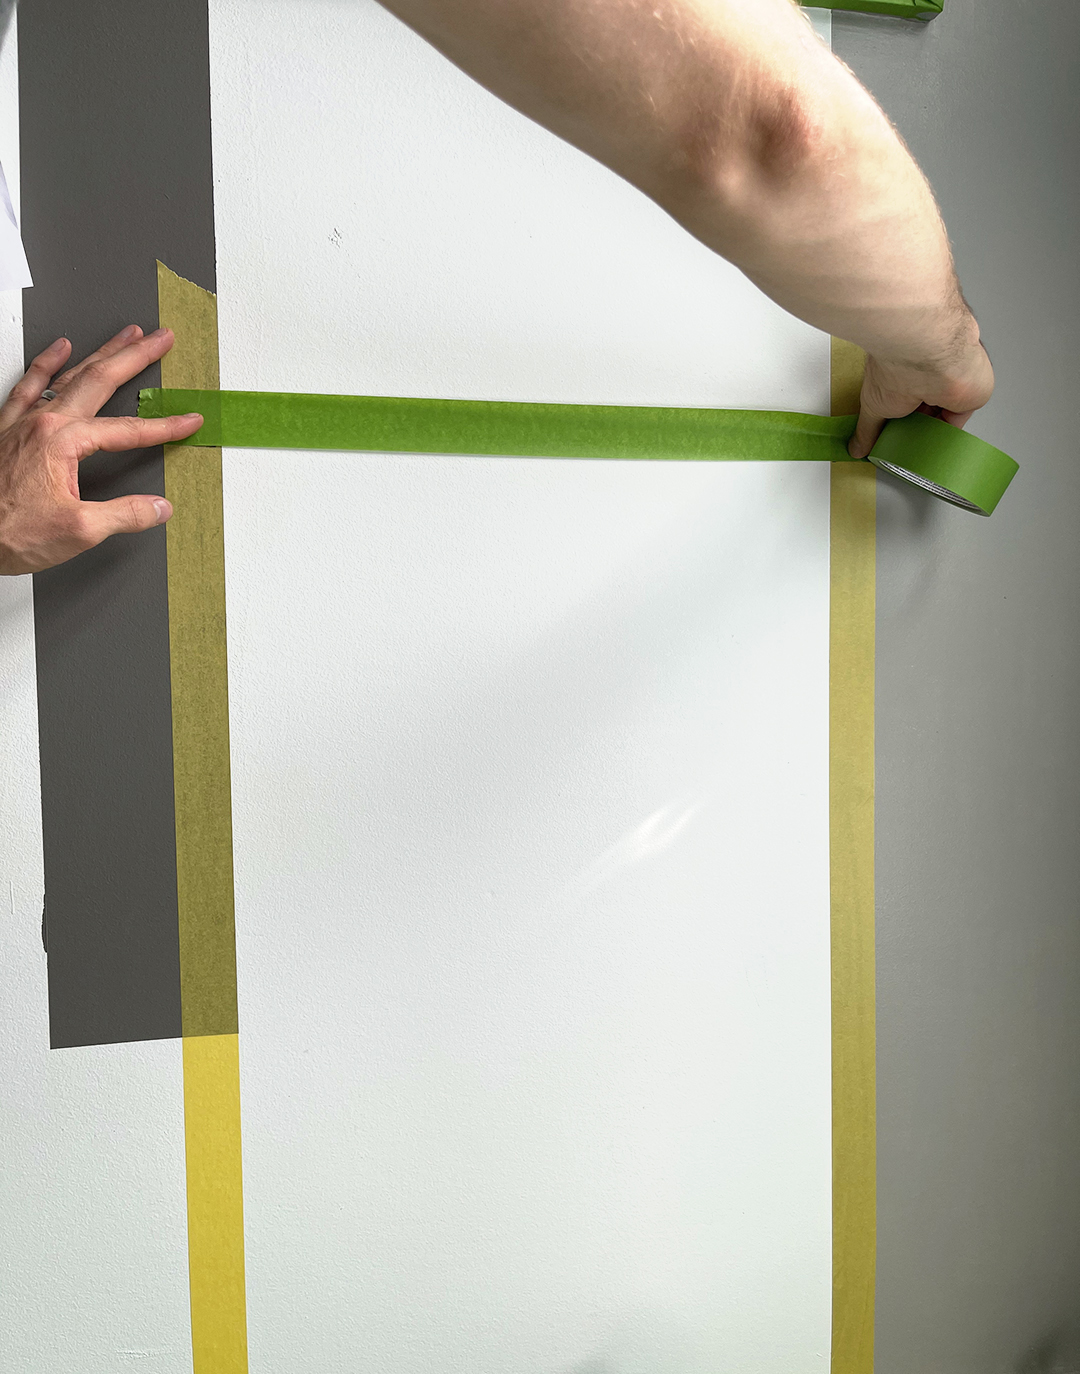
- Layout the pattern on the wall with a metal ruler for smaller shapes and a tape measure for longer shapes. Use a laser level for vertical alignment. FrogTape (see tape selection note below), following the laser level.
Note: since the paint colors touch, you will need to work in segments. We first laid out one color, let it dry and then laid out the next color. You will be working all over the wall to allow the paint to dry. Tip: Since you will be working all over the wall, use a small piece of tape to mark which section you will be painting. Remove small piece of tape before you paint that area.
For existing wall paint, I used FrogTape Multi Surface.For freshly painted surfaces, I used FrogTape Delicate –since I didn’t have a few days for the paint to fully cure. FrogTape Multi Surface is a good all around painters tape that works on a variety of surfaces, including painted walls. FrogTape Delicate, is perfect for more delicate surfaces, such as freshly painted walls. I let the paint dry for about 30 minutes – 1 hour and had no issues with paint peeling off when the tape was removed.
- For horizontal lines, measure and mark line placement with a pencil, on the FrogTape.
- Hold the level and mark on opposite side of tape. Make a mark.
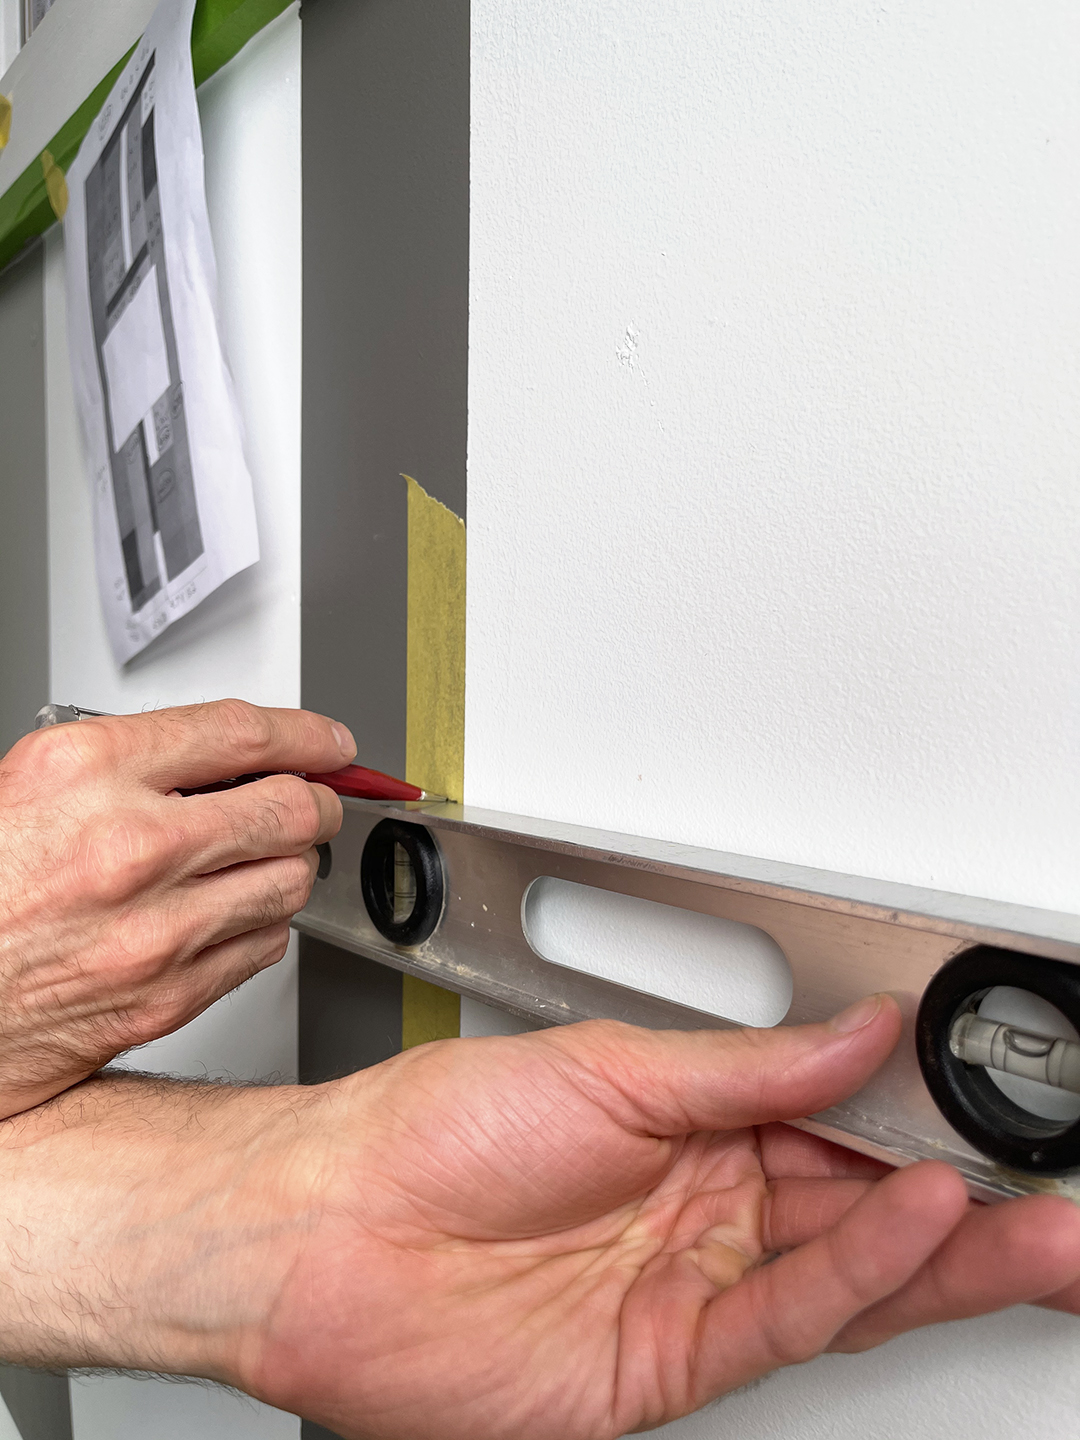
- Line up the FrogTape on both marks and apply.
- Paint surface with required number of coats. I applied two coats. See time-lapse video HERE
- Once complete, remove tape. See time-lapse video HERE
- Repeat steps above until entire wall is painted.
This post is part of a series with FrogTape in 2021. Other post include Modifying Entry Built in with Closed Storage and Decorative Metal Door
This post has been sponsored by FrogTape. As always, I only share brands and products that I love and have had a good experience with. Thank you so much!
Sarah, this looks amazing! I love the tonal colors, too!